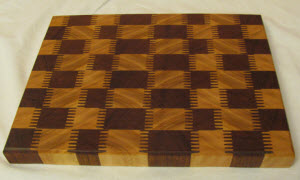
 Cutting boards and trivets are commonly available in a wide range of materials, and typically uninteresting. However, the latter need not be the case. As a woodworker I’ve steadily added tools to my shop. With the router and router table available I’ve tried to figure out ways to justify the expense. Here’s a project that takes cutting boards to a new level and makes new use of a few specialized router bits.
Tools and Materials
For this article I’ve chosen lyptus and jatoba for materials. Both pieces were cut-offs from a local cabinet shop. Any good contrasting wood combination will work I also like walnut/maple, birch/walnut, wenge/maple and cherry/maple.
The amount of material depends on the size of the cutting board you plan to construct. I prefer to use 5/4 material which is the capacity of my finger joint bit. Plan to use a quality waterproof glue Titebond III is used in this example.
Tools – thickness planer, jointer, table saw, miter saw, router and router table, finger joint bit or other joinery bit, clamps. A drum sander is also nice, but you can hand sand.
Cutting the Materials
You have a lot of wiggle room here. For this project I cut 4 slightly different widths on each of the 2 materials used to give the board a little bit of random character. Typically, I cut materials between 1-1/2 and 3 inches wide. Run all the sides through your jointer to ensure they are quite straight and smooth.
The next step is routing the ‘fingers’ along the vertical edges of each board. Choose 2 pieces – one from each material type – for your outside edges. Make sure you only cut fingers in one edge of these boards. I typically prepare 3' or 4' lengths – enough for 2 medium or 2 larger cutting boards.
For this project I just used 15? pieces.
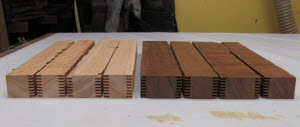
First Assembly Stage.
Clean all wood chips from the channels between fingers – I used compressed air for this task. It’s important to wear eye protection as chips may dislodge and fly in any direction.
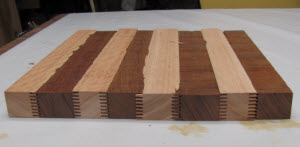 Arrange the pieces in an alternating pattern and test fit before applying glue. This allows you to arrange and adjust your clamps. For long assemblies I glue-up just 4 or 5 pieces at a time to avoid the problem of glue on the first joint curing before the glue on the last joint is applied and the clamps are positioned and tightened. This also ensures more uniform pressure along the entire glue line of each joint.
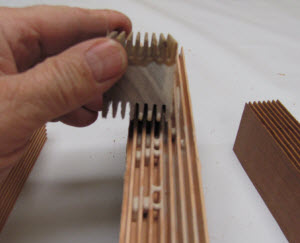 Once you’re satisfied with the test fitting disassemble the pieces and apply glue. I use a short piece of ‘fingered’ material for this purpose.
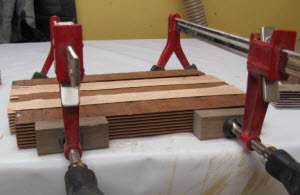 If you glue up less than the total width it’s a good idea to use some short sections of material fingered on one side as a clamp block.
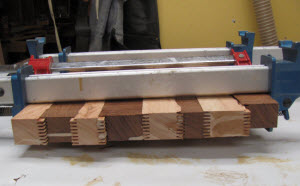 Once the first glue up section has cured adequately, add the remaining sections and allow to cure completely.
Cutting the Glue-up
True both ends of the glue-up by running it through the table saw. Next I flatten the top and bottom of the glue-up with a thickness planer or drum sander. These surfaces become your next glue joints so make sure they’re quite flat and even.
 Once both surfaces are planed or sanded flat we’ll start slicing off sections for the next glue-up stage. Slice across the finger joints to get the following collection of pieces.
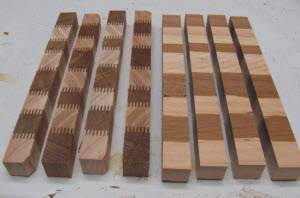 Next, swap every second strip end-for end, then, rotate the pieces 90 degrees so the finger joints show.

Second Assembly Step
Now you’re ready for the final assembly and glue-up. Apply glue to the contact surfaces of each strip and clamp. Let the assembly cure completely.Once the glue cures completely, remove the clamps, trim the ends and sand the top, bottom and all 4 edges. I use a 1/2? round-over bit to soften the top edge all the way around.
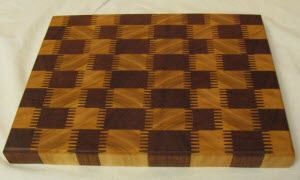
Apply a Finish
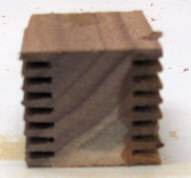
Finally, apply a food-safe oil finish. I prefer walnut oil over others – it never turns rancid.Here’s a photo of our completed project. Note the slightly darker color after the application of oil. The photo looks fuzzy but isn’t – this is a fun optical illusion created by the finger joints.
Photos By Author
Source:
Rockler finger joint router bit – catalog item 22617
www.rockler.com
(800) 279-4441


71 years old and new to woodworking. This is going to be one of my first projects
Nice I'm going to try this
I made a similar board using a whiteside glue joint router bit #3354, with good results same method different pattern
like the cutting board
What a great idea using the finger cutter, the finished result is fantastic. Well done.
Must remember to wear my glasses whenever using this gift. May mess with my astigmatism.