Article updated August 2023
Wood joints are the backbone of any woodworking project. Understanding the various types of wood joints and their applications is essential for achieving strong, durable, and visually appealing results. From simple butt joints to intricate dovetails, the choice of joint can significantly impact the overall quality of your work. In this article, we’ll explore the different wood joints available, their strengths, weaknesses, and best use cases.
You can also download this article in a handy PDF: DOWNLOAD HERE!
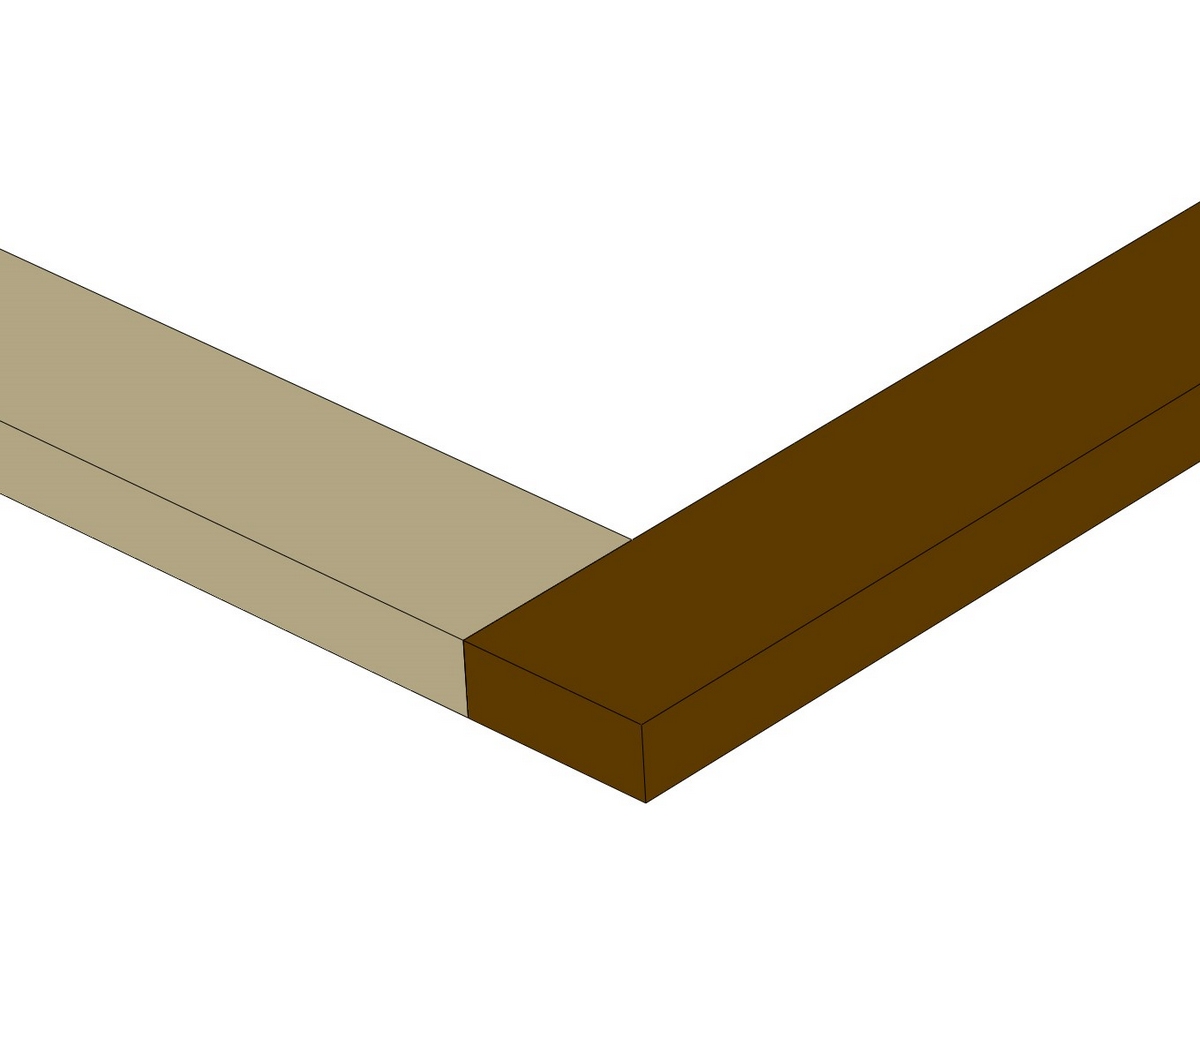
1. BUTT JOINT
Butt joints are one of the simplest woodworking joints to make and are commonly used where much strength in the joint isn’t required. It’s usually made by gluing one end grain piece and one long grain piece together. What this joint makes up for in simplicity, it loses in strength and durability.
Since the butt joint is straightforward and easy to create, it’s ideal for beginners or for projects where simplicity is desired. Butt joints can be quickly assembled and require fewer tools and materials compared to more intricate joinery methods. This makes them cost-effective and a common choice when building inexpensive items. However, since they lack any interlocking or alignment features, the mating surfaces can be tricky to position, and the joint will not survive even moderate racking or shearing forces. If your project calls for an end grain to long grain butt joint, consider reinforcing the joint.
A few common uses for butt joints are picture frames, small boxes, or drawers. One of the most common is edge-to-edge glue-ups to create panels.
Butt joints have lots of strength when used in long grain to long grain glue-ups. For instance, gluing the edges of two boards together to make a wide panel is a butt joint. In this scenario, the resulting joint is usually stronger than the surrounding wood.
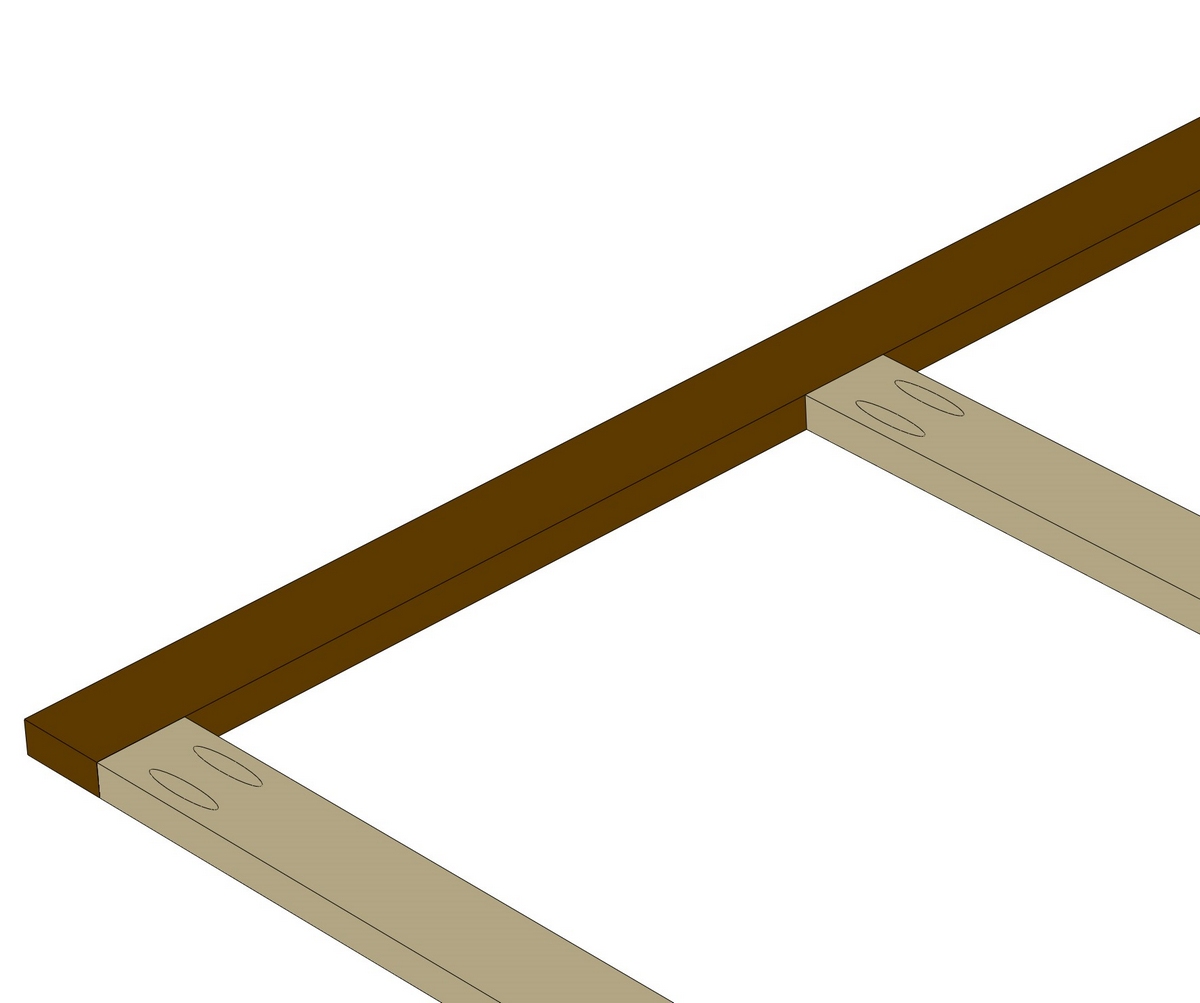
2. POCKET-HOLE JOINERY
Pocket-hole joinery is one of the most popular woodworking joinery methods and is well suited for beginners and professionals alike. At the heart, this is a butt joint that’s been reinforced with screws.
The pocket-hole joint requires forming an angled hole/slot located close to the end of a board. This pilot hole prevents the board from potentially splitting as the screw joins the two pieces together. Glue can be added to this joint to provide additional strength.
The pocket-hole joint can be formed a few different ways. The most common method is with the use of a pocket-hole jig and a stepped drill bit which counterbores the pocket and pre-drills for the screw simultaneously. Jigs like this range in cost from around $20 to $400+ depending on what features you want. Pocket-holes can also be formed by cutting an angled slot (pocket) with a router bit via a CNC or other specialty pocket-hole machinery. This method is generally reserved for production furniture/cabinetry shops as the equipment cost can be in excess of $1,200.
Pocket-hole joinery shines where speed and efficiency are paramount and is well suited for assembling case goods (cabinets, dressers, etc.), face frames, drawer boxes, and most other applications where a reinforced butt joint is needed. Another benefit of this joinery method is the ease at which items can be disassembled (assuming you didn’t add glue to the joint) if modifications are necessary.
In instances where the screw holes would be unsightly if seen, plugs can be used to fill the pocket-holes. While the pocket-hole joint is significantly stronger than the butt joint, it’s not well suited for joints that will see regular racking or twisting forces. For instance, this isn’t a good joint for chair or bed building. Face frame assembly is a very popular and effective use of pocket-hole joinery.
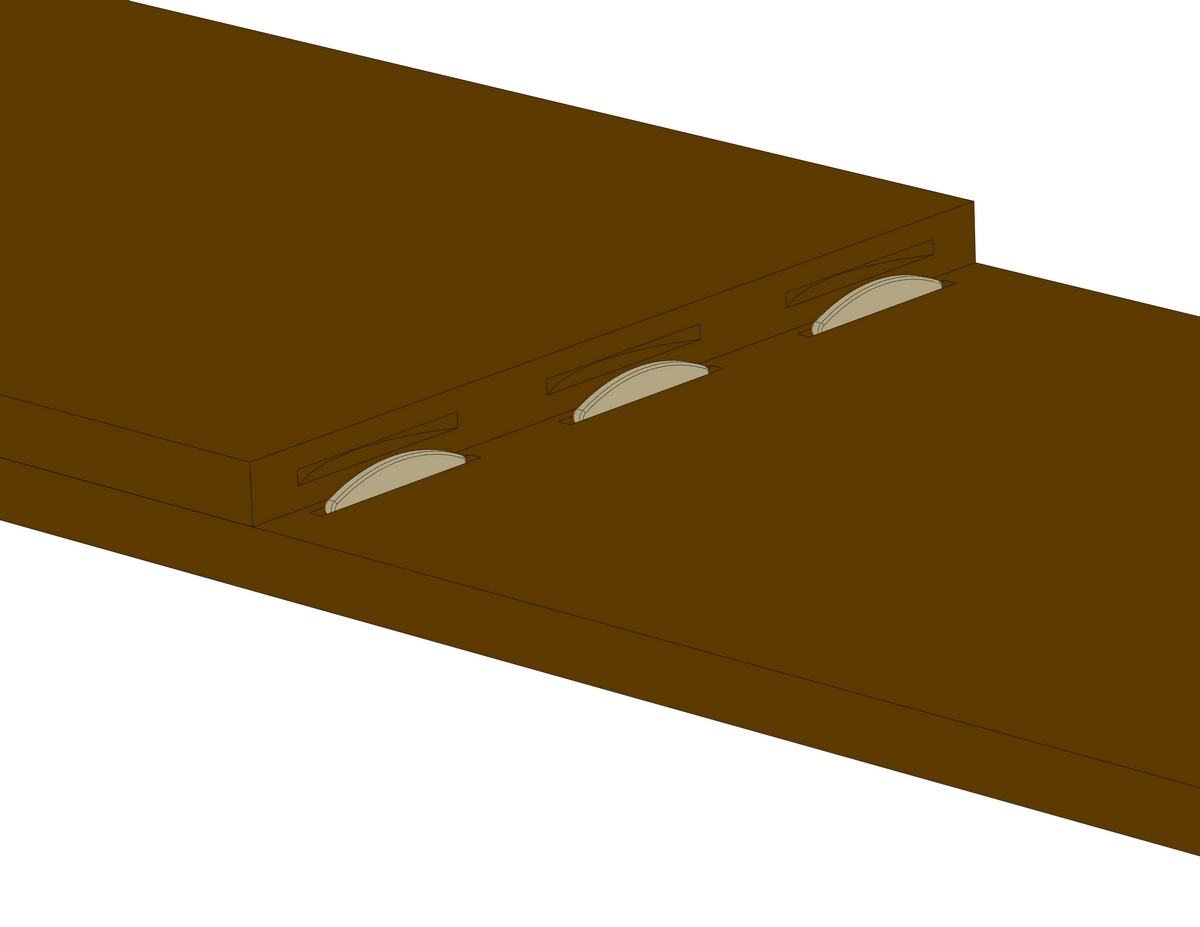
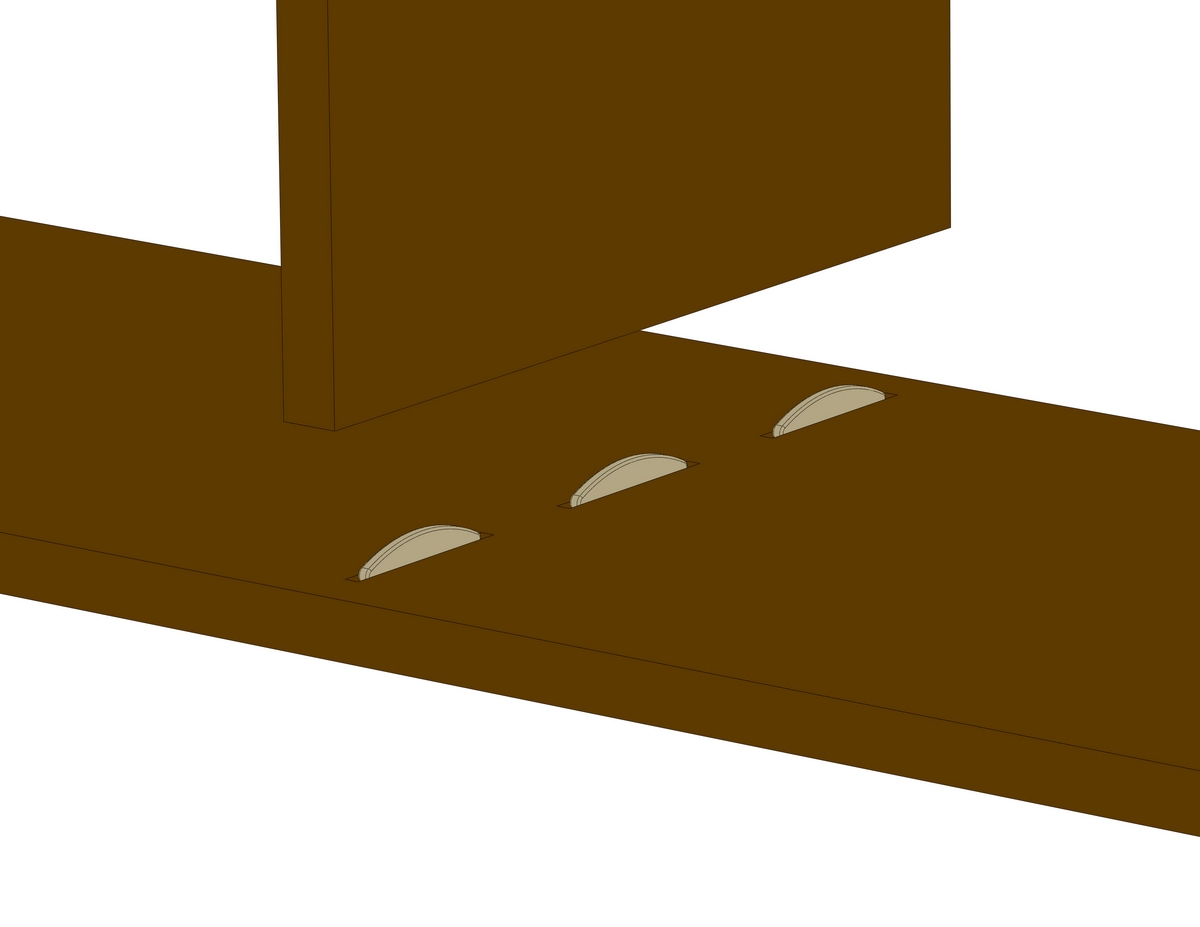
3. BISCUIT JOINT
At first the biscuit joint may seem like nothing more than a reinforced butt joint, but biscuits can also serve as a helpful aid when gluing up larger panels or tabletops by providing great registration of the faces so you do less leveling after glue-up. This joinery method works by cutting a slot into the surface of the two pieces that are to be joined and inserting an oval-shaped biscuit into the slots. Biscuits are typically made from compressed beech.
The most efficient way to create biscuit joints is by using a biscuit joiner, sometimes called a plate joiner. There are other ways to cut these slots, but given that biscuit joiners typically range from $50–$300, depending on the quality and features of the tool, I think it’s better to simply buy the tool that’s designed for the job. While a biscuit joiner’s primary role is cutting slots for biscuit joints, it is a handy tool for other applications in the shop as well, such as cutting slots for Z-Clips that can be used to secure tabletops.
Accurately cutting the biscuit joint is critical. While a quality biscuit joiner can make this easier, if the slots are not cut in the proper location, to the correct depth, or are crooked, the assembly process will be difficult if not impossible. However, if the slots are cut correctly, it allows for an easy assembly sequence and produces fairly strong joints. Check out part 1 and part 2 of our article on tips for using a biscuit joiner.
Biscuit joints can be used in a variety of woodworking projects, including cabinets, tabletops, and frames. They are particularly useful in projects that involve edge-to-edge, end-to-edge, or even end-to-end joining and produce a stronger joint thanks to the additional gluing area of the biscuits. Even though these aren’t the most robust joints possible, they are adequate for the majority of case good projects and a less expensive option to a Domino joiner when used as an alignment aid for large glue-ups.
The easiest way to cut biscuit joints is with a dedicated biscuit joiner, but you can also use a hand-held router or router table, with some limitations.
4. FLOATING MORTISE AND TENON
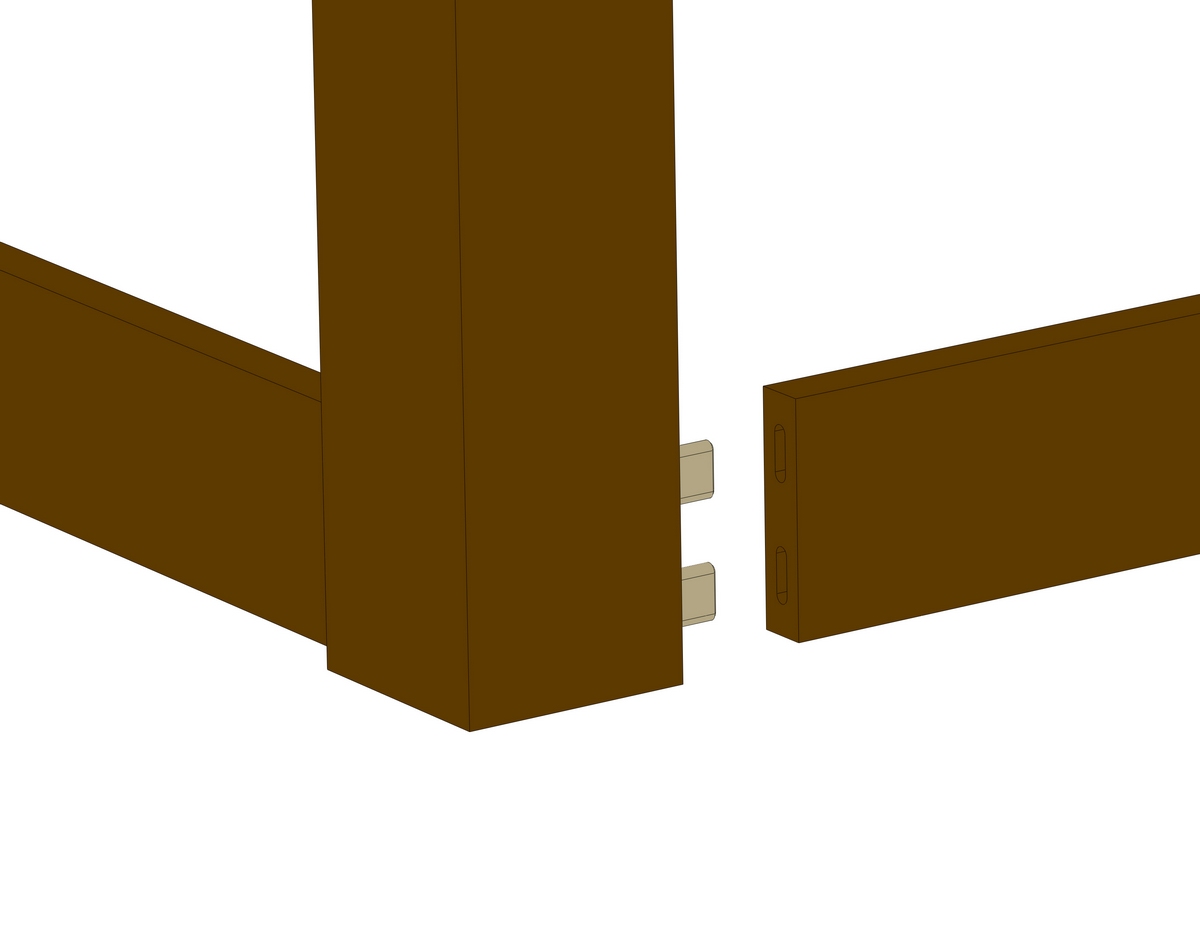
A floating mortise and tenon joint, also called a loose tenon, simulates a mortise and tenon but is much easier to produce, while still providing the strength of a mortise and tenon joint.
One way to make loose tenon joints is with a Festool Domino. Domino joinery is loved and hated for a variety of reasons. On one hand, it’s a fast and very strong joinery option. On the other hand, buying a Domino joiner can be prohibitively expensive for some.
First off, let’s discuss what a Domino joiner is and why it’s so versatile. This tool quickly and accurately produces a loose tenon joint by forming a mortise with a cutter that pivots in a side-to-side motion until the desired depth is reached. The Domino joiner can make mortises in a range of widths and depths to suit a large majority of joinery applications from small to large projects.
Once the mortise is cut, you glue a Domino (the loose tenon) into place and clamp the joint while the glue cures. Since Dominos are made from beech and can be over a ½” thick and extend into the wood over 2 ¾”, they are capable of producing very strong joints.
The Domino joiner is also easy to adjust to the needs of different joinery applications and has a few built-in stops that can reduce the need for marking and measuring before cutting the mortises. This form of joinery makes it easy to dry fit an assembly prior to gluing things together. It can be helpful to have a set of “dry run” Dominos in the shop that have been sanded down slightly to aid in the ease of disassembly prior to adding glue.
The Domino DF500 and Domino 700 are expensive machines, ranging from $1,200–$1,600. You’ll need to make your own buying decision to determine if they’re right for you. There are other ways to produce floating tenons. One such tool is the Jessem Pocket Mill Pro, which is offered at $350. Another is the Beadlock Tenon Jig, available for about $90.
Another viable option to utilize floating mortise and tenon joinery is setting up a hand-held router with a jig to guide the router in cutting the mortises. Some woodworkers use a horizontal router table to cut the mortises.
Biscuit joints are also floating mortise and tenon, but because of the shallow penetration of a biscuit into each of the mating pieces, biscuits don’t provide as strong a joint as these methods. Dowels are also floating tenons, and are strong, but can be fussy to use.
5. RABBET JOINT
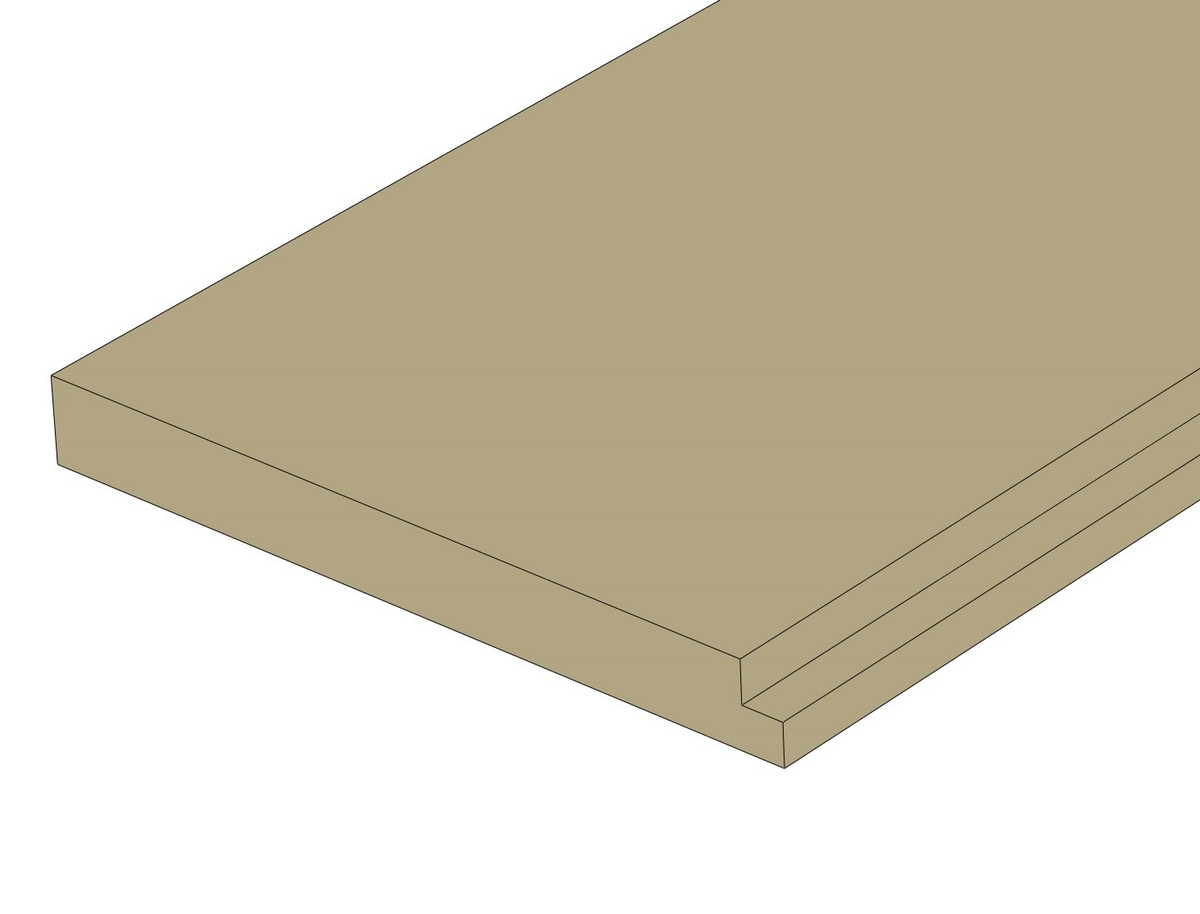
Rabbet joints are made by cutting an L-shaped notch or groove along an edge of the board. This is easily done with a table saw or router and has a handful of practical applications in the shop. Since rabbet joints have more surface area than butt joints, they produce a stronger bond when gluing. Due to the geometry of the joint, they can also make alignment of mating pieces easier during assembly.
The basic rabbet joint is commonly used on the back edge of cabinets to inset the back flush with the sides, on cabinet sides to receive the top or bottom, or in frames/doors with a glass pane. This joint can also be used when constructing drawer boxes, but can benefit from the addition of brad nails to help reinforce the joint.
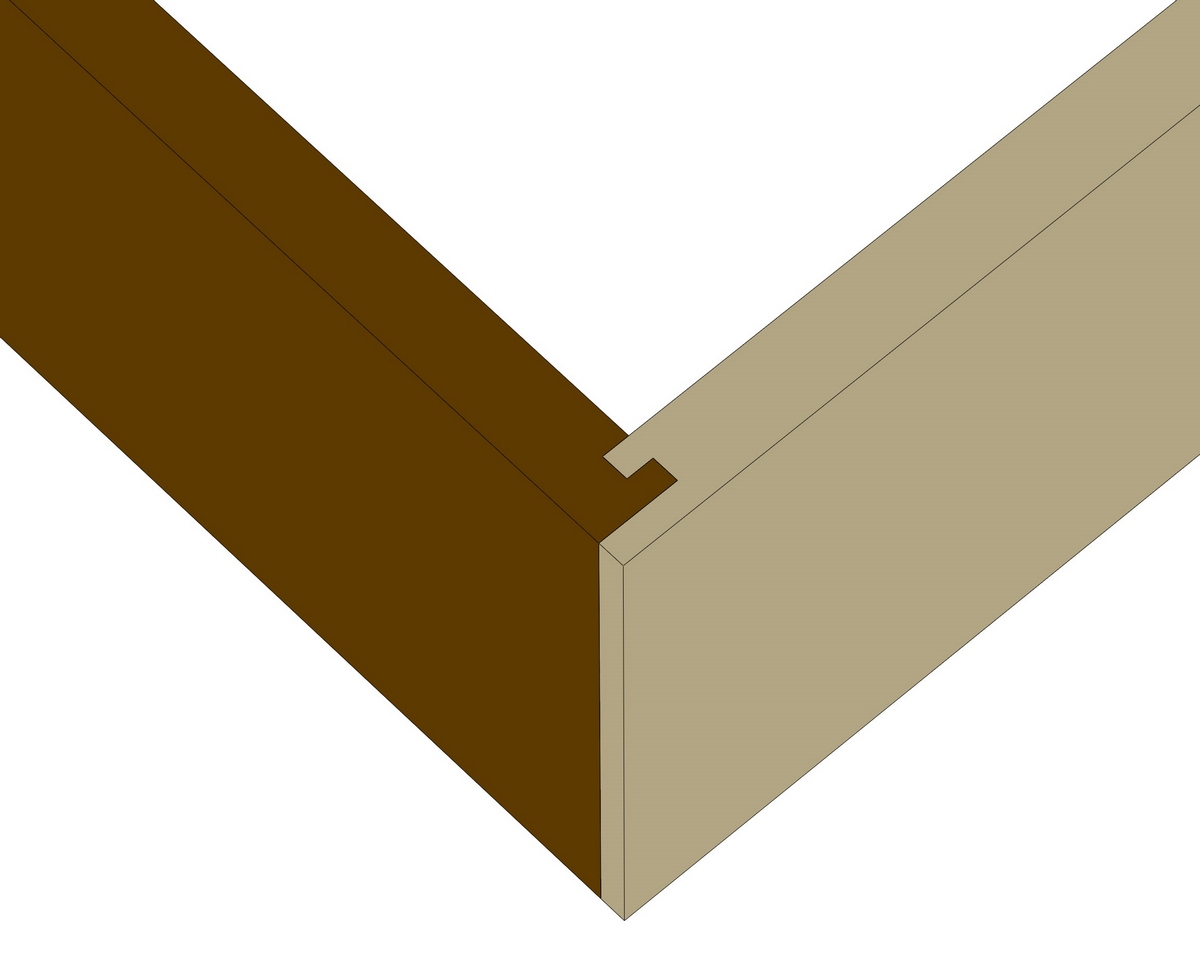
A variation of the basic rabbet (known as a locking rabbet) is a great alternative joint for drawer boxes where additional strength is desired but the complexity/time of dovetail joinery needs to be avoided. The locking rabbet joint takes the strength of the basic rabbet up a couple notches and creates a durable joint with ample surface area for gluing. It can be cut on a router table or produced on a table saw.
6. DADO JOINT
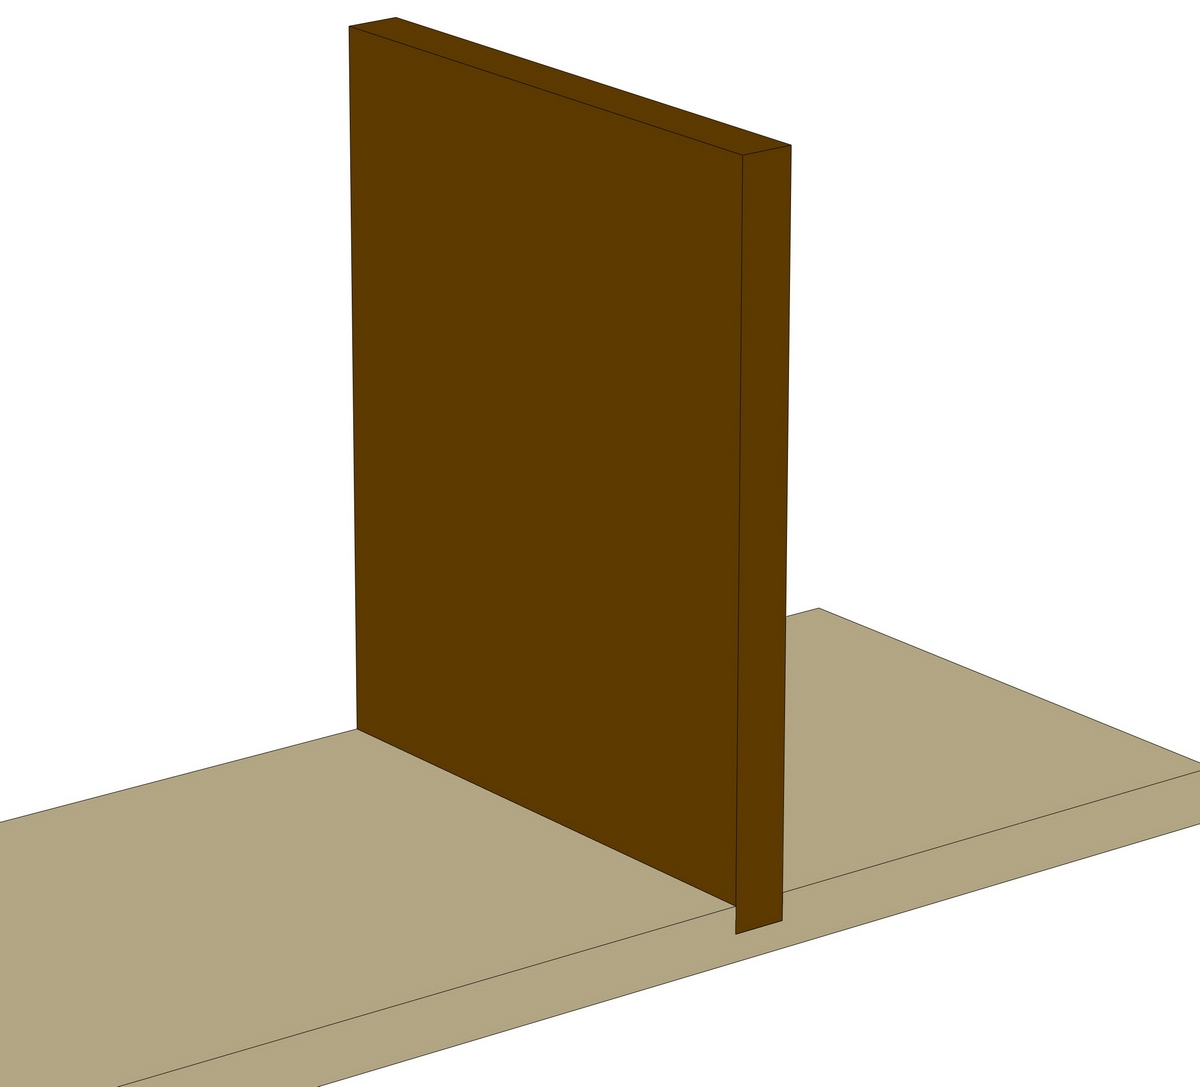
Put simply, a dado is a groove cut into a board. If we want to be technical, a dado is cut across the grain while a groove is cut along the grain. Regardless of the direction the groove is cut, this joinery technique has a variety of applications and is relatively easy to master.
Dadoes/grooves are commonly used for securing shelves in a cabinet, accepting drawer bottoms, or in jigs and fixtures for hardware such as T-track. When the dado is cut all the way across a board, it’s known as a through dado. This is commonly used when the ends of the boards won’t be seen or the aesthetic isn’t a concern.
However, when the ends of the boards will be seen, a stop dado can be employed. With a stop dado, the slot simply ends at some point before the edge of the board and the mating piece is notched to accommodate this.
A dado is typically cut on a table saw with a dado stack, on a router table, or with a hand-held router. The biggest drawback to dadoes is that they can be time consuming to complete, dialing in the width and depth of the slot is critical, and errors can be difficult to correct or hide. When setting up for a dado cut, it’s recommended to dial in the size of the dado using scrap pieces of your project material to minimize mistakes.
7. LAP JOINT
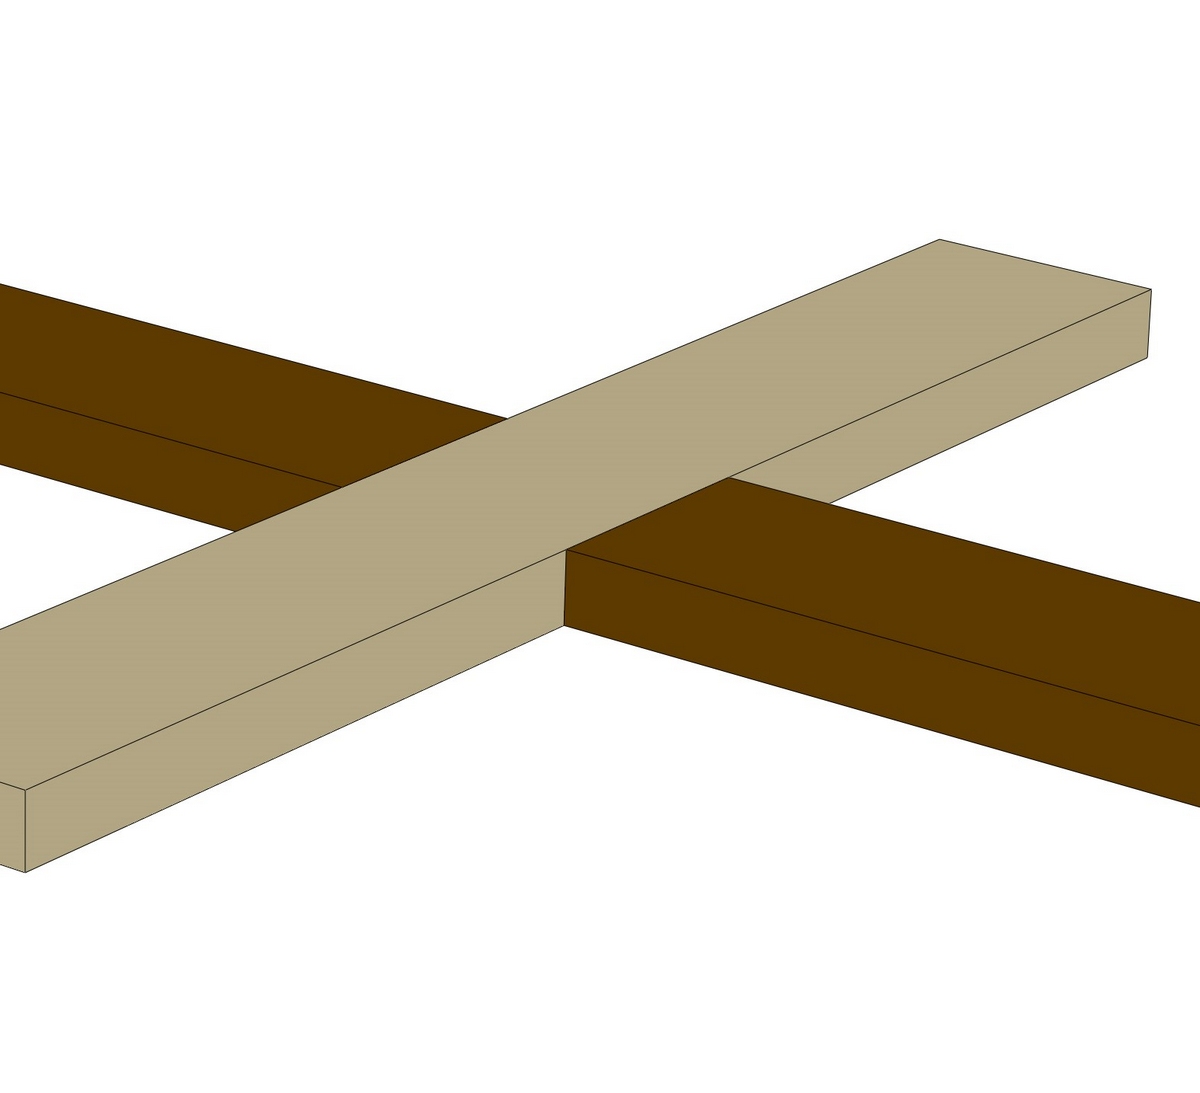
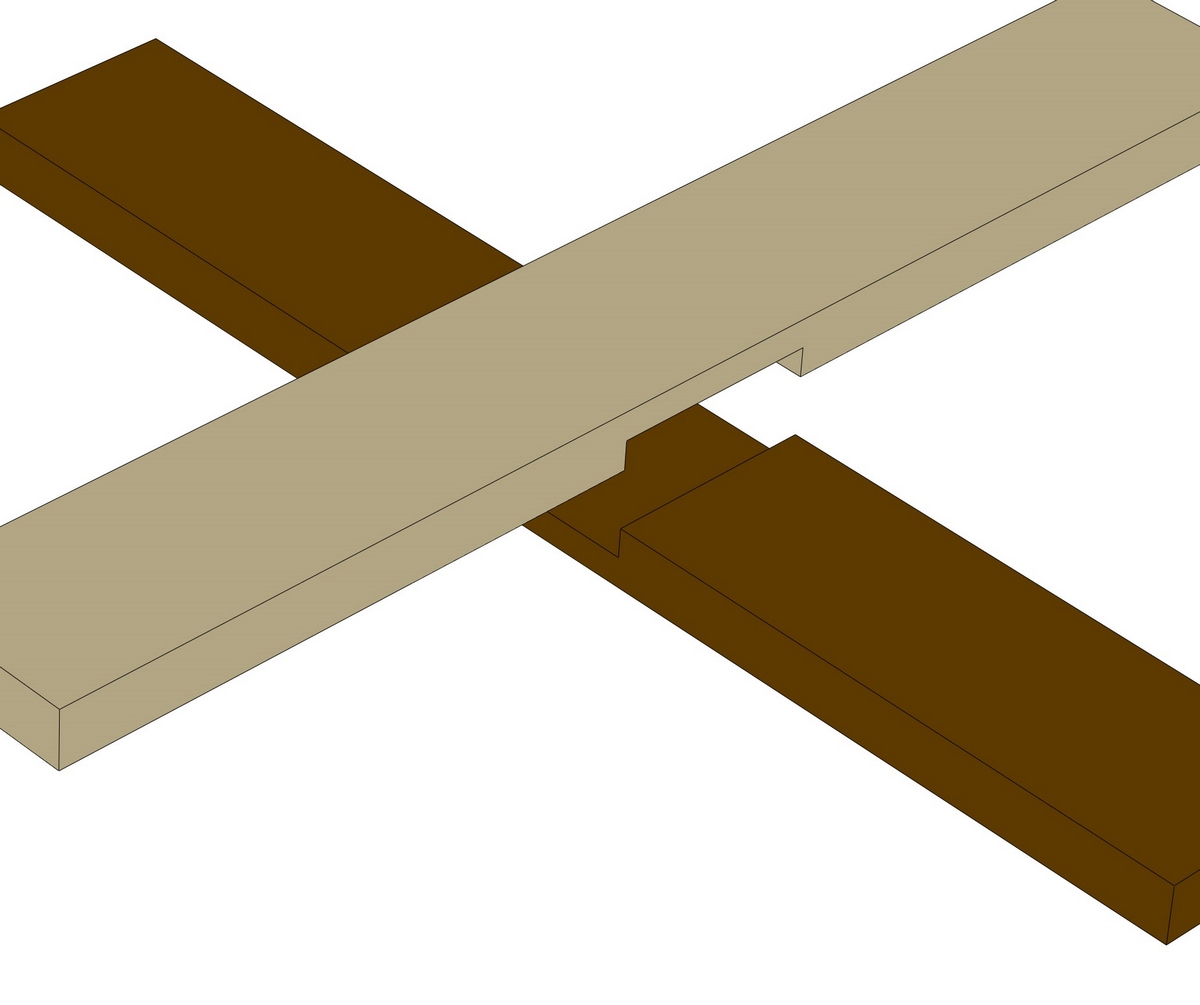
A lap joint is a staple woodworking joint that’s formed by two pieces of wood overlapping each other. This creates a strong connection between the pieces and, depending on the size and orientation of the joint, can also significantly reduce racking in the structure. Lap joints have A LOT of glue surface and are very strong. They can be cut in a wide range of configurations and are utilized in everything from delicate drawer organizers to timber framing joinery.
The half-lap is the most common variant of this joint and, as the name implies, is where each piece has a notch cut halfway through it so that when the two pieces mesh they are flush with each other on both sides. However, the lap joint can also be formed with pieces only partially meshing together as desired for the project’s design.
The lap joint is a fairly simple joint to create and can be made with a variety of tools. Most commonly, lap joints are made with a dado head on a table saw or by using a router, but they can also successfully be cut on the table saw with a standard blade and simple jig, or with hand saws and chisels. If a snug fit is achieved with this joint, it will not only look great and go together with a high level of accuracy, but the additional surface area for gluing will produce a robust joint.
There are two main downsides to the lap joint, though. First is the need for precise layout and execution of the cut. If the joint isn’t precisely cut, the resulting fit will be sloppy. The best way to prevent a bad fit is by sneaking up on the final size of the notches. This can be achieved by cutting close to the layout line and checking the fit before continuing. By sneaking up on the final size of the notch, you’re much more likely to achieve a great fit. Secondly, the joint lines will be visible. While this may be a desired aesthetic, if the joint wasn’t cut precisely, it can make for a less than visually pleasing joint and the errors can often be difficult to disguise.
When you’re ready to make a lap joint, it’s good to have a handful of test pieces ready that are exactly the same size as your project pieces. You’ll need them for setup and test cuts.
8. FINGER JOINT
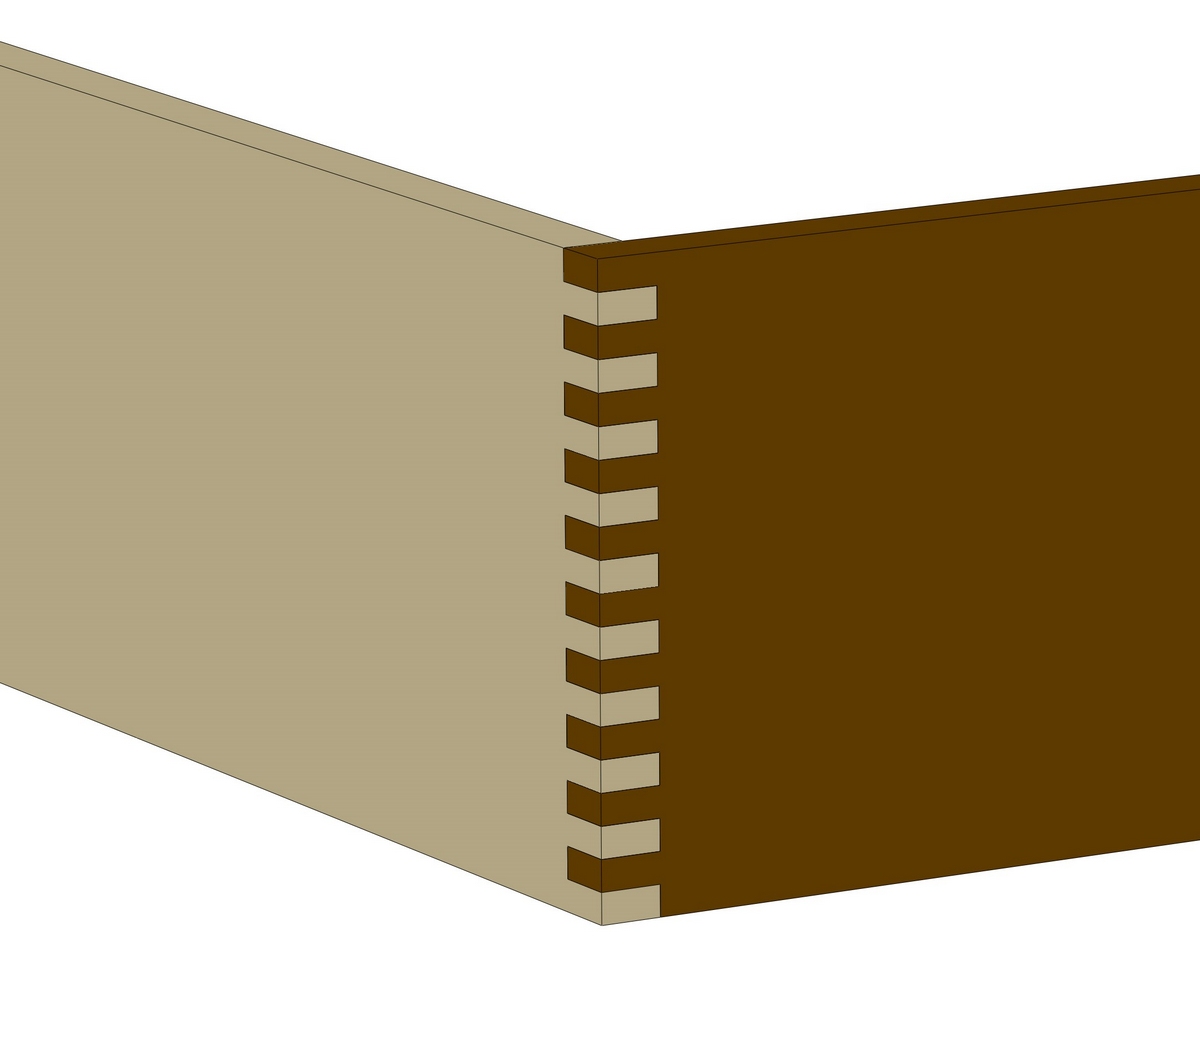
A finger joint, also known as a box joint, is a type of woodworking joint that is typically used to join two pieces of wood at a right angle. They are commonly used in a variety of woodworking applications such as boxes, cabinets, drawers, and frames. When made from contrasting woods, like maple and walnut, this is a very attractive joint.
A variation of the finger joint can also be employed to effectively stitch two boards together at their ends. An example of this is paint-grade millwork.
The box joint has ample surface for gluing which makes it very strong, and thanks to the interlocking fingers that create this joint, it’s easy to accurately assemble. The finger joint resembles a dovetail joint in the way that both boards mesh together and create a visually appealing pattern when the joint is assembled, but the finger joint is significantly easier to master.
The main downside of the finger joint is the additional time it takes to plan the cuts. However, once that’s done, the process of actually cutting the joint is relatively easy when a jig is utilized in conjunction with a table saw or router.
9. MORTISE AND TENON JOINT
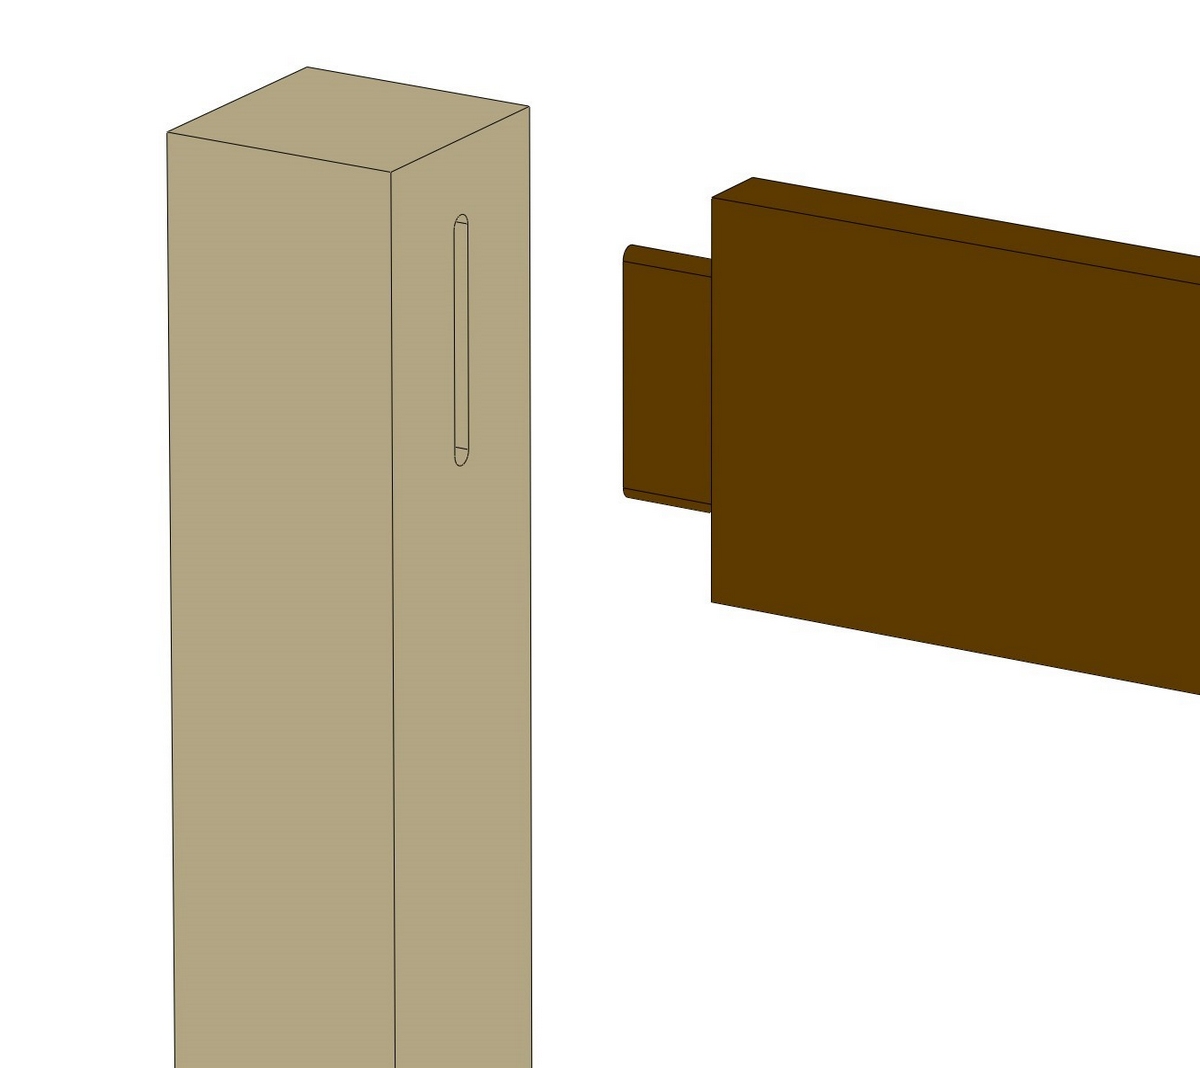
Mortise and tenon joints are widely regarded as one of the strongest and most reliable woodworking joints. They involve creating a mortise, or a hole, in one piece of wood and a tenon on the end of the other piece, which fits into the mortise. This joinery method is frequently employed in high-end heirloom quality furniture due to its longevity and strength.
The mortise and tenon joint is most commonly used at 90-degree intersections and is glued together. However, instead of using glue, pins or wedges can be used to secure the joint. Mortise and tenon joints can also be used where two pieces come together at an angle, but this is much more complex to create. Generally speaking, a tenon should be sized roughly one-third the thickness of the piece it’s being cut from, and a well-fitted tenon should require moderate clamping pressure to fully close the joint.
While the mortise and tenon joint is very strong, durable, versatile, and lends itself to be aesthetically pleasing, it can be daunting for newer woodworkers to attempt. The standard mortise and tenon joint (where the mortise and tenon are hidden once the joint is complete) is a great joint to practice so you can build your confidence. Even with a less-than-perfectly cut joint, the results can still be strong enough for basic woodworking projects once the joint is glued together. Most mortise and tenon joints can be cut with relative ease by using a router and a couple of jigs. As mentioned with cutting lap joints, it’s advised to sneak up on the final dimensions for this joint as well.
The joint can be created using a hand-held router and router table. Mortises can be created on a drill press, on a benchtop mortiser and even on a CNC router. In addition to the router table, tenons can be cut on a table saw.
10. BRIDLE JOINT
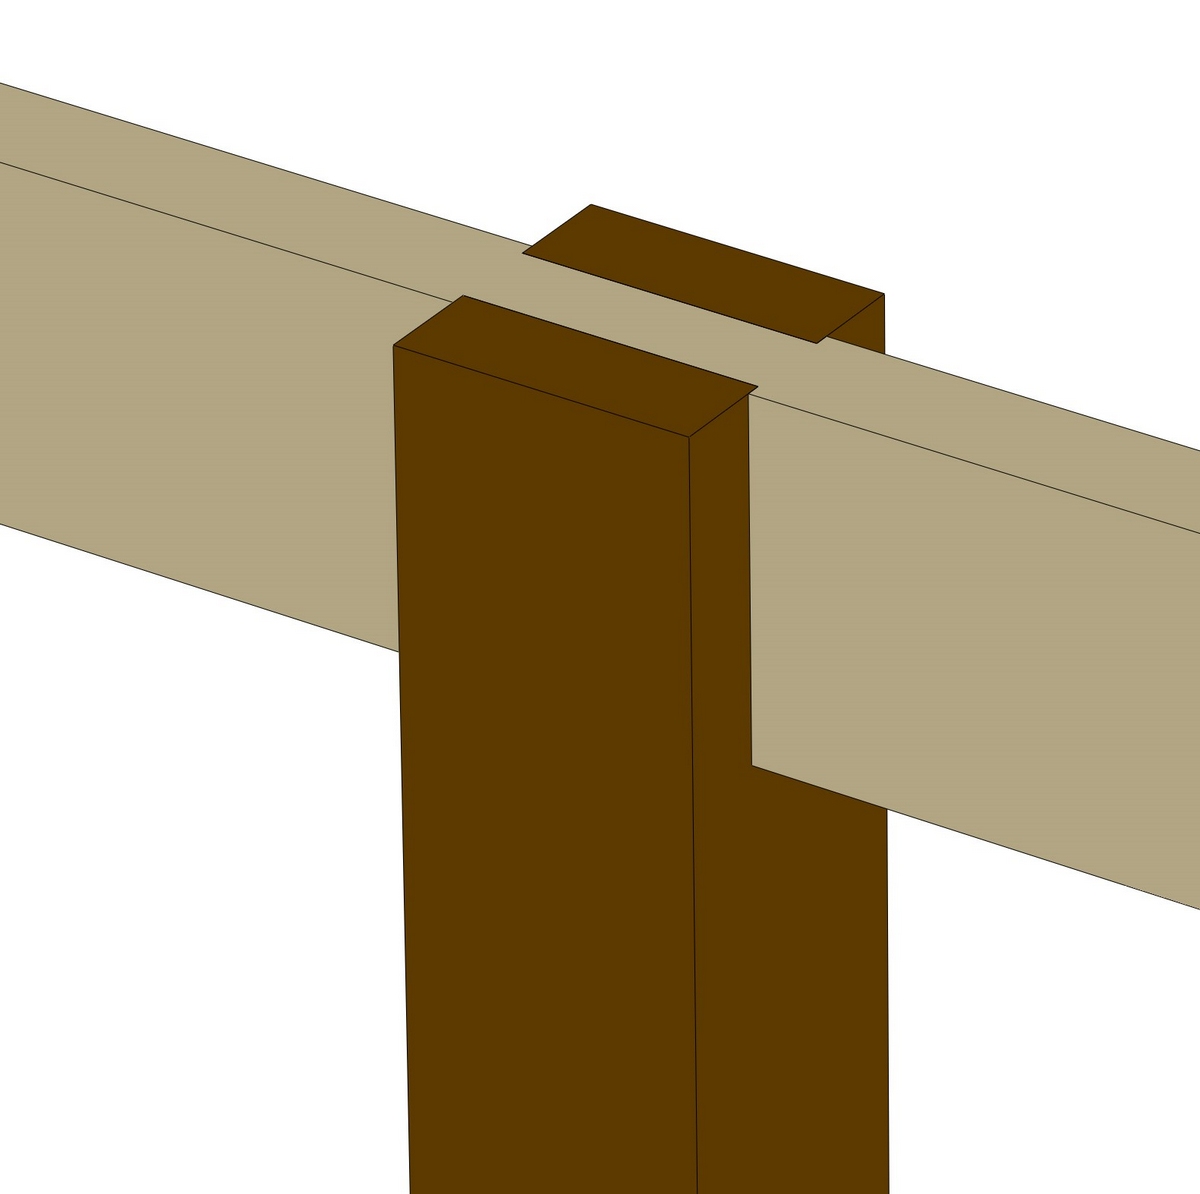
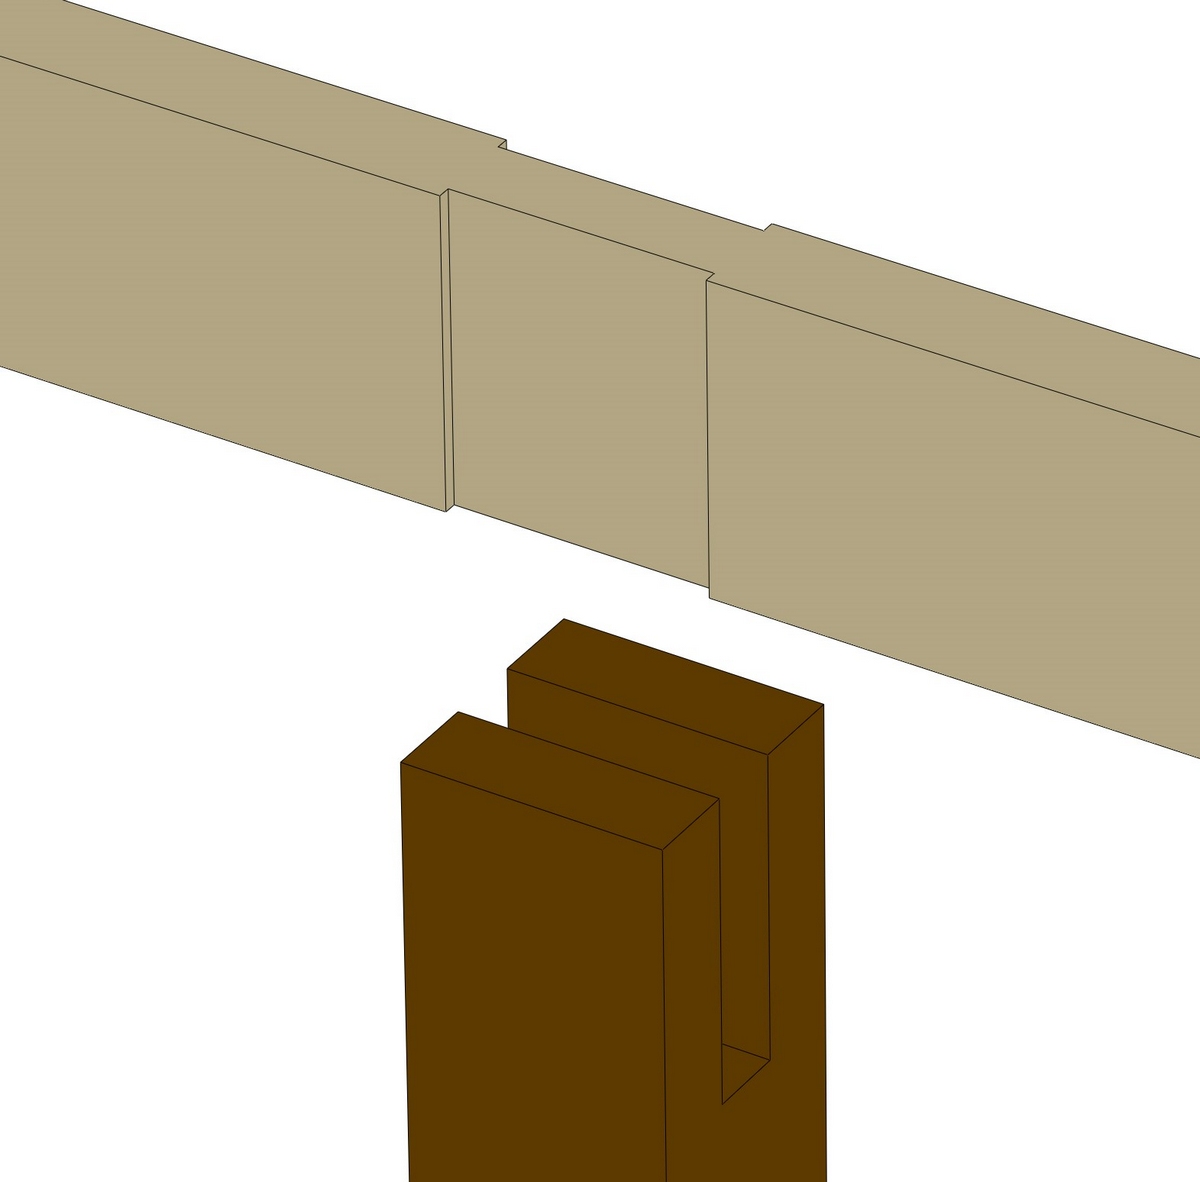
Bridle joints (also known as open mortise and tenon) are similar to mortise and tenon joints but differ in the fact that they have three glue surfaces rather than four. This joint is commonly made with a table saw, band saw, and router, but can also be successfully cut with hand saws and chisels.
When accurately cut, this joint is not only visually pleasing, but is also very strong and stable thanks to the additional gluing surfaces and geometry of the mating pieces. This joint can be used in a variety of applications such as joining angled pieces, corner pieces, or T-joints.
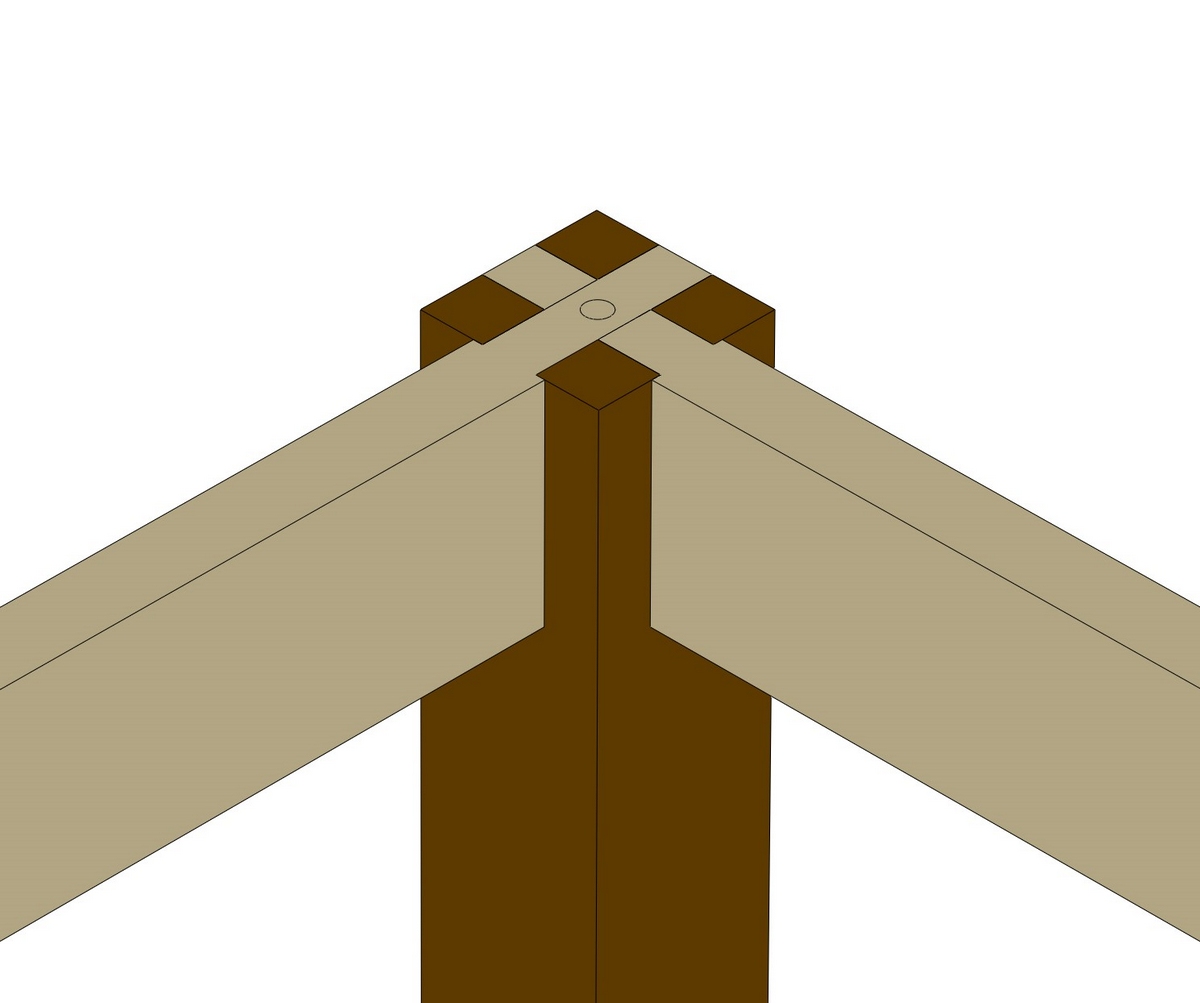
Another variation of the bridle joint is the castle joint. An example of the castle joint is at the corner of a four-leg table base where the aprons meet the leg. The top of the leg has two mortises cut perpendicularly into it, and the end of each apron has a half-lap cut into them. To further secure the joint, a screw can be driven through the half-lapped portion of the apron into the leg.
As you may expect, a well-cut bridle joint can be more difficult to achieve than a standard mortise and tenon joint due to the fact that the joint is more visible than a standard mortise and tenon. The bridle joint and its variants not only require accurate layout, but also demand care to be taken while being cut. A poorly cut bridle joint will not be visually appealing or have near the strength and resistance to racking that can be achieved when this joint is cut accurately. But when made well, the bridle joint is incredibly strong.
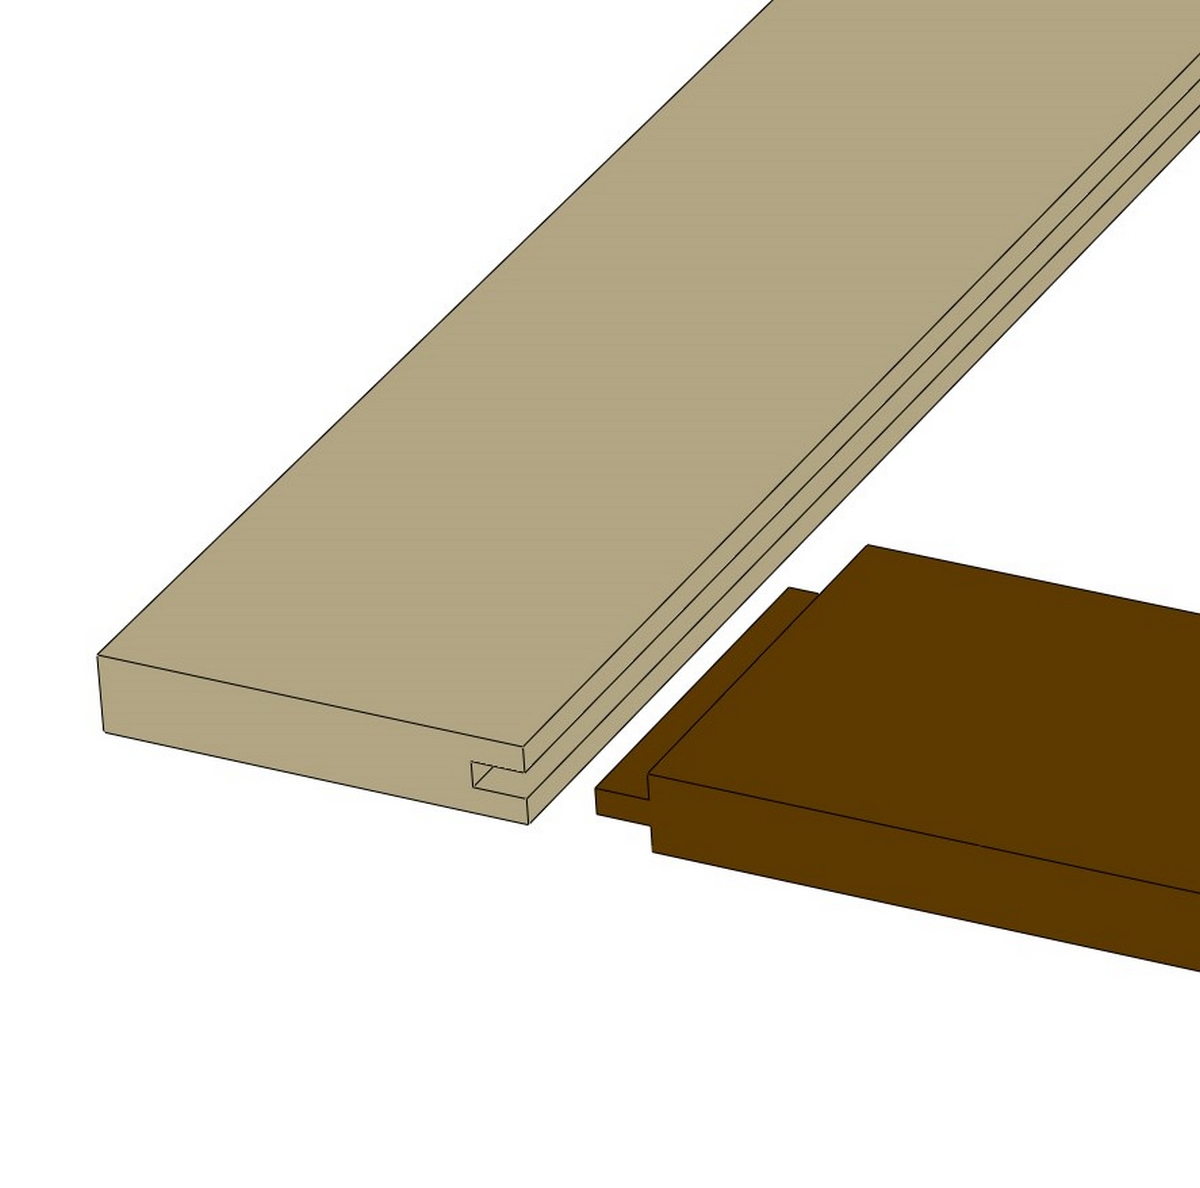
11. TONGUE AND GROOVE JOINTS
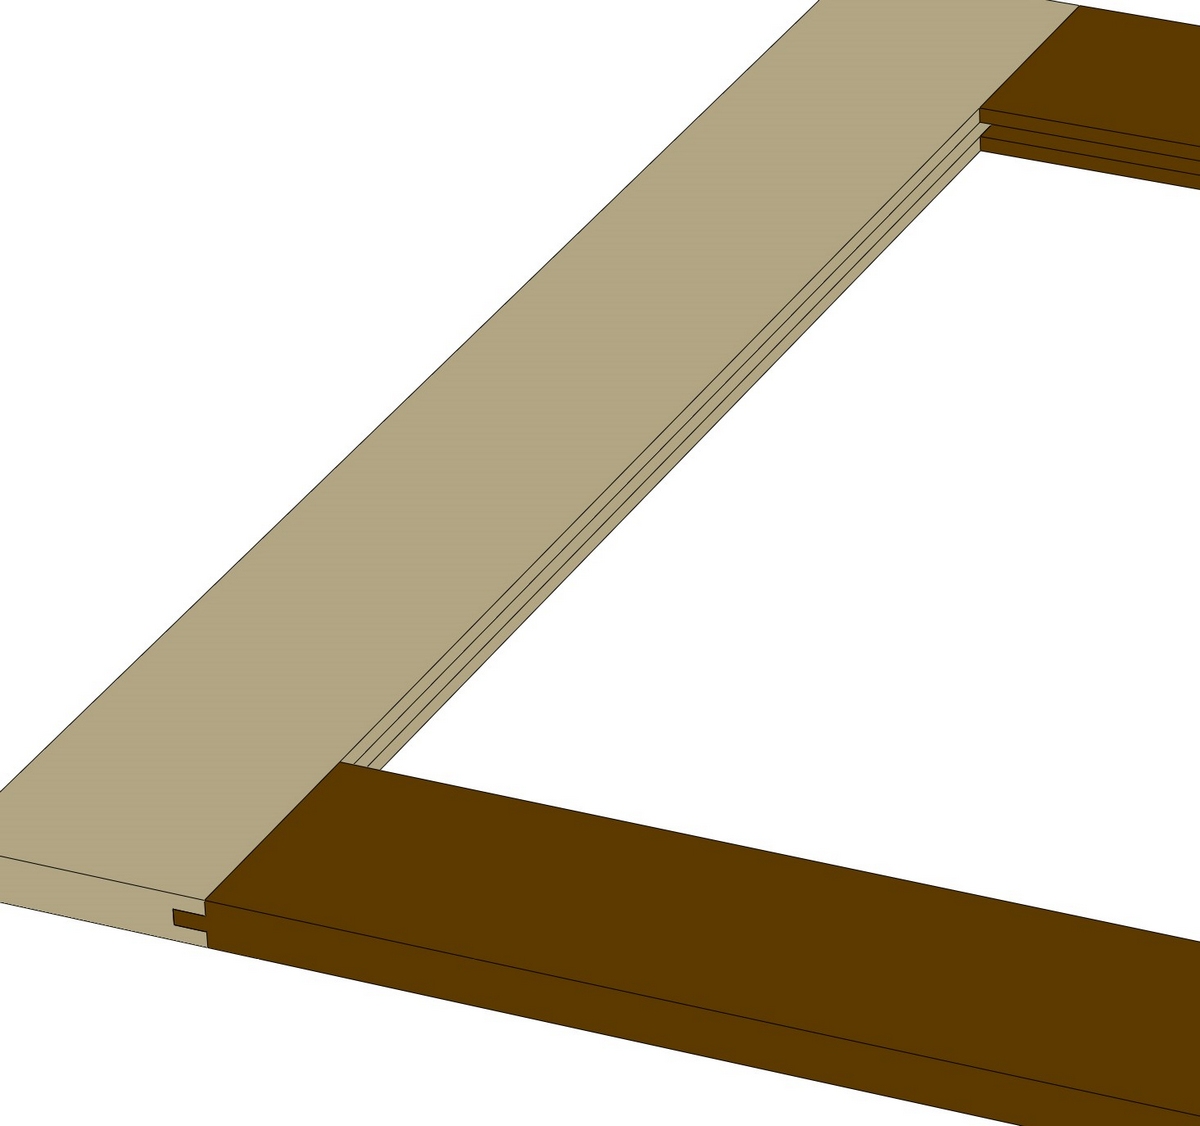
Tongue and groove joints are a staple in products we enjoy every day. This joinery technique is very similar to the mortise and tenon joint, with the difference being that the groove runs the entire length/width of the edge it’s created on. The tongue is analogous to the tenon and the groove is similar to the mortise. This joint is commonly used in flooring, paneling, and various styles of frame and panel assemblies.
This joinery technique provides exceptional strength and stability thanks to its interlocking design. It can also make accurate assembly easier and faster since the mating pieces naturally align with one another.
Setting up to cut tongue and groove joints can be time consuming, especially if you’ve never attempted this joint before. While the joint can be successfully cut using only a table saw, it’s usually much faster to mill this joint using a router table/shaper with a tongue and groove cutter set. Even though tongue and groove joinery requires a bit more attention to detail and a few test cuts while setting up the tools, it is one of the faster “advanced” woodworking joints to utilize.
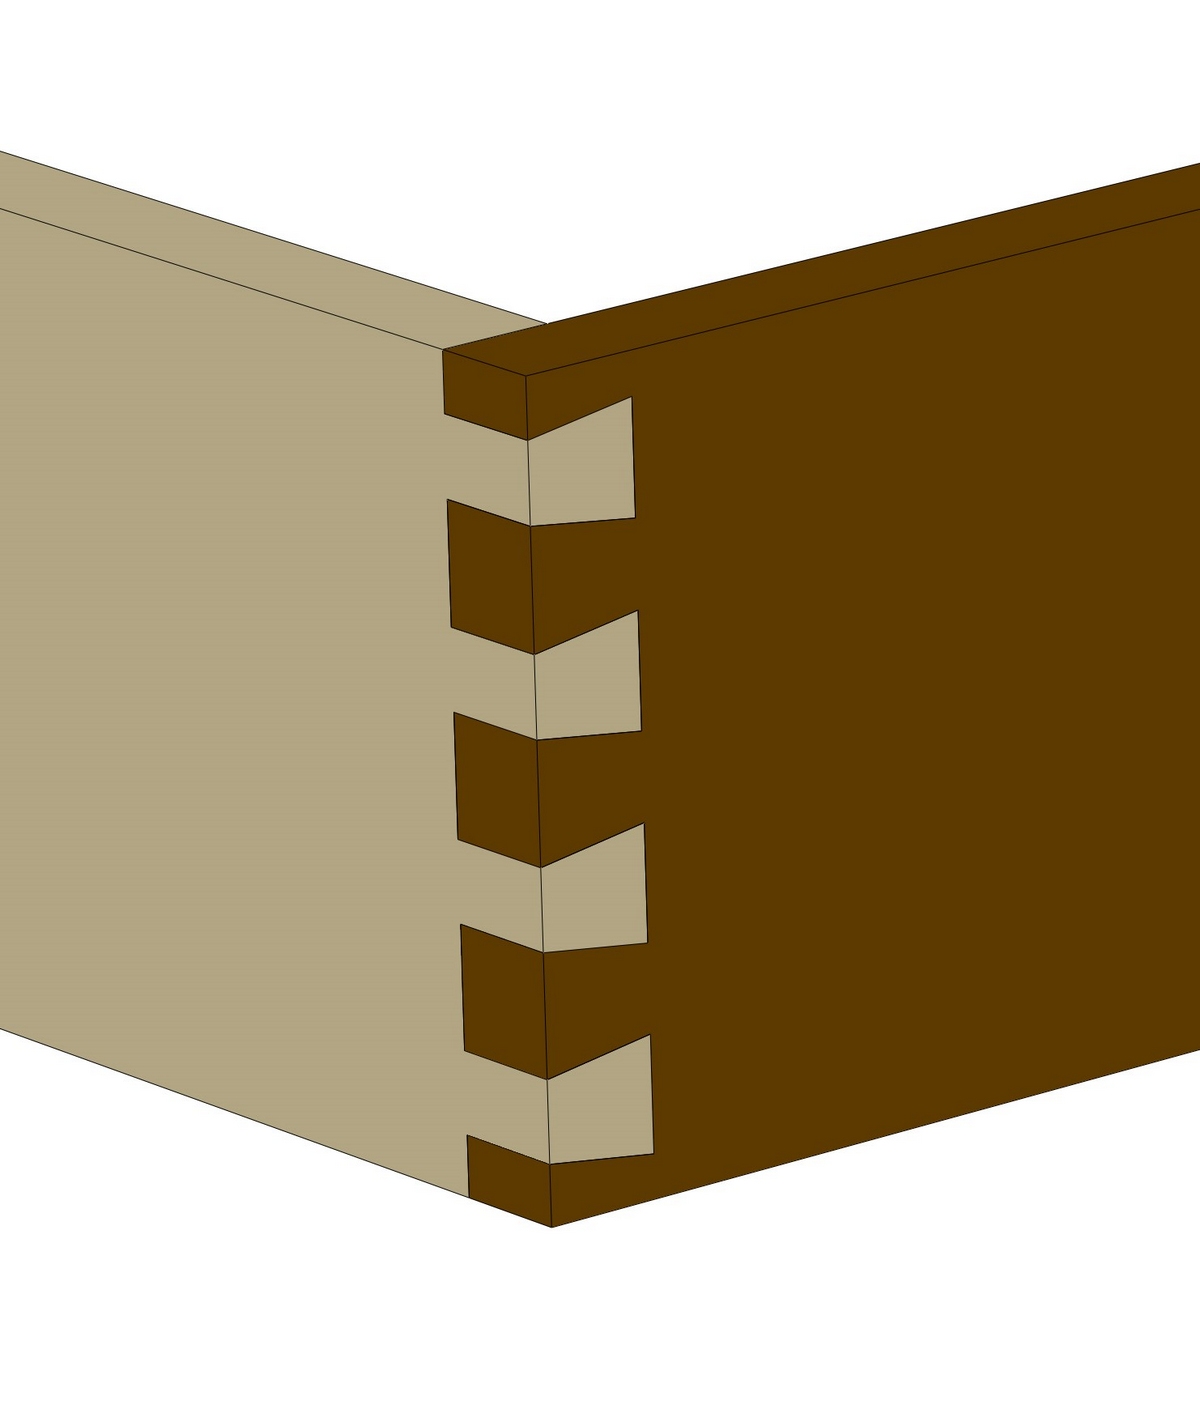
12. DOVETAIL JOINT
Dovetail joints are known for their strength, durability, and decorative appeal in woodworking. They are a union of interlocking wedge-shaped projections (pins and tails) that create a secure and aesthetically pleasing joint. Once glued, the dovetail joint is incredibly robust and does not require any additional reinforcement.
This joint is commonly cut with a router and template, but is traditionally cut using a dovetail saw and chisels. Through dovetails can even be cut with a bandsaw. The sockets of a through dovetail can be cut on a table saw using a dado head. It’s hard to beat the ease of creating great half-blind dovetails or through dovetails using a router jig.
Dovetail joints are most commonly used to create drawer boxes and are typically reserved for higher end projects. It’s common for half-blind dovetails to be used for drawers and through dovetails to be used for boxes and cases. Thanks to this joint’s design, it resists pulling apart, which makes it a great option for drawer box construction with pins and sockets being cut into the drawer sides.
A variation of this joint is the sliding dovetail. This is essentially a dado that has had the sides of the slot angled while the mating piece also has a matching angle along its edge.
The dovetail joint is regarded as one of the more advanced joinery methods in woodworking and well-executed hand-cut dovetails will all but enshrine your name in woodworking lore. Be sure you understand dovetail slope before hand-cutting dovetails. While those bragging rights are nice, they don’t come without the complexity that’s associated with mastering this joinery technique. Careful layout, an extra dose of patience, and sharp tools are all essential to successfully creating dovetail joints you can be proud of.
The endless types of wood joints means there are so many different ways to accomplish the same goal, which is one of the most fun aspects of woodworking. There are MANY more woodworking joints out there that we haven’t even touched on in this article, but this list is a good place to get started. Understanding these 12 essential joints will give you a great start on your woodworking joinery journey.
You can also download this article in a handy PDF: DOWNLOAD HERE!

If I may be so bold, this is not, nor ever has been a..."castle joint." The term is "made up." This does not show how to cut a 城継ぎ手 "shiro tsugite" at all. Which is the true and honest "castle joint." What it does show is a version of 화통맞춤 "hwatongmajchum" (for this joint I prefer the many Korean styles of it.) It is applied to both roof and foundation systems of timber frames I have designed and built...Questions and/or feedback welcome...
Great article thanks for the detailed post ,I will print and save 😃😃😃
Good article
A nice review of the many options for joinery! There’s a couple I haven’t tried yet…
looks to be a good article on various types of wood joints, thank you
Looks to be a good article on various types of joints, Thanks
Dovetail joints are challenging. Before I tackle dovetails for a project I make single dovetails joints with scrap hemlock of fir. I find that it helps my muscle memory before making dovetails on my project.
Very good article on various types of joints you can use. Forgot a couple of joints that are listed. Good refresher on all various types.
Comprehensive article, particularly helpful for novices to good quality jloinery
Excellent article.