Photos and illustrations by author
Overview
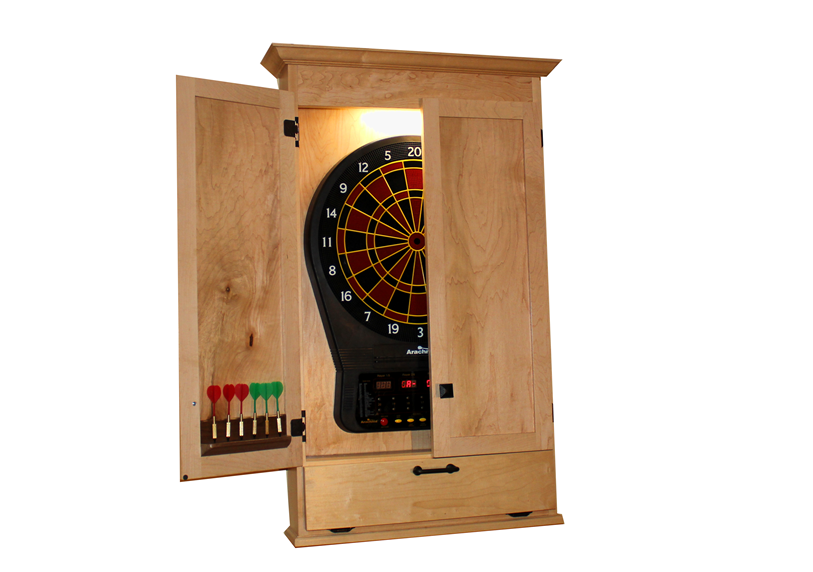
When I added an electronic dartboard to my recently finished basement, I wanted to “class it up” a bit by building a cabinet to house the board. The cabinet serves a few important functions:
- It looks nice as it encloses the dartboard when not in use.
- Darts, extra tips, and other accessories are now neatly organized in the built-in storage included in the design.
- It prevents the wall from getting dinged from “near misses”. Can’t imagine someone missing a dartboard entirely from only a few feet away? You should see what my son and his teenage friends did to the drywall behind the board in only a few months of use with no cabinet.
The project uses basic joinery throughout. Biscuits are used on the carcase, and the flat panel doors are put together using simple groove and tenon joinery.
Materials

I used hard maple for the solid wood components, but any hardwood will do fine. I’d suggest avoiding soft woods as they are likely to get dinged up from dart strikes over the years. The back panel calls for ¾” plywood with one good face, and the door panels are ¼” plywood with two good faces.
Adapting to your dartboard
I designed this so that my dartboard (Arachnid Cricket Pro 650) would fit comfortably within the cabinet. My dartboard seems larger than most, and much larger than non-electronic models, so it will be important to rework the dimensions to fit your specific board. By allowing 1-1/2” – 2” around the perimeter of the dartboard, you’ll have ample space to get your fingers into position to mount the board, and to accommodate the vertical travel in mounting hardware. If you plan on installing lighting in the cabinet, you will also want to leave some space in the cavity above the dartboard (as I have done in this design) to mount the light and hide its wiring.

Routing wires
My cabinet is mounted on a wall behind which there is an unfinished room. That allowed me to run wires through the back of the cabinet into the next room. Based on where your cabinet is installed you will have to determine the best location for any wiring necessary to power your light or dartboard. For installation with an outlet directly below, the power cord could be run through the storage area and out the bottom of the cabinet.
Constructing the cabinet

Start with the carcase
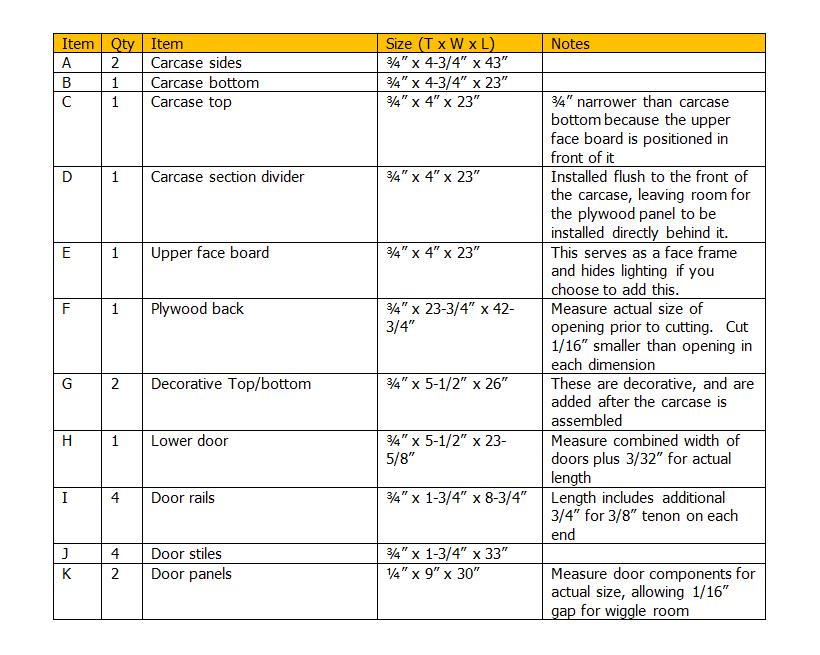
Start by milling the carcase components to the dimensions specified in the cut list. The carcase for this cabinet consists of two sides, a top, bottom, and a section divider that sits between the lower storage compartment and the dartboard area.
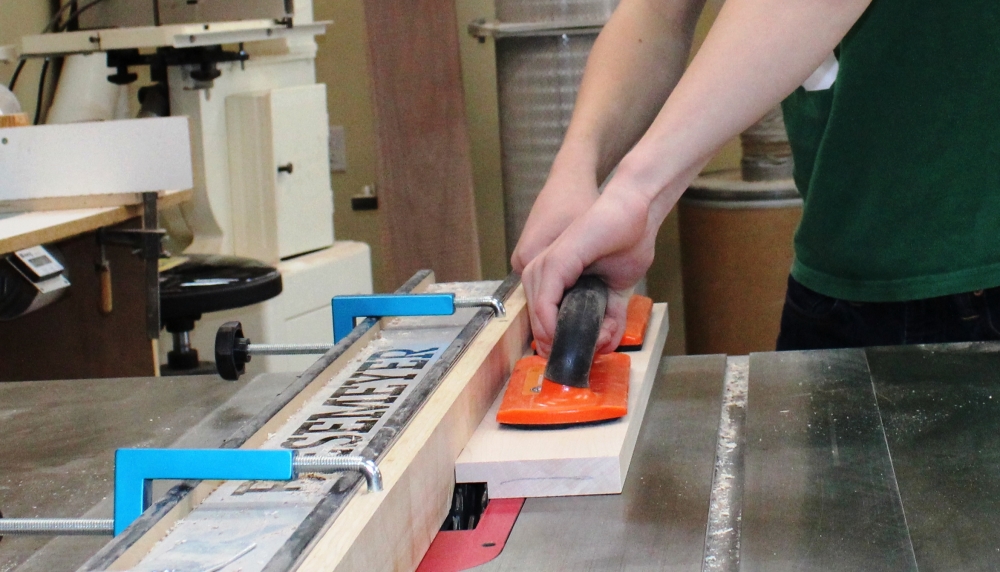
Joinery
To keep construction simple, the design uses biscuits to join the parts together. For tips and tricks for using a biscuit joiner refer here: https://www.wwgoa.com/using-a-biscuit-joiner/
Mark for biscuits
Mark the locations for each biscuit as specified in the illustration by placing a line at the center point on each end of each horizontal member. Double check everything before milling slots with the biscuit joiner to be sure that your biscuits slots will be milled in end grain on the horizontal members and long grain on the vertical members.
Mill biscuit slots
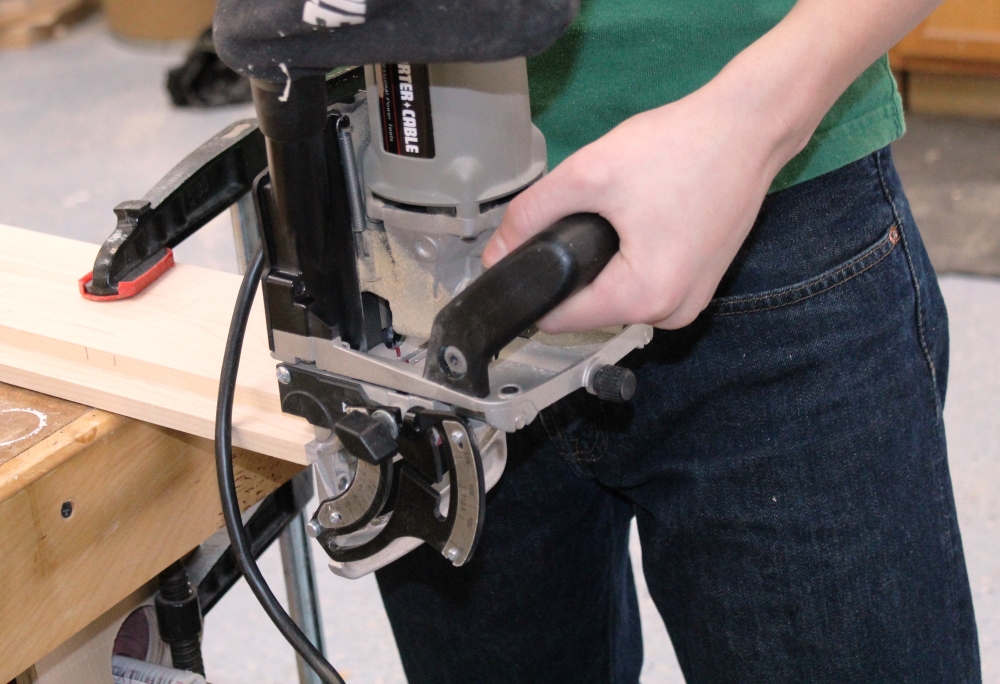
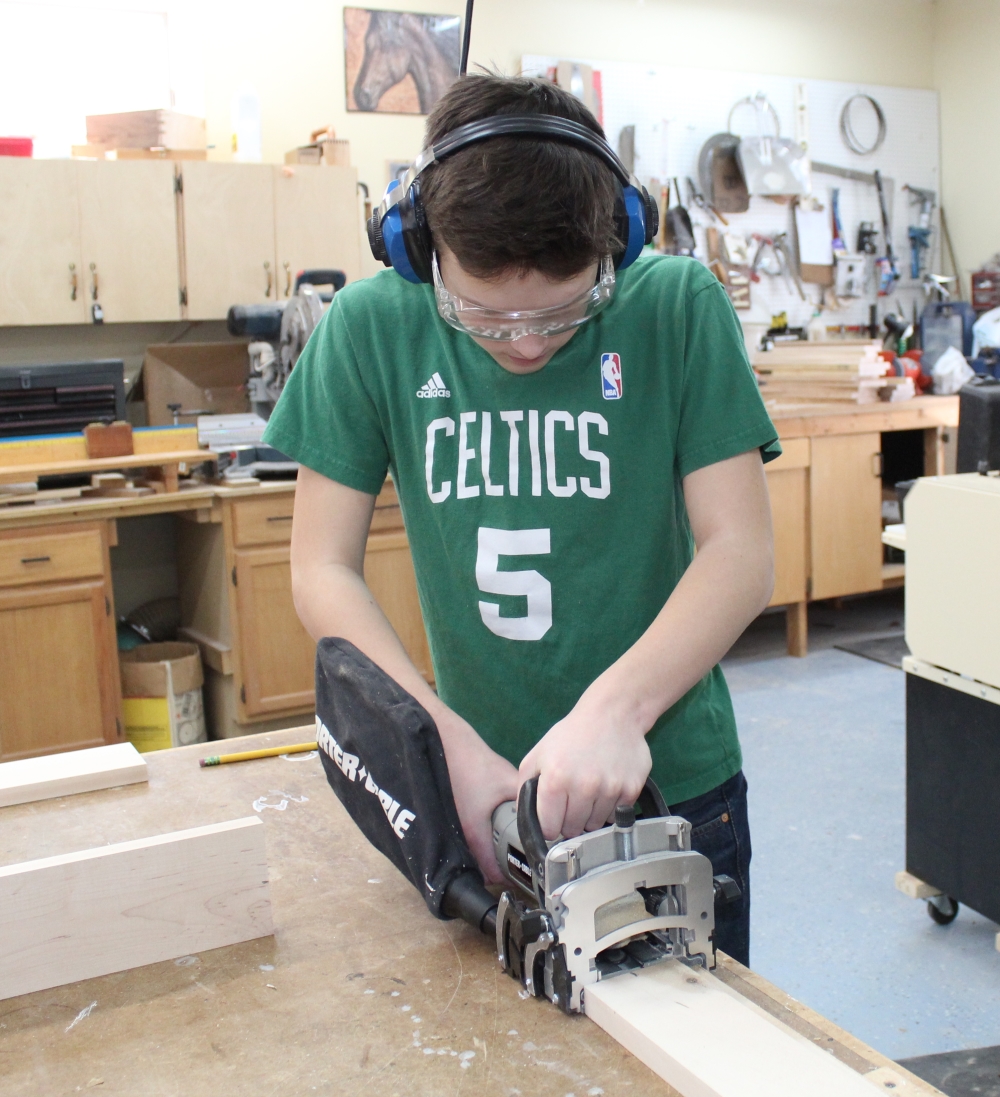
Secure the work pieces to your bench and cut the biscuit slots. For the two slots cut for the section divider, clamp another board to the work piece to use as a temporary fence, positioning the biscuit joiner for a plunge cut into the appropriate location.
Assemble the carcase
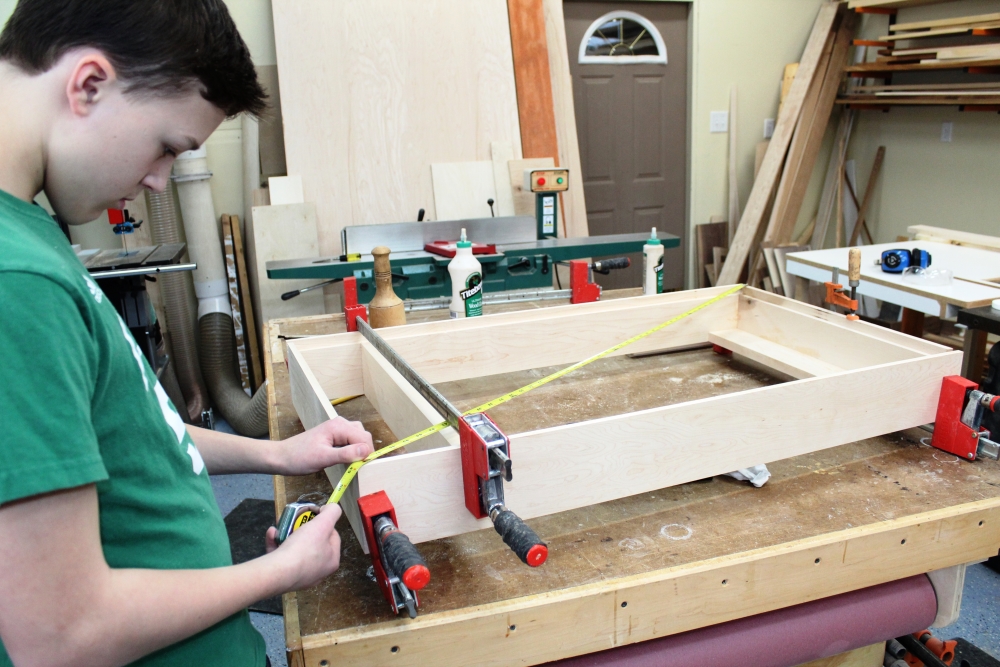
After gluing and clamping the case together, measure diagonally from corner to corner to check for square. The measurements should be the same within 1/16”. If you find that the difference is greater than 1/16”, adjust the clamps to apply any necessary pressure to force the assembly into square. If the glue sets up while the carcase is out of square, it will cause problems later so it is important to deal with it now while adjustments are still easy to make.
Remove excess glue
Use a damp rag to remove excess glue from the carcase. Use a small screwdriver to force the rag into inside corners.
Cut the back panel
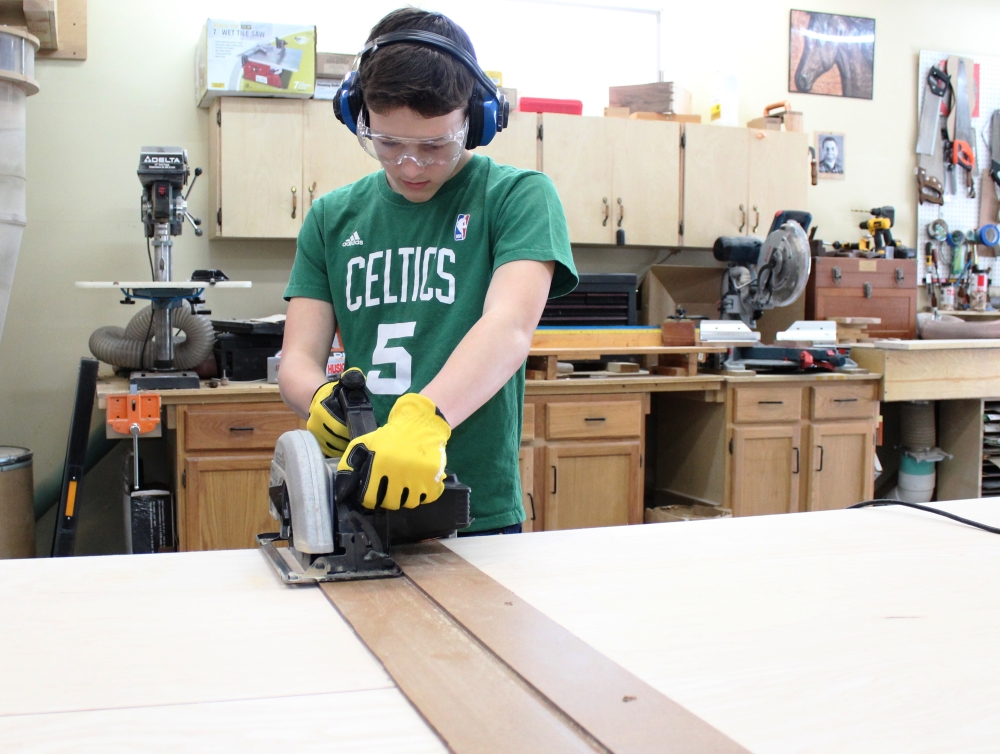
Measure the opening on the carcase for the back panel, and cut a piece of ¾” plywood to fit. Undersize the plywood by 1/16” in each direction so that you have adequate wiggle room to deal with any imperfections. Dealing with large pieces of plywood is easier with a jig and circular saw as shown. To build this jig for your shop go here: https://www.wwgoa.com/shop-made-circular-saw-guide-cheap-easy-awesome/
Attach the back panel
Use 1-1/4” brads and glue to secure the back panel, placing a brad about every 6” along the edge. Be careful to position the brads so that they don’t blow through the sides of the carcase. If you are using a hammer to tap in the brads (as opposed to a pneumatic gun), pre-drill all of the holes so that the carcase does not split.
Now for the Doors
Choose a good quality plywood for door panels
The door panels should be made from 1/4” sheet stock with two good faces. I like to use MDF core for door panels and drawer bottoms, as it is normally considerably thicker than veneer core plywood, providing more substance for these components.
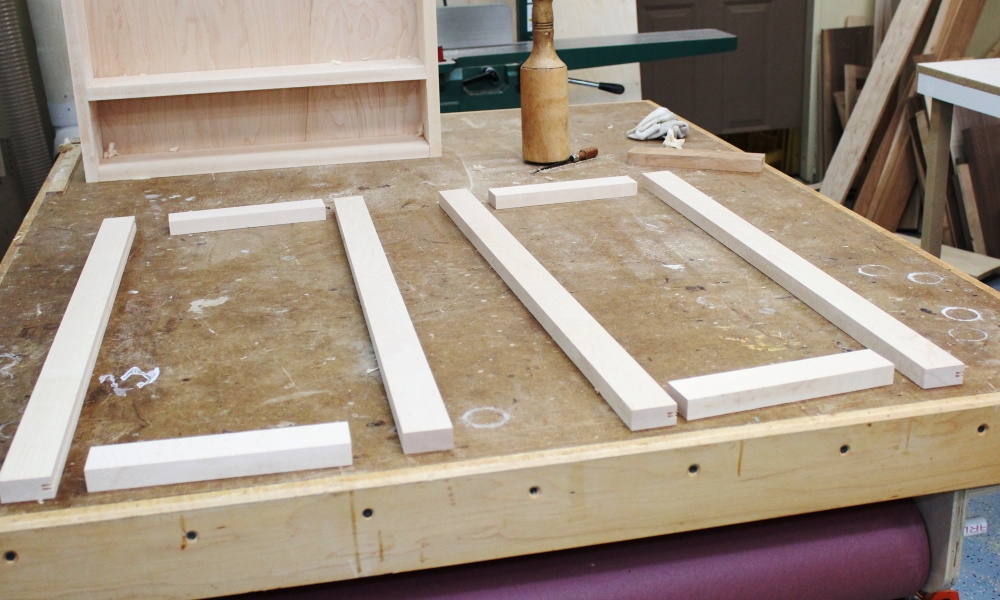
Cut the parts to size
The size specified in the cutlist accommodates a ½” tenon on the end of each rail. If you resize the project to accommodate a different sized dartboard, be sure to include the additional tenon length when you size the door rails.
Groove and tenon joinery

The joinery for these doors might look intimidating, but it is actually quite simple. You are going to mill a groove in all four pieces for each door that will accept the plywood panel. Then you will mill a tenon onto each end of the rails that will slip into the groove to form a strong joint to hold the door together.
Watch this video for complete info on machining the door parts and assembling the doors.
Grooves first
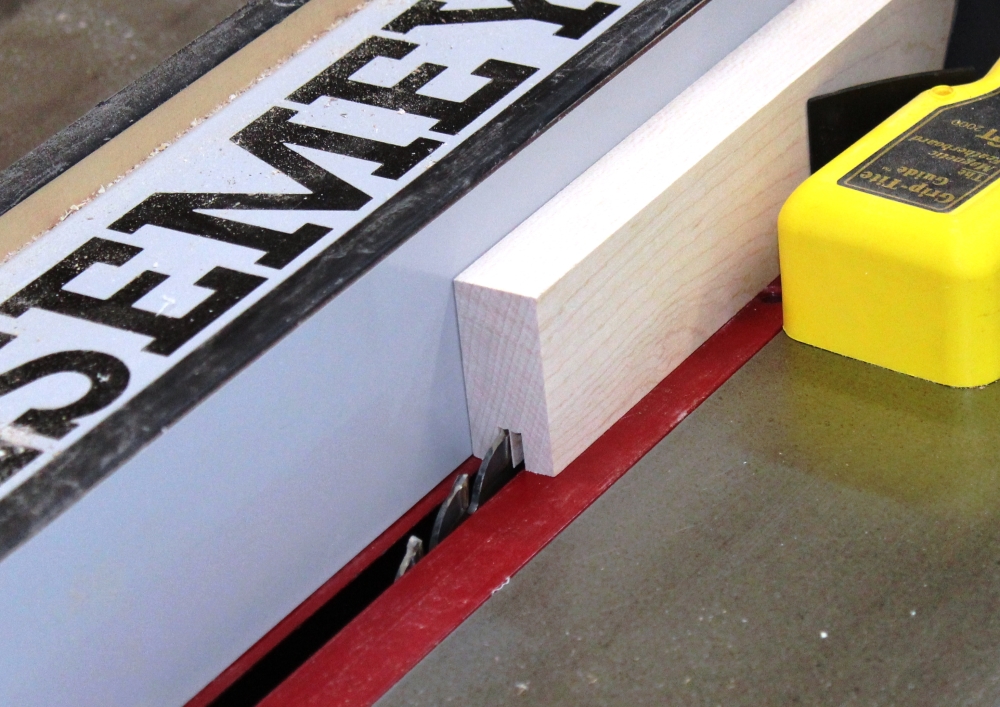
The depth of the groove is 3/8”, and the width is determined by the thickness of your plywood. For the MDF core panel that I used, a ¼” groove was appropriate. For most veneer core plywood you will want to make a groove that is slightly smaller than ¼”. Your goal should be a groove that allows the panel to slide in effortlessly, but has no slop when the panel is inserted. Have a piece of your plywood handy during test cuts to allow for some trial and error adjustments while you tune your fence adjustments for a perfect fit.
Tenons are next
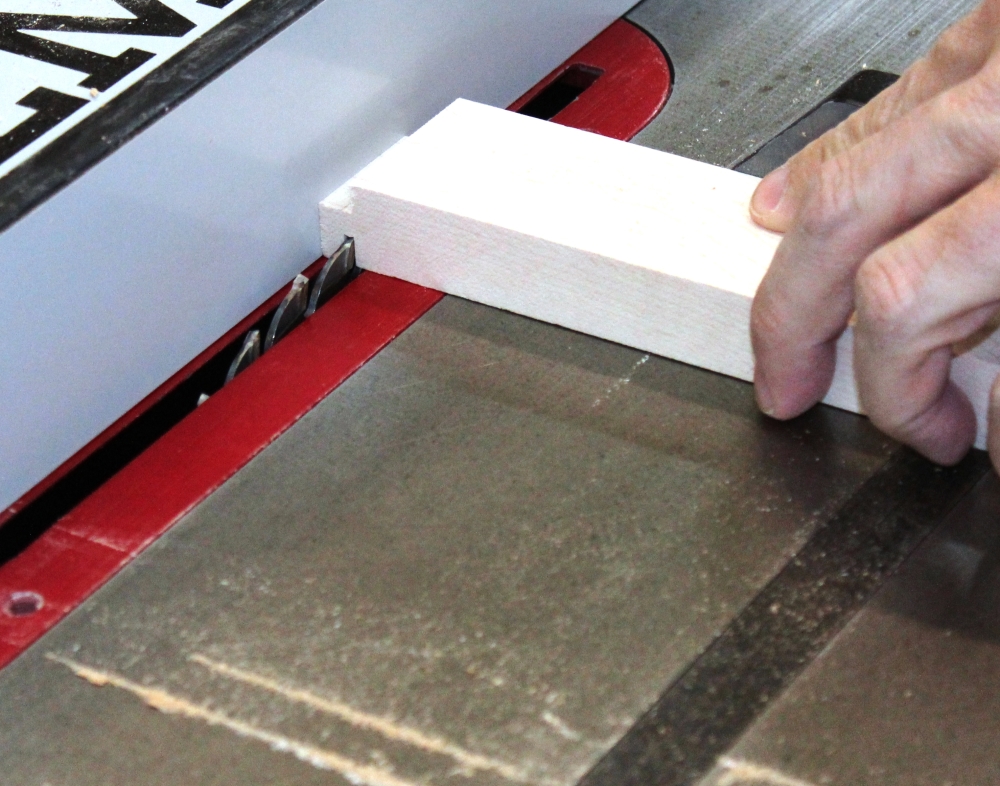
You will mill a tenon on the ends of each rail. The tenons will be 3/8” long, with thickness that matches the width of the groove that was milled on the previous step. The perfect fit will slide in with slight friction, but not so tight that you need to pound it in with much force, as the risk with forcing in a tight tenon is that you might crack the stile in the process.
Set the table saw fence to create a 3/8” long tenon. You will need to measure from the left side of the blade to the fence. Your blade height should be set to slightly less than ¼”, and will depend on the width of your groove.
After the saw is set up properly, run all of the rails through, creating a tenon on each end. Test fit each one and make any adjustments necessary to achieve a perfect fit.
Assemble doors
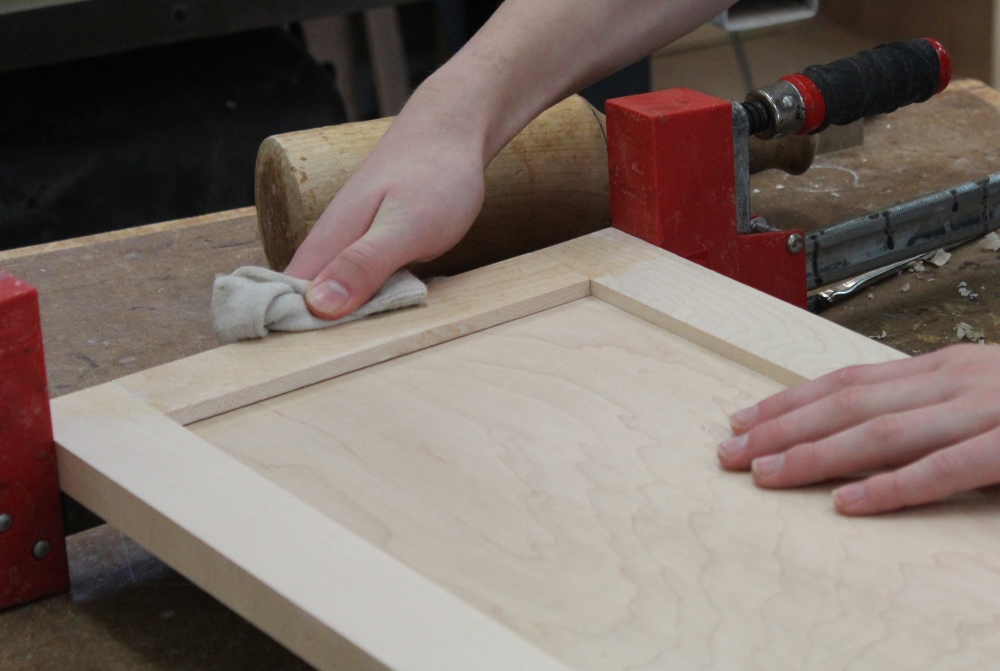
Liberally coat each tenon with glue, and put a light coat of glue in the groove as well. With plywood panels, glue can be applied to lock the panel into position and prevent rattling, but you wouldn’t apply glue to solid wood panels as they could crack when they expand and contract from seasonal variations in humidity. Apply light clamp pressure at each joint, ensuring that the tenons are properly inserted and fully seated into the grooves. Also, make any adjustments so that the tenons are flush with the ends of the stiles, and neither recessed nor protruding.
Cut the lower door
The lower door is fashioned from a single board, cut to length to align with the span of doors as they are installed on the carcase. Lay the doors into position as they will be installed (including a 3/32” gap between the doors), and measure for the exact length of the lower door. Cut to size.
Construct the top and bottom panels
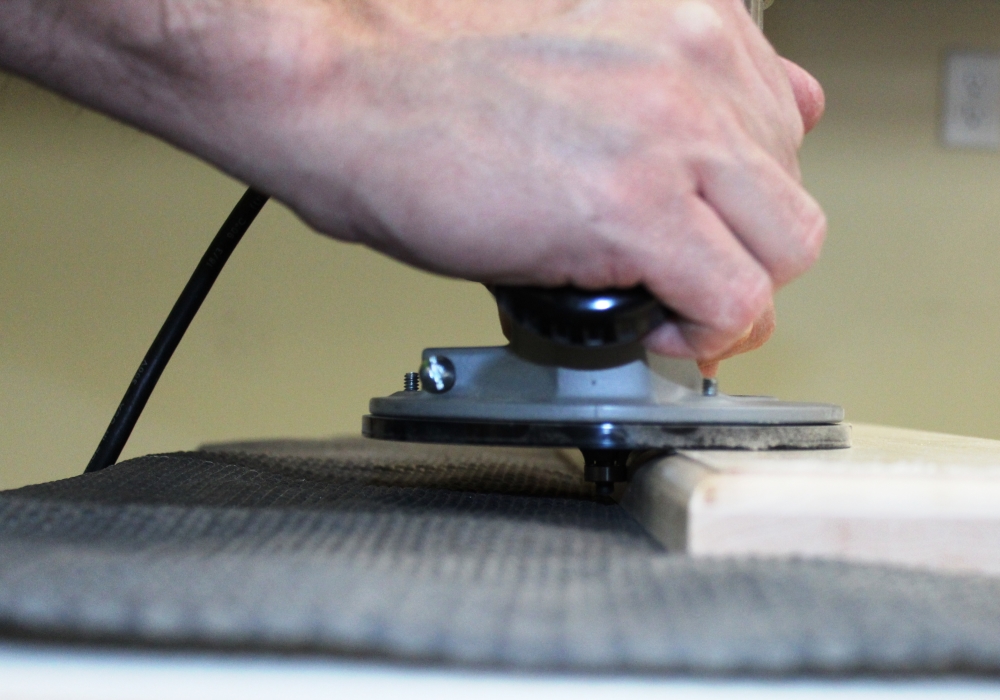
The top and bottom pieces are identical. Each is sized to extend past the sides and front of the cabinet by ¾”. Cut each piece, then use a 3/8” roundover bit to apply a profile on the front and side edges of each piece. The back will be out of sight so there is no need to apply the decorative edge.
Attach the top and bottom
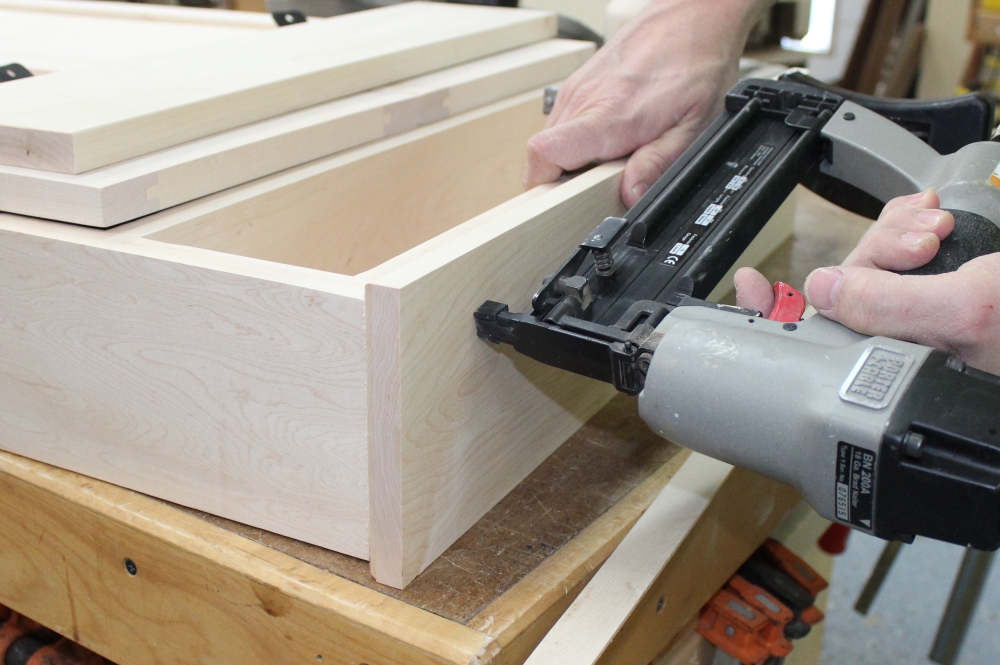
Apply glue and use brads to affix the top and bottom to the carcase.
Sand and finish
Sand all components thoroughly. I finished my cabinet with four coats of water based satin poly which provides good durability and is easy to apply with a rag.
Install hardware
Install hinges on the sides of each upper door, and on the bottom edge of the lower door. To establish perfect hinge alignment and simplify the installation process, use a Vix bit and follow the instructions here: https://www.wwgoa.com/vix-bits-tools-we-love/. Also install a magnetic catch (sourced below) on the lower door to keep it in its upright position.
Install the cabinet
Install the cabinet so that the dartboard’s bull’s-eye is positioned 5’8” off the floor. Because users will be pulling darts out and regularly bumping the cabinet, I recommend that you secure the cabinet solidly to the wall by running screws through the cabinet back and at least 1-1/4” into a wall stud (that required 2-1/2” screws for my configuration).
Optional Upgrades for Your Cabinet
The cabinet as described so far will look great and serve you well. As with any project, however, there are numerous ways to enhance both form and function. Here are a few ideas worth considering if you want to take this project to the next level.
Lights
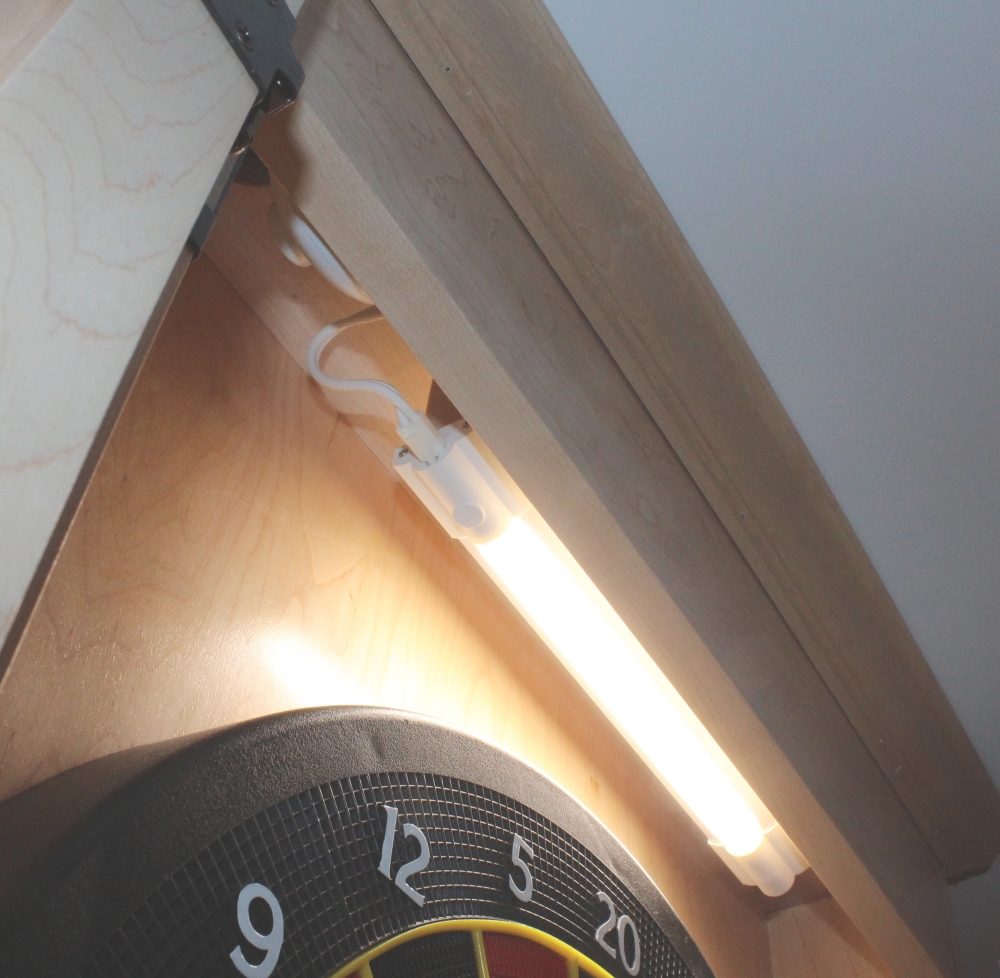
Darts is a game of precision, and adding built-in lights to your cabinet will enhance the players’ ability to see what they are aiming at. There are many options available for built-in cabinet lighting. LED is a good option given its low heat output. Mount the light fixture as far forward in the cabinet as possible to minimize shadows and cast as much light on the dartboard as possible.
Dart holders
Build these by cutting a ¾” thick x 1-1/2” wide board to fit snugly between the door stiles. Simply glue into position against the door panel and the top of the lower rail. Drill 1/8” holes on even spacing at least 1-1/4” apart to accept the dart tips.
Dovetails and contrasting wood
Constructing the carcase with dovetails and contrasting wood (maple and walnut shown here) can add a distinctive flair to the project.
Crown molding
Crown molding on the top can dress up the project, and can also provide a good means for installing next to a ceiling.
Cut list
Sources:
Dartboard
Arachnid Cricket Pro 650 Soft-Tip Dart Game, $199
DMI Sports, Inc.
dmisports.com
1-800-423-3220
Cabinet hardware
P659-STB 1-1/2 In. Statuary Bronze Magnetic Catch, $2.09
P60010F-VB Vintage Bronze Surface Mount 1/4 In. Overlay Hinge, (2 pack) $5.49
P2171-BI 3 In. Craftsman Black Iron Cabinet Pull, $5.49
Hickory Hardware Company
hickoryhardware.com
1-877-556-2918

Would you be willing to build one or two for sale?
You guys had me all confused here. I had to google just what in the heck a carcase is. Even Grammarly is telling me I'm misspelling it. I didn't realize you were a British site. Across the pond here we spell it carcass.
Thank you for sharing.
What hinges do I need for the lower door? And. what light did you use?
Very well thought out and executed. Good job!
Looks amazing but I can’t do that. Would you Be willing to create one for sale?
Please include a complete PDF of cuts needed and a parts list of hardware and lumber needed. Thank you!!
Hello there I am so happy I found your site, I really found you by accident, while I was researching on Yahoo for something else, Nonetheless I am here now and would just like to say thanks a lot for a incredible post and a all round thrilling blog (I also love the theme/design), I don’t have time to read it all at the minute but I have bookmarked it and also added in your RSS feeds, so when I have time I will be back to read a lot more, Please do keep up the great jo.
I've been looking for plans to make for my dartboard to replace a piece of plywood behind my board. The plans are just the ones I have been looking for and for the instructions they are great. "" THANKS""
Looks like a nice project for my guys.