Lathe turning can be lots of fun, but I know that some woodworkers are intimidated by the prospect of a piece of wood spinning against a tool at a high rpm. This article will help you overcome some of those concerns and, hopefully, help turn you on to turning. It’ll take you through safely mounting spindles on the lathe, and show you basic cutting techniques from a unique ‘turner’s view’ perspective in the photos.
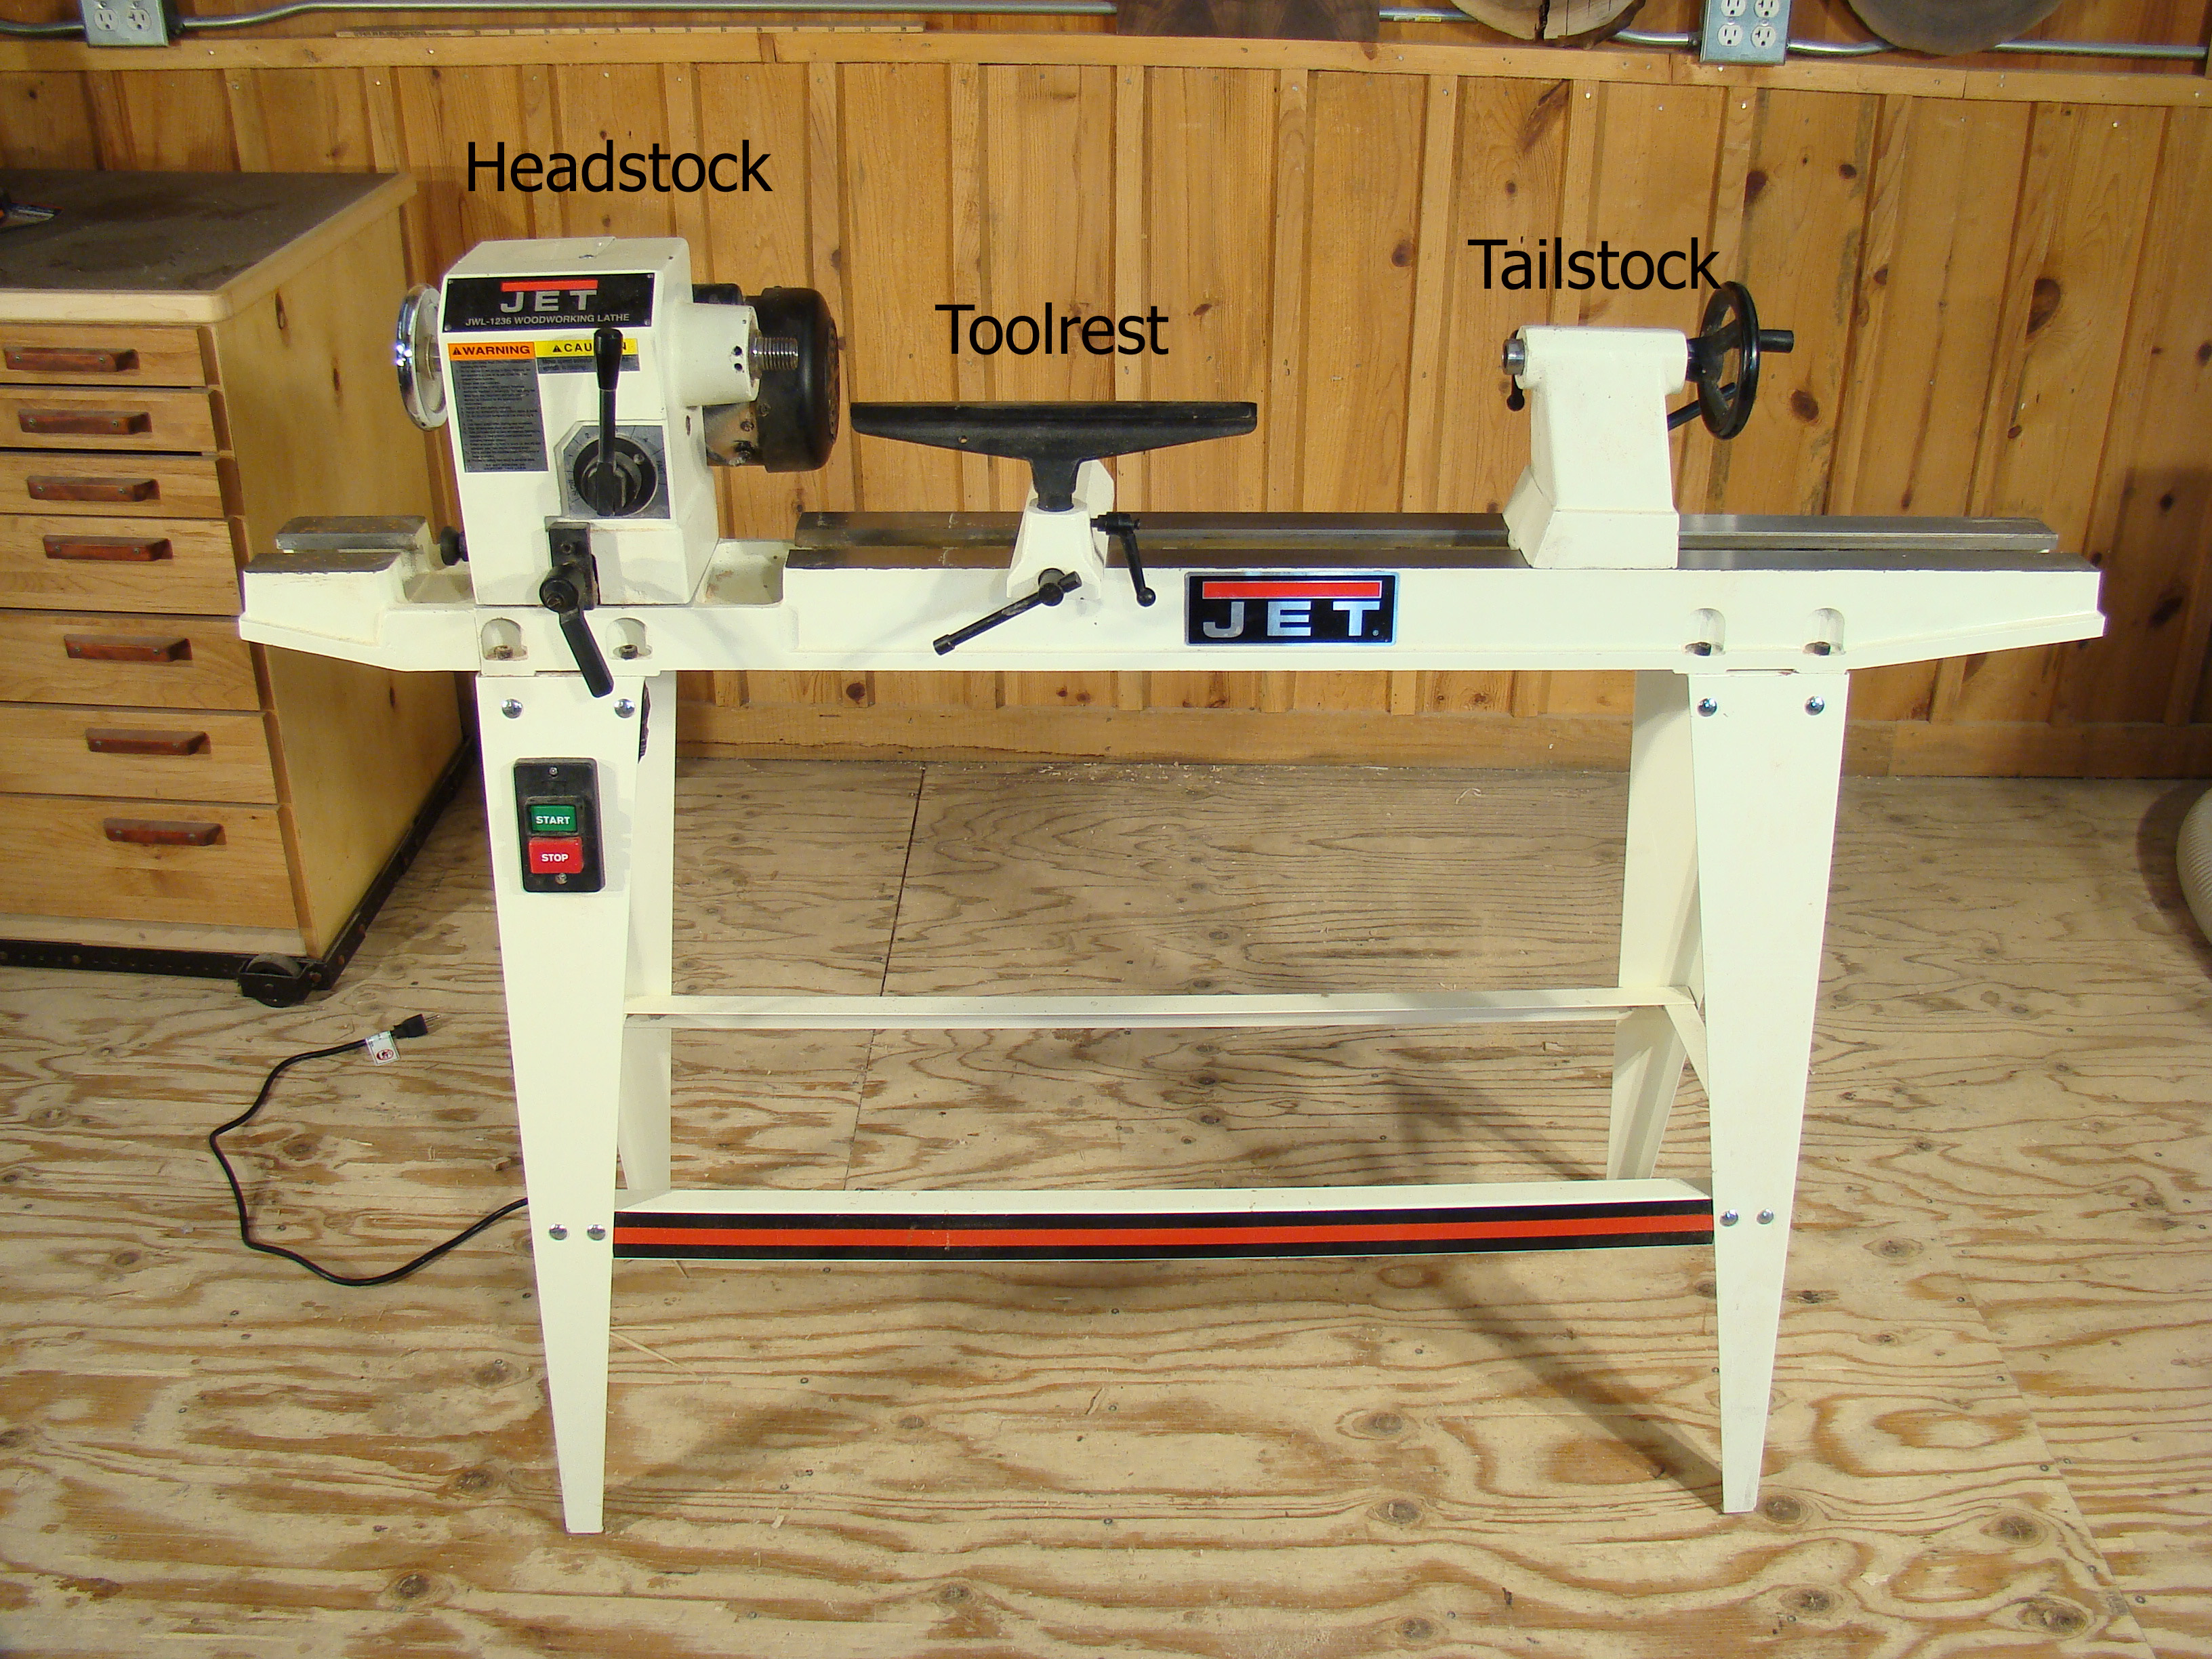
Know the Players. Before considering mounting a spindle on the lathe, be sure you understand your machine.The headstock is the drive end of the machine and contains the motor and speed control. It’s very important that you’re familiar with the speed control in order to keep your turnings at a safe rpm. A spur center (also called a drive center) fits into the headstock and engages your work pieces.
The tailstock holds the tail center, typically a live center (meaning it has bearings and spins along with the spindle) and supports the end of your work. The tool rest can be moved up and down the lathe bed and is what your lathe chisels sit on while you’re turning.

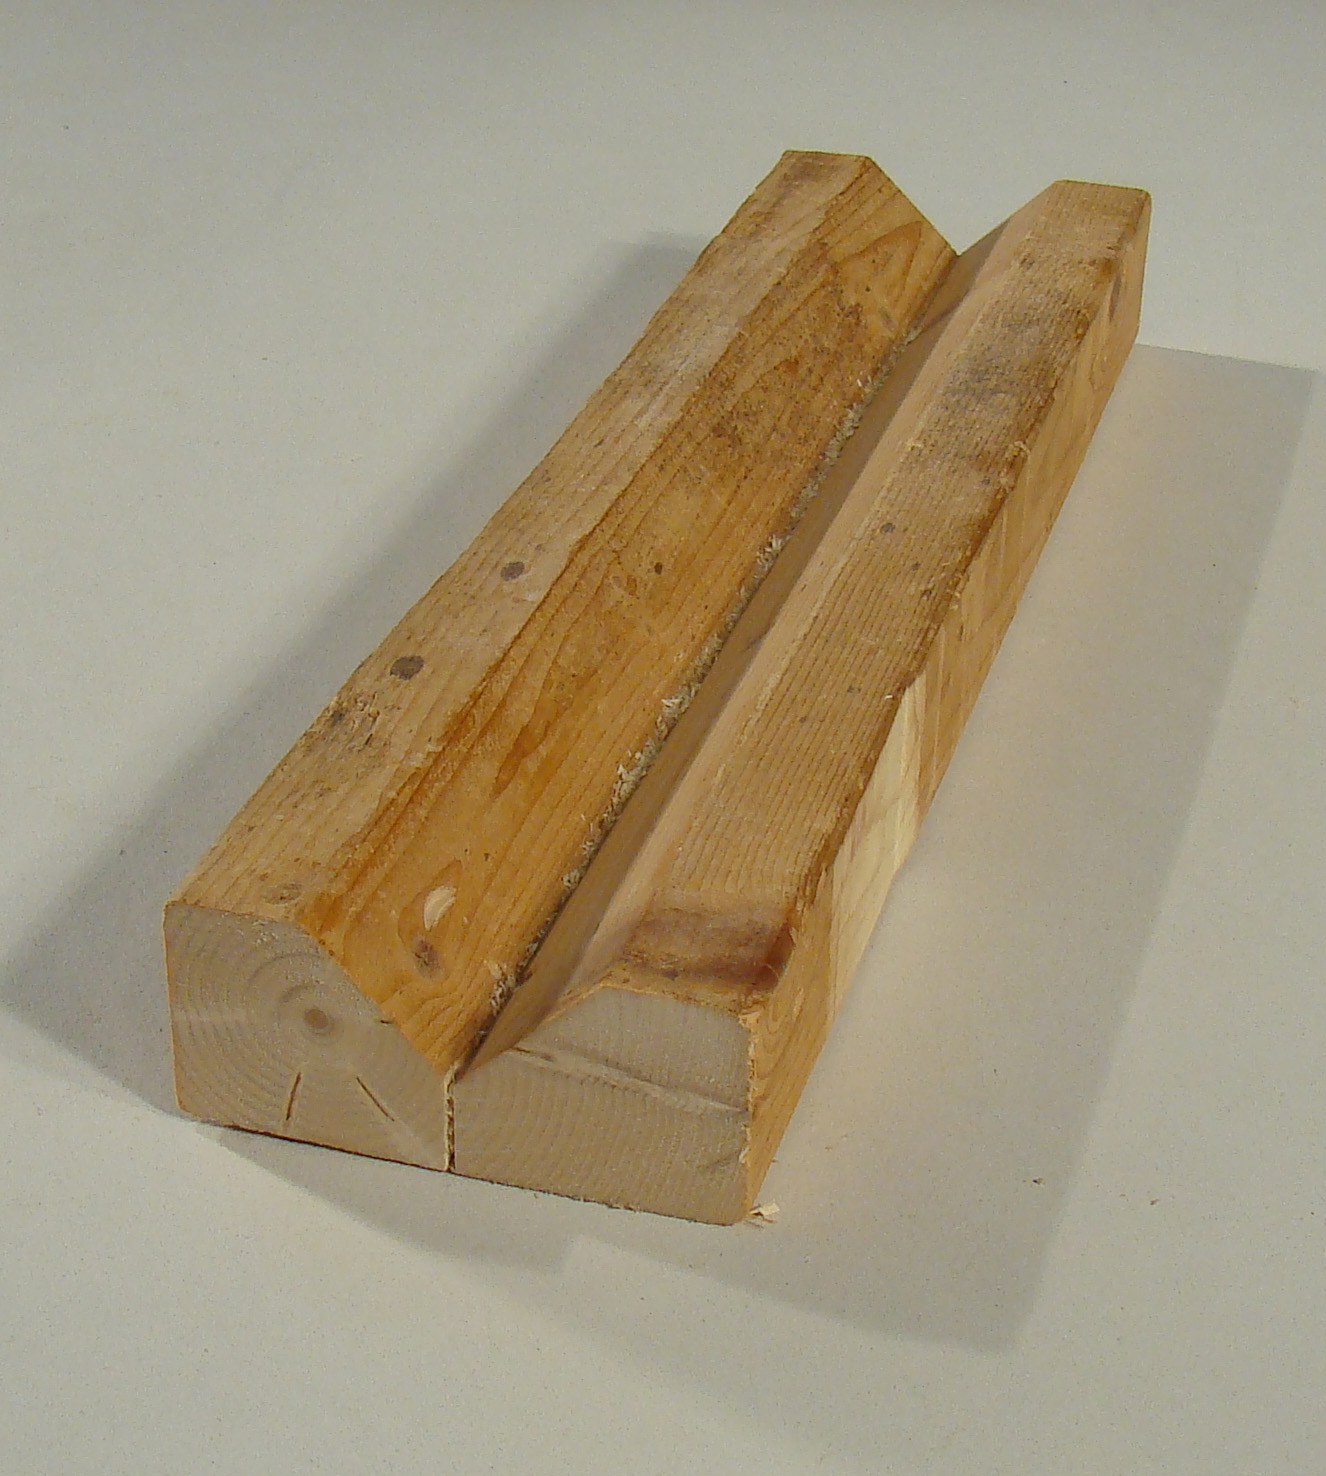
A Shop-Made Jig Helps. Before driving the spur center into the end grain of a spindle, you should create relief cuts. One of the easiest ways to do this is on the band saw using a simple sled.
The sled is simply a 45-degree cradle you can rest your turning blank in (Photo 1). Make it by making two 45-degree cuts on the tablesaw. The jig shown here was cut out of a 2 x 4.
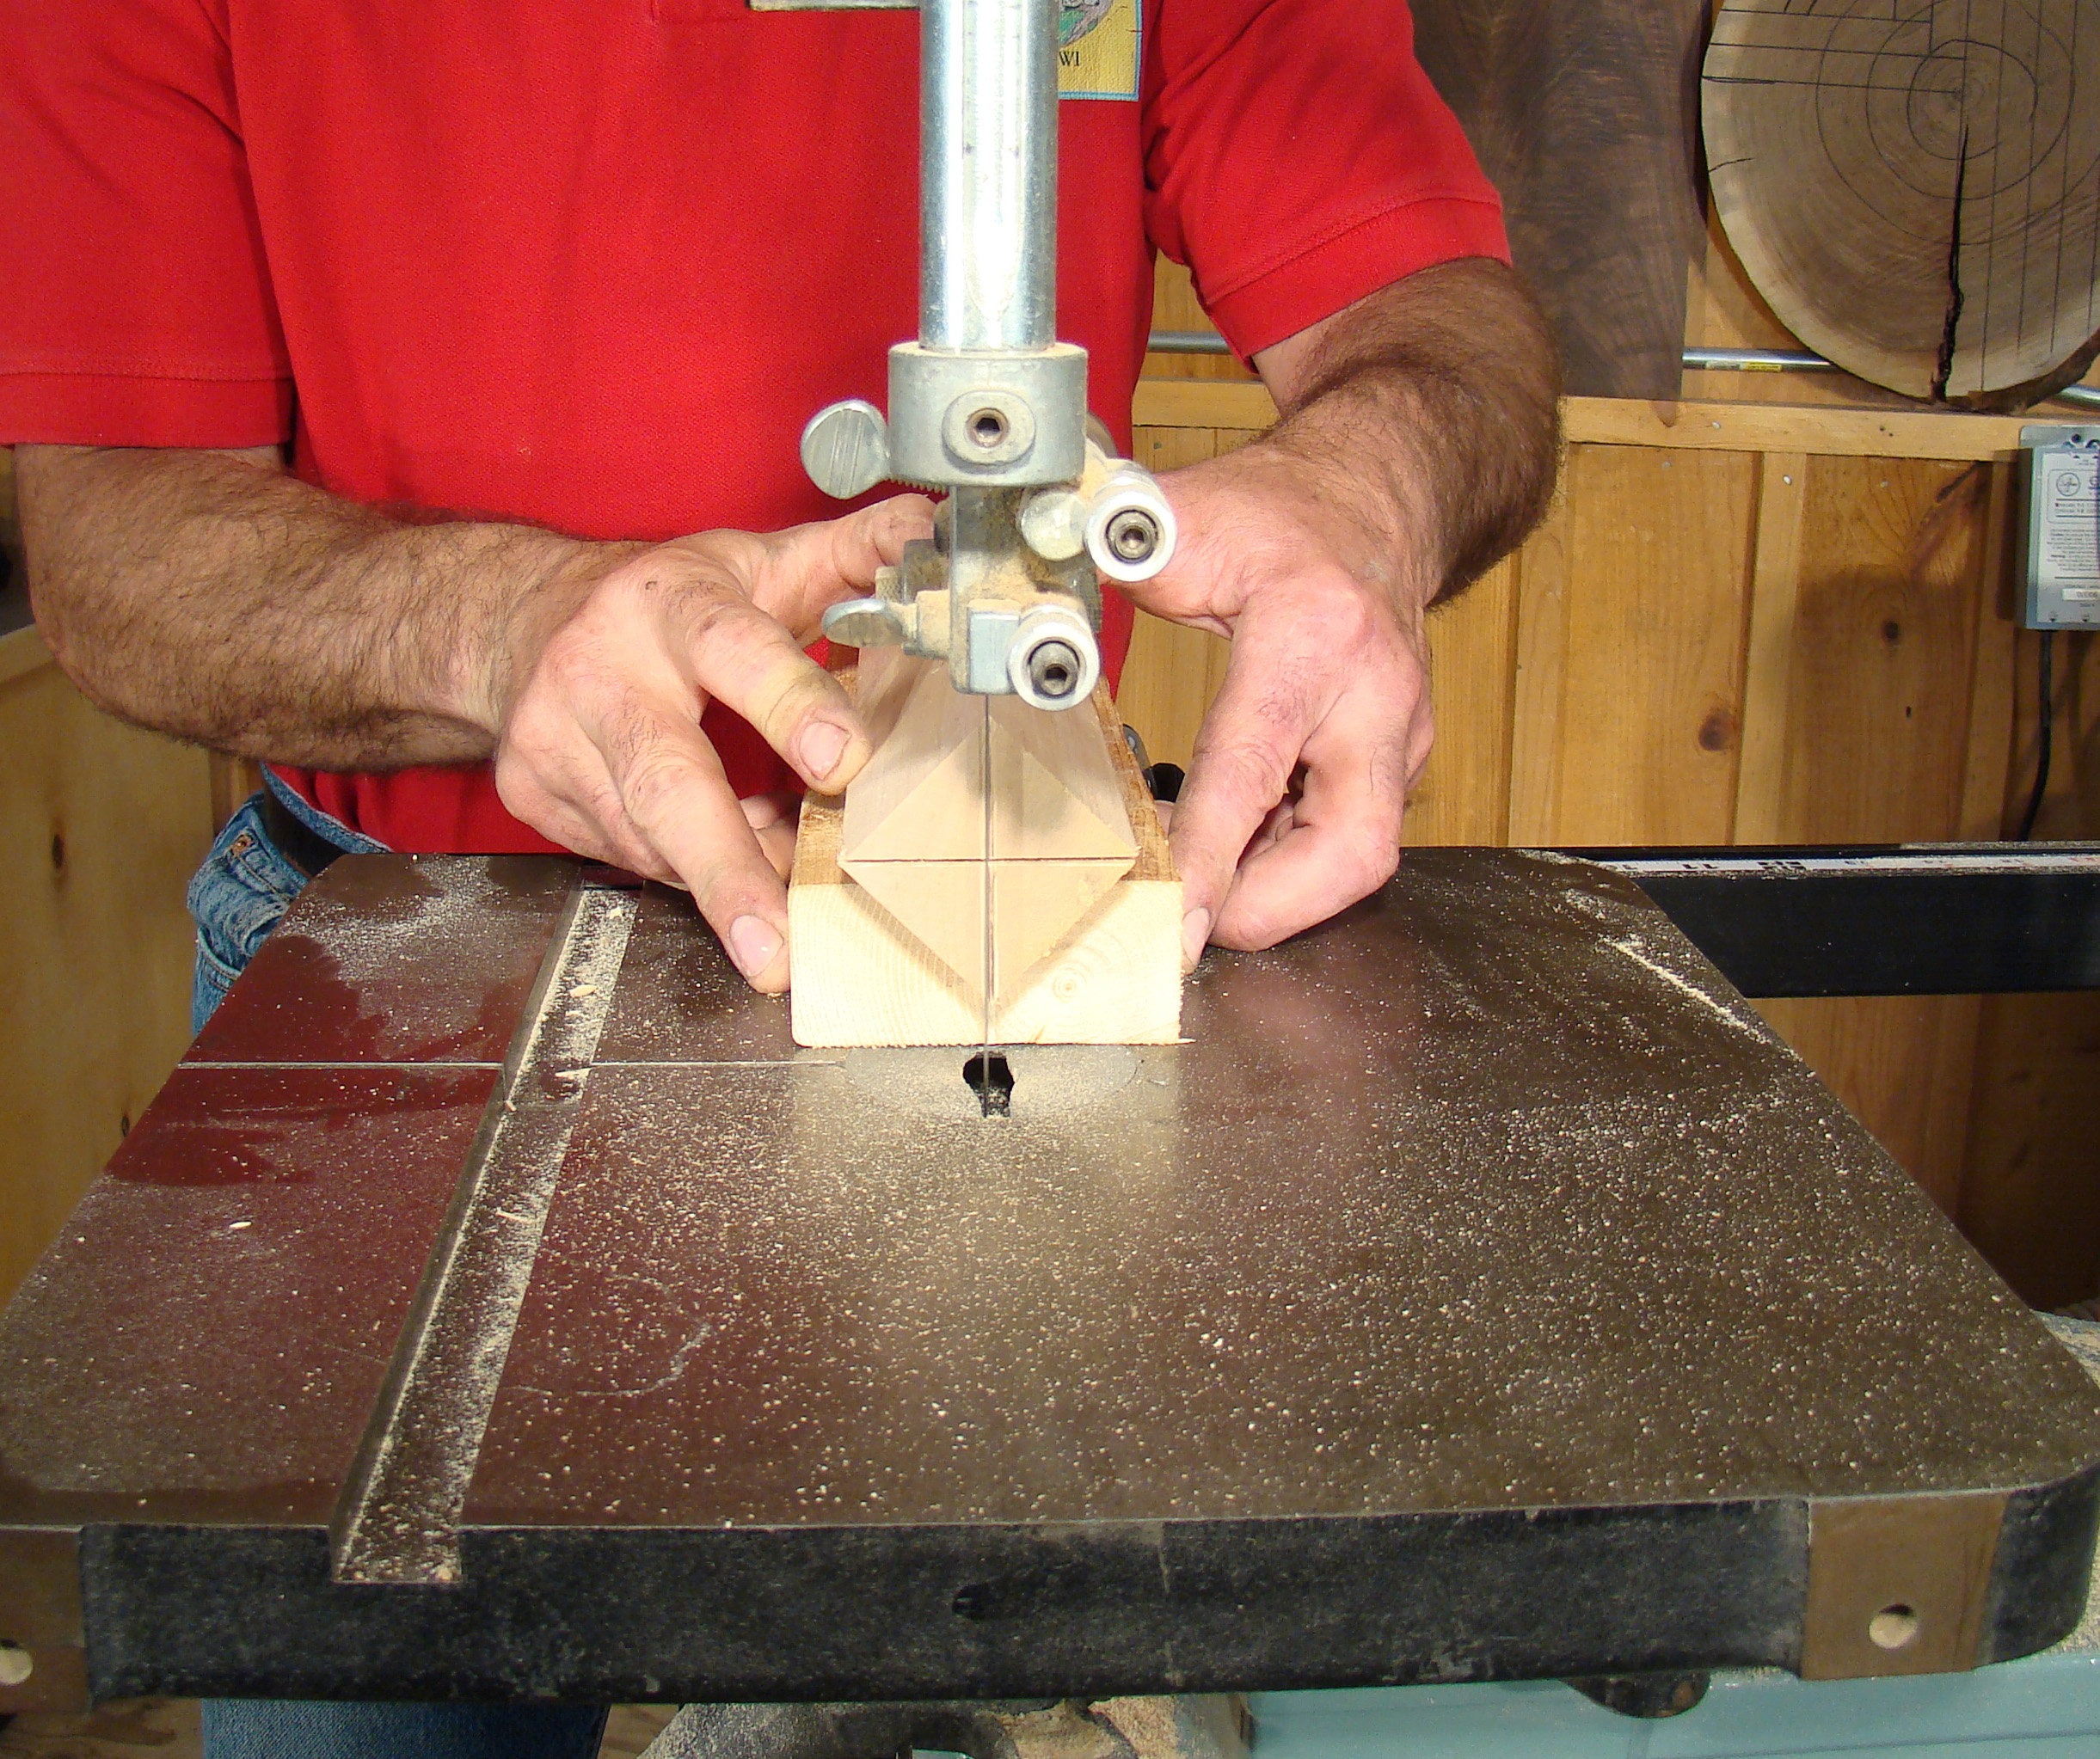
Rest your spindle blank in the cradle and make two cuts, one from each corner (Photo 2). If you don’t have a band saw, you can make the relief cuts by holding the blank vertically in a vise and making the cuts with a handsaw.
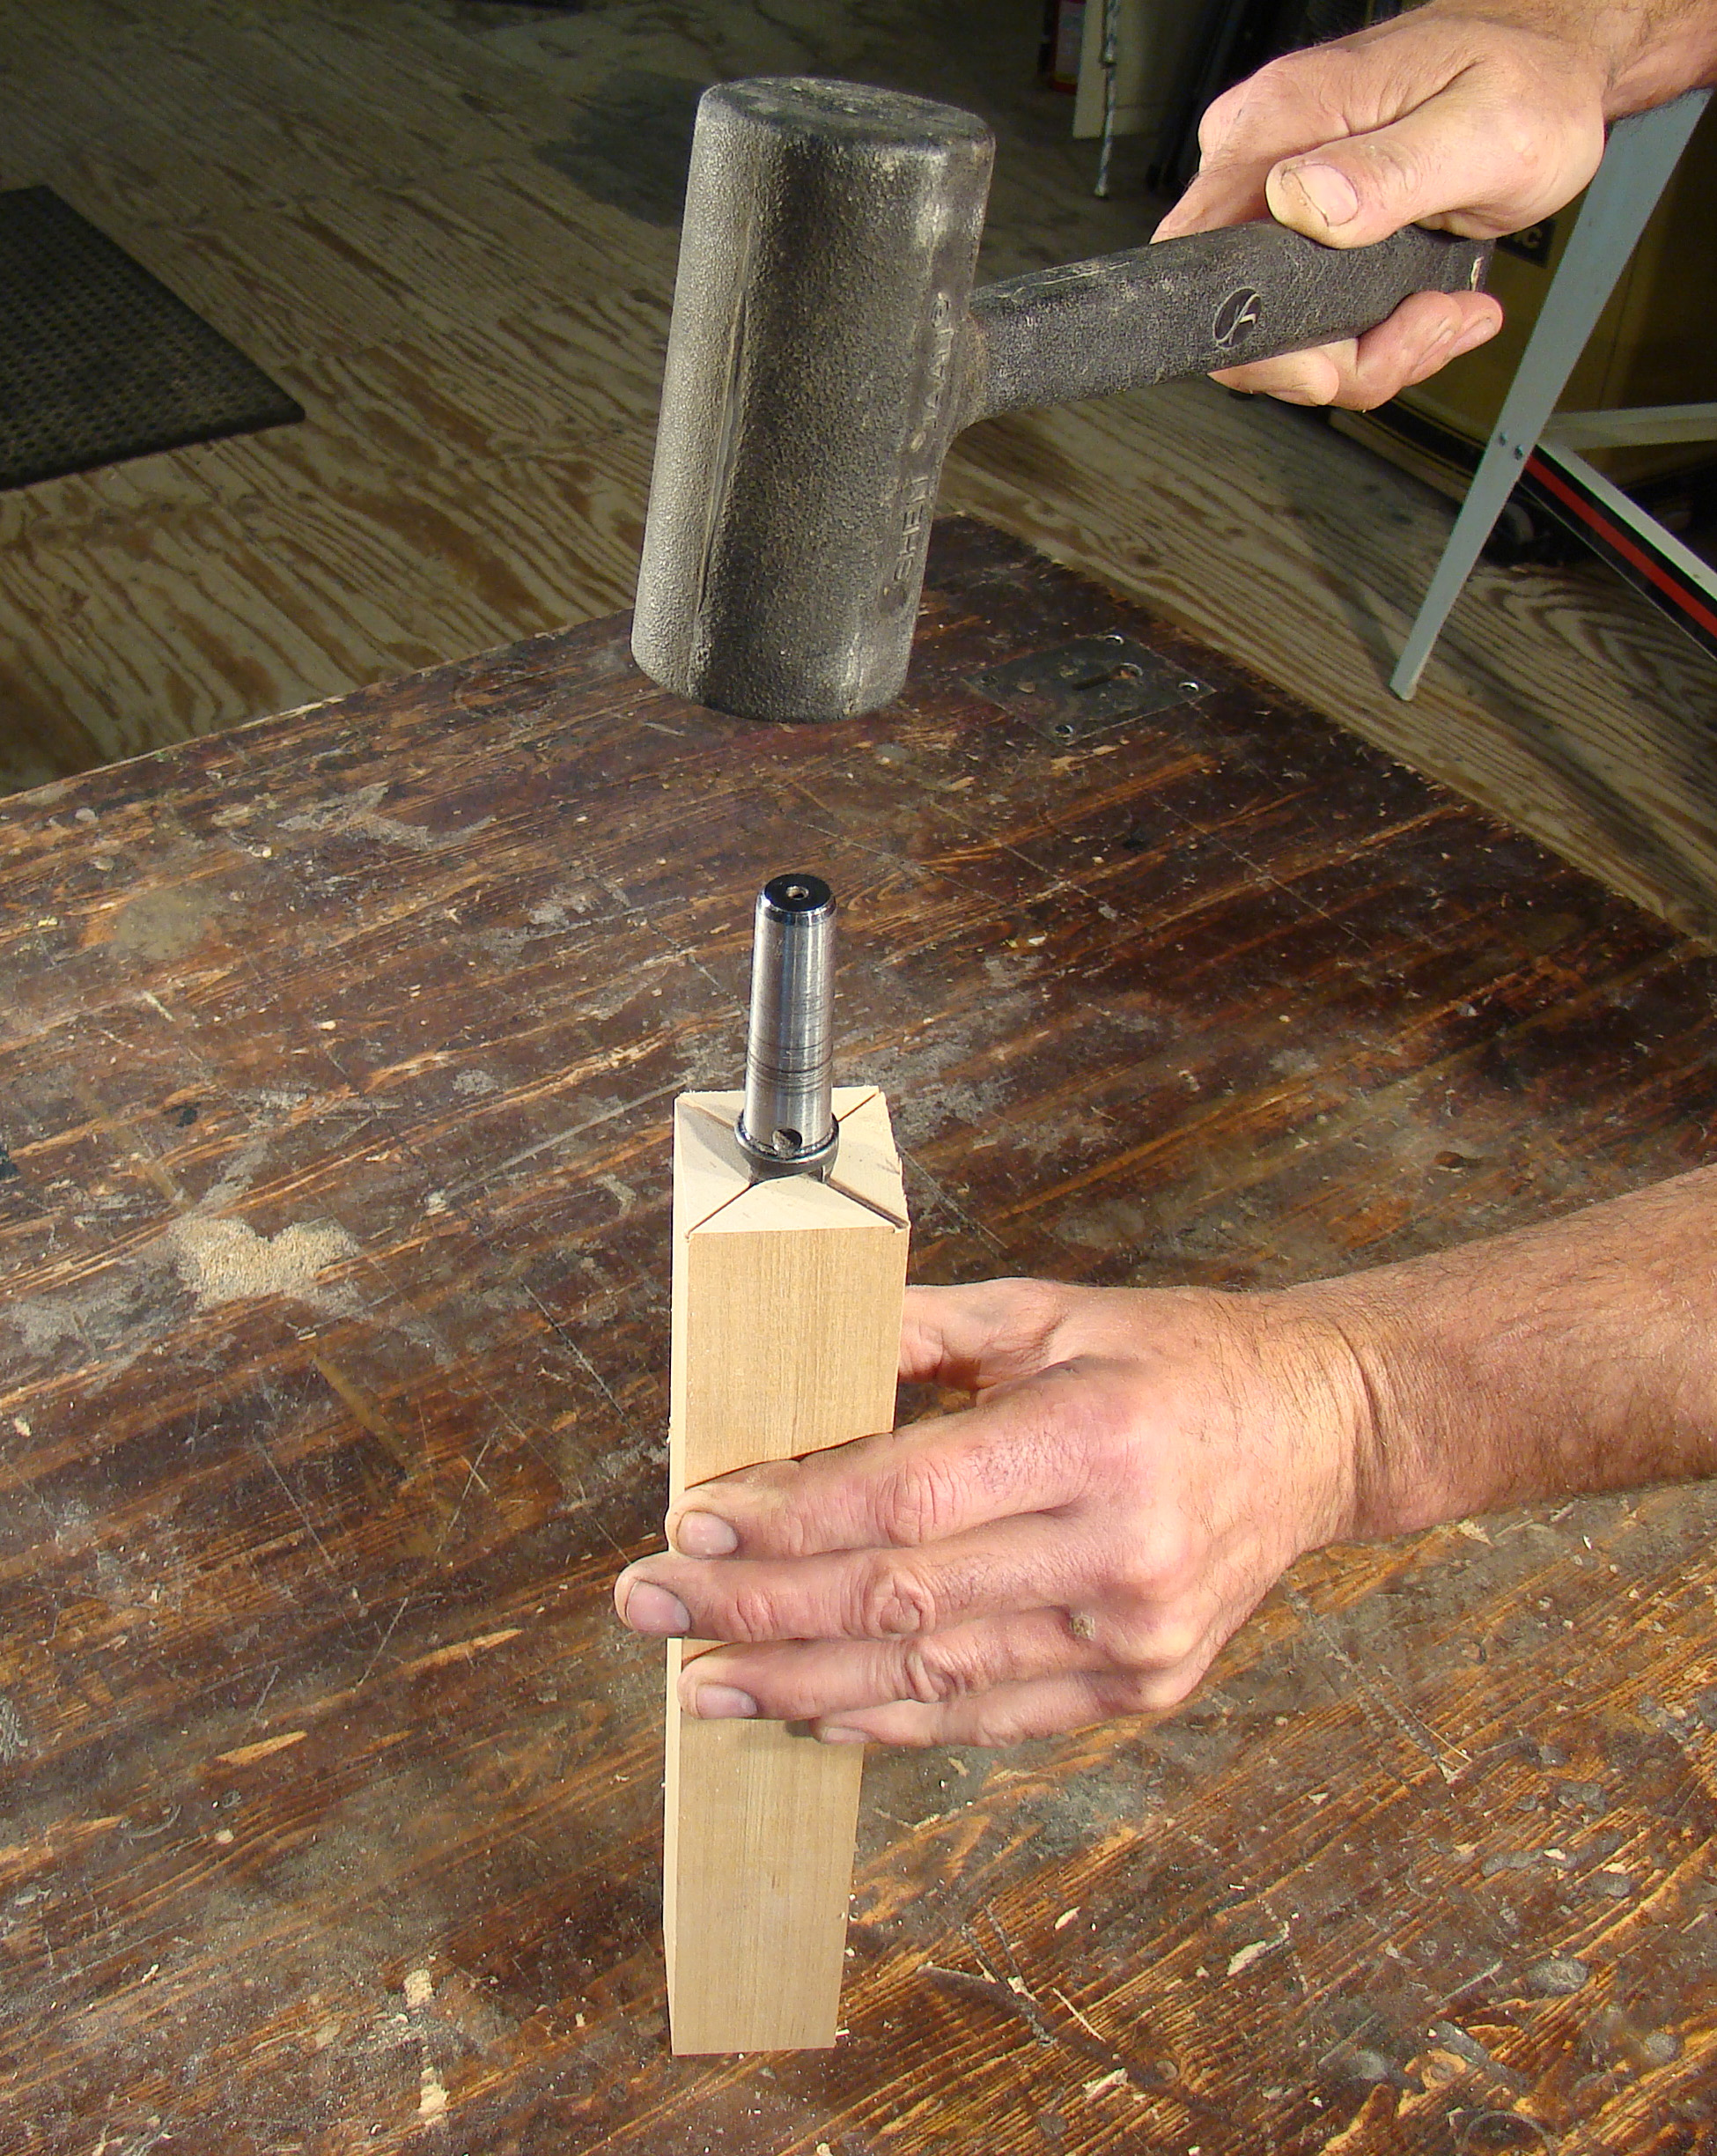
Preparing the Blank. If your spindle blank is 3″. x 3″ or larger you should cut the corners off before mounting the blank on the lathe. You can make these cuts on the band saw using your 45-degree cradle.Using a mallet, drive the spur center into the relief cuts (Photo 3). Never use a steel hammer for this or you’ll mushroom the end of the drive center. Do this step on a solid workbench so you can hit the spur center hard enough to get it fully engaged in the end grain. Once you’ve tapped the spur center in, you can pull it back out to make mounting the spindle on the lathe easier.
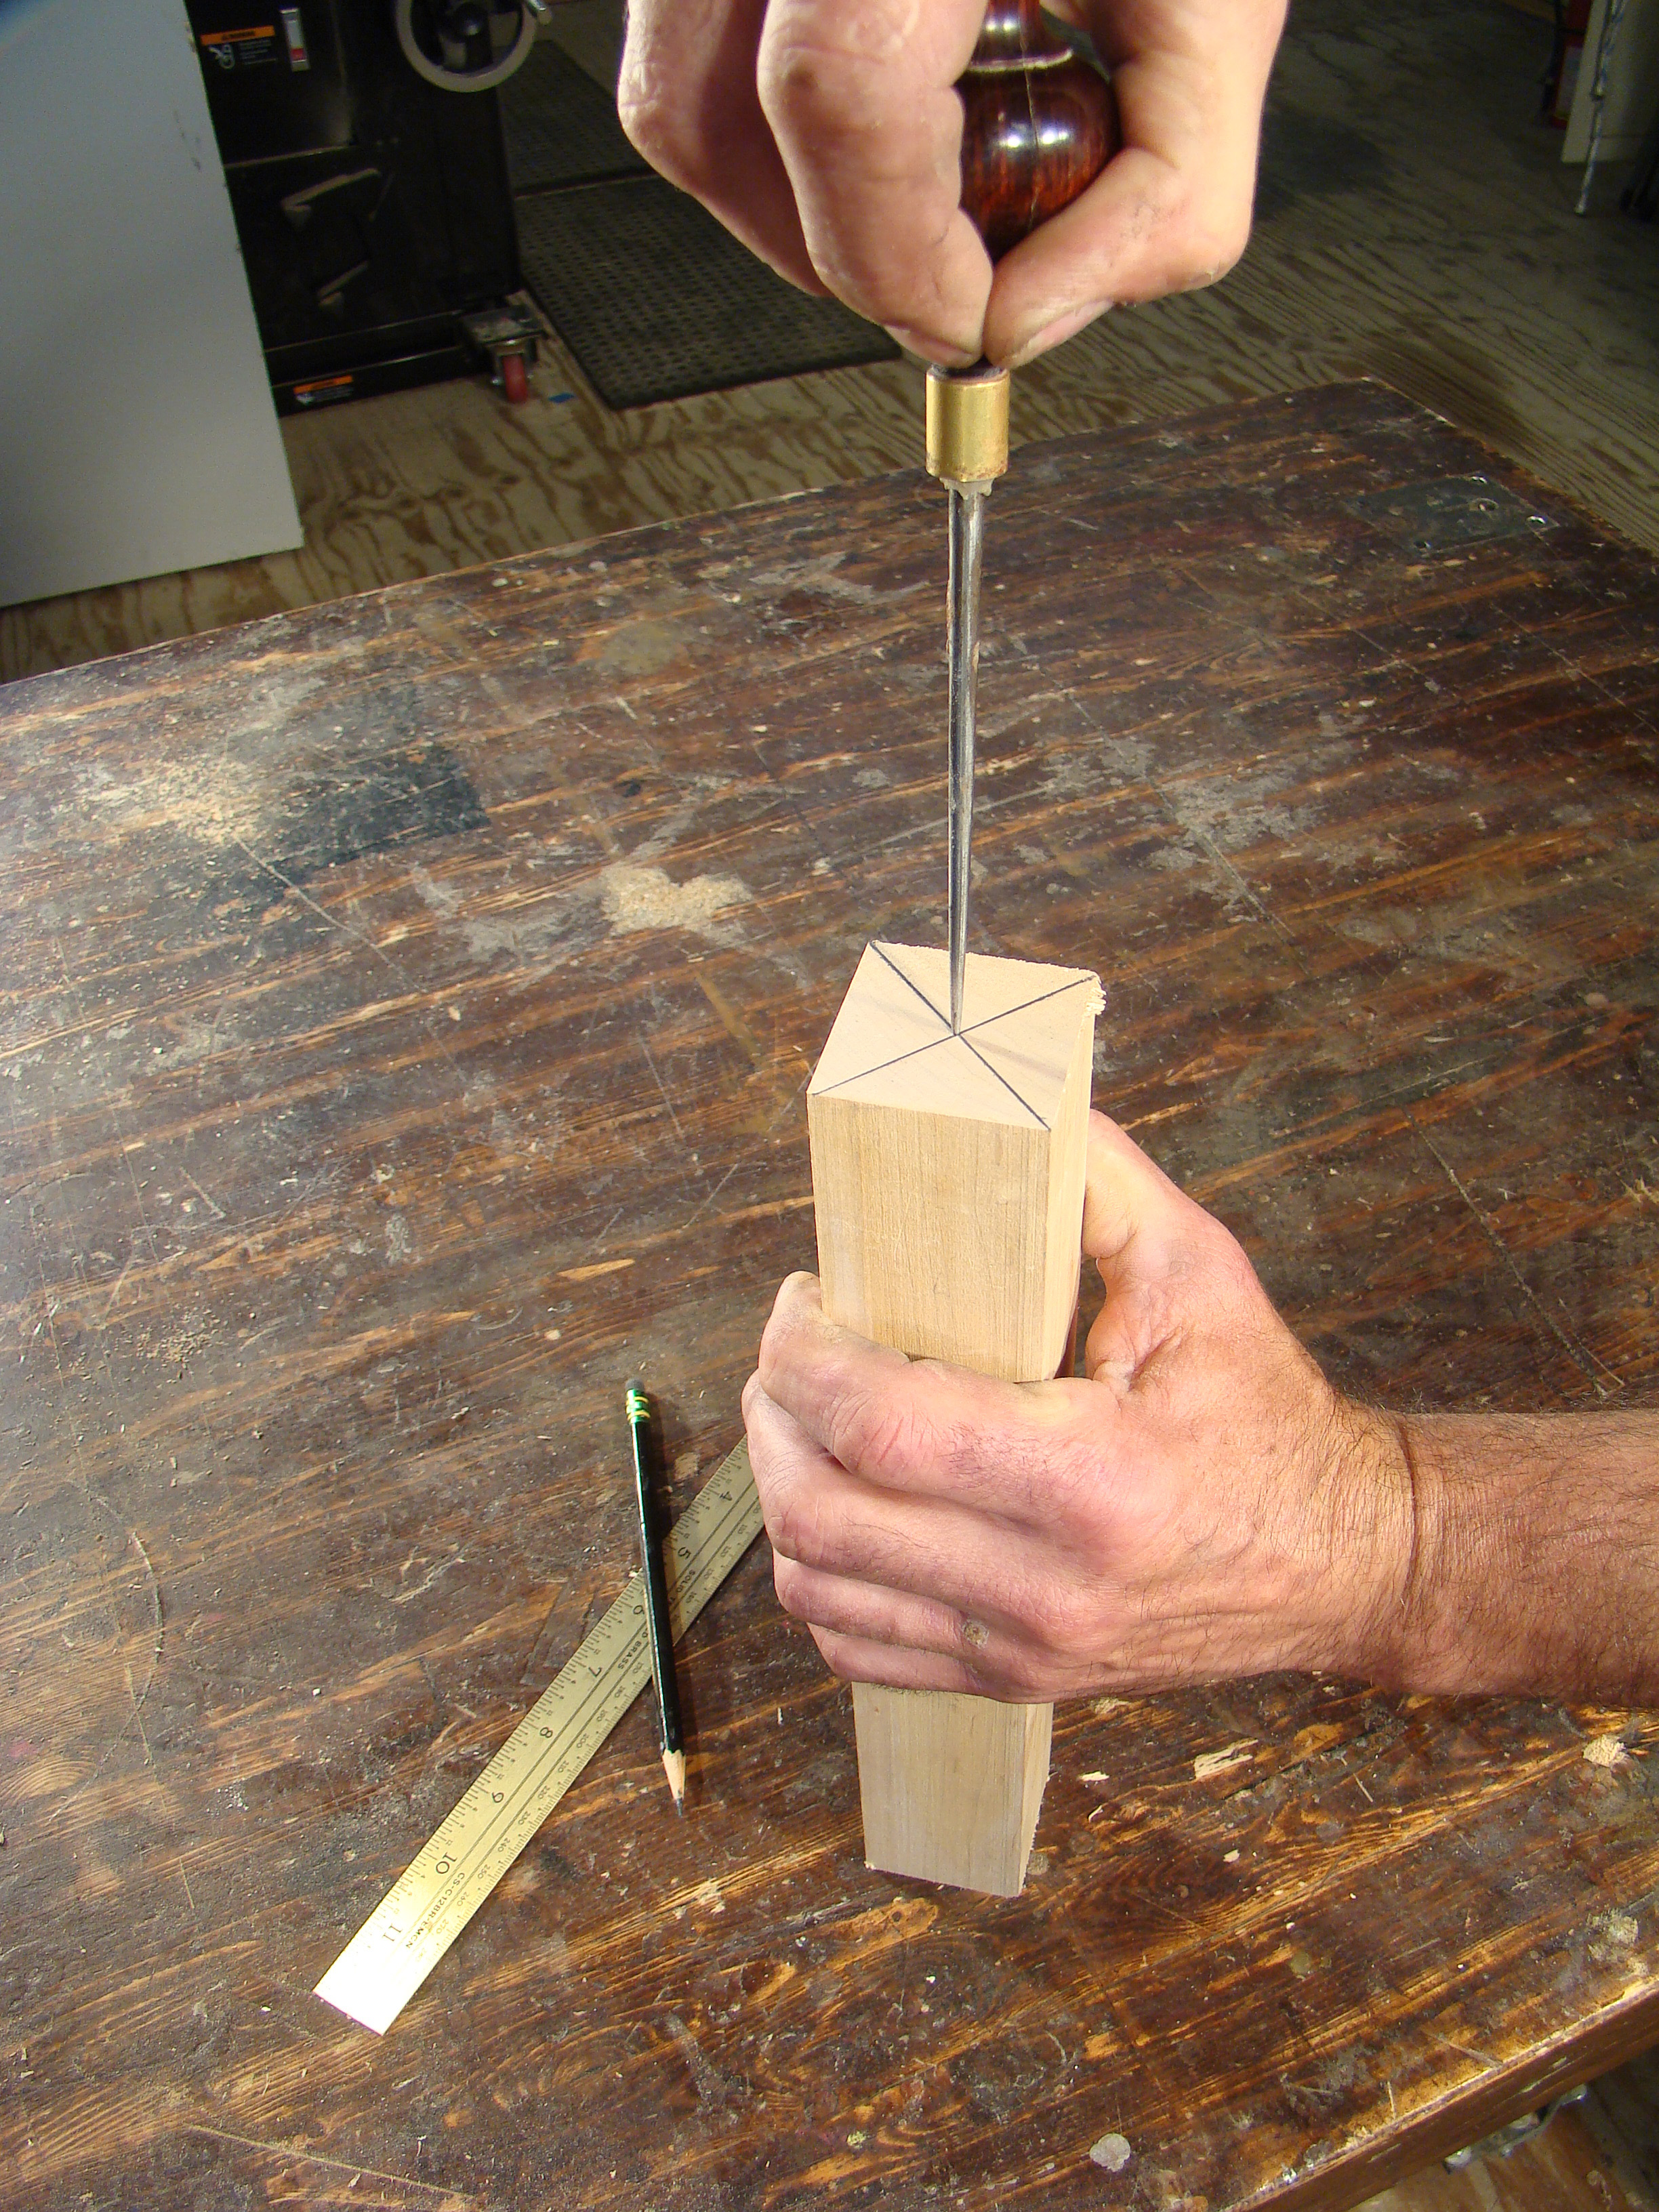
On the tailstock end of your blank, mark the center by drawing lines from corner to corner using a straight edge. Dimple the center point using a scratch awl (Photo 4).
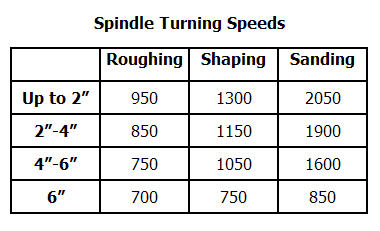 Move to the Lathe. Before mounting your work on the lathe, make sure you’re at the right speed.Keep this chart handy and use it. Roughing is the first step, where you’re making the spindle round. Shaping is the next step in which you’re adding detail to the spindle. Finally sanding is, well, sanding. Each step calls for a speed change.
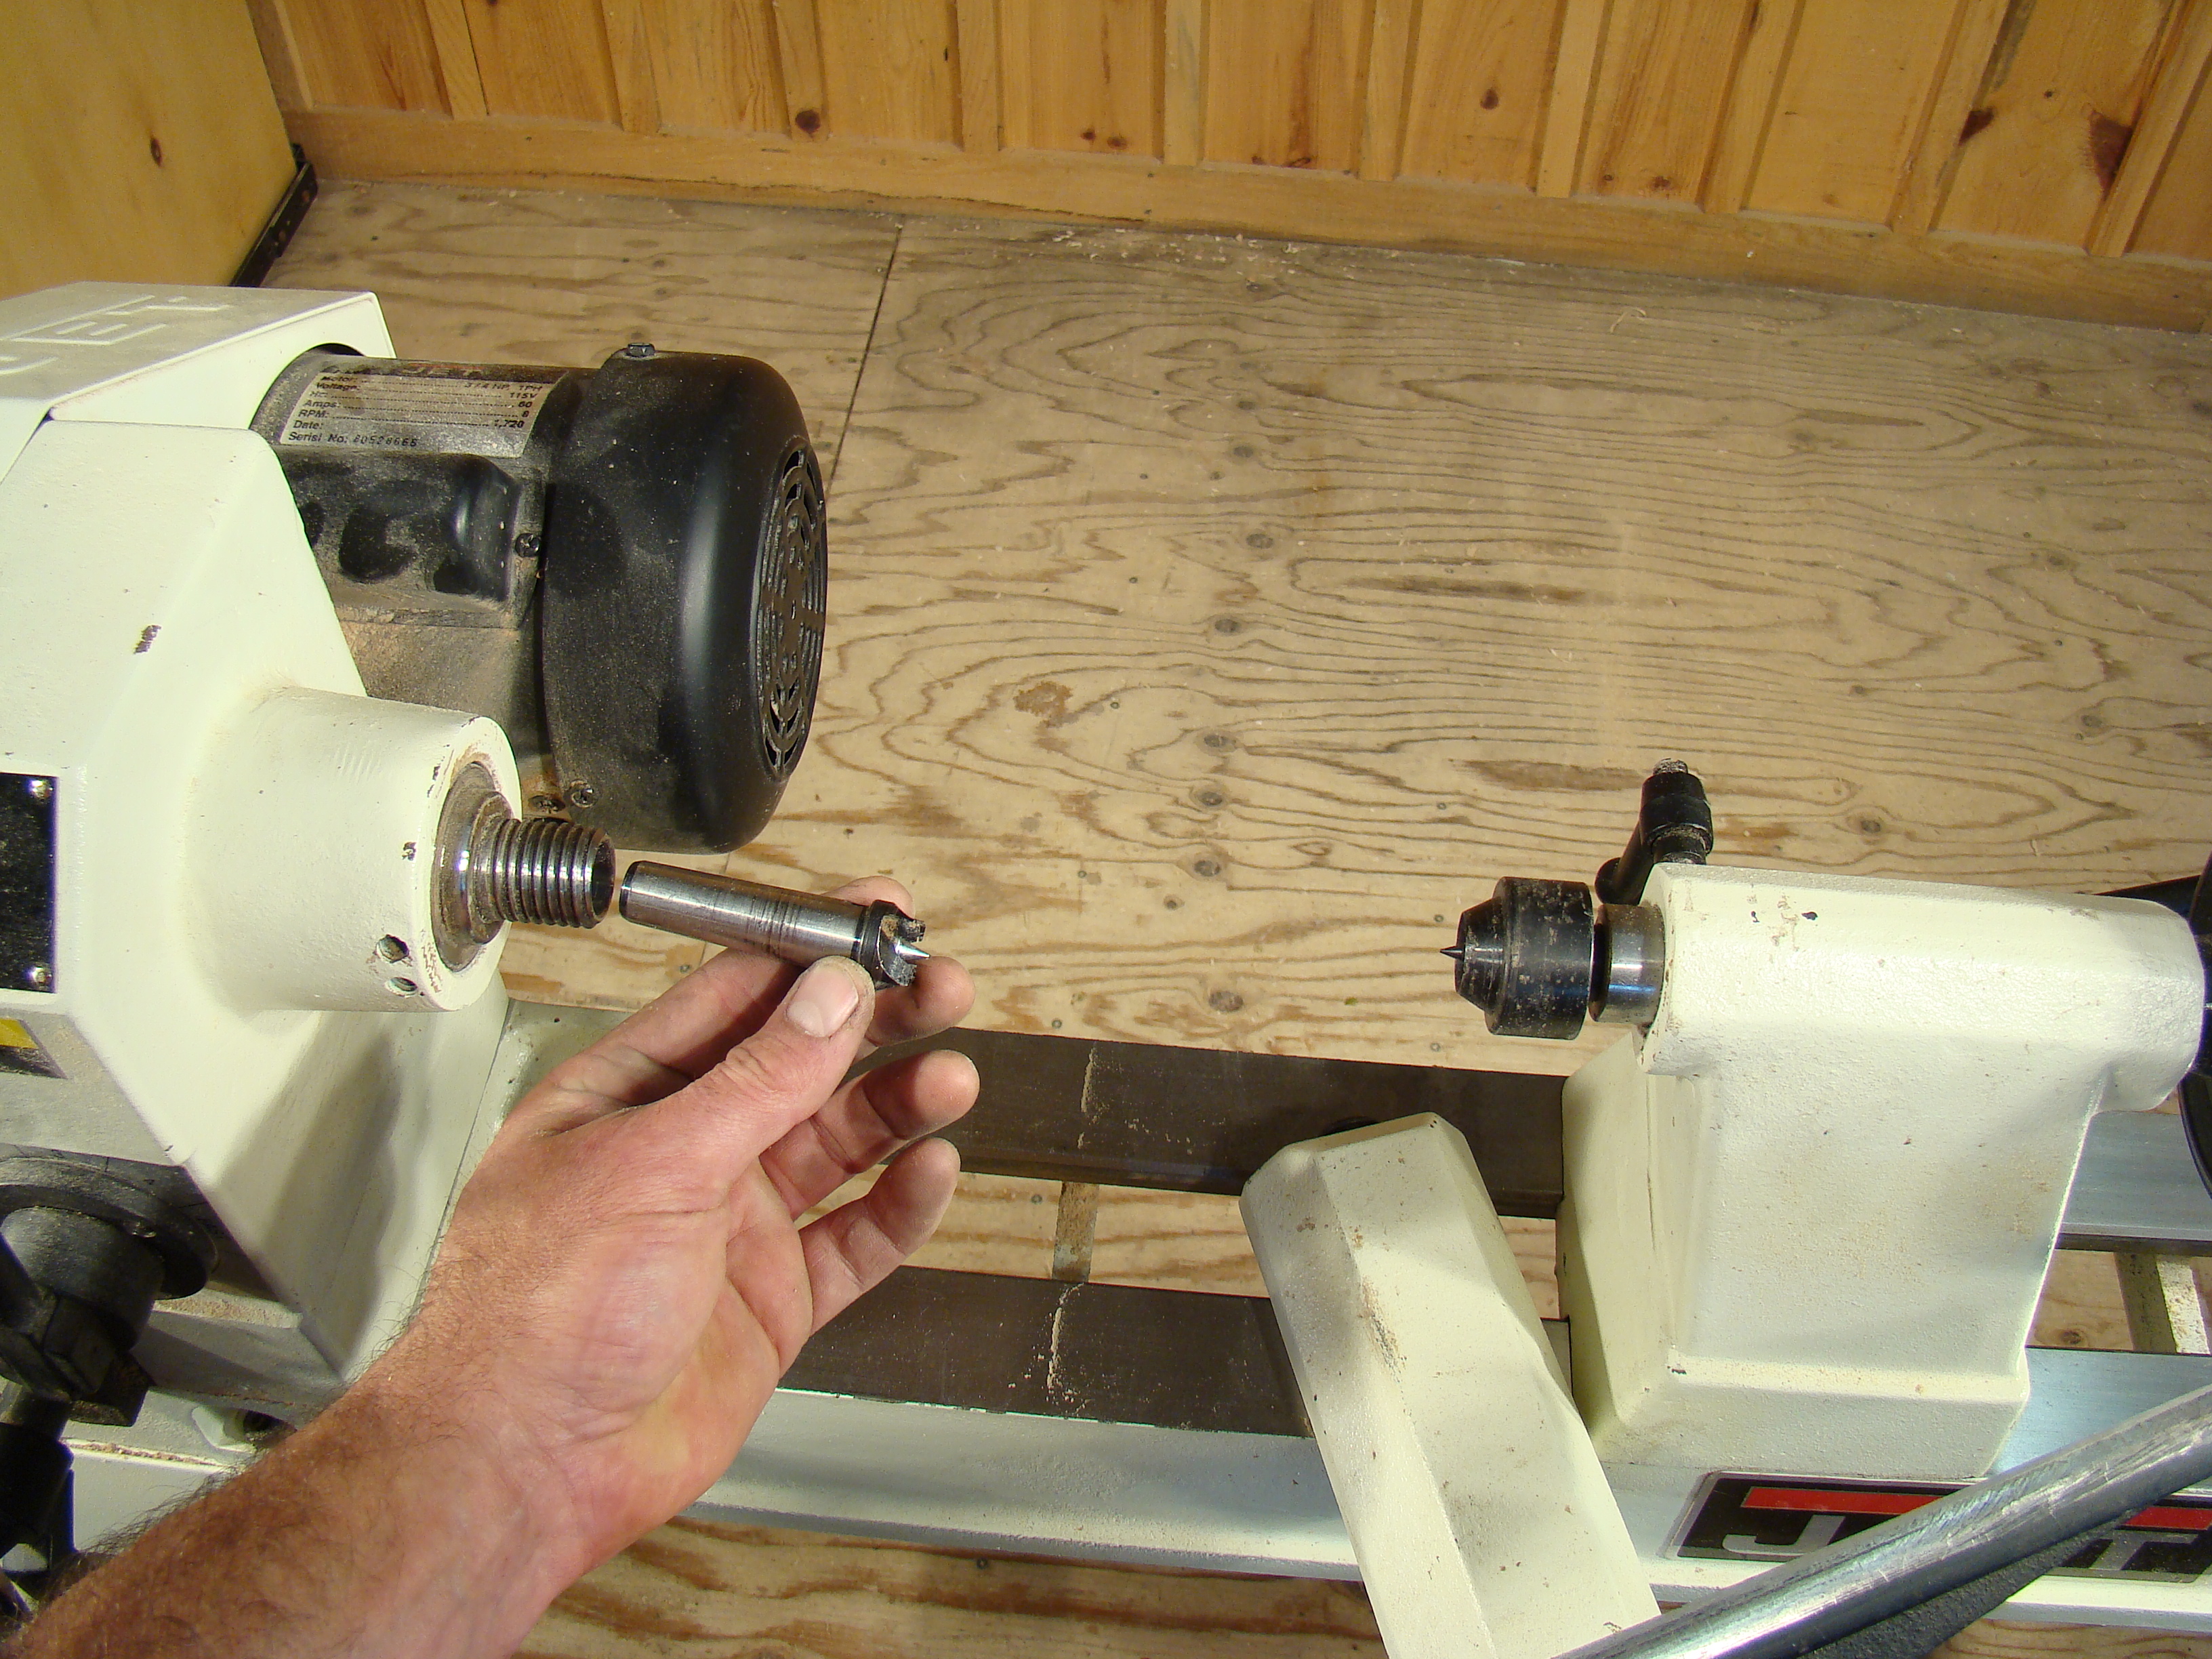
Insert the spur center into the headstock. The taper on the spur center will lock it in place (Photo 5).
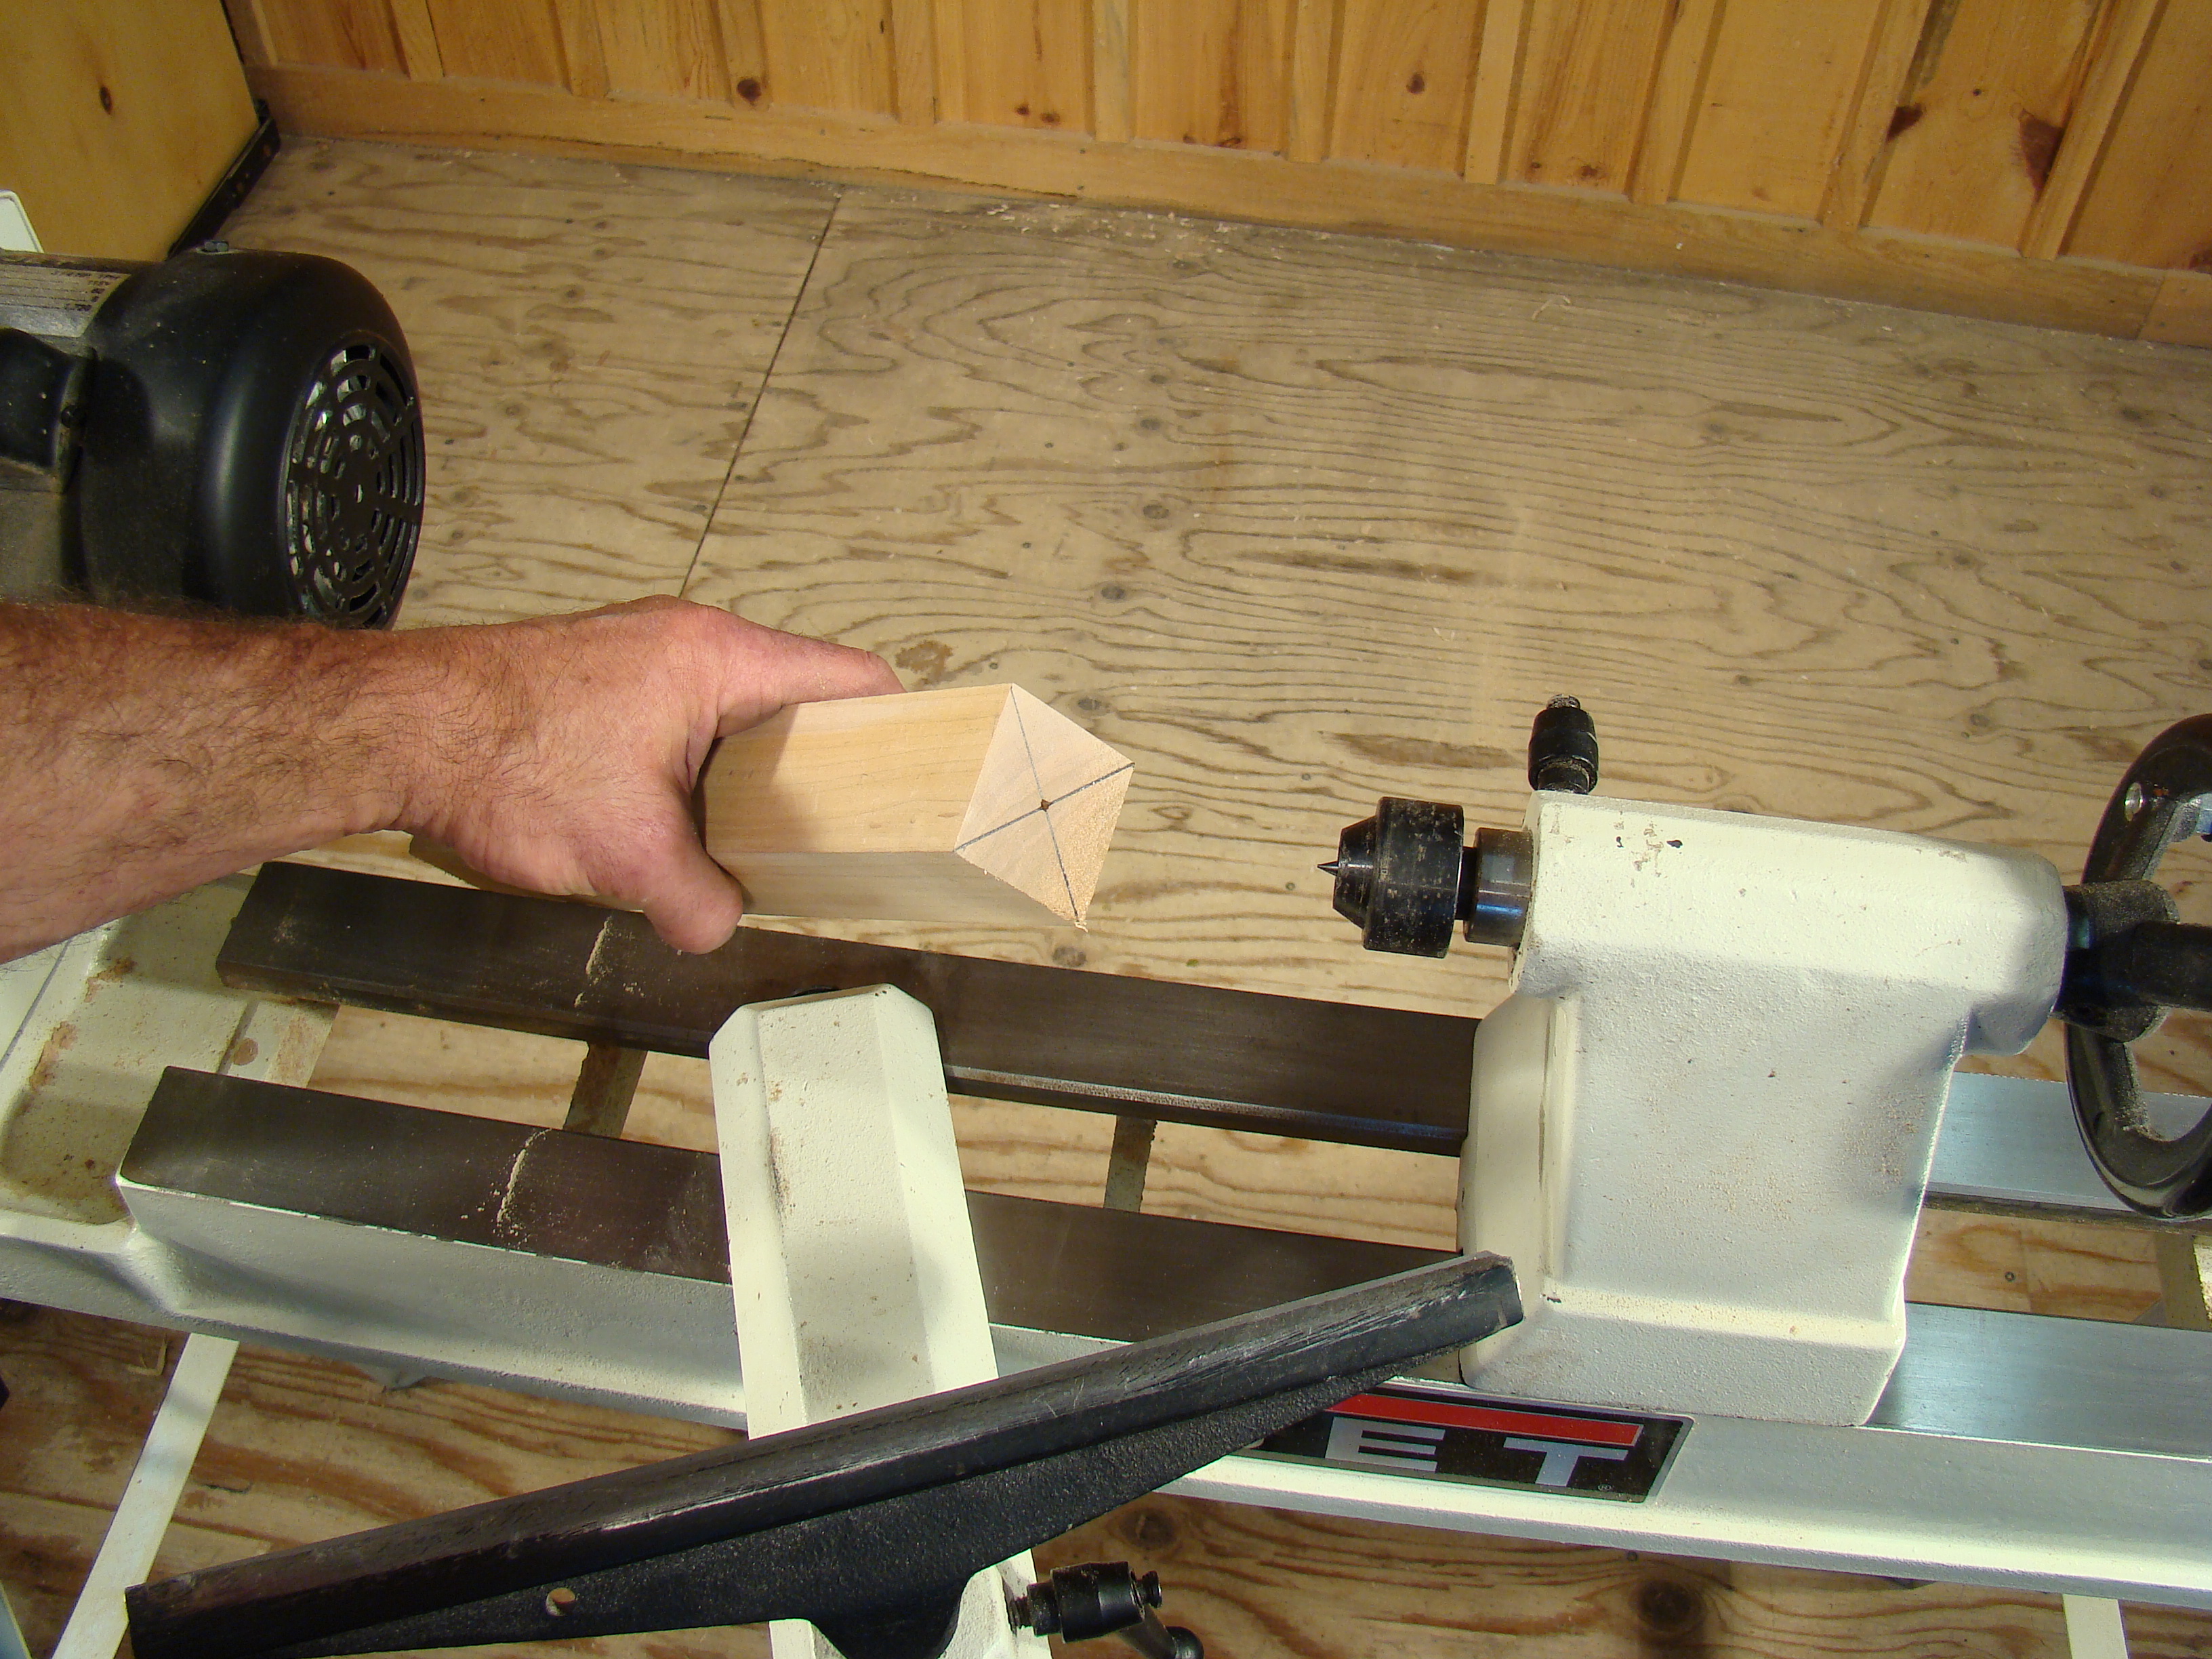
Engage the live center in the dimple you made in the tailstock end of the blank (Photo 6).
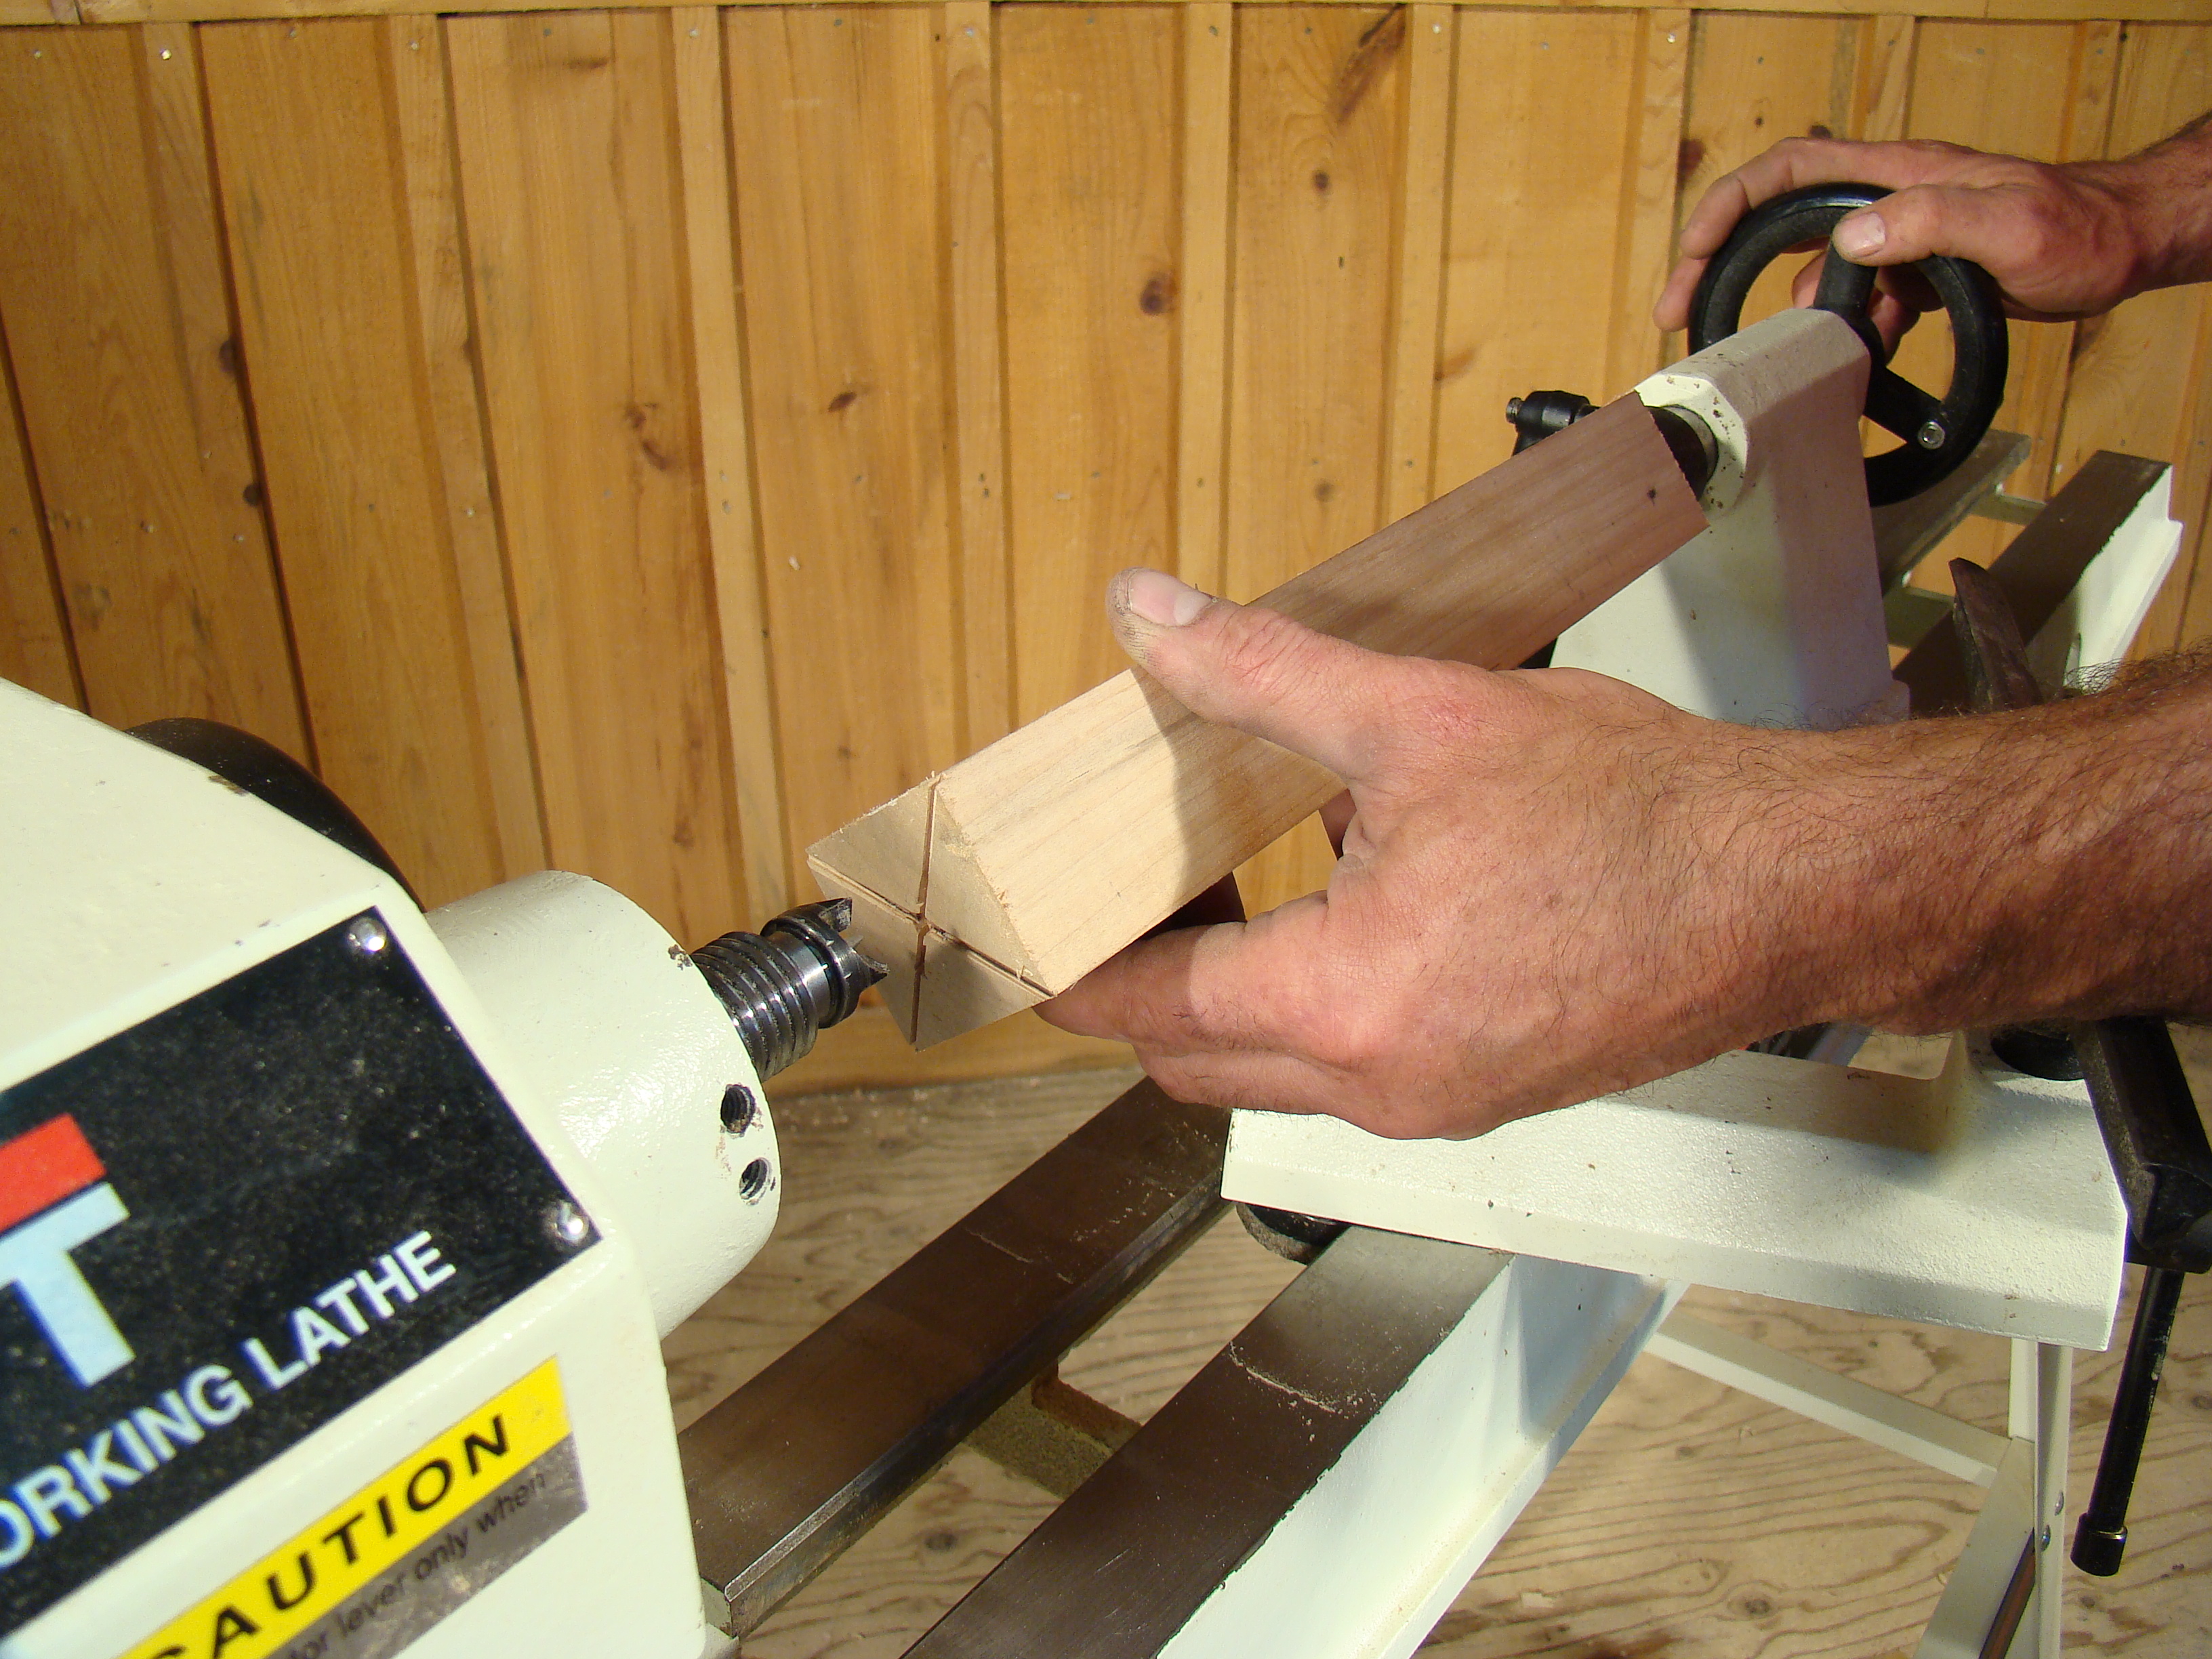
Using the handwheel on the tailstock, advance the spindle against the spur center until the spurs are engaged in the relief cuts (Photo 7). Don’t over tighten the handwheel, but be certain it’s firmly tightened. As you work, you’ll probably have to tighten the handwheel again as the end grain fibers ‘relax’ a little.
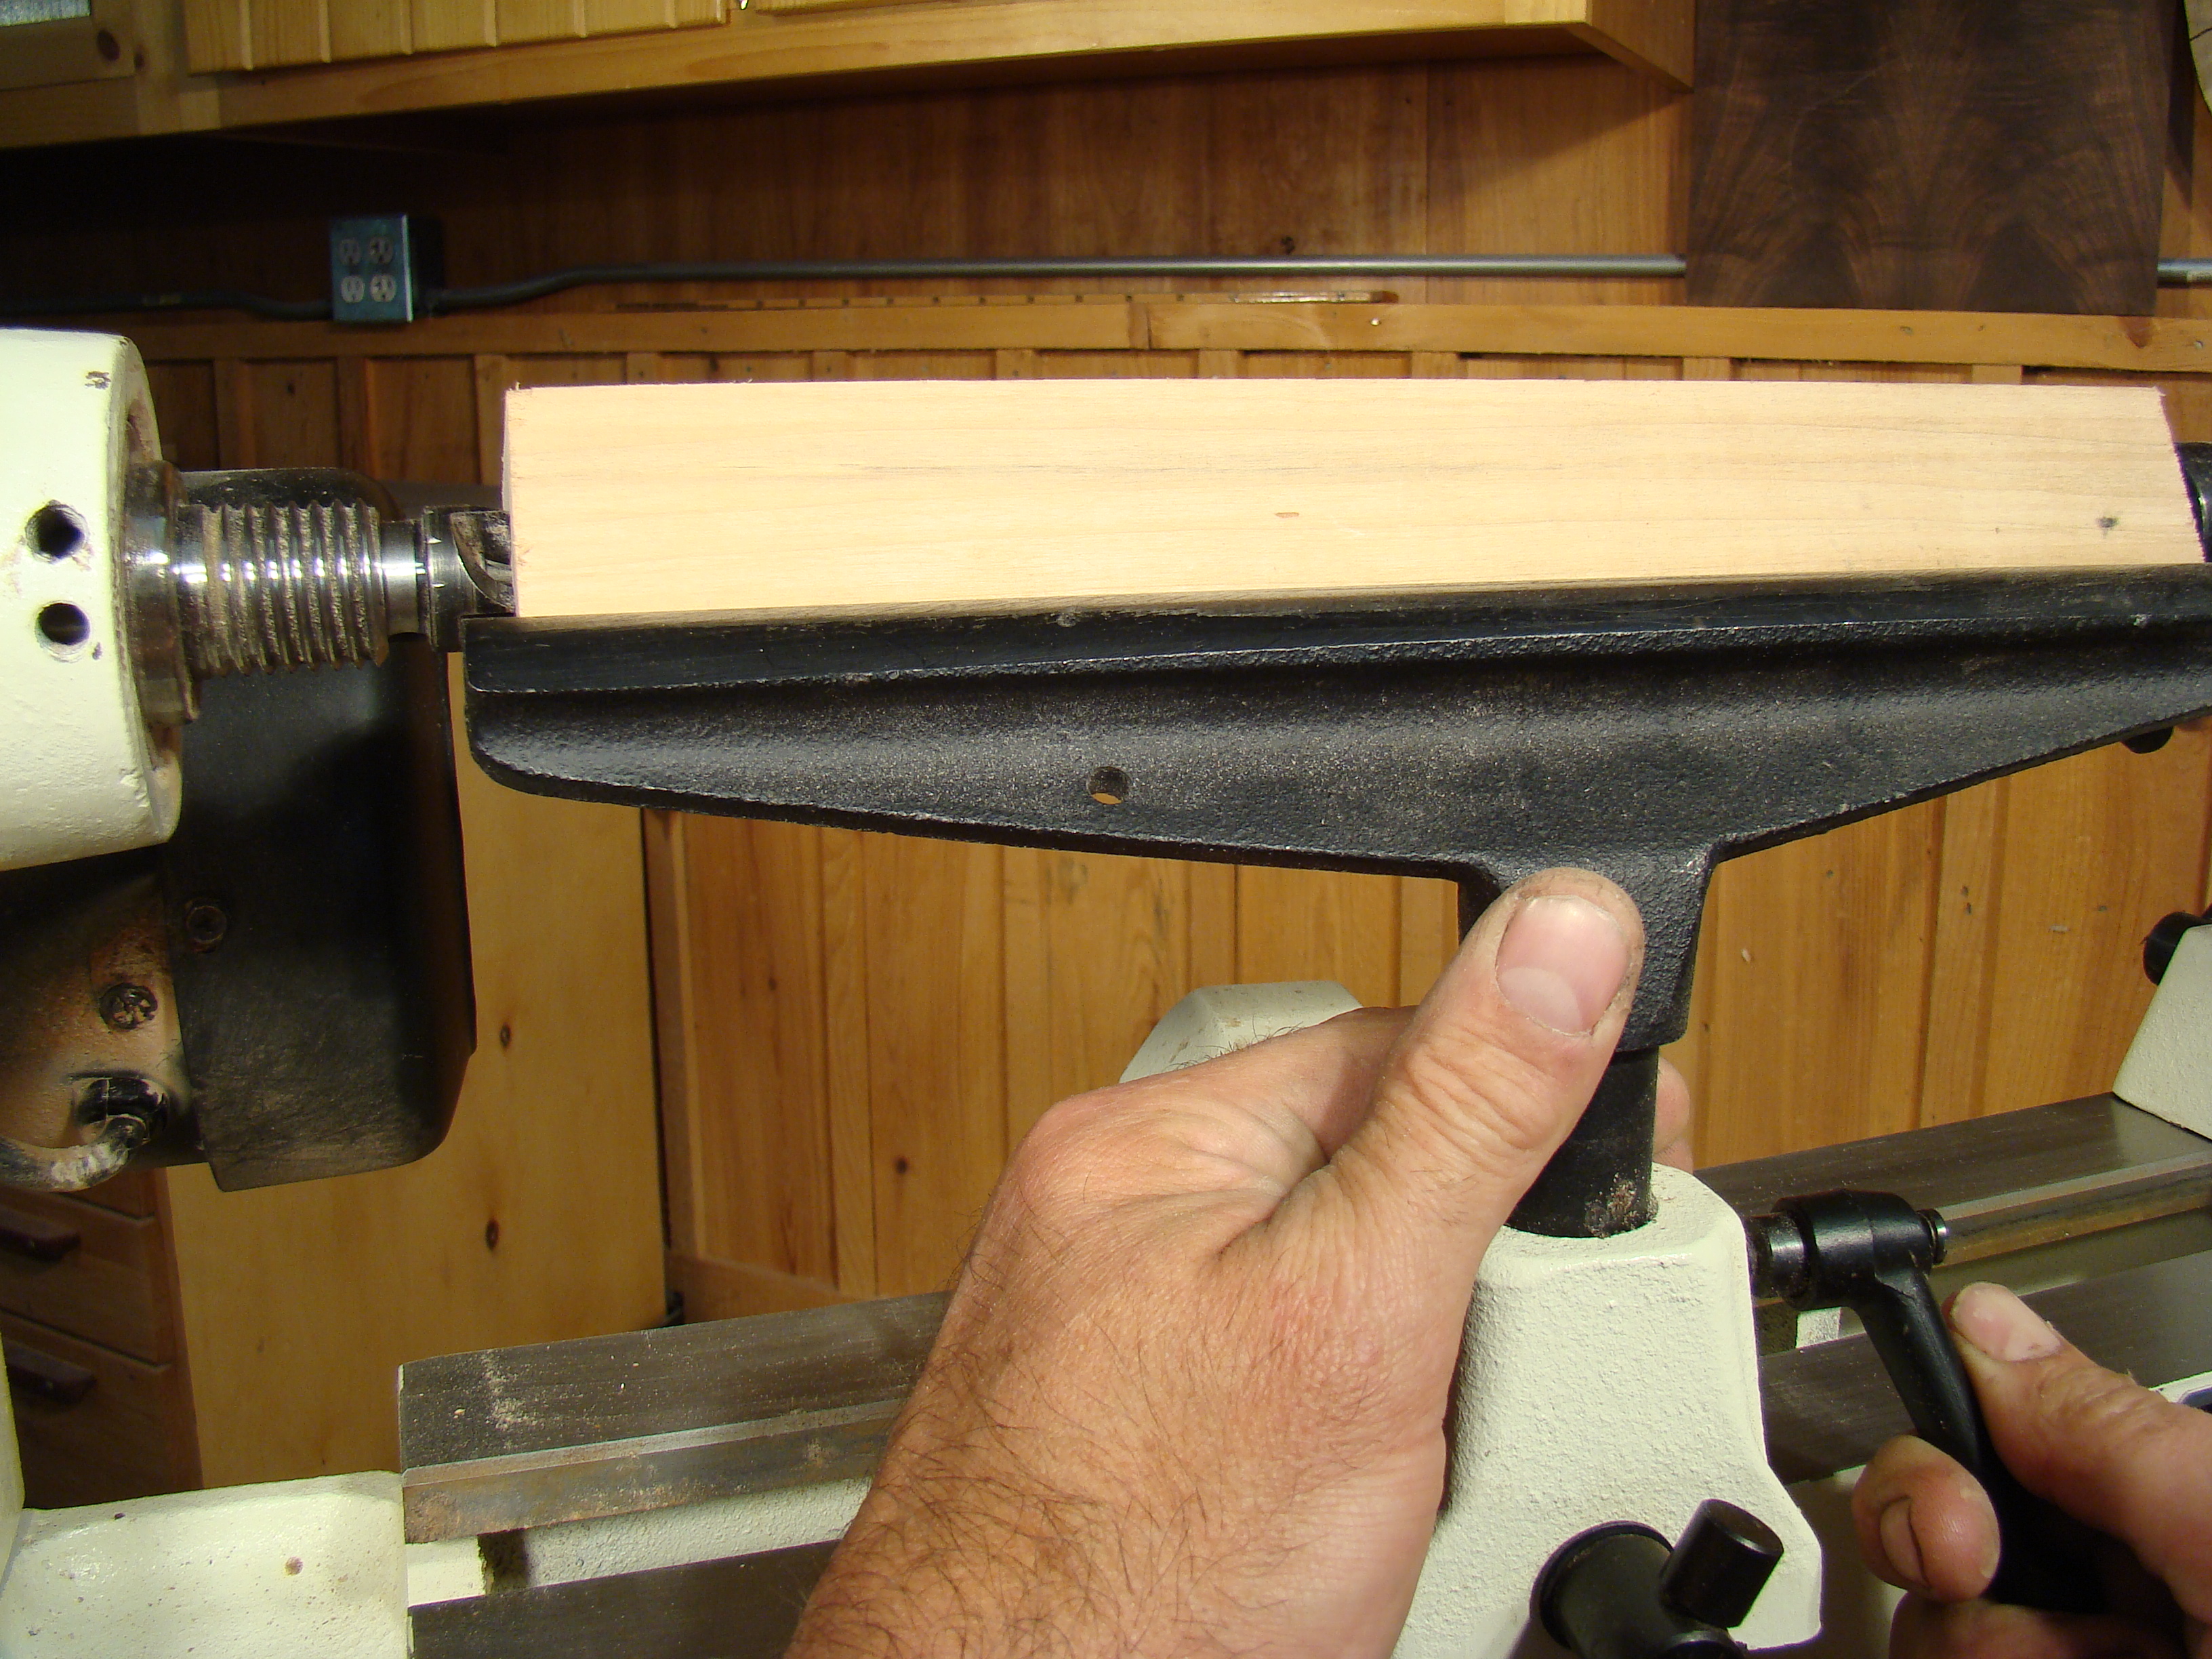
Set the height of the tool rest so it’s slightly below the center axis of the spindle (Photo 8).
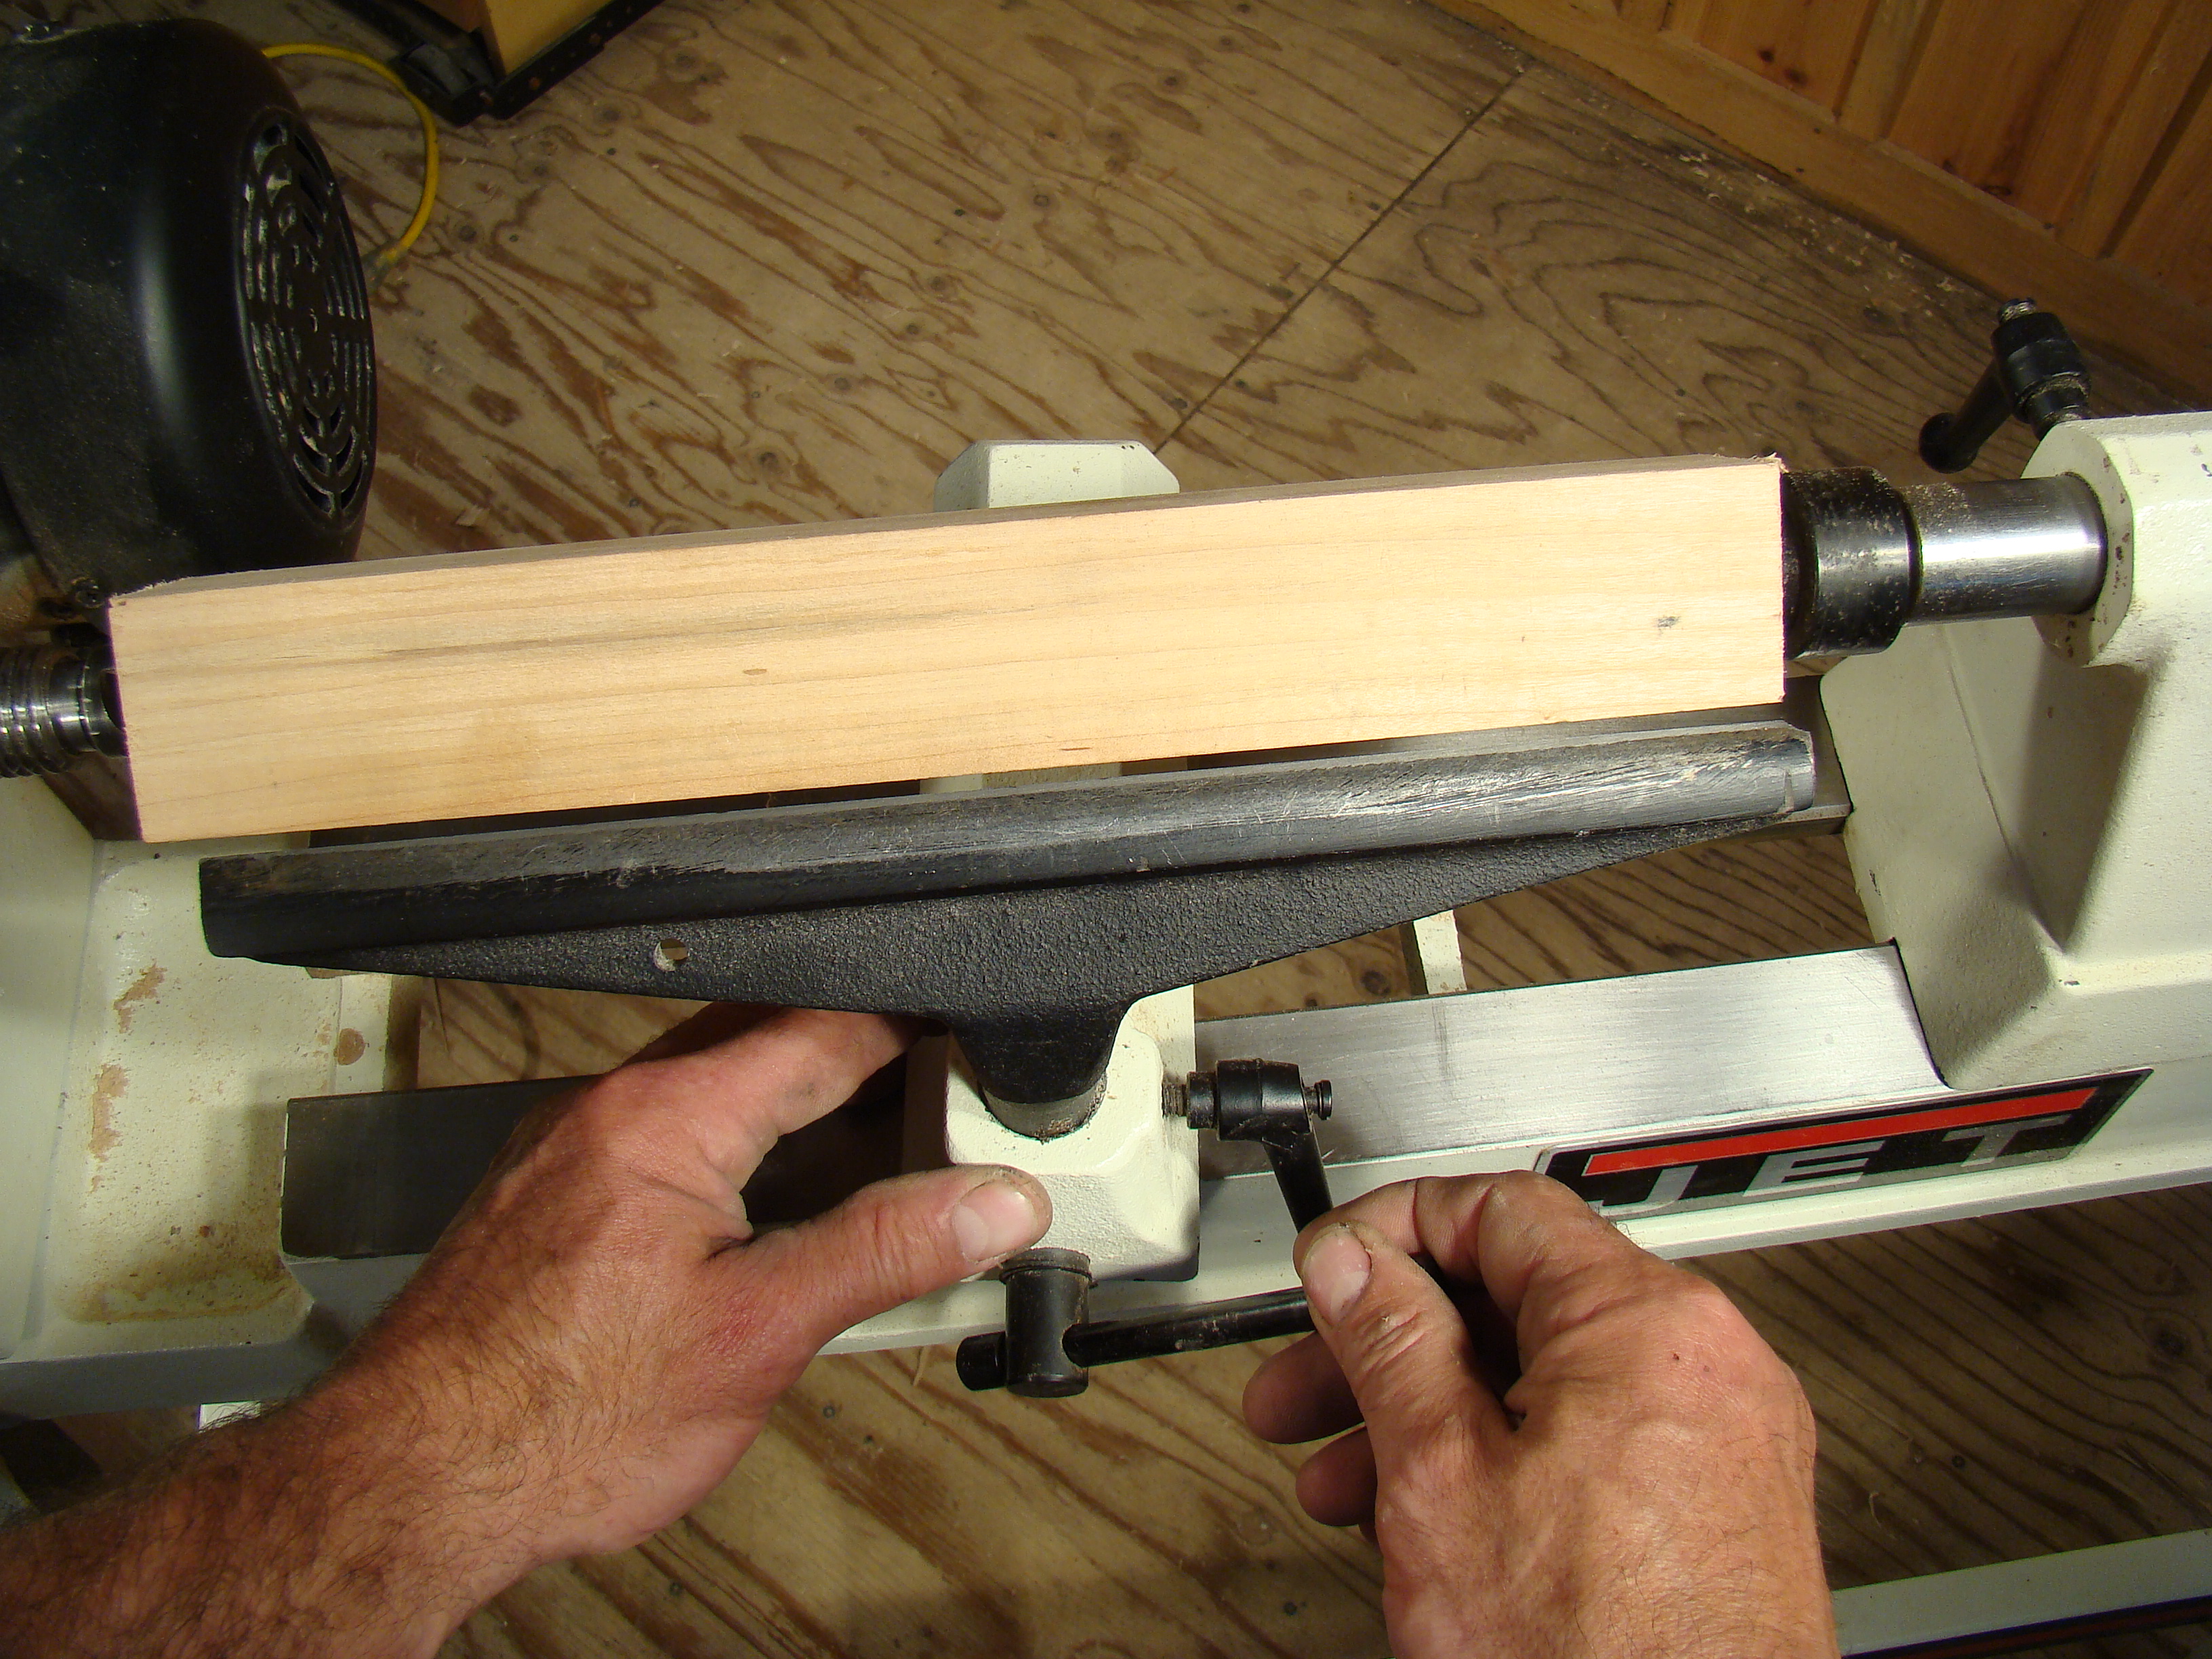
Bring the tool rest as close as you can to the spindle, without allowing it to touch the spindle (Photo 9). Be sure you turn the spindle by hand to make sure it clears the rest on all sides.
A Few More Safety Rules. In addition to the speed limit, there are a few more lathe laws you need to follow. Sleeves should be above your elbows. Take off any jewelry. And wear a full face shield. When sanding, you need to wear a dust mask to protect your lungs. Be sure your tools are sharp. Dull chisels are more dangerous than sharp ones.
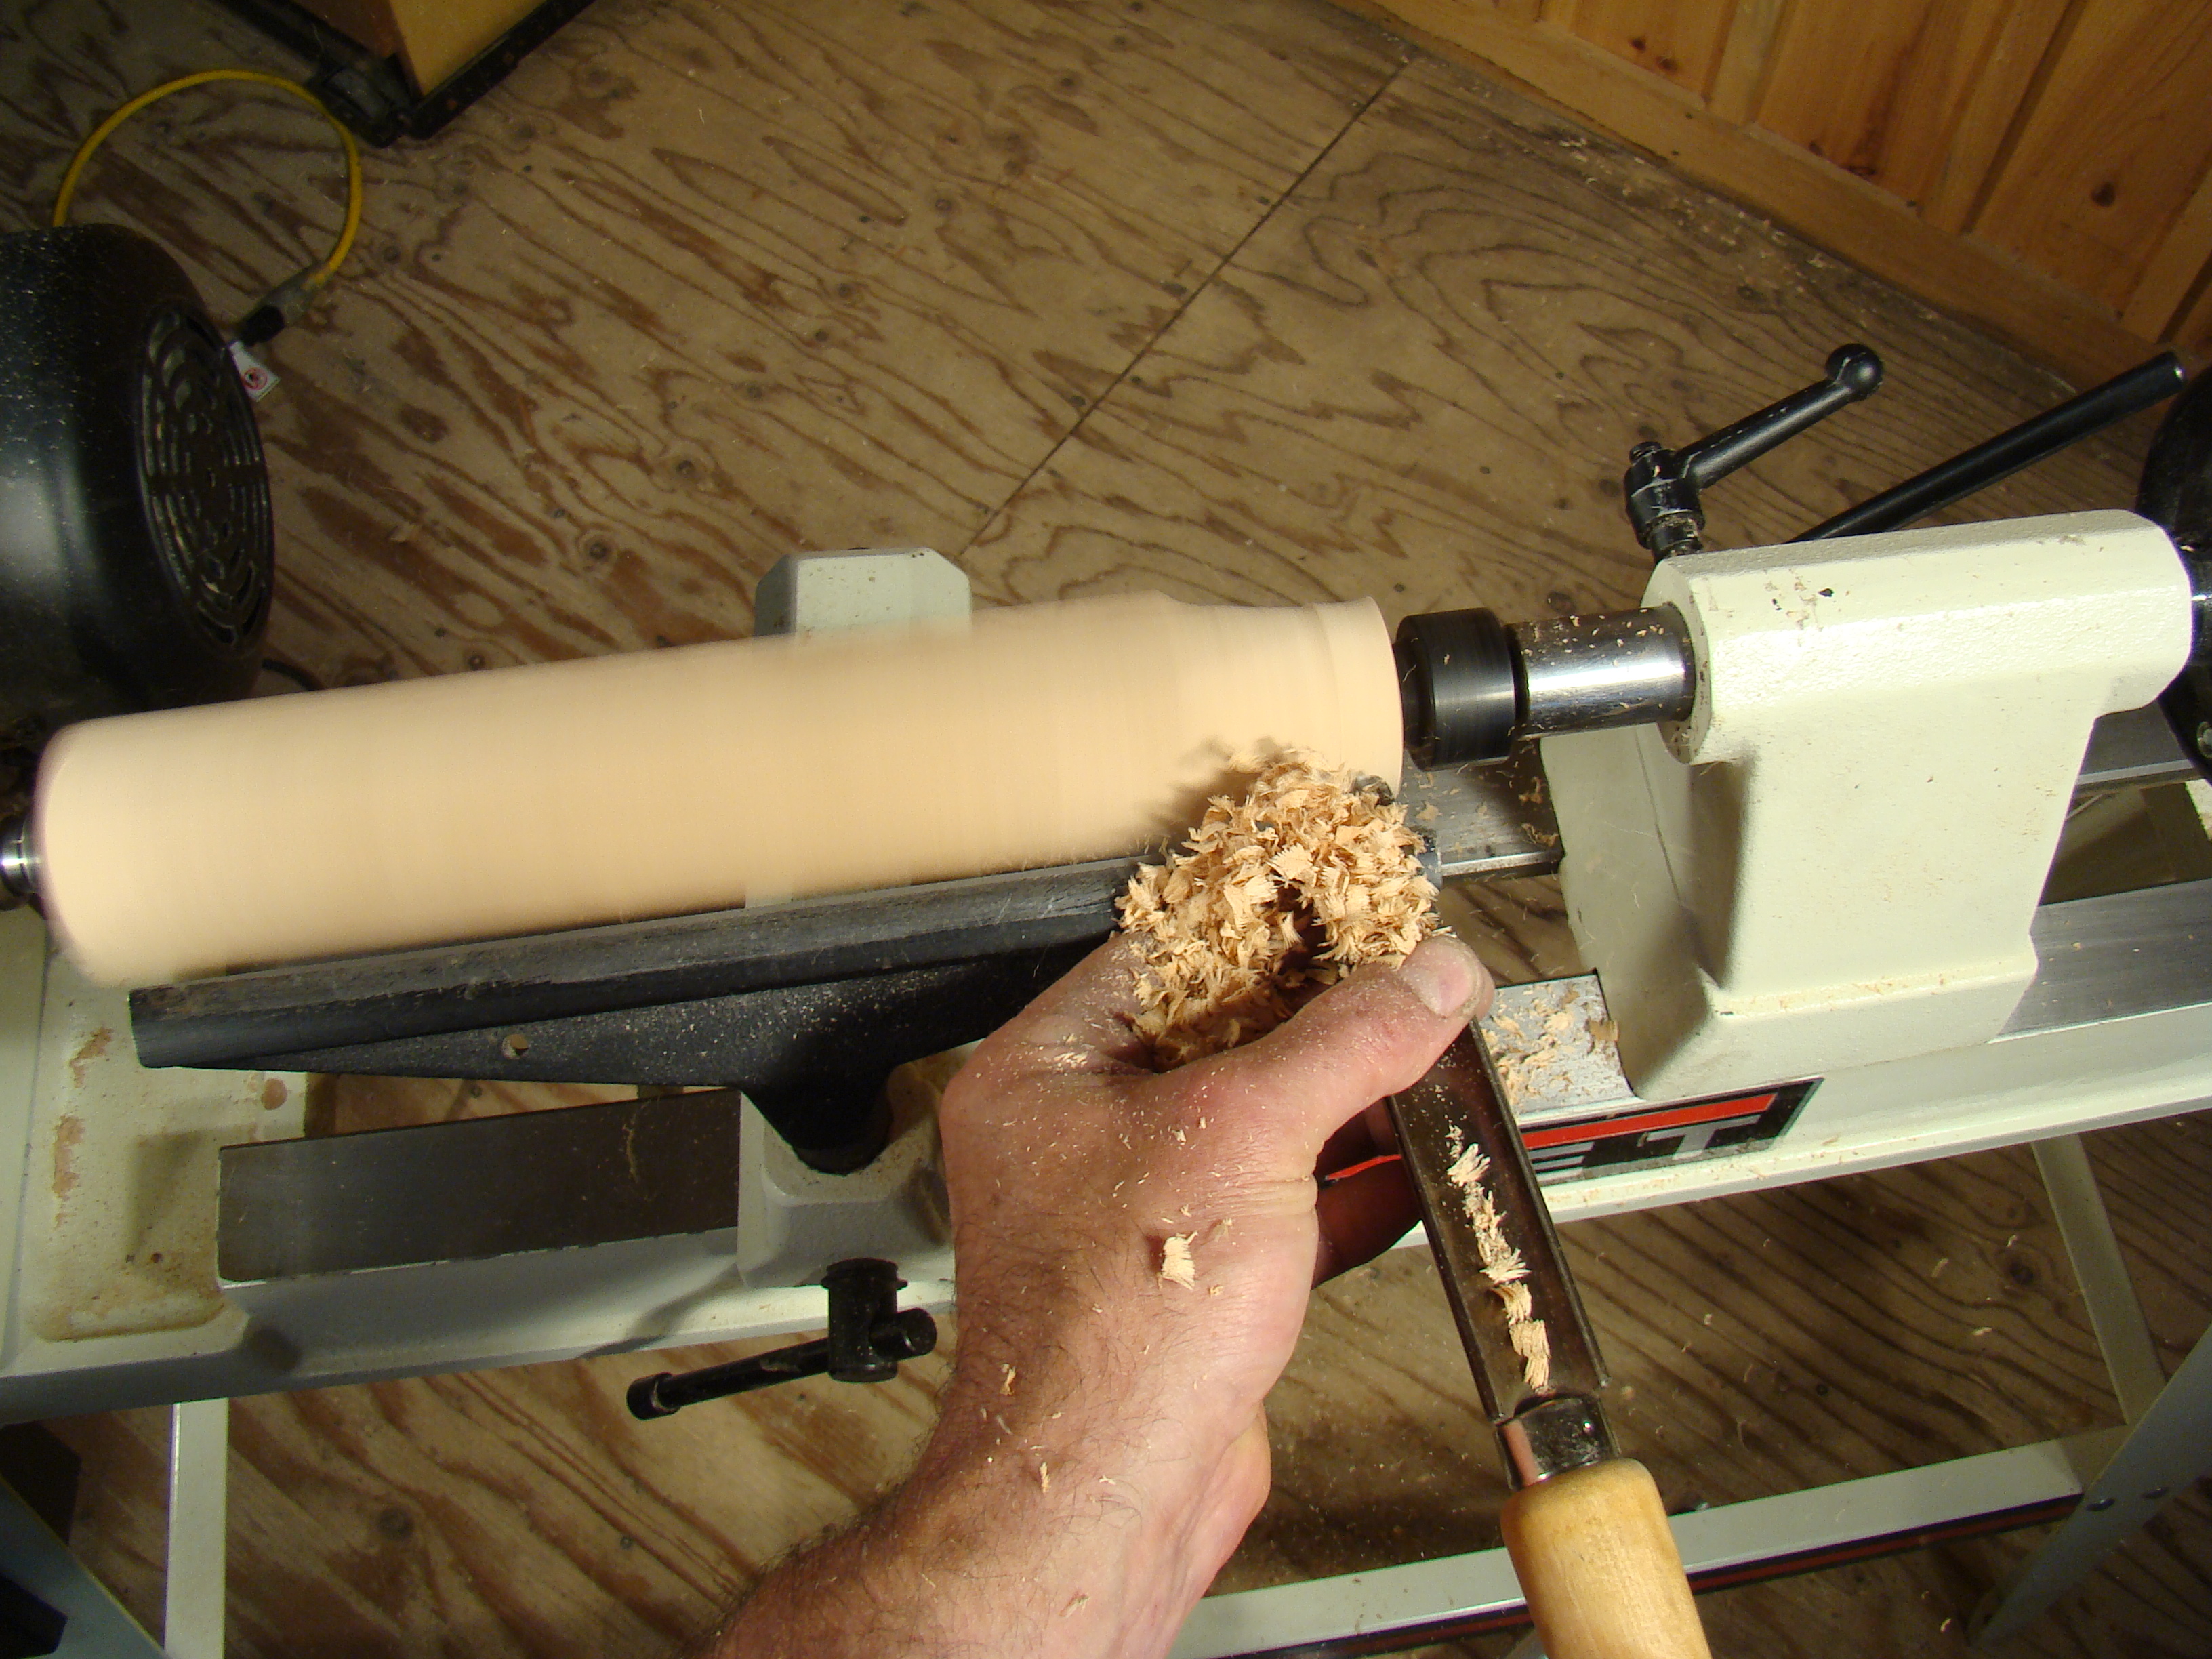
Making the Cuts. With the spindle and machine set up complete, you’re ready to cut wood.Using a spindle gouge and holding the chisel approximately parallel to the floor, gently probe the tip of the chisel into the spinning spindle. Start at one end and remove the corners (Photo 10a).
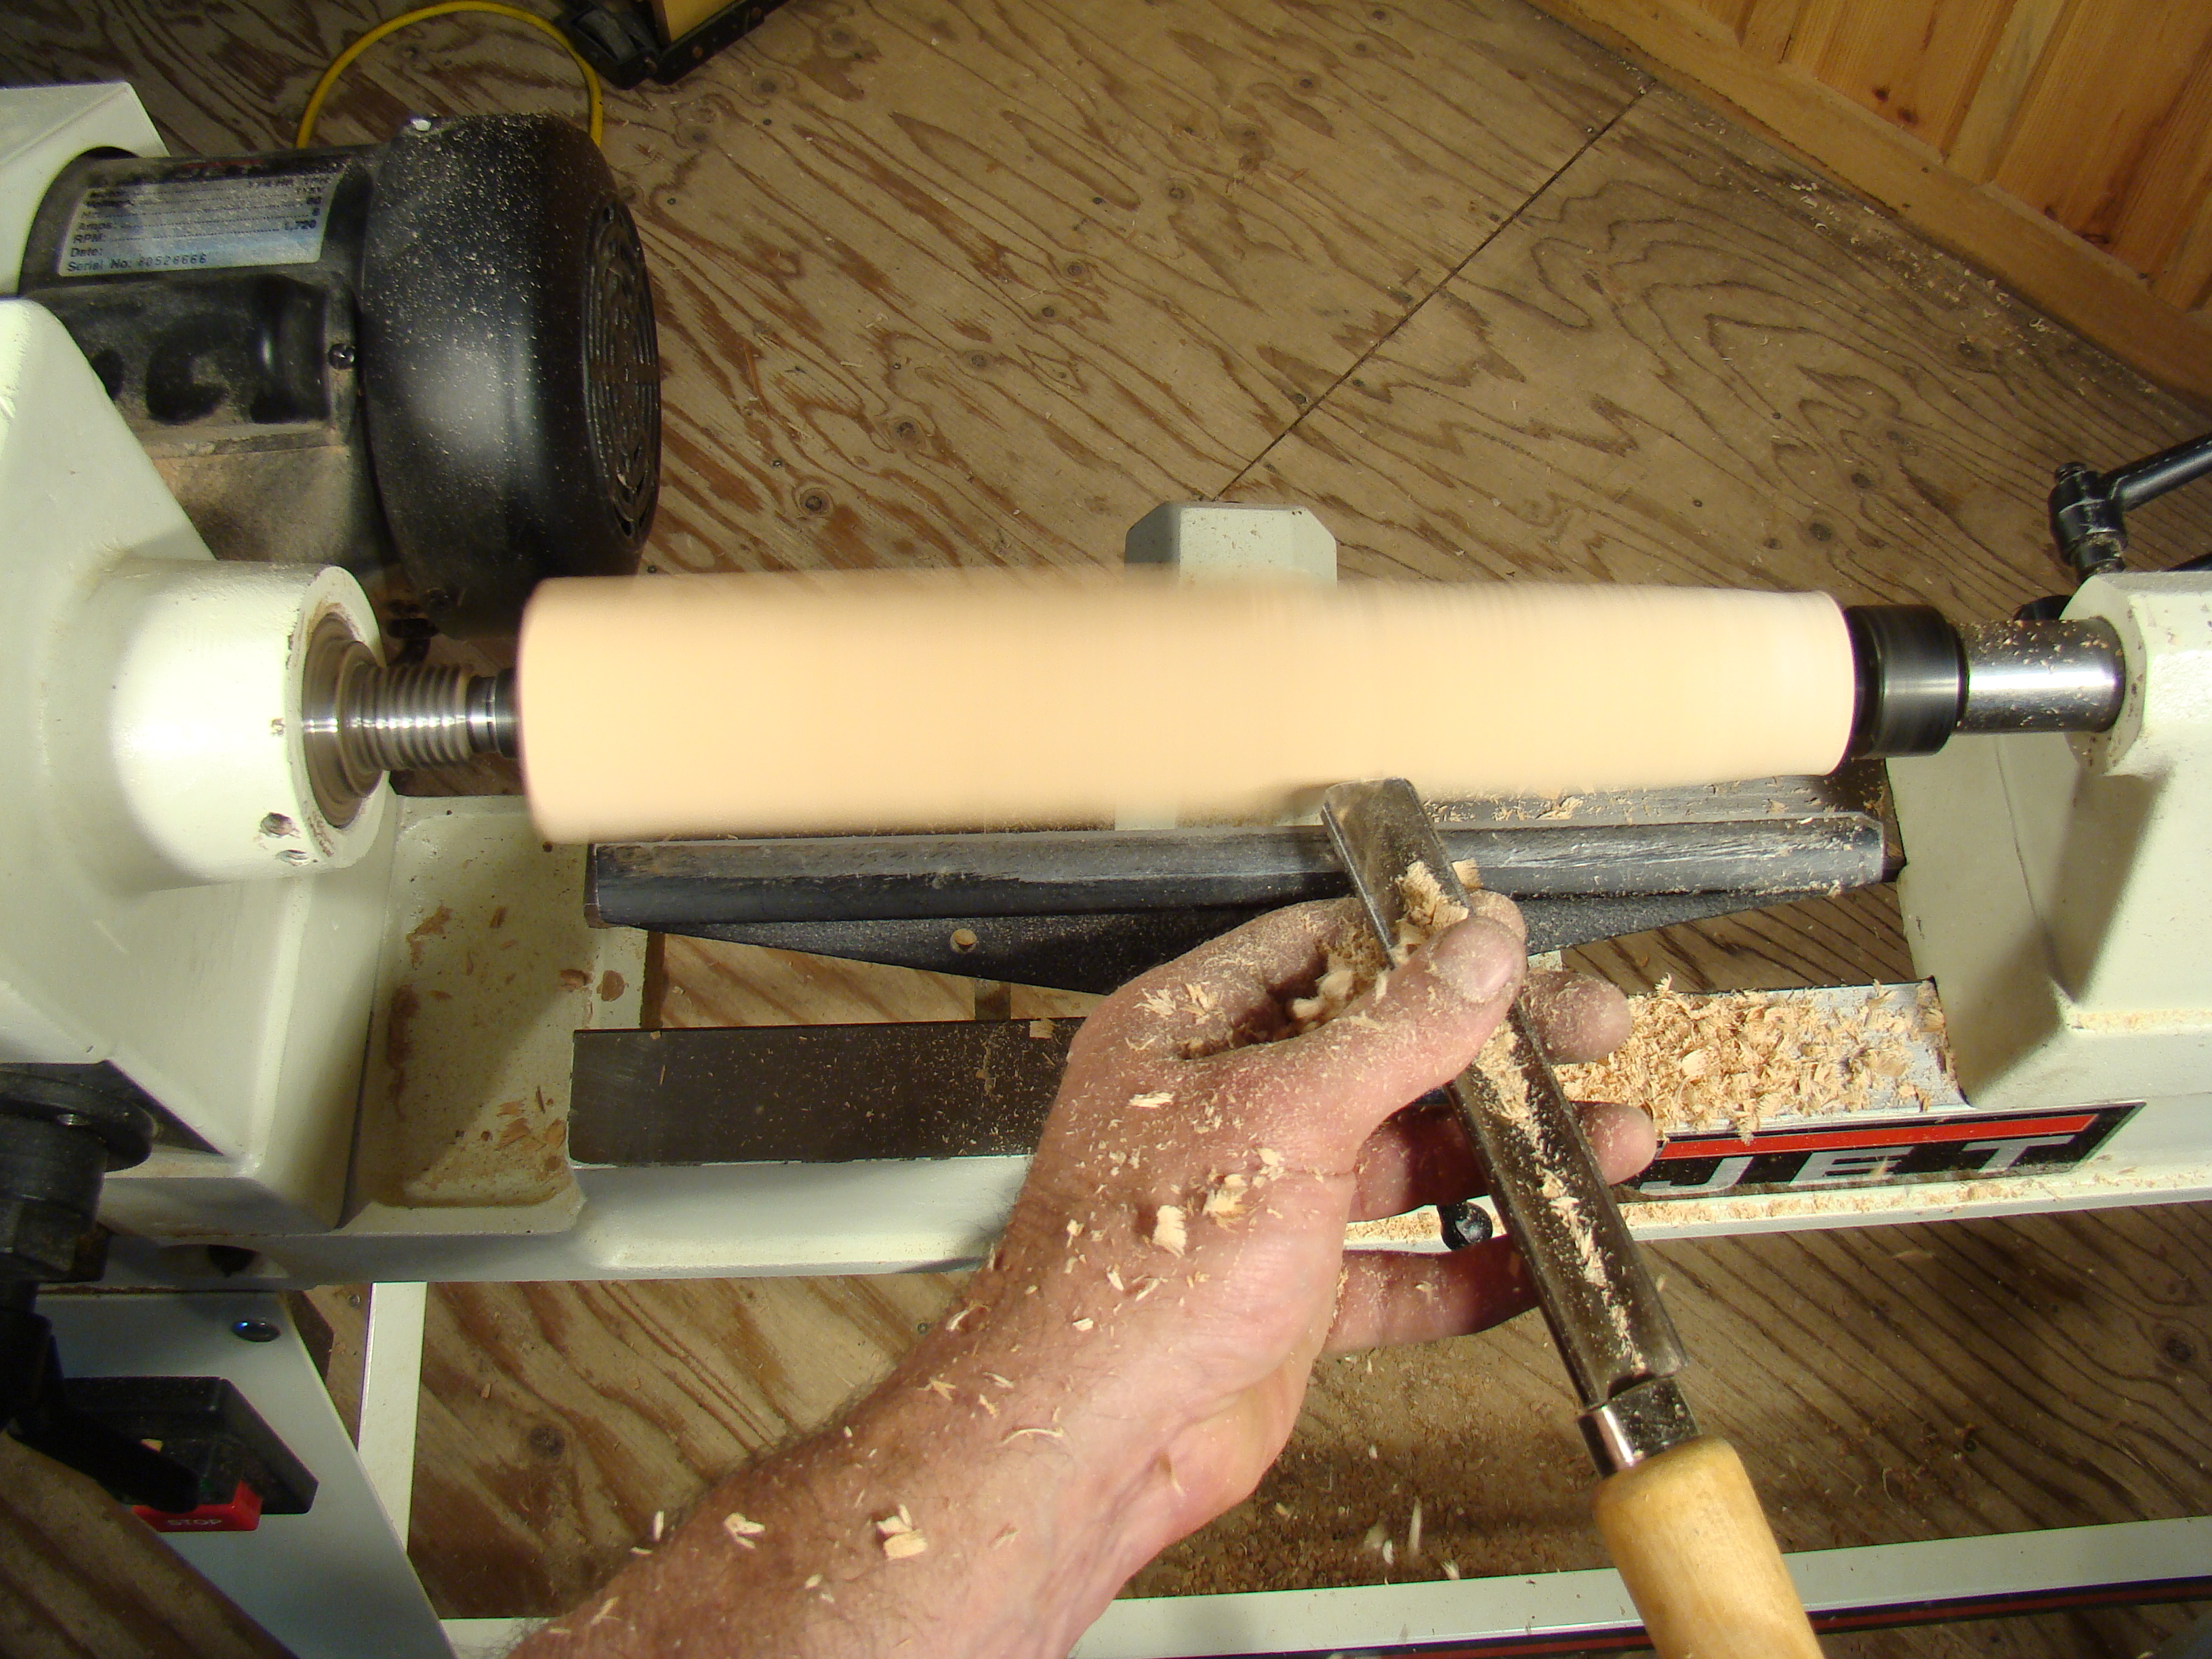
Make each pass a little longer, working ‘downhill’ from uncut wood to rounded wood (Photo 10b). Turning requires only a light touch on the chisel. If your knuckles are turning white, you’re working too hard. Continue working until all the corners are off and the spindle is round.
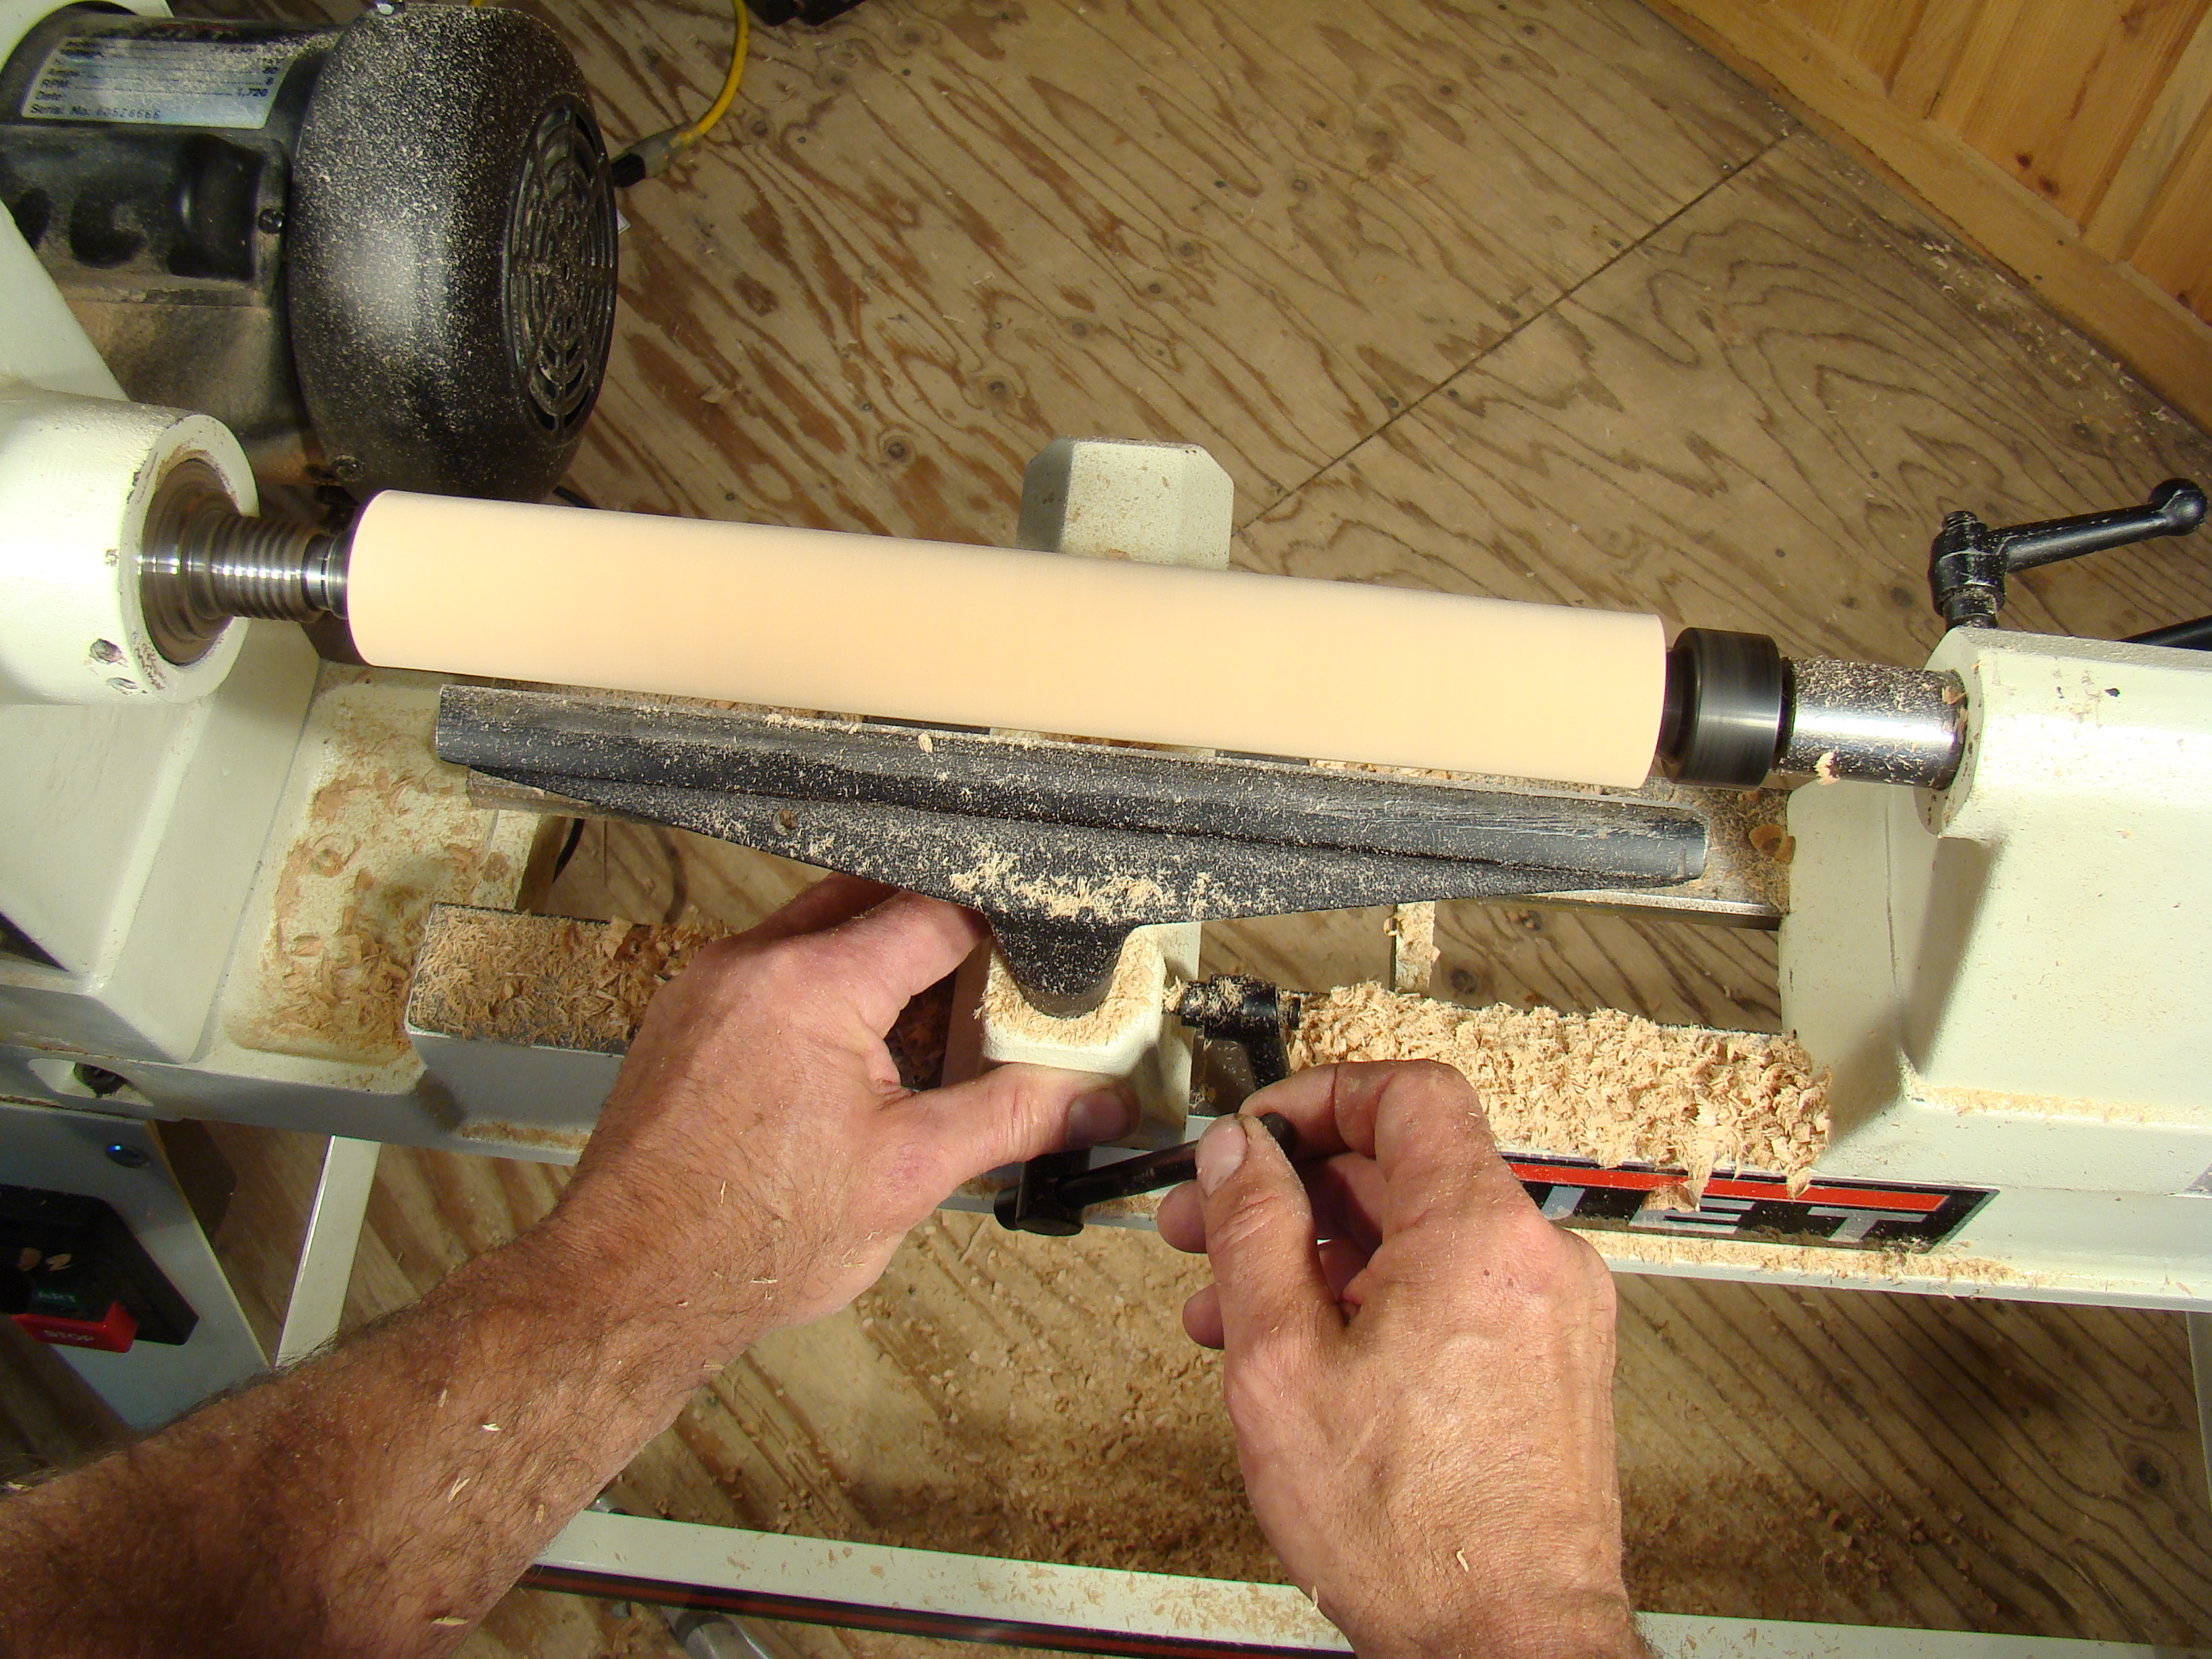
Once the cylinder has been rounded you’ll need to move the tool rest in (Photo 11).
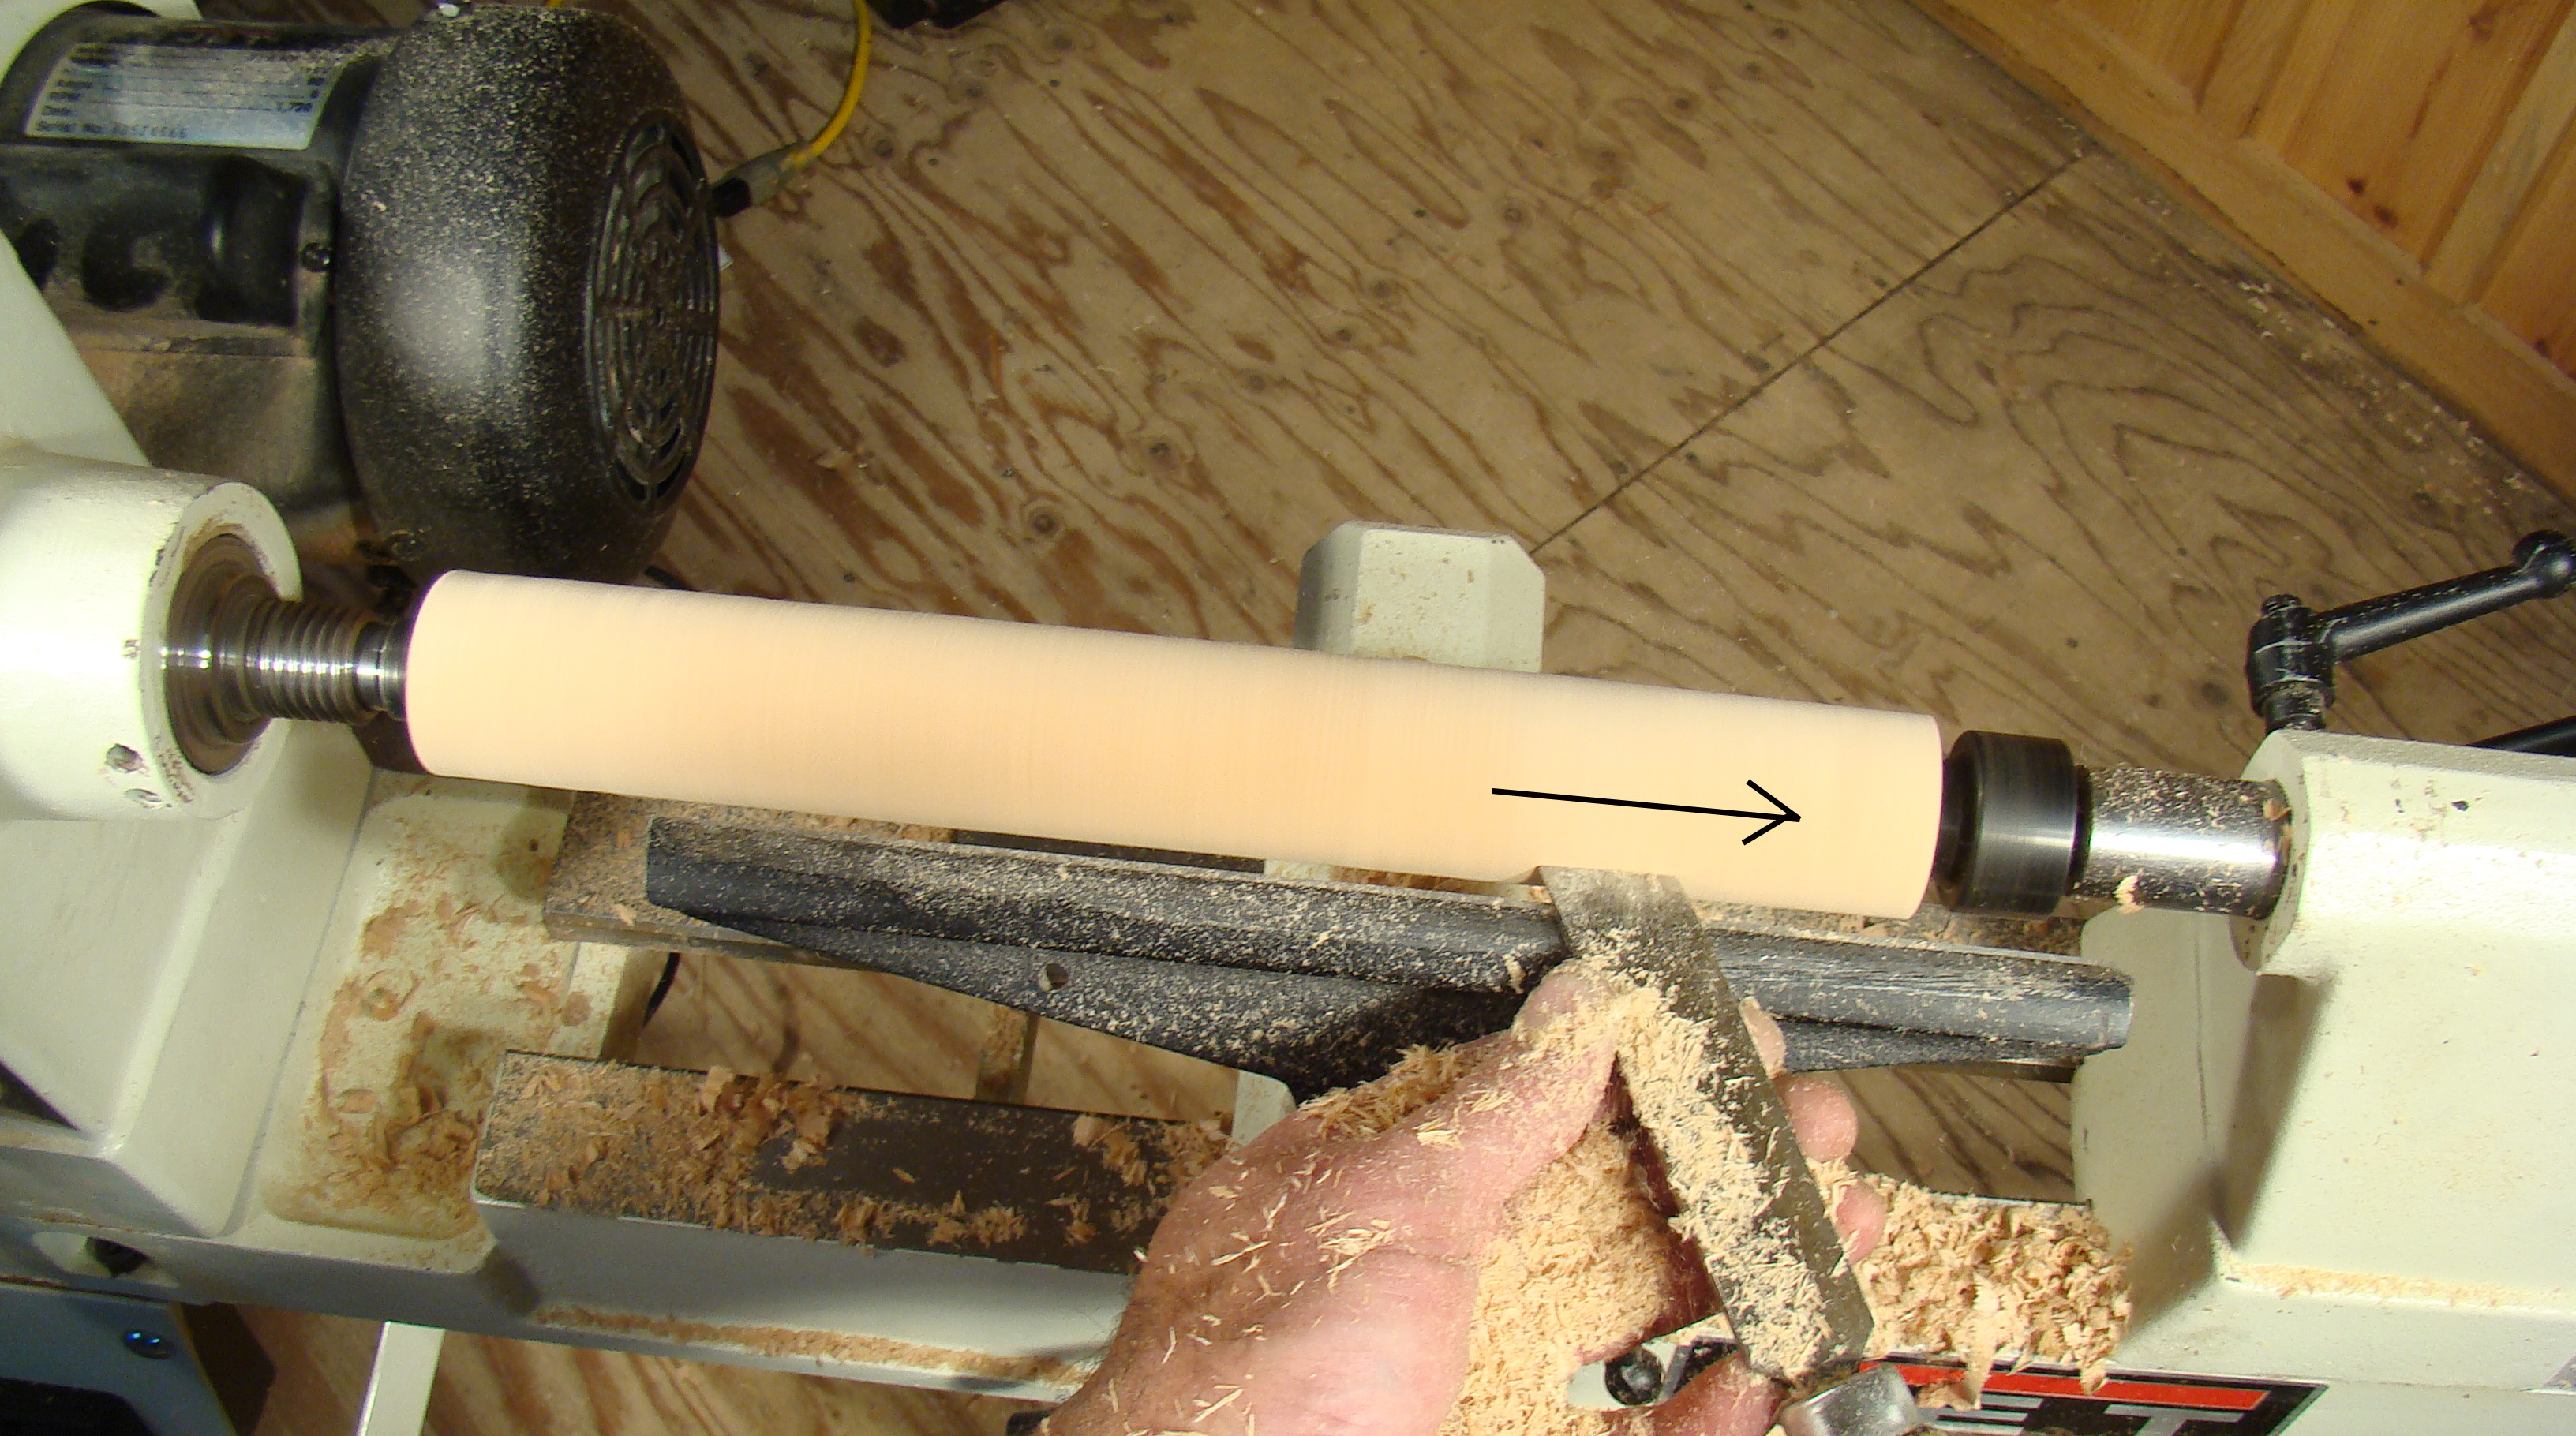
After the spindle is completely round from end to end, use a skew to level it off by working from the center out. A gouge will leave lots of high and low spots. The straight edge of a skew is a good way to straighten things out and get a uniform cylinder. Move the skew in the direction shown without allowing either of the skew’s corners to dig in (Photo 12). This will take some practice, but provides good results once you get it right.Once the right end of the spindle is leveled, flip the skew and, working from the center toward the left, repeat the cuts on the other end.
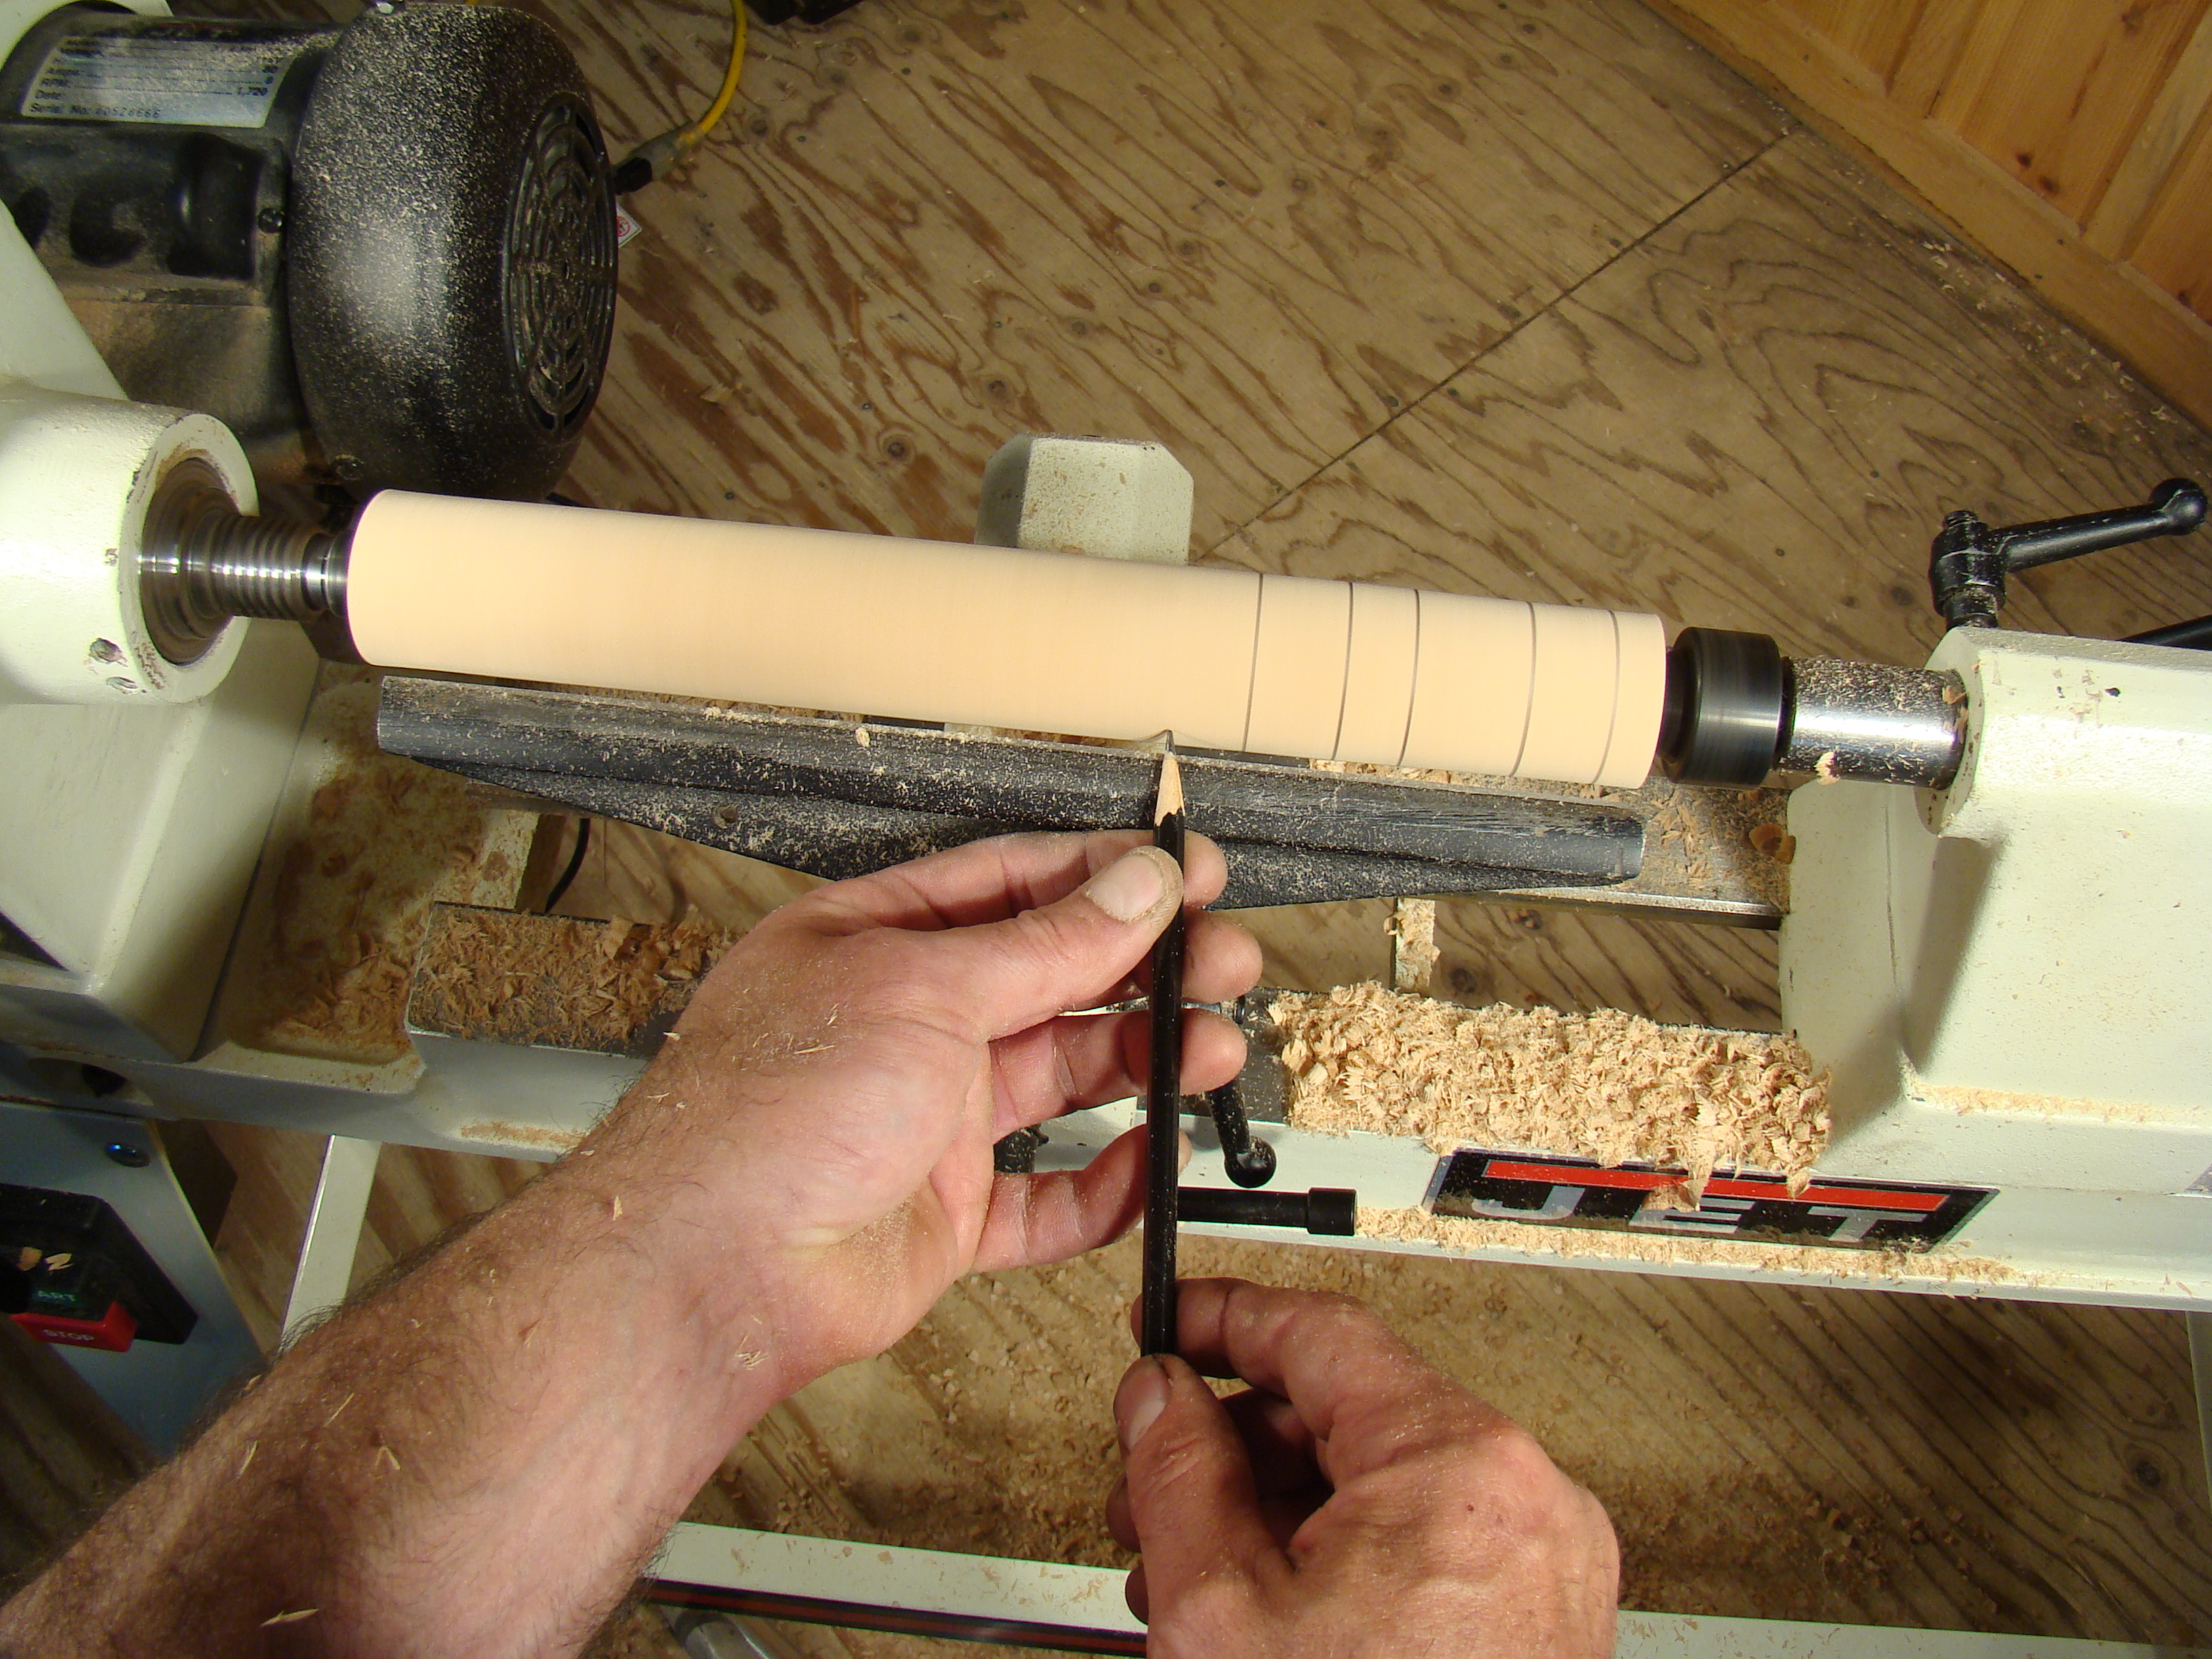
Beads and Coves. Now you’re ready for shaping. Here’s where you master beads and coves.Make a series of pencil lines on the cylinder, indicating where you’ll cut coves (Photo 13).
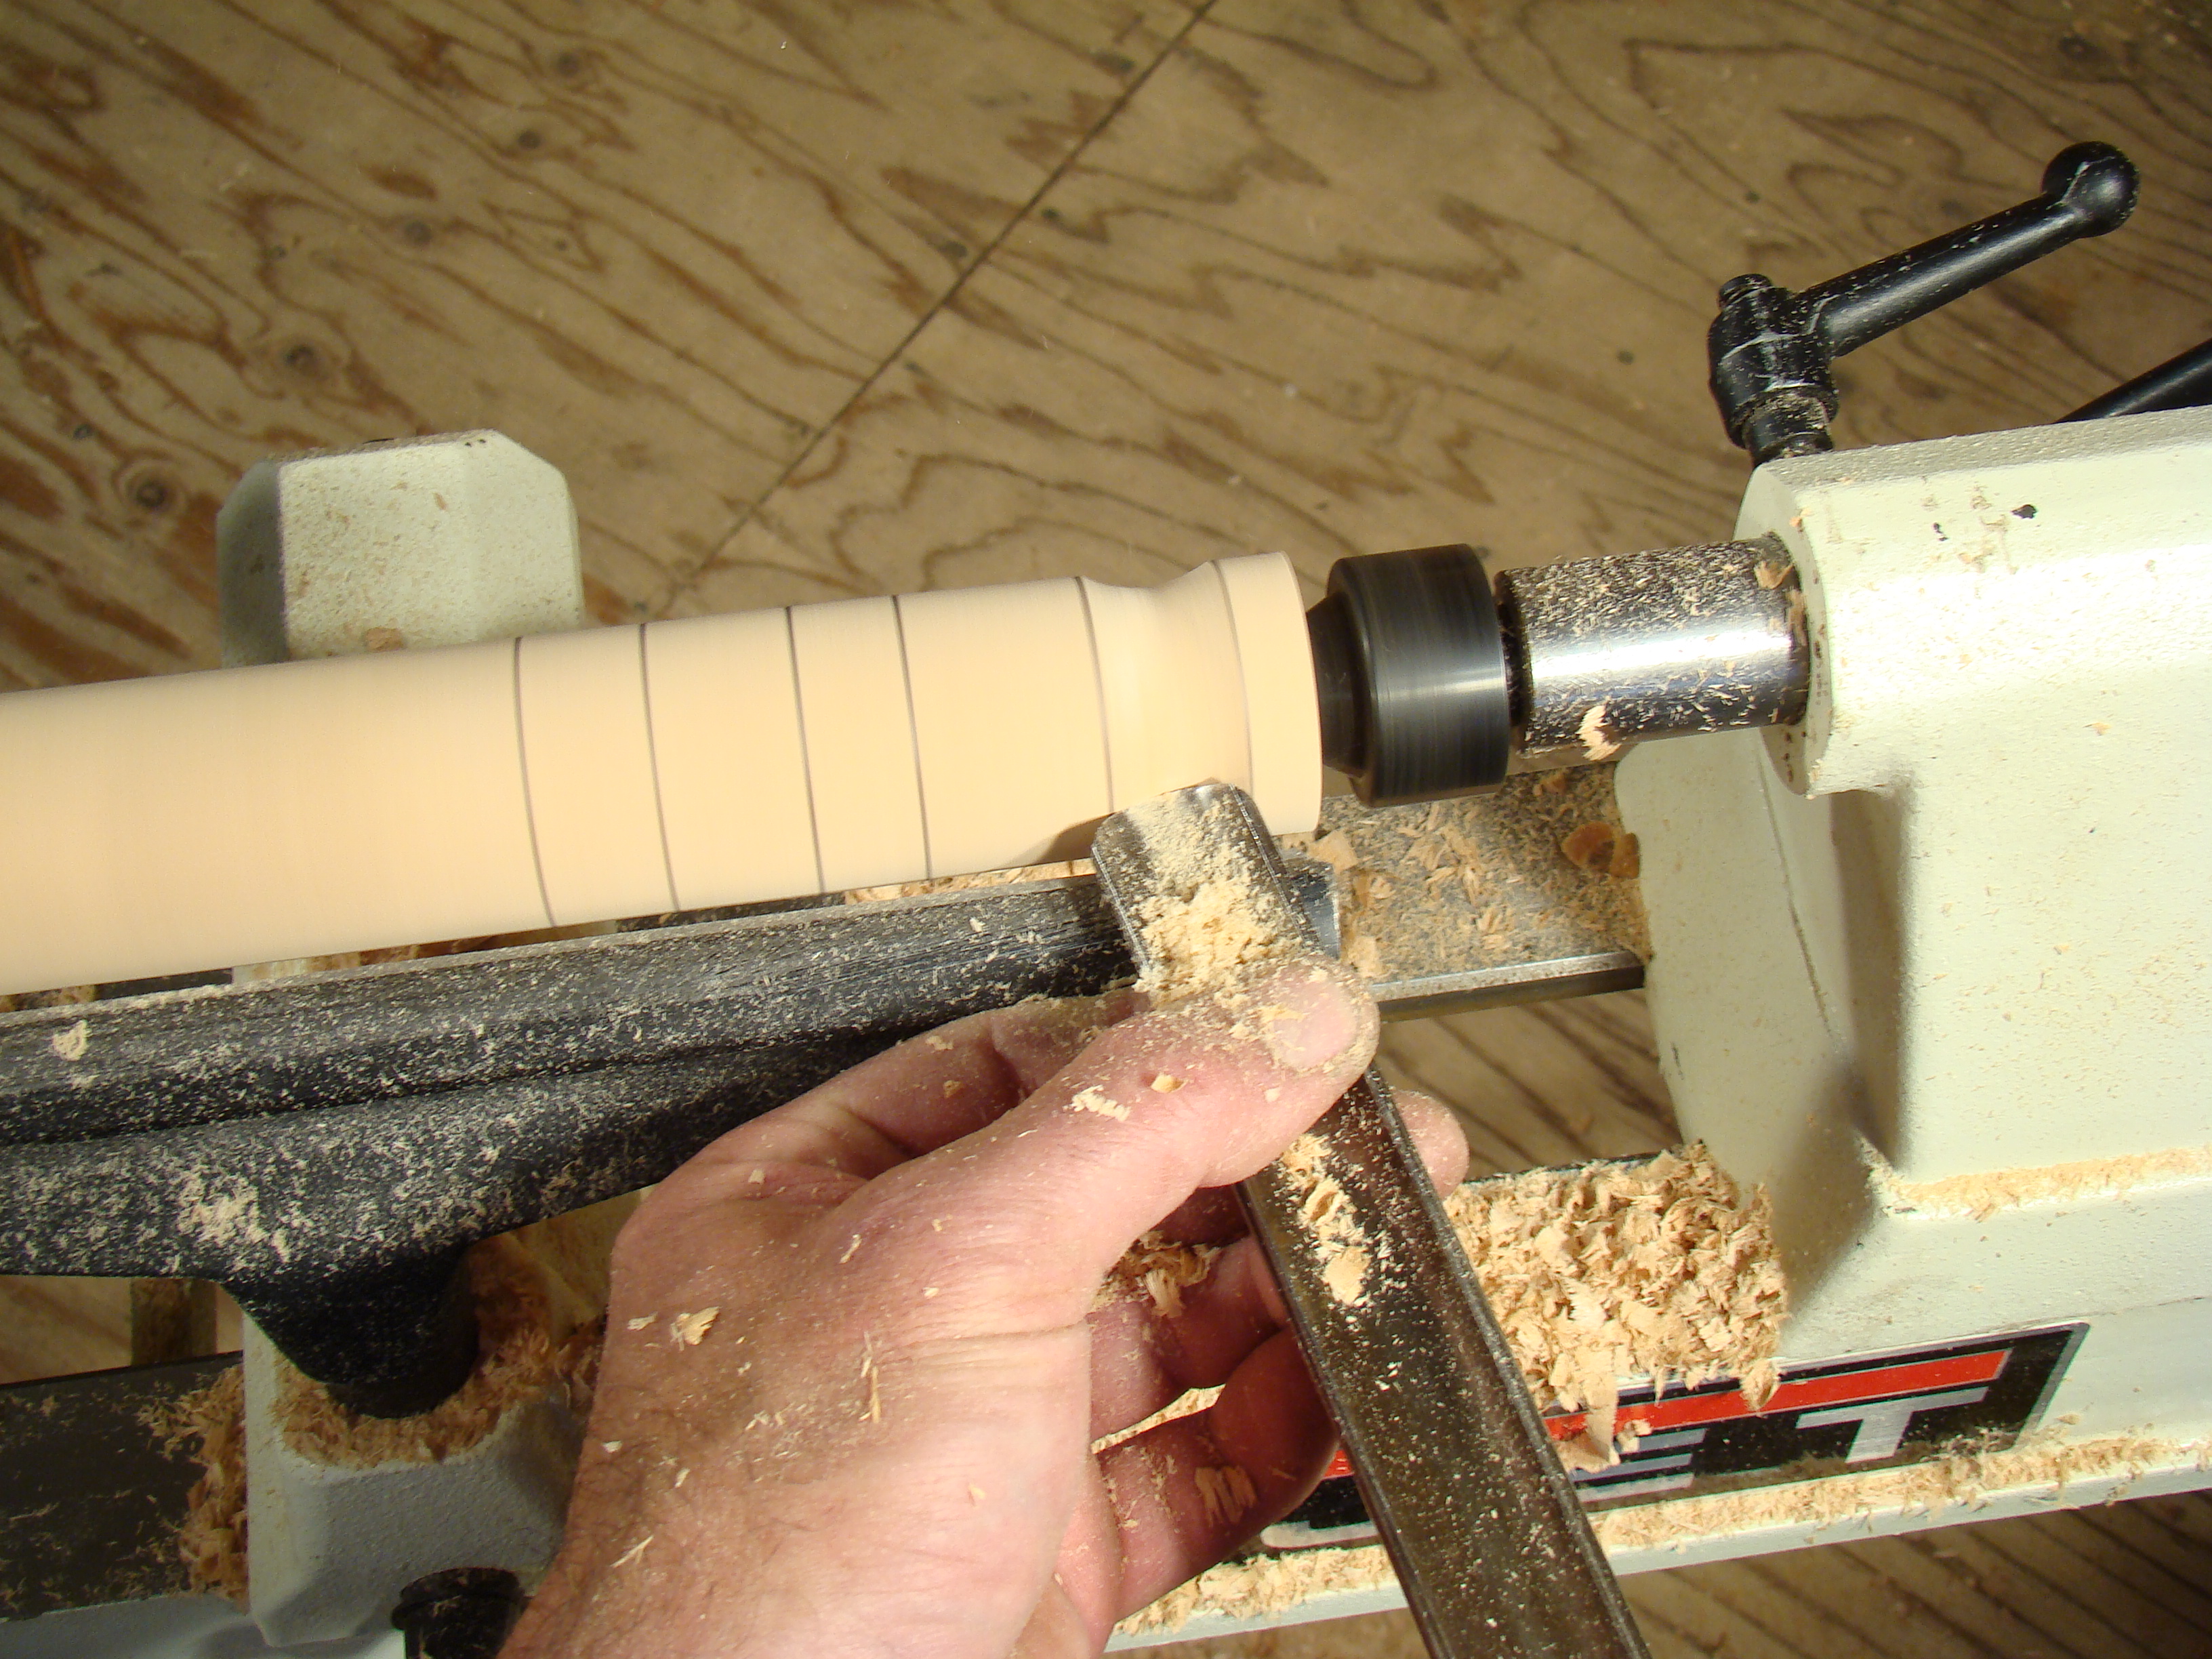
A cove is simple. All you’re doing is making a concave surface that’s nearly the same shape as the tip of your spindle gouge by probing the chisel into the spindle (Photo 14). A wide gouge will make a wide cove.
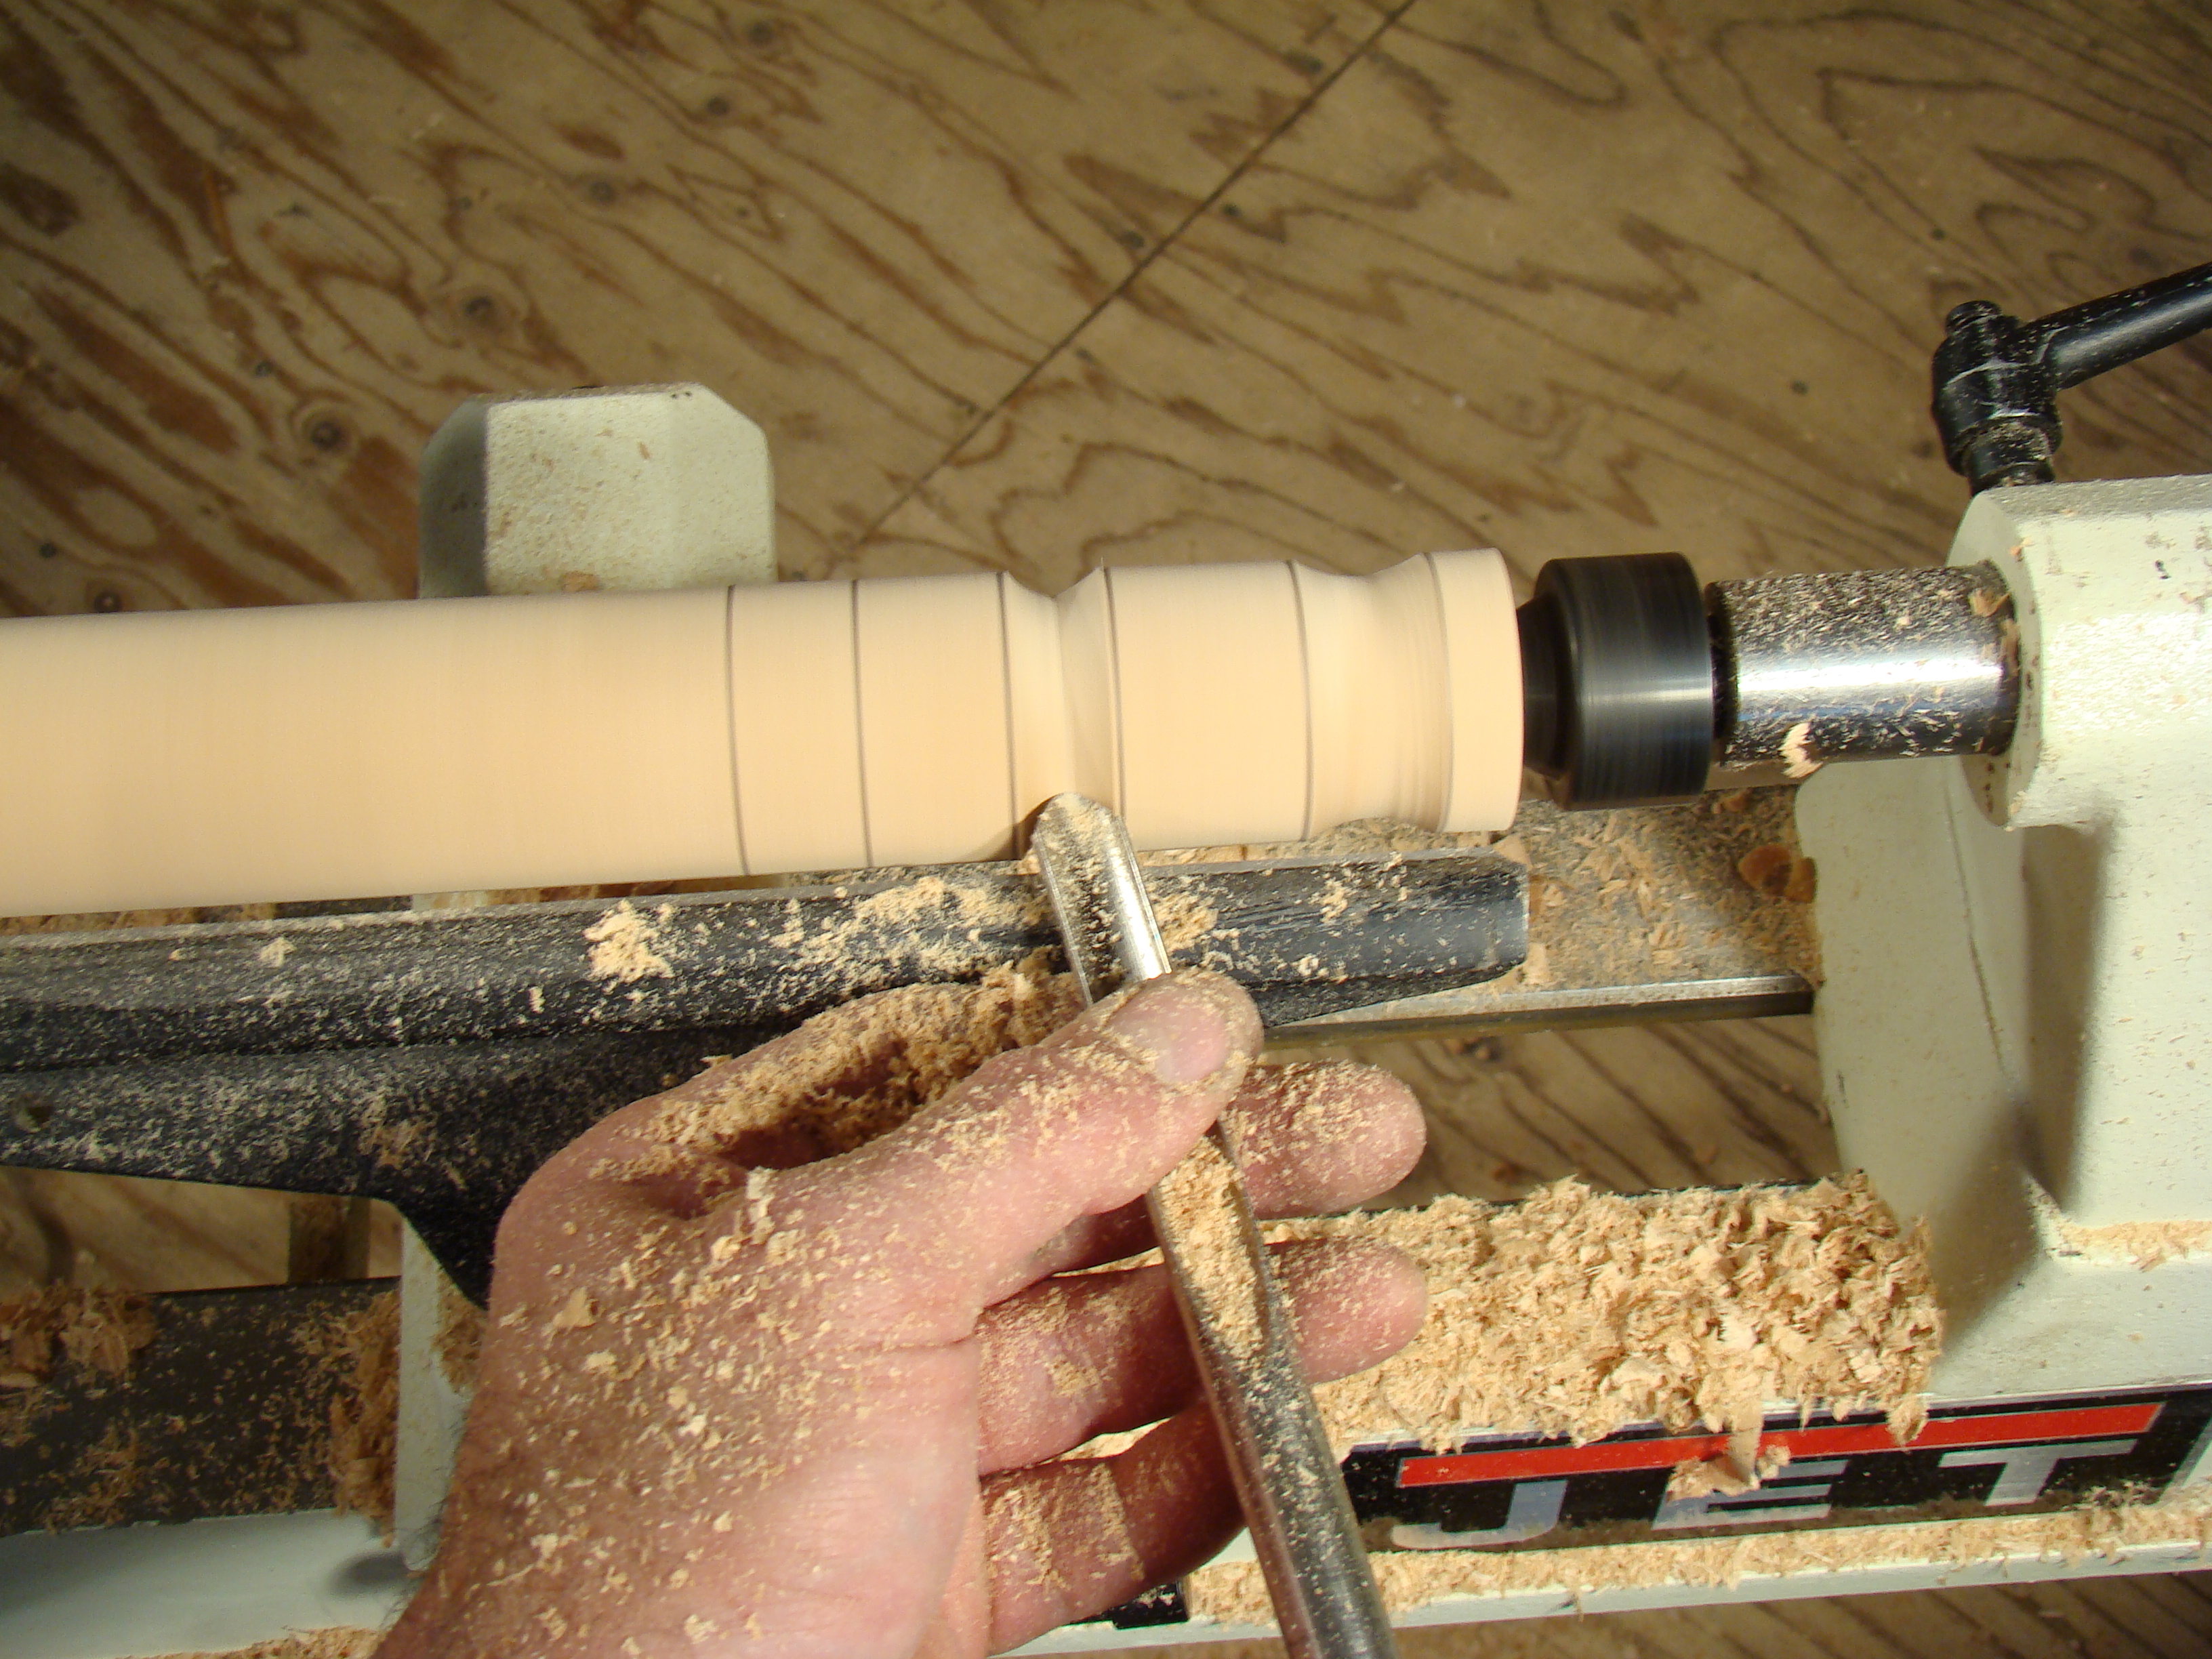
A narrower gouge will allow you to cut narrow and deep coves (Photo 15).
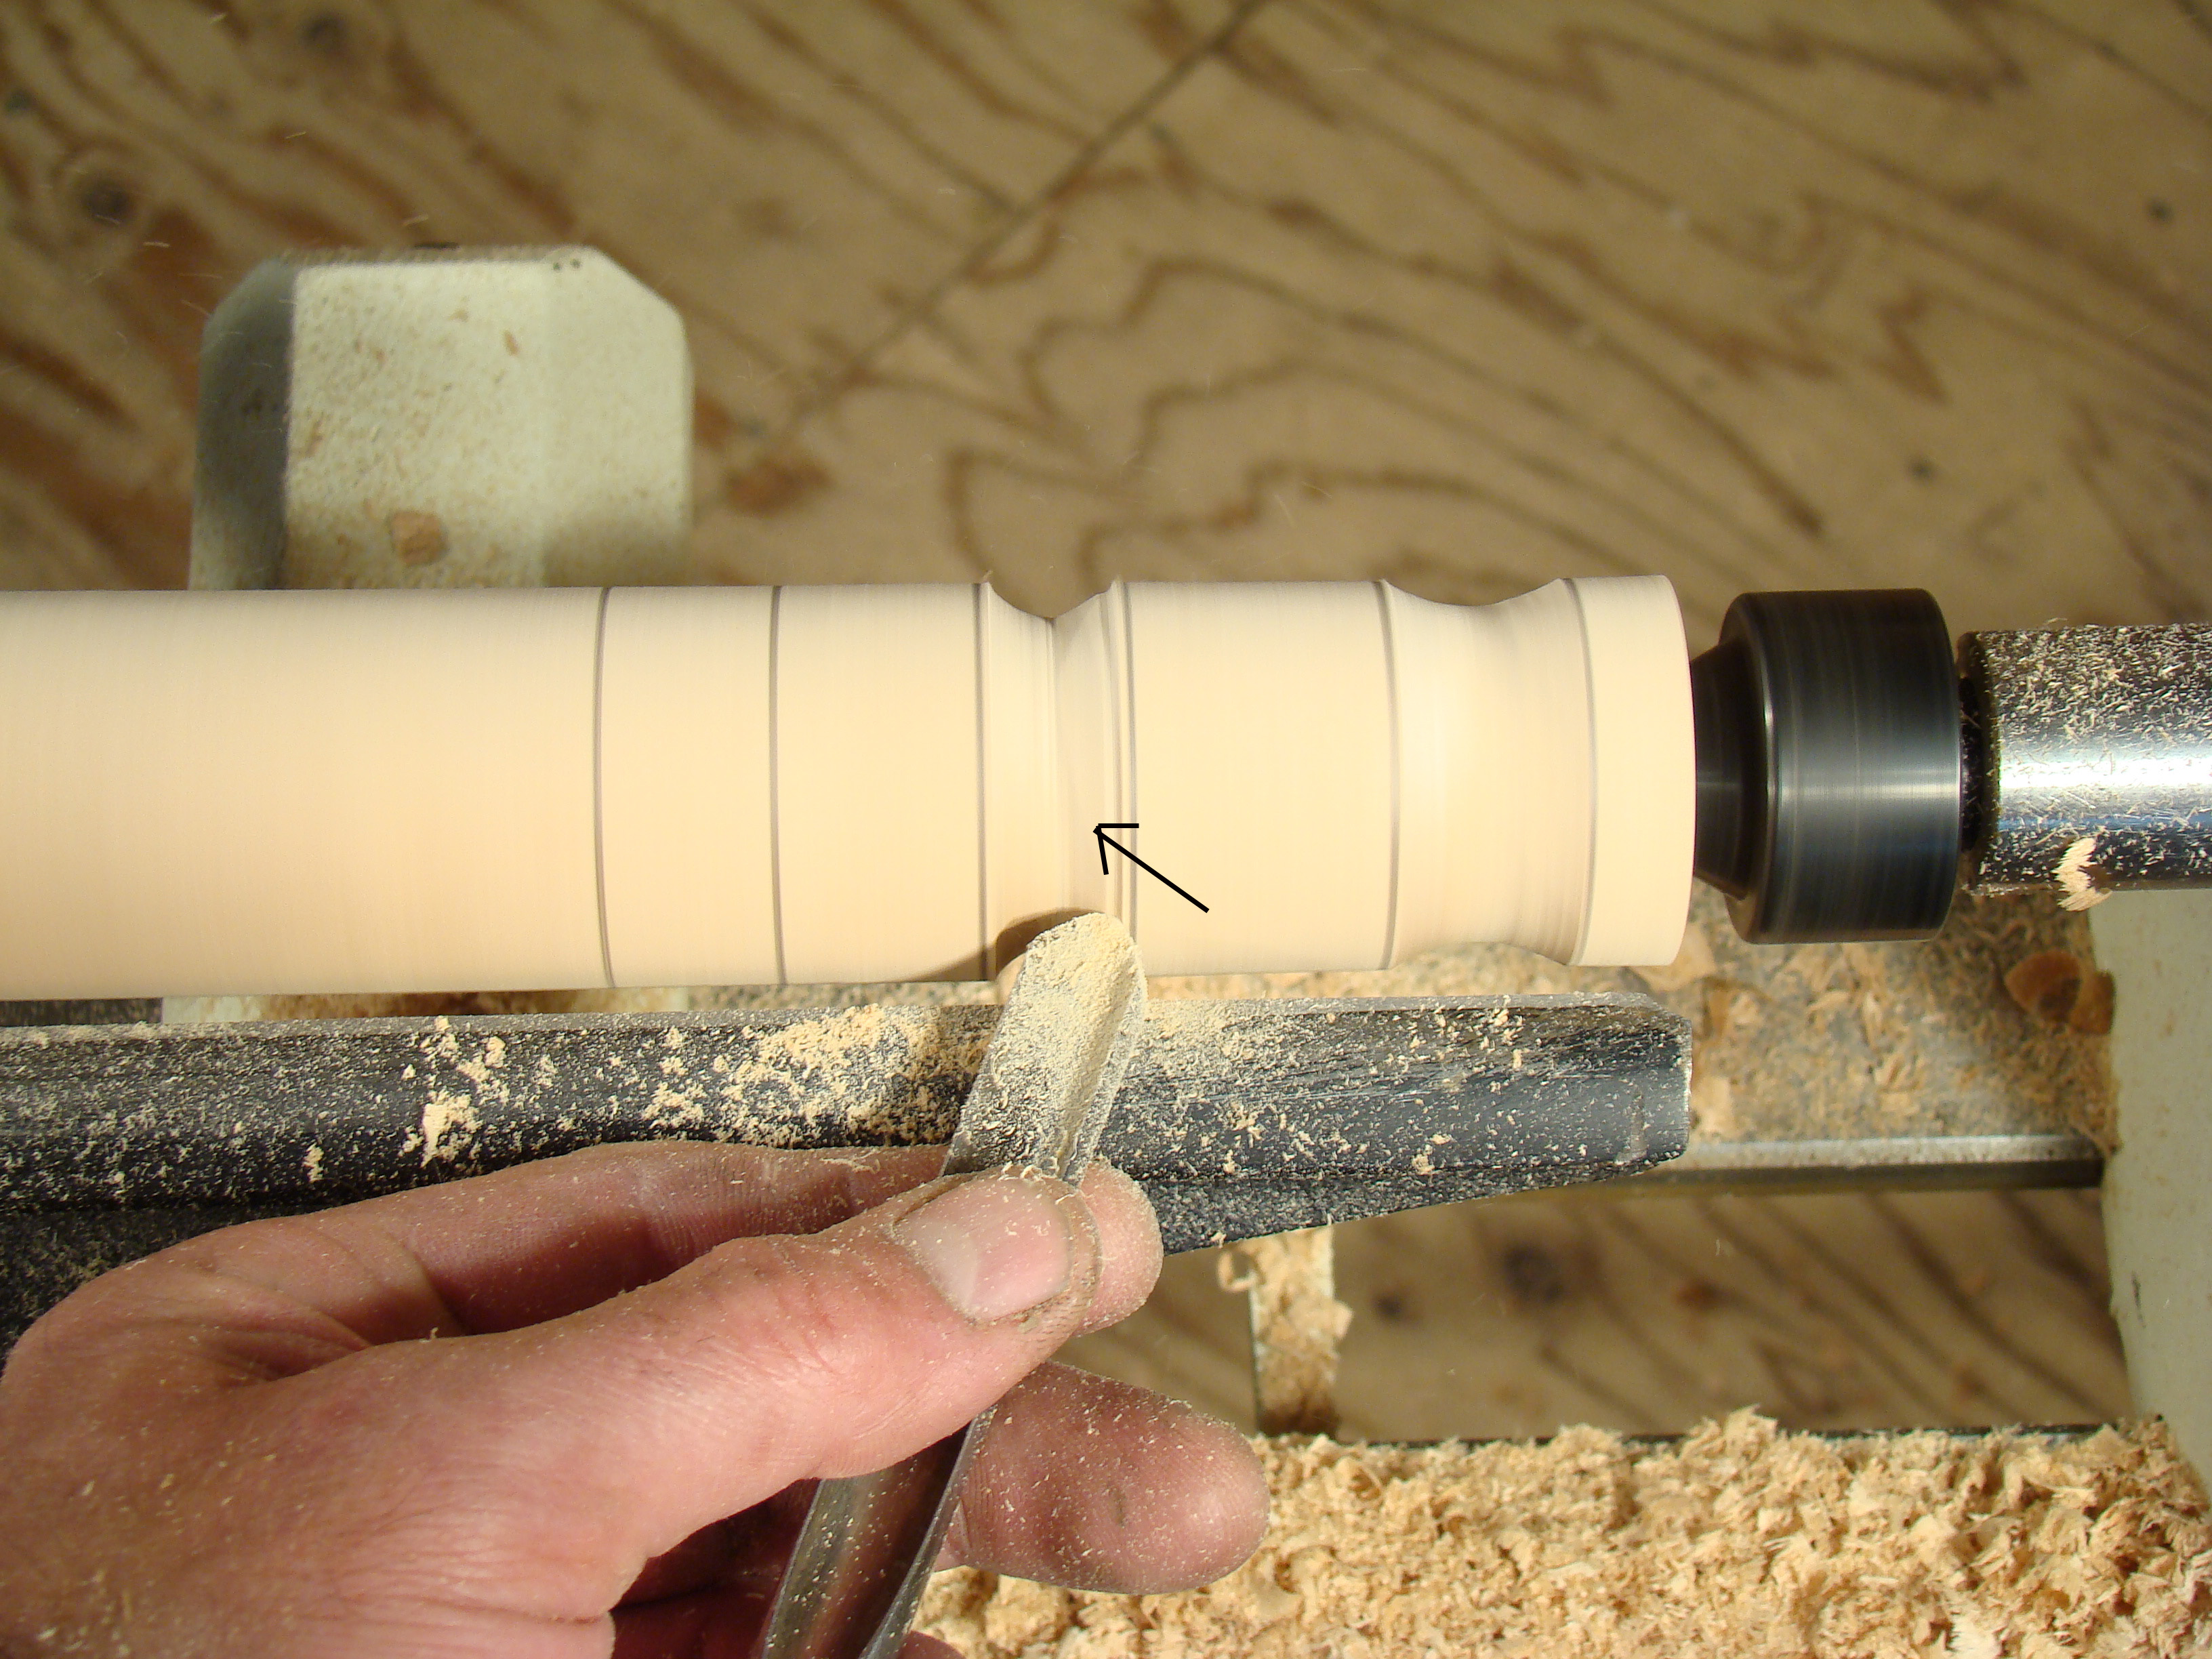
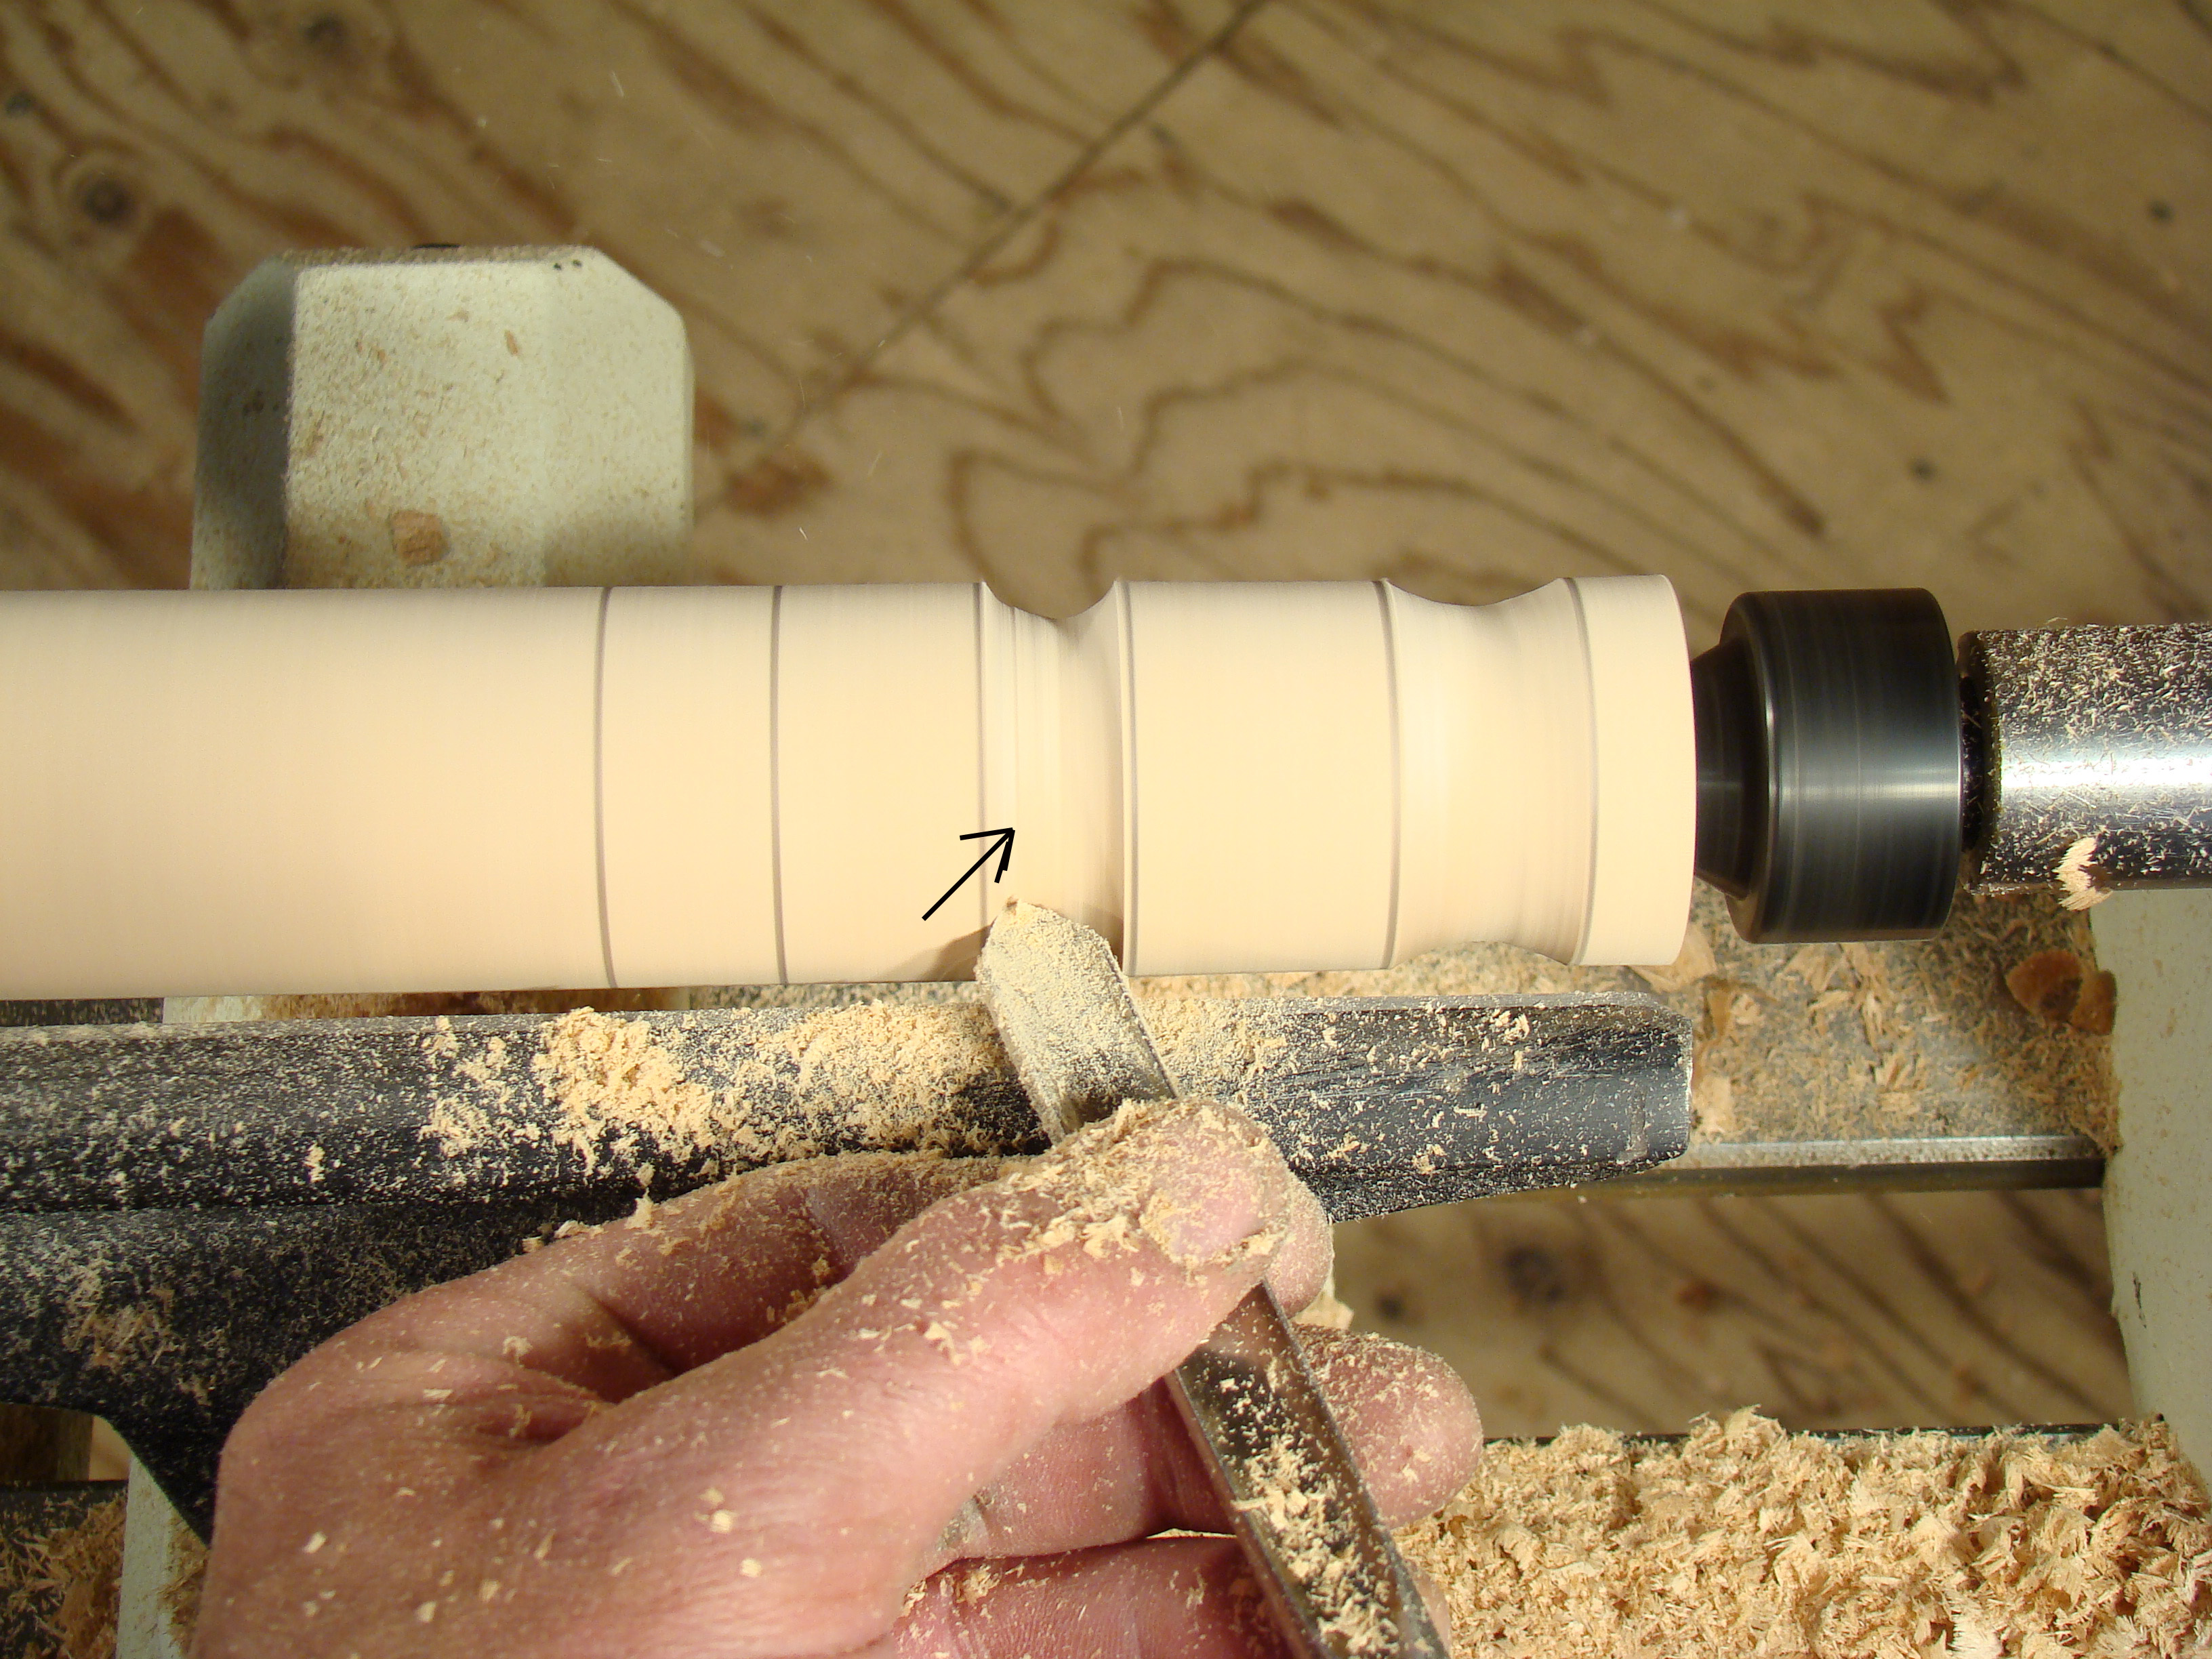
You’ll get the best surface inside your coves (that means less sanding) by cutting downhill, from the large diameter of the cylinder to the smaller diameter at the bottom of the cove. Cut from the left and the right, making the cuts meet in the bottom of the cove (Photos 16a and 16b).
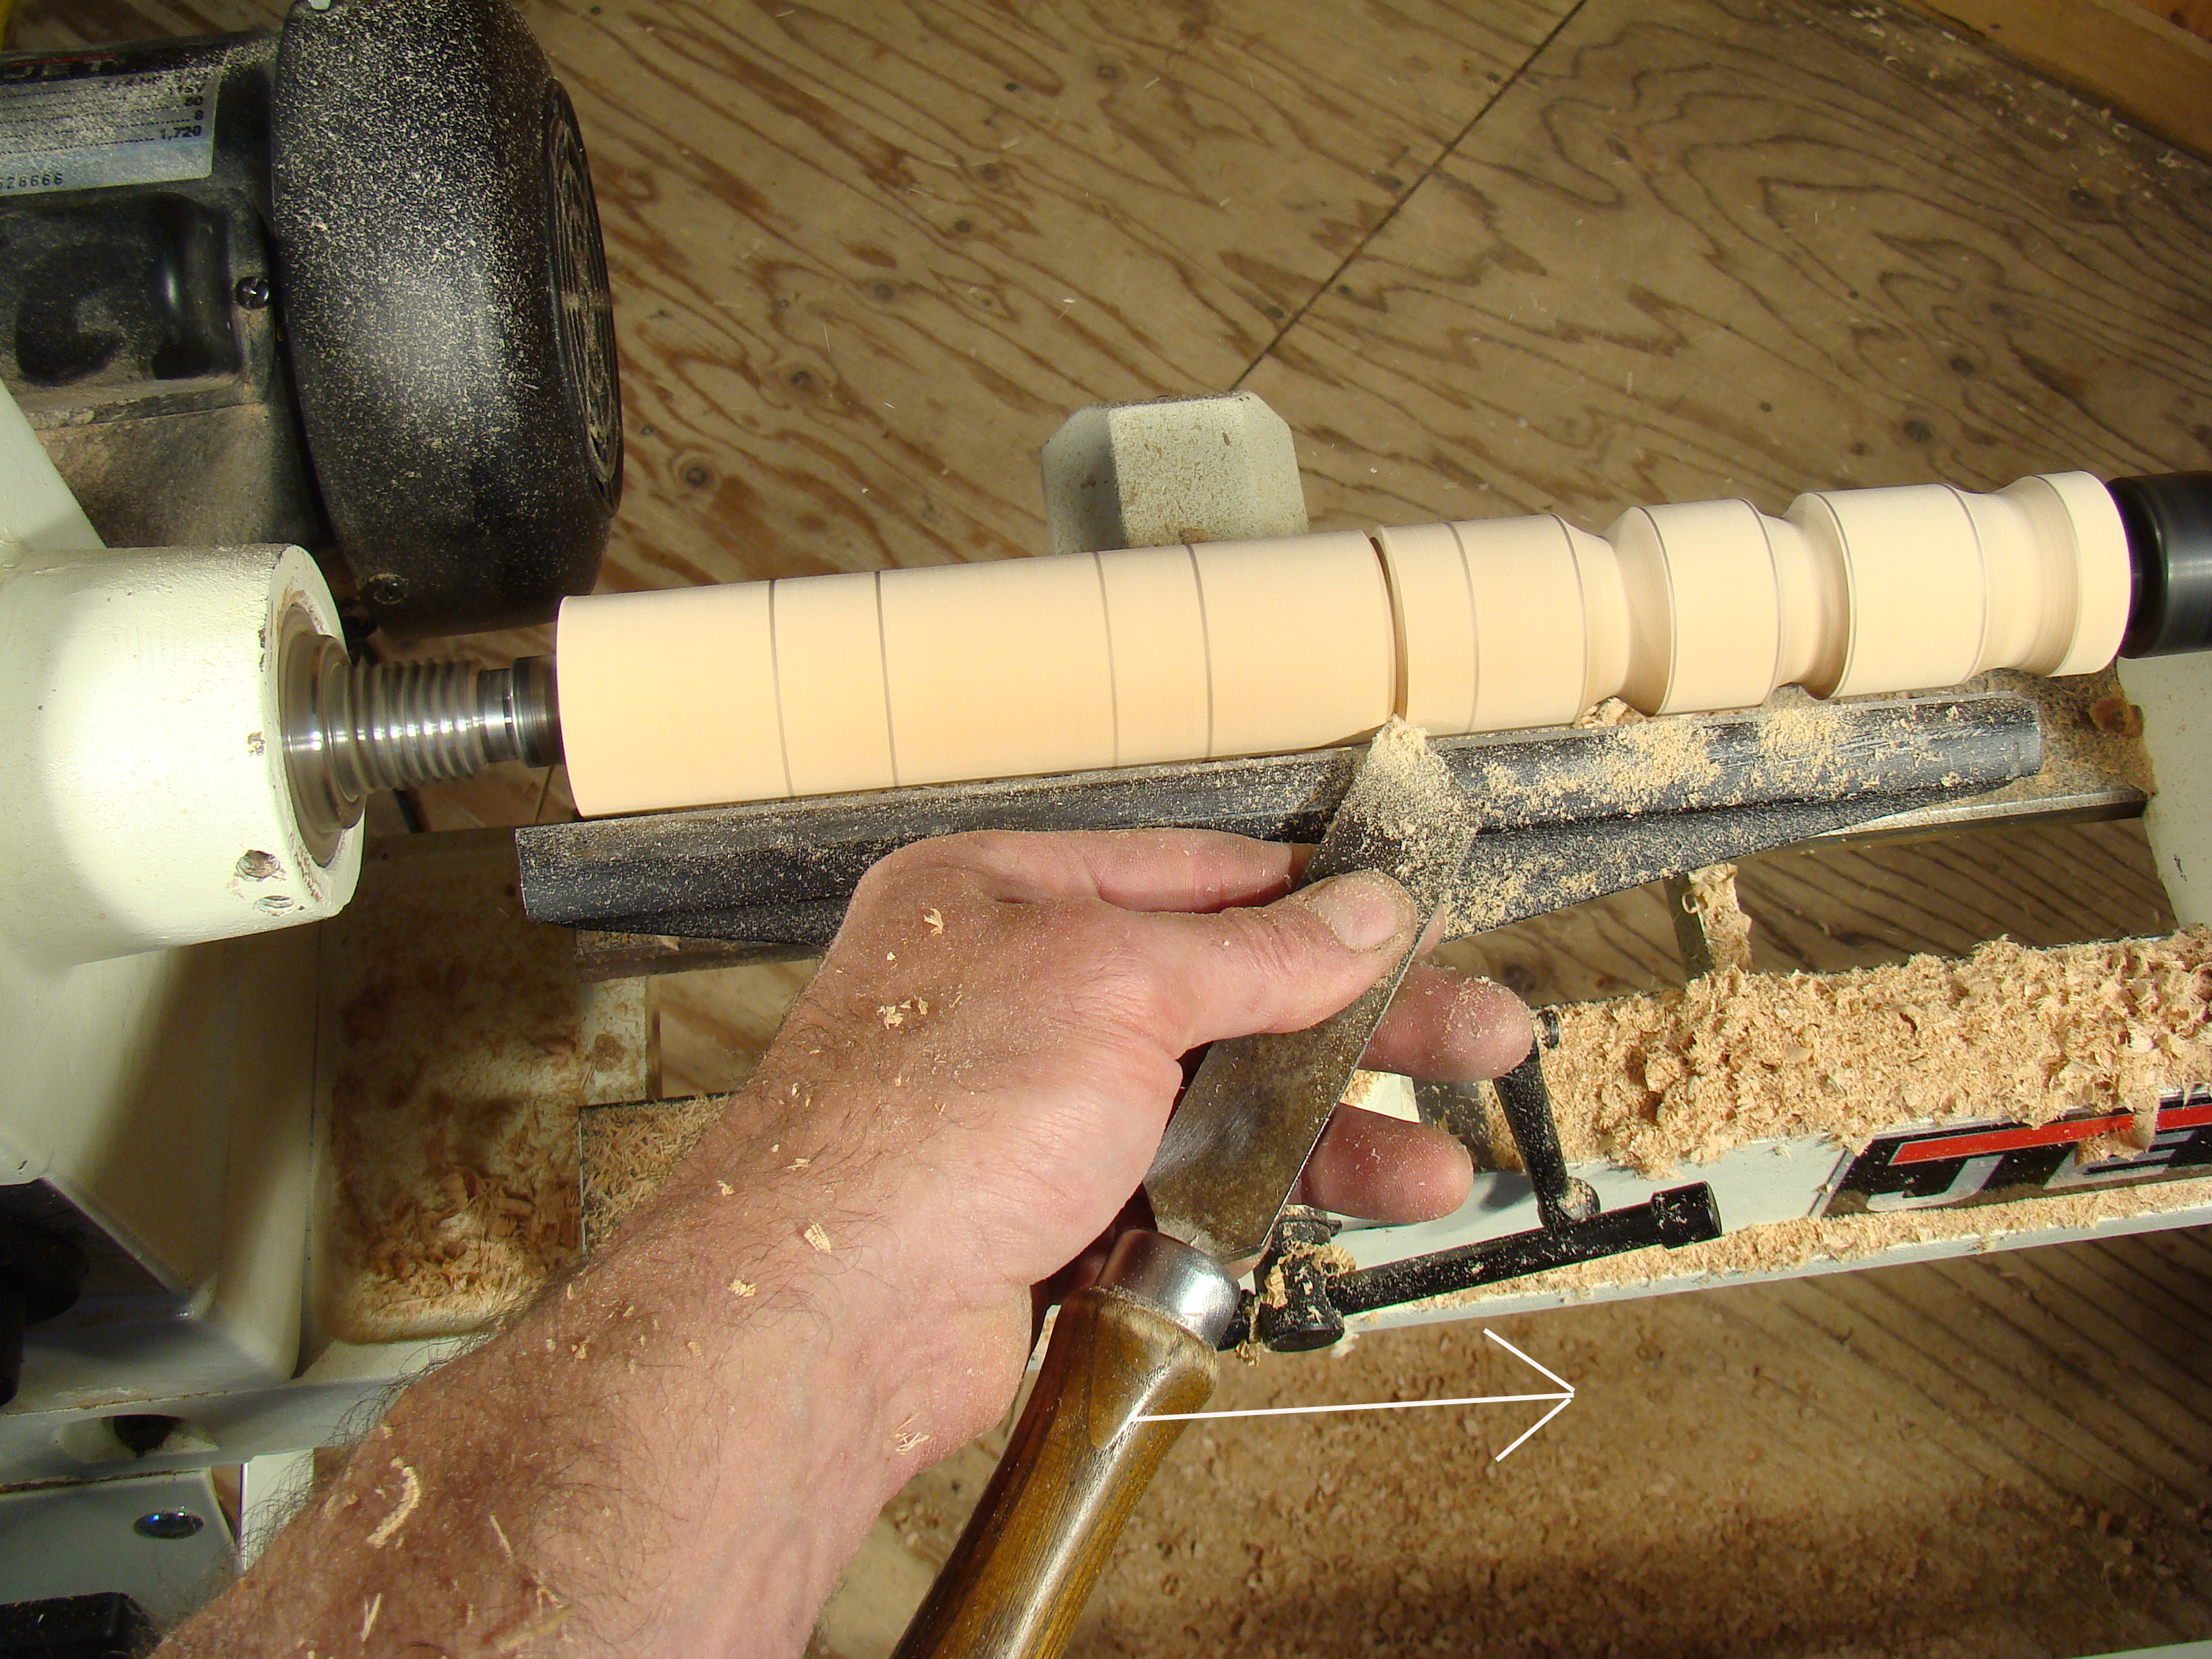
Mark out some more lines you can use for cutting beads. Beads are convex surfaces. Start by probing the point of the skew into the pencil line on the left side of a bead (Photo 17). The cutting edge of the tool should face the direction in which you want the bead to form. Form half a bead by pivoting the handle to the right without allowing the tip of the chisel to move laterally.
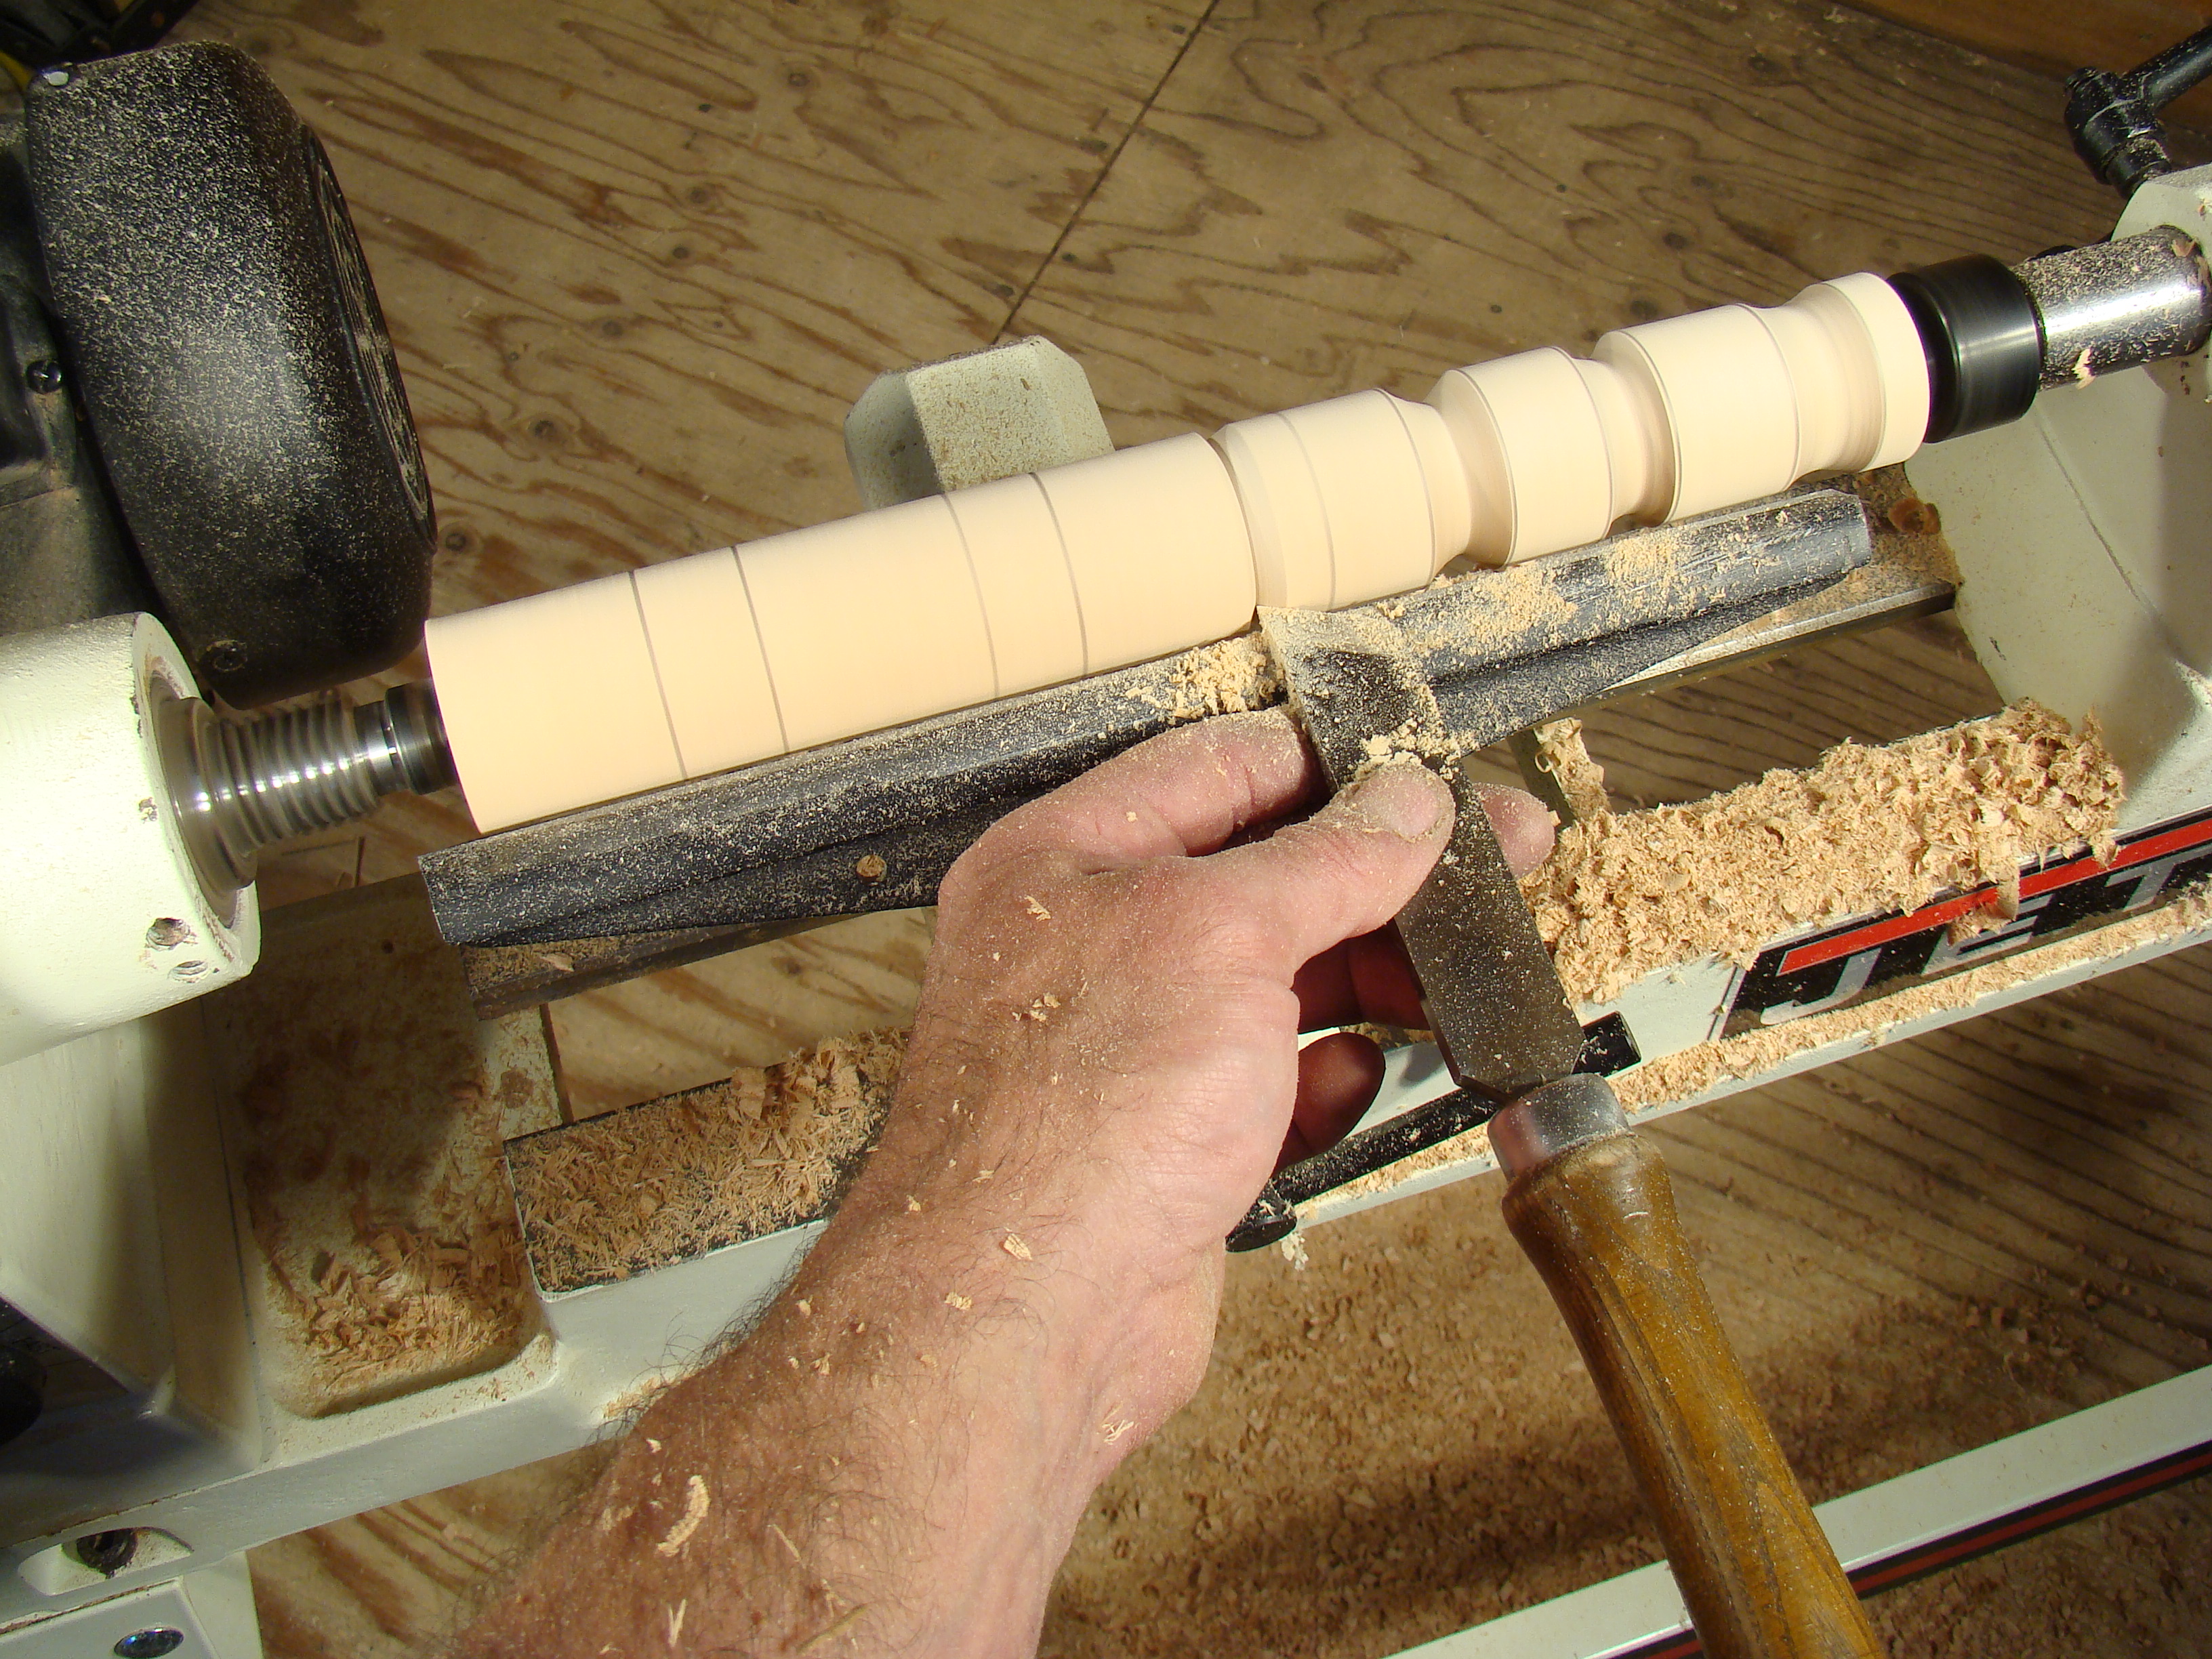
End with the chisel handle 90-degrees to the axis of the spindle (Photo 18).
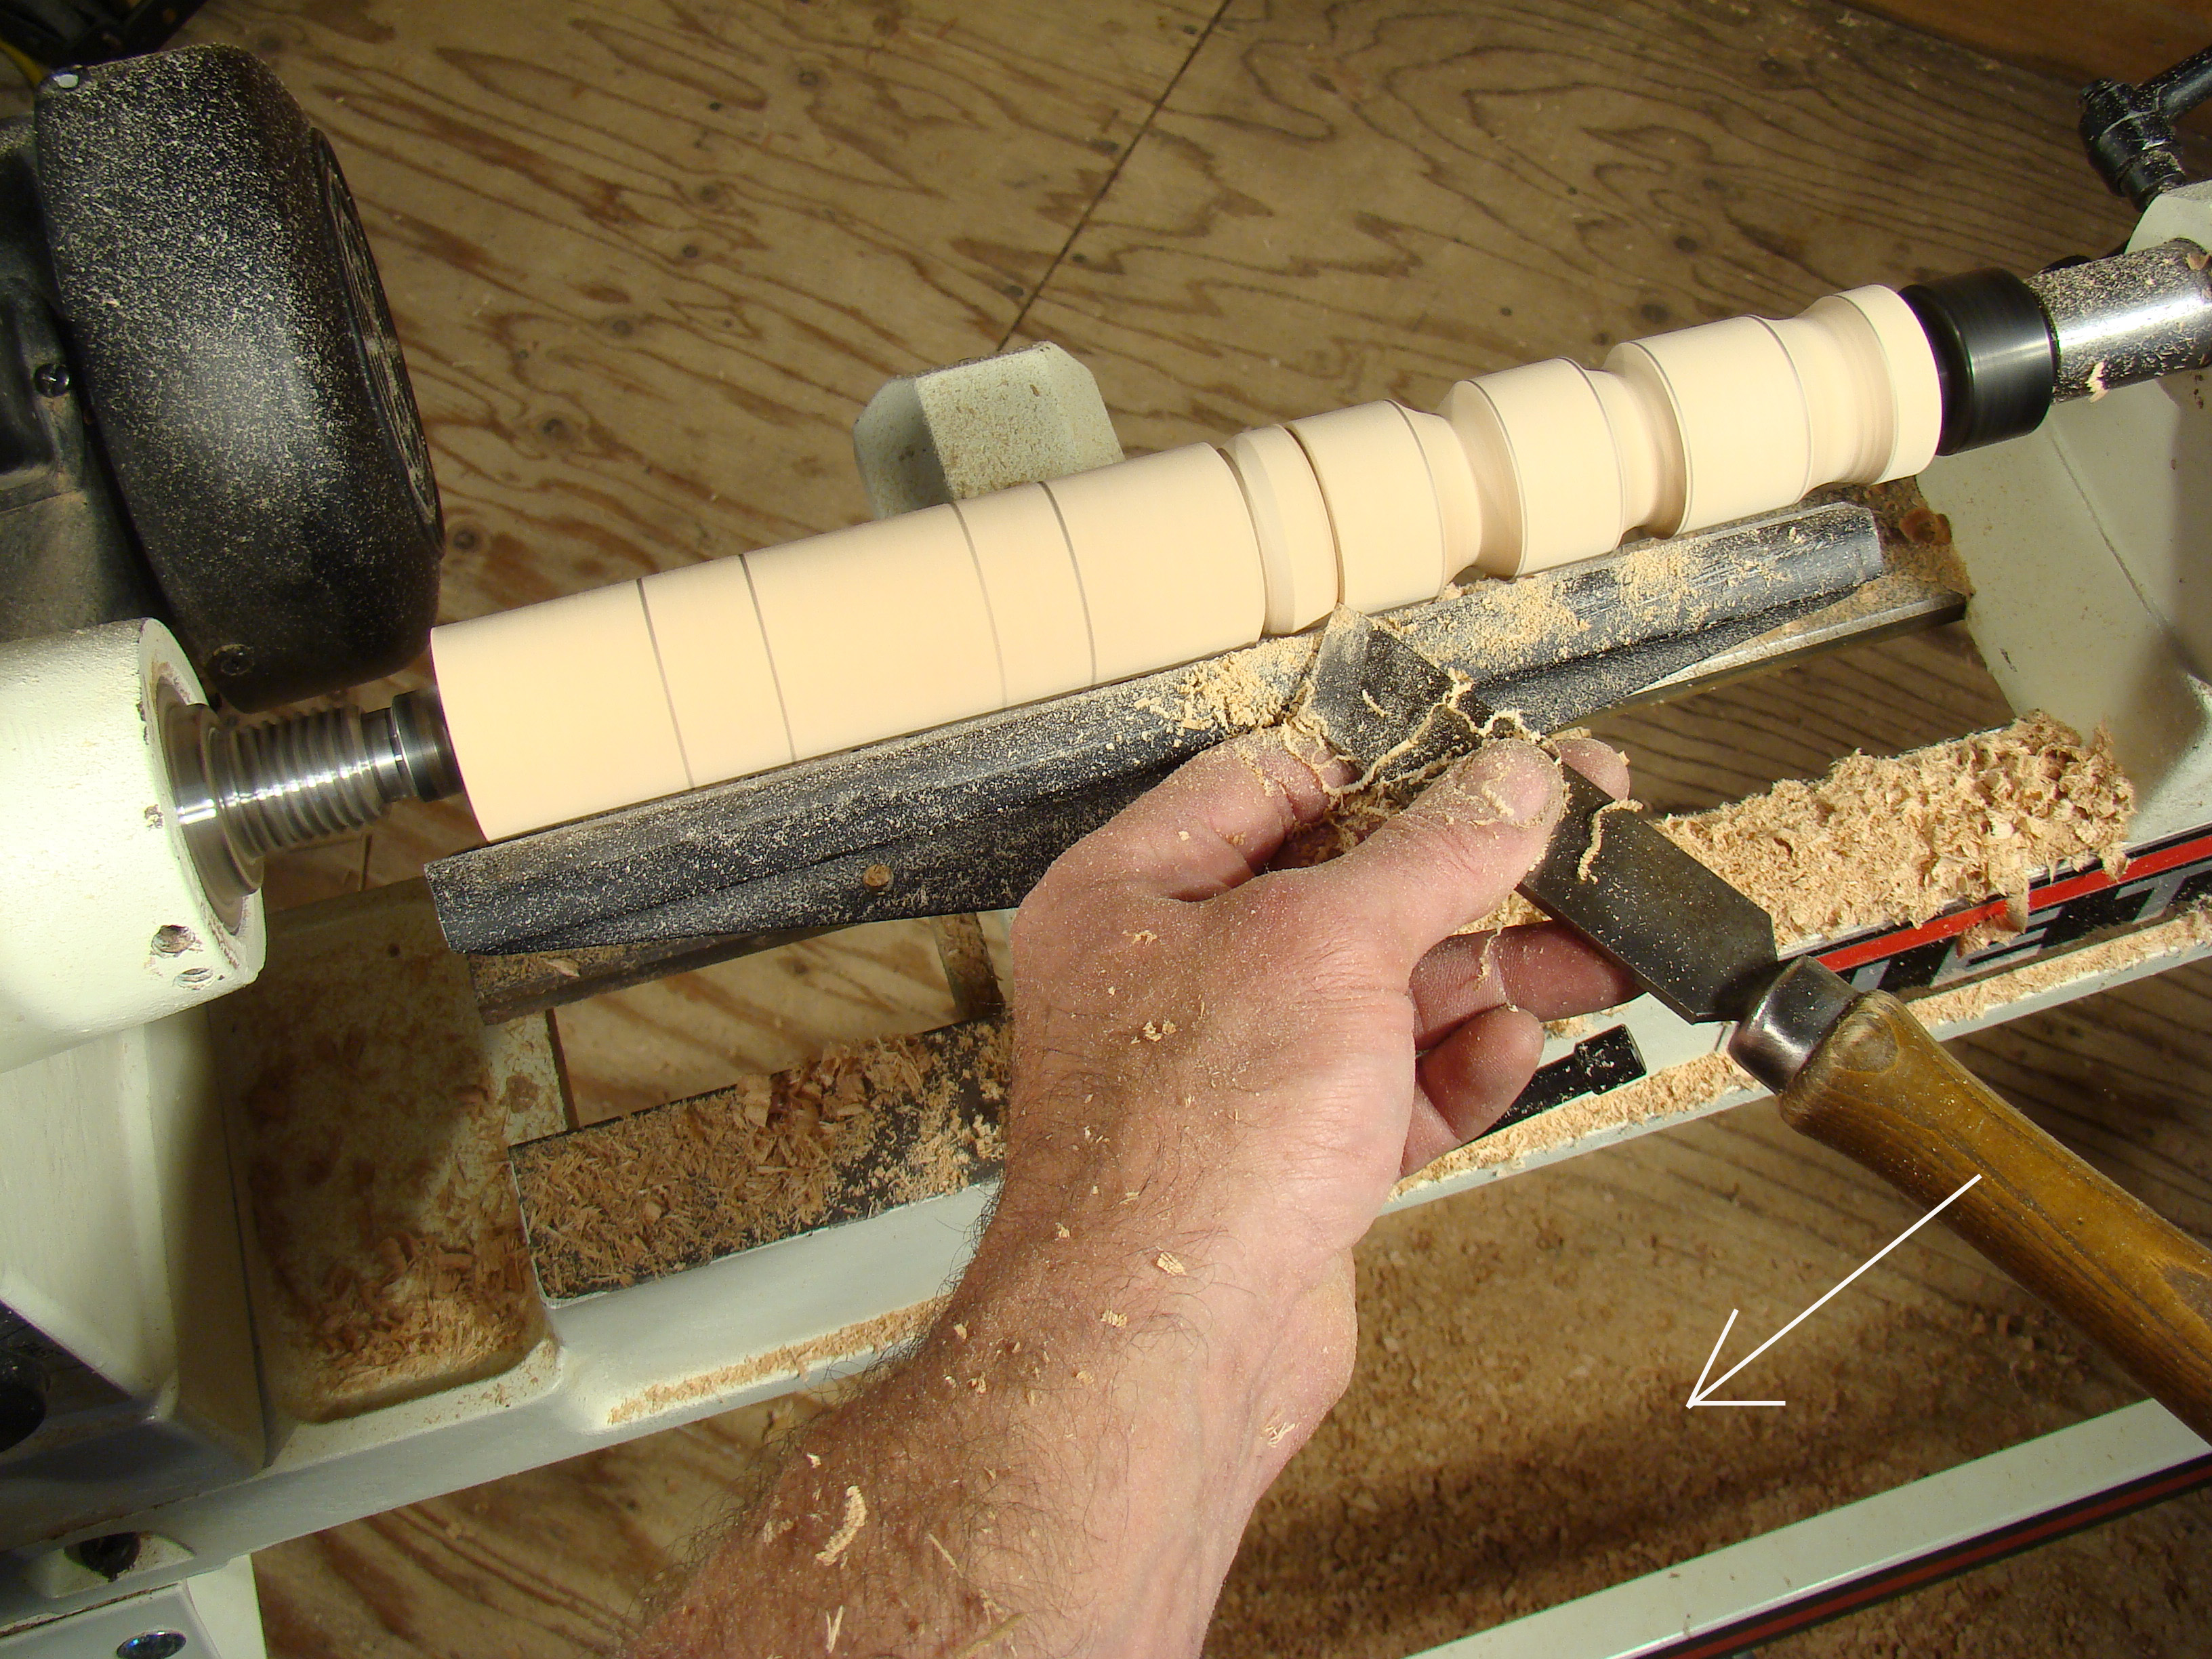
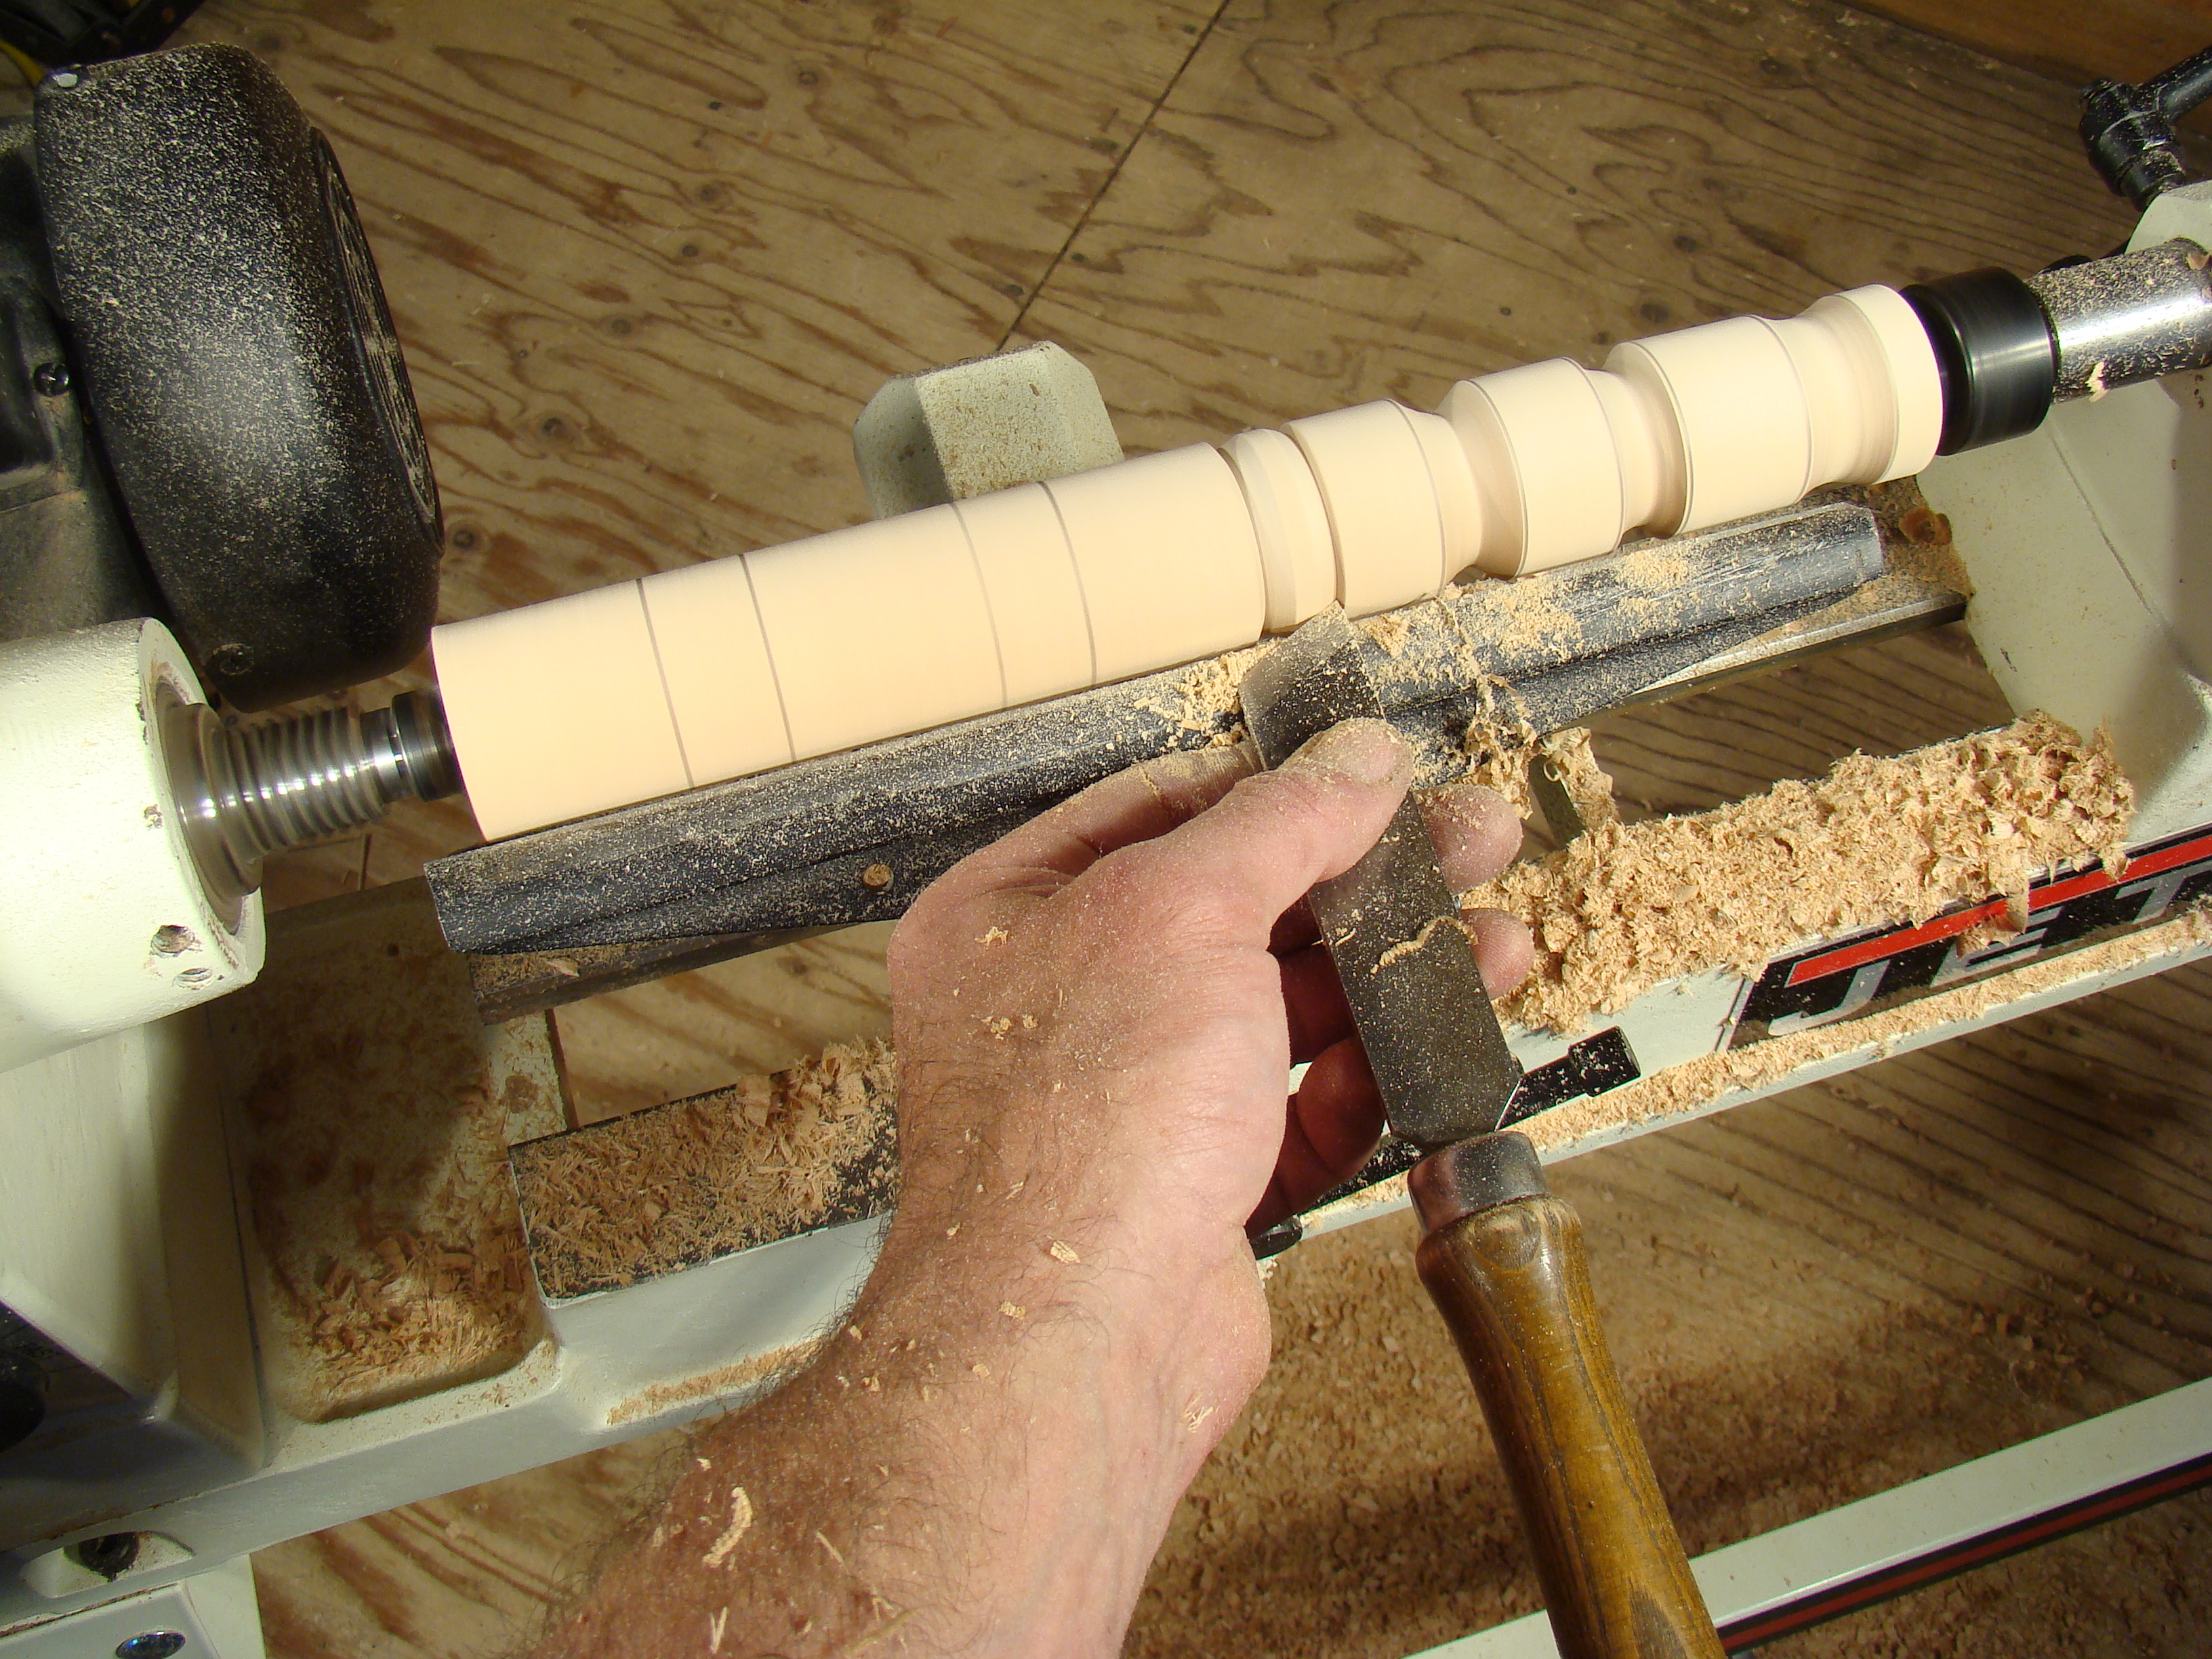
Repeat the process for the right side of the bead (Photos 19a and 19b).
Turning takes practice. The cuts you’re making are freehand, and it’ll take your hands a while to master the motions. Plan on mounting and turning some practice blanks that are nothing more than kindling when you’re done.A warning! turning is addictive. Once you’re comfortable with it you’ll be looking for chances to make chips in your shop.
What type of turning articles would you like to see? Email us at editor@wwgoa.com and let us know!
Photos By Author
I am just starting wood turning. The roughing gouge is sharp. I am finding rings from the gouge. Speed is 850 ona2x2 poplar 17in piece. Is this normal a is just a matter of clean up with a skew?
would like to know how to turn and tapered and fluted spindle
This is very helpful. I have notice on spindles many times besides the coves and beads there are other shapes as well. They tend to be in the center of the spindle and one end is wider and gradually becomes thinner. It is almost like a cone shape. What is the best way to get this done? Thanks.
Very useful! Thank you!
Would love to see this done with carbide tools and how to work the same spindle with the carbide tools.
Great can't wait to get started
why do you suggest a speed of 750 rpm for a 4" blank when all formulas indicate almost double this?
Thanks for the down to earth language and making turning techniques accessible to anyone who can read.