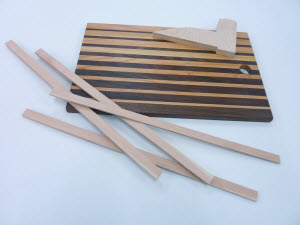
 Ripping thin strips of wood on a table saw can be a hair-raising activity, and doing so without a sound approach can lead to, well, really bad things. The goal in setting up for ripping strips is to ensure safe operations while maintaining efficiency. The challenge is that there is dangerously little space between the saw blade and the fence, which can make it difficult to adequately control the work piece. If not executed flawlessly risks include kickback, or human contact with a spinning blade; both bad scenarios. My father and I have looked at many jigs, gadgets and techniques over the years that are designed for optimizing this operation, and we wanted to share a few that still get used in our shops.
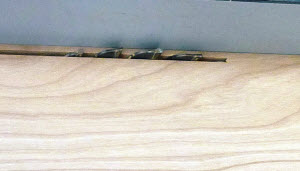 Blade Height. Before looking at the various approaches, it is important to address blade height. In general, the height of a blade above the work piece is a highly debated topic, but whatever your preferences for most table saw operations, I encourage you to keep it low when you are ripping thin strips. In the event that something goes wrong when you hand is that close to the blade, you want as little spinning carbide exposed as possible. The ideal setup positions the bottom of the saw tooth gullet just proud of the material being cut, allowing proper cooling of the blade and clearing of sawdust, while minimizing blade exposure during the cut.
Let's look at a few options for ripping strips: Pushsticks. This might be considered the "old faithful" approach, and it works well in a number of scenarios. There are numerous different designs for push sticks, and it is important to note the differences and choose one that makes you the most confident and comfortable while using them.
 "Trailers". Some push sticks are designed to trail completely behind the board as it runs through the saw. The advantage here is that your fingers are nowhere near the blade as it is cutting the material, which reduces the risk of a blade contact injury.
 Marginal Control. What concerns me about this design, however, is the lack of control that you have over the board in terms of holding it down against the table as it passes the blade. If the board binds even slightly between the blade and fence, you are in a poor position to mitigate a potential kick. Given this general feeling of marginal control, I give a thumbs-down to this design.
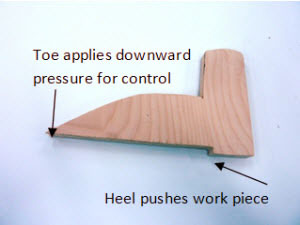 Push Shoe. Another push stick design features the look of a shoe, with the heel of the shoe pulling the board through the cut. This type of push stick positions your hand above the board that is being cut, applying downward pressure to hold it steady in the event of minor binding. The toe of the shoe also extends several includes out onto the board, applying greater leverage and pressure closer to the back of the blade which is where kickback begins. I like this design a lot. One downside to any push stick design, however, is that you will need to remove your blade guard when ripping thin strips. I know that some woodworkers shun the use of blade guards, but I prefer to use mine whenever possible.
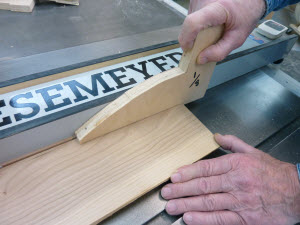 Using a Push Shoe. This is as simple as it seems. Hold the work piece to the fence behind the blade as you normally would, and push the board through the blade with steady pressure. Follow through past the blade, or for rips that are more narrow than the width of your push stick, the bottom of push stick will pass right through the spinning blade.
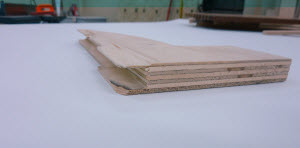 Wearing Out Your Shoes. If you rip a lot of strips that are narrower than your push stick, you can quickly wear out the heel of the shoe. Once this gets too thin it becomes unsafe, and time to replace the push shoe.
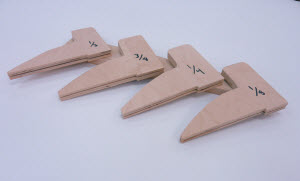 Vern's Solution. My father was wearing out push shoes at a fast clip, when he decided to take a slightly different approach. He now keeps one push shoe on hand for each size rip that he commonly makes in his cutting board production; 1/8", 1/4", 3/8", and 1/2". Now, he uses the push stick designated for the size strip he is ripping, which means that only a small kerf is removed from the shoe, and the push shoes last much longer before needing replacing. When it does become time to make some new push shoes, he makes a large batch of them at one time and he likes to keep a few spares on hand. The idea is that you never want to take a shortcut because you are in a hurry or can't find the right tool or jig to perform the ripping operation safely.
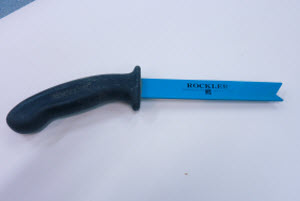
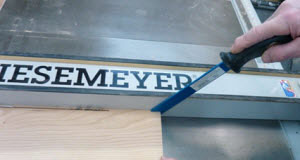
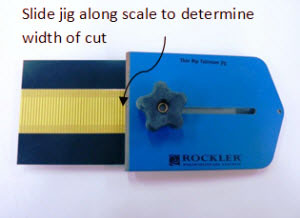 "Thin Rip Table Saw Jig". This jig cleverly places the thin strip to the left of the saw blade, so that it won't bind between the fence and blade. Depending upon the overall size of the board you are ripping, this may allow you to perform the operation with your blade guard in place which is a huge advantage.
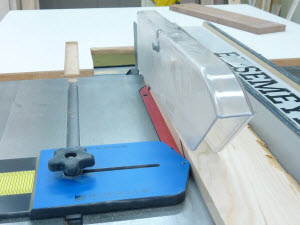 Using the Jig. Zero the jig out by sliding it to your blade, then back it off from the blade the same distance as the width of strip you would like to rip. There is a measure scale on the jig itself, but we found it difficult to read so we used a tape measure. The downside to using this jig is that if you are cutting multiple rips of the same width, you will need to adjust the fence each time. Depending upon the level of precision required for your rip, this may be problematic, and even if that is not a factor, this is a hassle if you are doing any volume of thin rips. This jig is well made and easy to use, however, so I give it a thumbs up for periodic use.
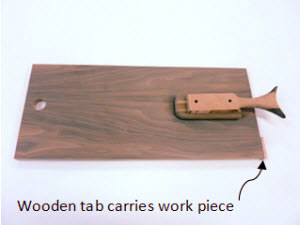 Shop-made Sled. This is a simple but ingenious design. The sled rides between the fence and blade, and a small wooden tab at the rear of the sled pulls the work piece through the cut. The sled is made to be an even 10" wide, so setting the fence is simple. For example, to rip a 3/8" wide strip, set the fence at 10-3/8", and you are ready to rip as many identical strips as you would like without further configuration.
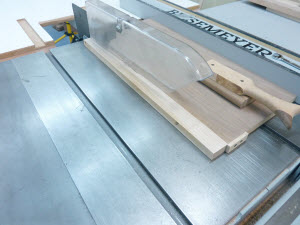 Using the Blade guard. Like the Rockler jig, this jig also supports use of the blade guard for any width of strip. I like many aspects of this jig and use it quite regularly for ripping small batches of strips. For larger production runs, the size and weight of the jig slow down operations slightly, and in that scenario I commonly switch to a push shoe.
Conclusions:
The most important thing in ripping thin strips is to have a plan in place before the need arises so that you are not tempted to try something quick but dangerous when facing this situation. Find the right approach for you, get comfortable with it, and use it with confidence. All of these approaches are proven, and have various strengths and weaknesses that might make any of them your best option.
Source:
Rockler Thin Rip Tablesaw Jig, $24.99
Rockler Woodworking and Hardware
800-279-4441

The MicroJig Grrr-ripper push block makes trivially simple - and safe - work of ripping thin strips.
If the strips don't need to be too long, I put a block of wood against the fence and adjust the distance between the flock and blade to the thickness of the strip. then position the block against the fence and in front of the blade. The source piece for the strips is the fit up against the block and you push it through the blade using the miter gauge. The strips fall safely to the side of the blade when the cut is finished. Return, repeat until you have enough or the source is to thin to be pushed with the miter gauge. I have used a hooked block to push the too thin source through to get most of the rest of the source.
I like the idea of a jig to help make thin strips, but unless I'm missing something, this isn't gonna work when one is trying to rip long strips, like 36 - 40 inches. It would take a pretty long jig to accomplish that. Am I looking at this wrong? Jim