 Tips To Help You Prep And Handle Big SlabsI take advantage of the ample supply of hardwoods that surround my old farmstead here in western Wisconsin. I focus primarily on fallen trees or ones that are slated for removal. I built a solar kiln to dry the lumber and my barn is ideal for storage.
I cut the log to preserve my options for future use. So, my tendency is to cut thick, wide slabs that can be used as is or cut up into smaller boards. Large pieces of wood leave me with lots of options but it also means I have some pretty hefty slabs to deal with.
I’ll show you some of the tricks I use to get the most from my wood while preserving my back. Chances are you already have most of the tools you need to tame those giant slabs of wood.When it comes to harvesting the wood and stacking it for drying, I always have a helper. The green wood is just too heavy for one person. Ideally I’ll also get some help stacking the dried wood on my assembly bench. But once the wood is in my shop, I’m typically on my own. I always sticker the wood on my bench and let it acclimate to my heated shop for a few days before I begin. This is especially important in the dry winter months. My assembly bench acts as my staging area where I can easily move the wood from my bench to a pair of low sawhorses for the prep work.

 Moving Log SlabsI limit my lifting of heavy stock to half a slab at a time. I lift one end off the stack off my bench and onto the sawhorse.
 Next, I move the other end of the slab from the stack to the sawhorses. While it is possible to lift the entire slab at once, I’ve found that taking the time to break the move into two steps never leaves me with a sore back or strained muscles.
 Walk your big slabs when you need to move them around the shop. From my bench, I set one end of the slab on the floor, and then stand the slab vertically. Keeping the slab balanced I’ll tip it up on one corner and rotate the other corner in the direction I want to move the slab.
 Now I pivot the opposite corner and continue to walk the wood where I want it to go.
 I call this The Big Wood Two-Step.
Preparation
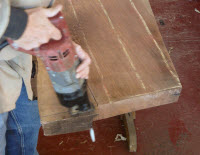
Clean the slab with an electric hand plane for a better view of the grain. It’s difficult to read the grain when the surface is rough, stained and dirty. With a clear view of the slab I can properly plan the cuts to maximize the yield from each slab.
Map out the boards you want before you cut. In this case I need a pair of stout legs for a headboard design. I spend a fair amount of time mapping out each board with a piece of chalk and a straight edge to get the best looking boards I can. Chalk makes it easy to try different layouts. A stiff bristle brush works great as an eraser. For longer cuts I’ll often use a carpenter’s chalk box and snap a line. Note how the layout for the legs avoids the end checks and sapwood in the slab while it parallels the grain.
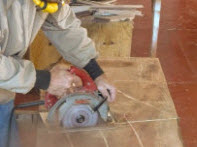
 Cutting Log Slabs A circular saw cross cuts the slab where the boards end. I’ll save the off cut for some other project.
 This slab was too thick for my circular saw to cut all the way through. A reciprocating saw makes quick work of finishing the cut. You may be tempted to use the reciprocating saw for the whole cut, but believe me, the circular saw is much faster.
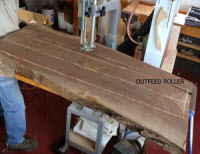
 Next, I head to the bandsaw for the rip cuts. Even though it’s been cut down substantially from its original size, the slab is still big and heavy. An outfeed roller is a must to help support the slab through the cut. Sometimes, the slab is too big for me to handle comfortably on the bandsaw. In that case, I’ll go ahead and do the rip cuts with my circular saw as well.
See how I used this technique in my Slabwood Nesting Tables project.
Photos By Author
Related Videos:
does anyone know where I can level out a raw wood slab?