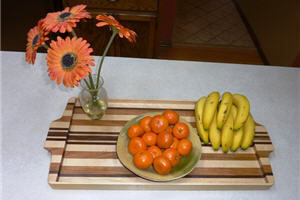
 Delight your friend or significant other by building this artisan serving tray for them, featuring contrasting hardwoods for stunning beauty, graceful curves, large convenient handles, and a solid feel that will make this tray a great conversation piece at any party, as well as an instant family heirloom. You will find a couple of pleasant surprises with this adaptation of a classic design. Recessed trays of this style are generally constructed by plowing out large volumes of wood with a router, which is both wasteful of expensive hardwood resources, as well as extremely messy in your shop. This version features sides that are ‘built up’, which is a more economical and pleasant approach. Secondly, the delicate sculpting of the handles is reduced to two easy steps using a dado blade on a table saw, followed by series of simple cuts with a handheld jig saw.
 Start by selecting straight, stable defect free stock. This panel is required to sit flat and any stress contained in the stock will cause noticeable warping and twisting of the completed serving tray. Also,small projects like this are a great opportunity to utilize those special off cuts that you just couldn’t throw away after previous projects. We generally build these trays with a combination of maple, walnut and cherry, but you can choose whatever materials you find most appealing. Later in the article, we will describe a finishing alternative that will also allow you to use this piece as a cutting board. If you choose that option, be sure to use stock that is suitable for cutting boards, such as walnut, cherry, maple, birch, or other closed pore hardwoods. Woods such as oak and mahogany, are best avoided due to their open pores that can trap food particles and collect bacteria.
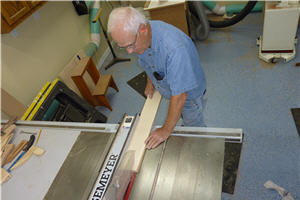
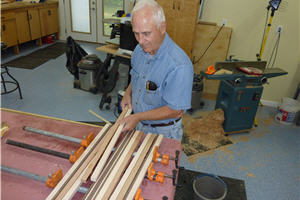 Rip the strips for the tray. The blanks for the strips should be cut to a length of 30?. Plane all stock to a consistent thickness. We generally like to bring the stock to about 3/4? at this phase. Rip into strips. The width of your strips is largely a matter of artistic preference. We generally cut most of the strips to 1? widths, with some more narrow for pattern variation. The walnut strips pictured in this article are 1/4? wide, while the maple and cherry strips are 1? wide.
 Lay out the pattern. One of the more exciting aspects of this project is designing the arrangement of your contrasting wood strips with your own artistic expression. If you are careful when ripping, and you have a good blade and proper setup on your table saw, you may be able to avoid running the pieces through a jointer. But if you see any gaps when laying out the boards, run the identified pieces through the jointer or planer to create gap-free glue lines.
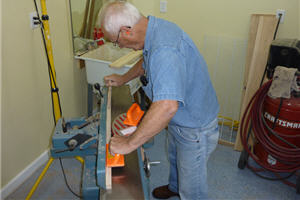 Joint the edges that need it. When jointing, be sure to use safety gear. Push blocks are essential when passing small stock through your jointer.
Now you are ready to glue up the panel. Make sure that you are well prepared before applying any glue. This glue-up is deceptively tricky because of the number of glue joints you will create. Be sure to use a glue that offers adequate open time and water resistance because the tray will likely be washed periodically. We use Titebond III, as it meets both of these requirements.
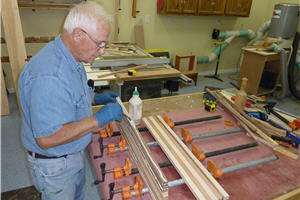 Glue up the panel using a glue brush or other device to spread an even coating of glue. Due to the large number of glue joints in this relatively small panel, proper glue coverage is critical, so apply liberally. We generally glue all of these pieces together in a single pass, but you might want to consider gluing up the panel in two stages and then jointing and gluing together the two half panels. This will allow you to complete the glue-up with lower stress on you and potentially save excess sanding or planing in subsequent steps, as you may be able to achieve a flatter panel by concentrating on fewer glue joints in a single glue-up. Let the glue set up in the clamps for a couple hours before removing. Depending on the temperature and humidity, you may be able to get away with removing clamps sooner. In general, more ‘bake time’ is better. You may choose to A: wipe the glue off with a damp rag while it is still wet or B: remove later with a paint scraper. Option A works well as long as you don’t flood the glue joint with too much water and option B works fine as long as you don’t wait too long and end up with fully cured glue that rips wood along with it when scraped. If you scrape the excess glue within six to eight hours, you should not have a problem. We usually wipe as much as we can with a wet rag and scrape the remainder from under each clamp after removing clamps.
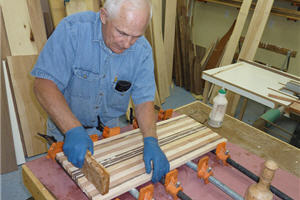 Force the panel flush at each clamp during glue-up. Tip: We have found it beneficial to start from one end of the panel, force each glue joint flush along the top, and then move to the next clamp. We generally use a mallet and a flat board to pound the panel down to the pipe and into alignment at each clamp. On your first pass through the clamps, it is beneficial to only tighten to about 75-80% of the final clamp tightness. Once all joints are flush and all clamps are partially tightened, go back and finish tightening. By waiting until that point to fully tighten the clamps, you allow the glue to set up just slightly and it minimizes the possibility of boards sliding out of alignment when the clamps are tightened. At the risk of spurring a long debate on this topic, we have found it works best to tighten the clamps solidly, but not strain for every last psi, as excessive pressure on the clamps can crush wood grain and can cause problems with the integrity of the panel.
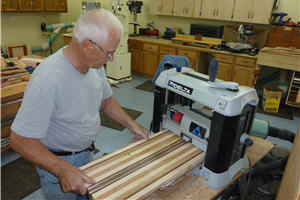 After scraping glue, run the panel through a planer or wide-belt sander, or alternatively flush the glue joints with a belt sander or hand plane. The flatness of the panel at the ends is extremely important, so pay close attention to this. If you use a belt sander, use caution to not tip the sander over the edge. If a planer is used, use light passes, and lock the cutting head if your planer is so equipped, so that sniping is kept to a minimum. This will allow for a better glue joint when the handle/rim pieces are glued on.
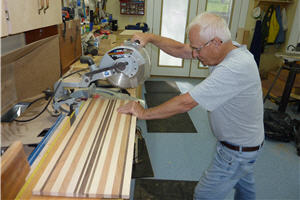 Trim the ends of the panel so that they are even and square. This can either be done on a table saw using a sled, or on a sliding compound miter saw or radial arm saw with sufficient blade travel.
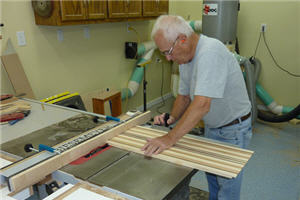 Next, machine the bottom profile for the handles. It is ideal to do this at this point because you will minimize your waste and be able to perform the operation more safely by keeping your dado blade lower. To do this, set up your table saw with a dado blade. The number of chippers is not critical, but we generally do this operation with the full set of chippers (at least 3/4? width), as this leads to the smoothest surface by making overlapping cuts in the rabbet– which means less sanding later. Set up a sacrificial fence on your table saw, as this operation will position the dado blade right next to the fence. Set the height of the dado blade so that your cut will leave a handle that is 3/8? thick. This means a height of 3/8? if your panel is 3/4? thick overall.
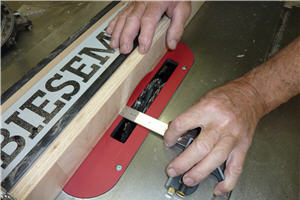 Adjust your fence for the final dado pass. You will ultimately create a rabbet of 1-1/4? on each end of the panel. To do this, you will need to make two passes on each end. Start by making a 3/4? (full width of dado blade) rabbet on each end. Then move the fence so that it is 1-1/4? from the outside edge of the dado and make a second pass on each end of the panel. This should leave a rabbet that is 3/8? thick and protruding 1-1/4? from the bottom edge of the panel.
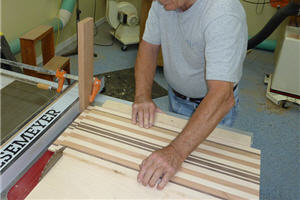 Using a panel cutting jig, cut a 2-1/4? piece from each end of the panel. Place witness marks on the top of each end of the panel so that you can easily recognize which end each piece was cut from. This is an important step for the aesthetics of the panel, as it will help ensure proper alignment of the wood strips. To ensure a consistent size and to avoid binding, set up a stop block on the fence, positioned safely in front of the blade (be sure to take the width of the stop-block into account when you set the fence.
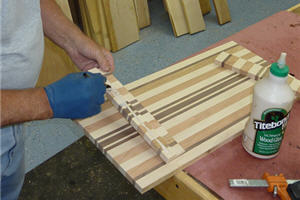 Apply glue to the bottom (narrower side of strips that received rabbet cuts and were cut from large panel). Press onto top edge of panel so that glue bead appears around perimeter. Apply clamps at each end and apply moderate pressure, checking edge of panel for alignment. You will want to pay close attention on this step and get the joint as flush as possible (particularly toward the center), to save excessive end grain sanding later.
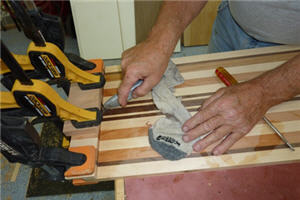 After clamps are securely fastened, remove excess glue from the joint, particularly on the inside of tray. Use a wet rag, along with a regular screw driver, to get the bulk of the glue and then remove any remaining glue residue with a sharp utility knife. Repeat these steps on the other end of the panel.
 After the glue cures, remove clamps and run each edge of your panel through a jointer to get a good gluing surface. If you do not have a jointer, this step can be done carefully at the table saw with the use of a high quality blade.
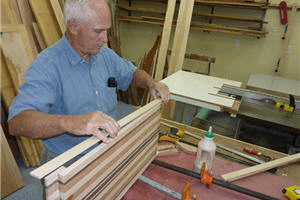 Cut two strips of wood of the same species as the current edge strips of the tray (maple in this case). Ideally, for color uniformity, these strips would actually come from the same board as the outside strips on the platter. The strips should be 3/8? thick and the same height and length as the tray. For our project, this measured 3/8? x 1-1/2?. x 26?. Glue these strips to the edges of the tray, being careful to get good alignment on both the bottom and top edges.
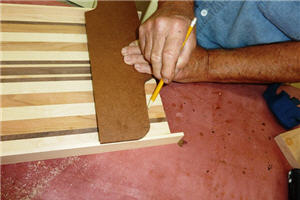 Using the supplied full-scale handle pattern, print and cut a template out of tempered hardboard, 1/4-in. plywood, or similar material. Use this template to trace the lines for the ends of your tray. Be sure that the entire cut line will cut through both the base of the tray as well as the piece you have glued to the top for the rim and handle. If you cut through just the top rabbet along the edge (except for where the cut extends out to form the handle), you will have an uneven edge along the end of the tray. If your tray now measures 12-3/4? wide, this template should leave a handle that is approximately 4? wide, which is adequate to support even the hands of the football player in your life. If your tray is less than 12? across, the handle will be smaller and you should consider modifying the cut line to accommodate a handle that is at least 3-1/2? to 4? across.
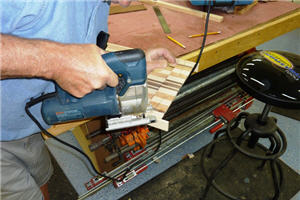 Using a band saw or jig saw, cut along the line you have just drawn on each corner of the tray. Take your time and cut as closely to the line as possible, as this will save you a lot of end grain sanding.
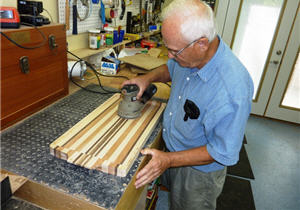 Sand all surfaces of the tray using a random orbit sander. Additionally, using a hand held belt sander or ROS, sand to your line along each corner of the tray, using progressively fine grits until scratches no longer appear. Sand nice consistent curves around each outside corner of tray as well. Finish sanding entire tray, top and bottom, with a ROS or palm sander. Finally, hand sand with progressively fine grits–up to at least 220-grit.Now you can decide whether your tray will serve double-duty as a cutting board. The tray can be flipped and used for cutting on the bottom and serving on the top. If you choose to use it in this fashion, your finishing job will be quite easy. A simple application of food-safe mineral oil or butcher block oil, will make the board beautiful. This can be reapplied periodically after the board is washed to retain its beauty.
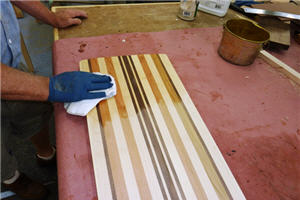 Apply your finish. If your tray will not serve a dual-purpose as a cutting board, we suggest that you opt for penetrating oil, to enhance the wood grain, topped with three to four coats of an oil based polyurethane (four to five coats should be used if using a thinned ‘wipe-on’ poly). Sand lightly between coats with 400 grit sand paper.
TIP: Let the final coat cure for a full week and then buff lightly with the back of a sheet of sandpaper to remove any remaining surface imperfections. Sandpaper backing generally has just enough abrasiveness to serve as a nice buffing tool and will leave the surface feeling buttery smooth.
PDF of the Serving Tray Handle Curve
Photos By Authors
Paul Mayer lives in Lakeville, Minnesota, and is a hopelessly addicted hobbyist woodworker, with 12 years experience building custom furniture and other fun projects. He also assists his father, Vernon Mayer, in his woodworking business, Vern’s Wood Goods, where they build serving trays, cutting boards, kitchen utensils and other fine crafts.

Good day, I would like to inquire for quotation. Thank you.
love the serving tray
Very interested in doing these projects
Great plan so simple but looks great. I made a cheese cutting board to match my serving tray
my comment is: THIS IS WORSE THAN PICK POCKETING . You charged $7 for premier enrollment then $10 for Gold enrollment AND NOW you want $10 more . I wonder what will come later. You better be careful AND honest. my experience with wood working people that they are much better than that !!!!!!!
You're a real deep thikenr. Thanks for sharing.
PDF of serving tray handle not working.