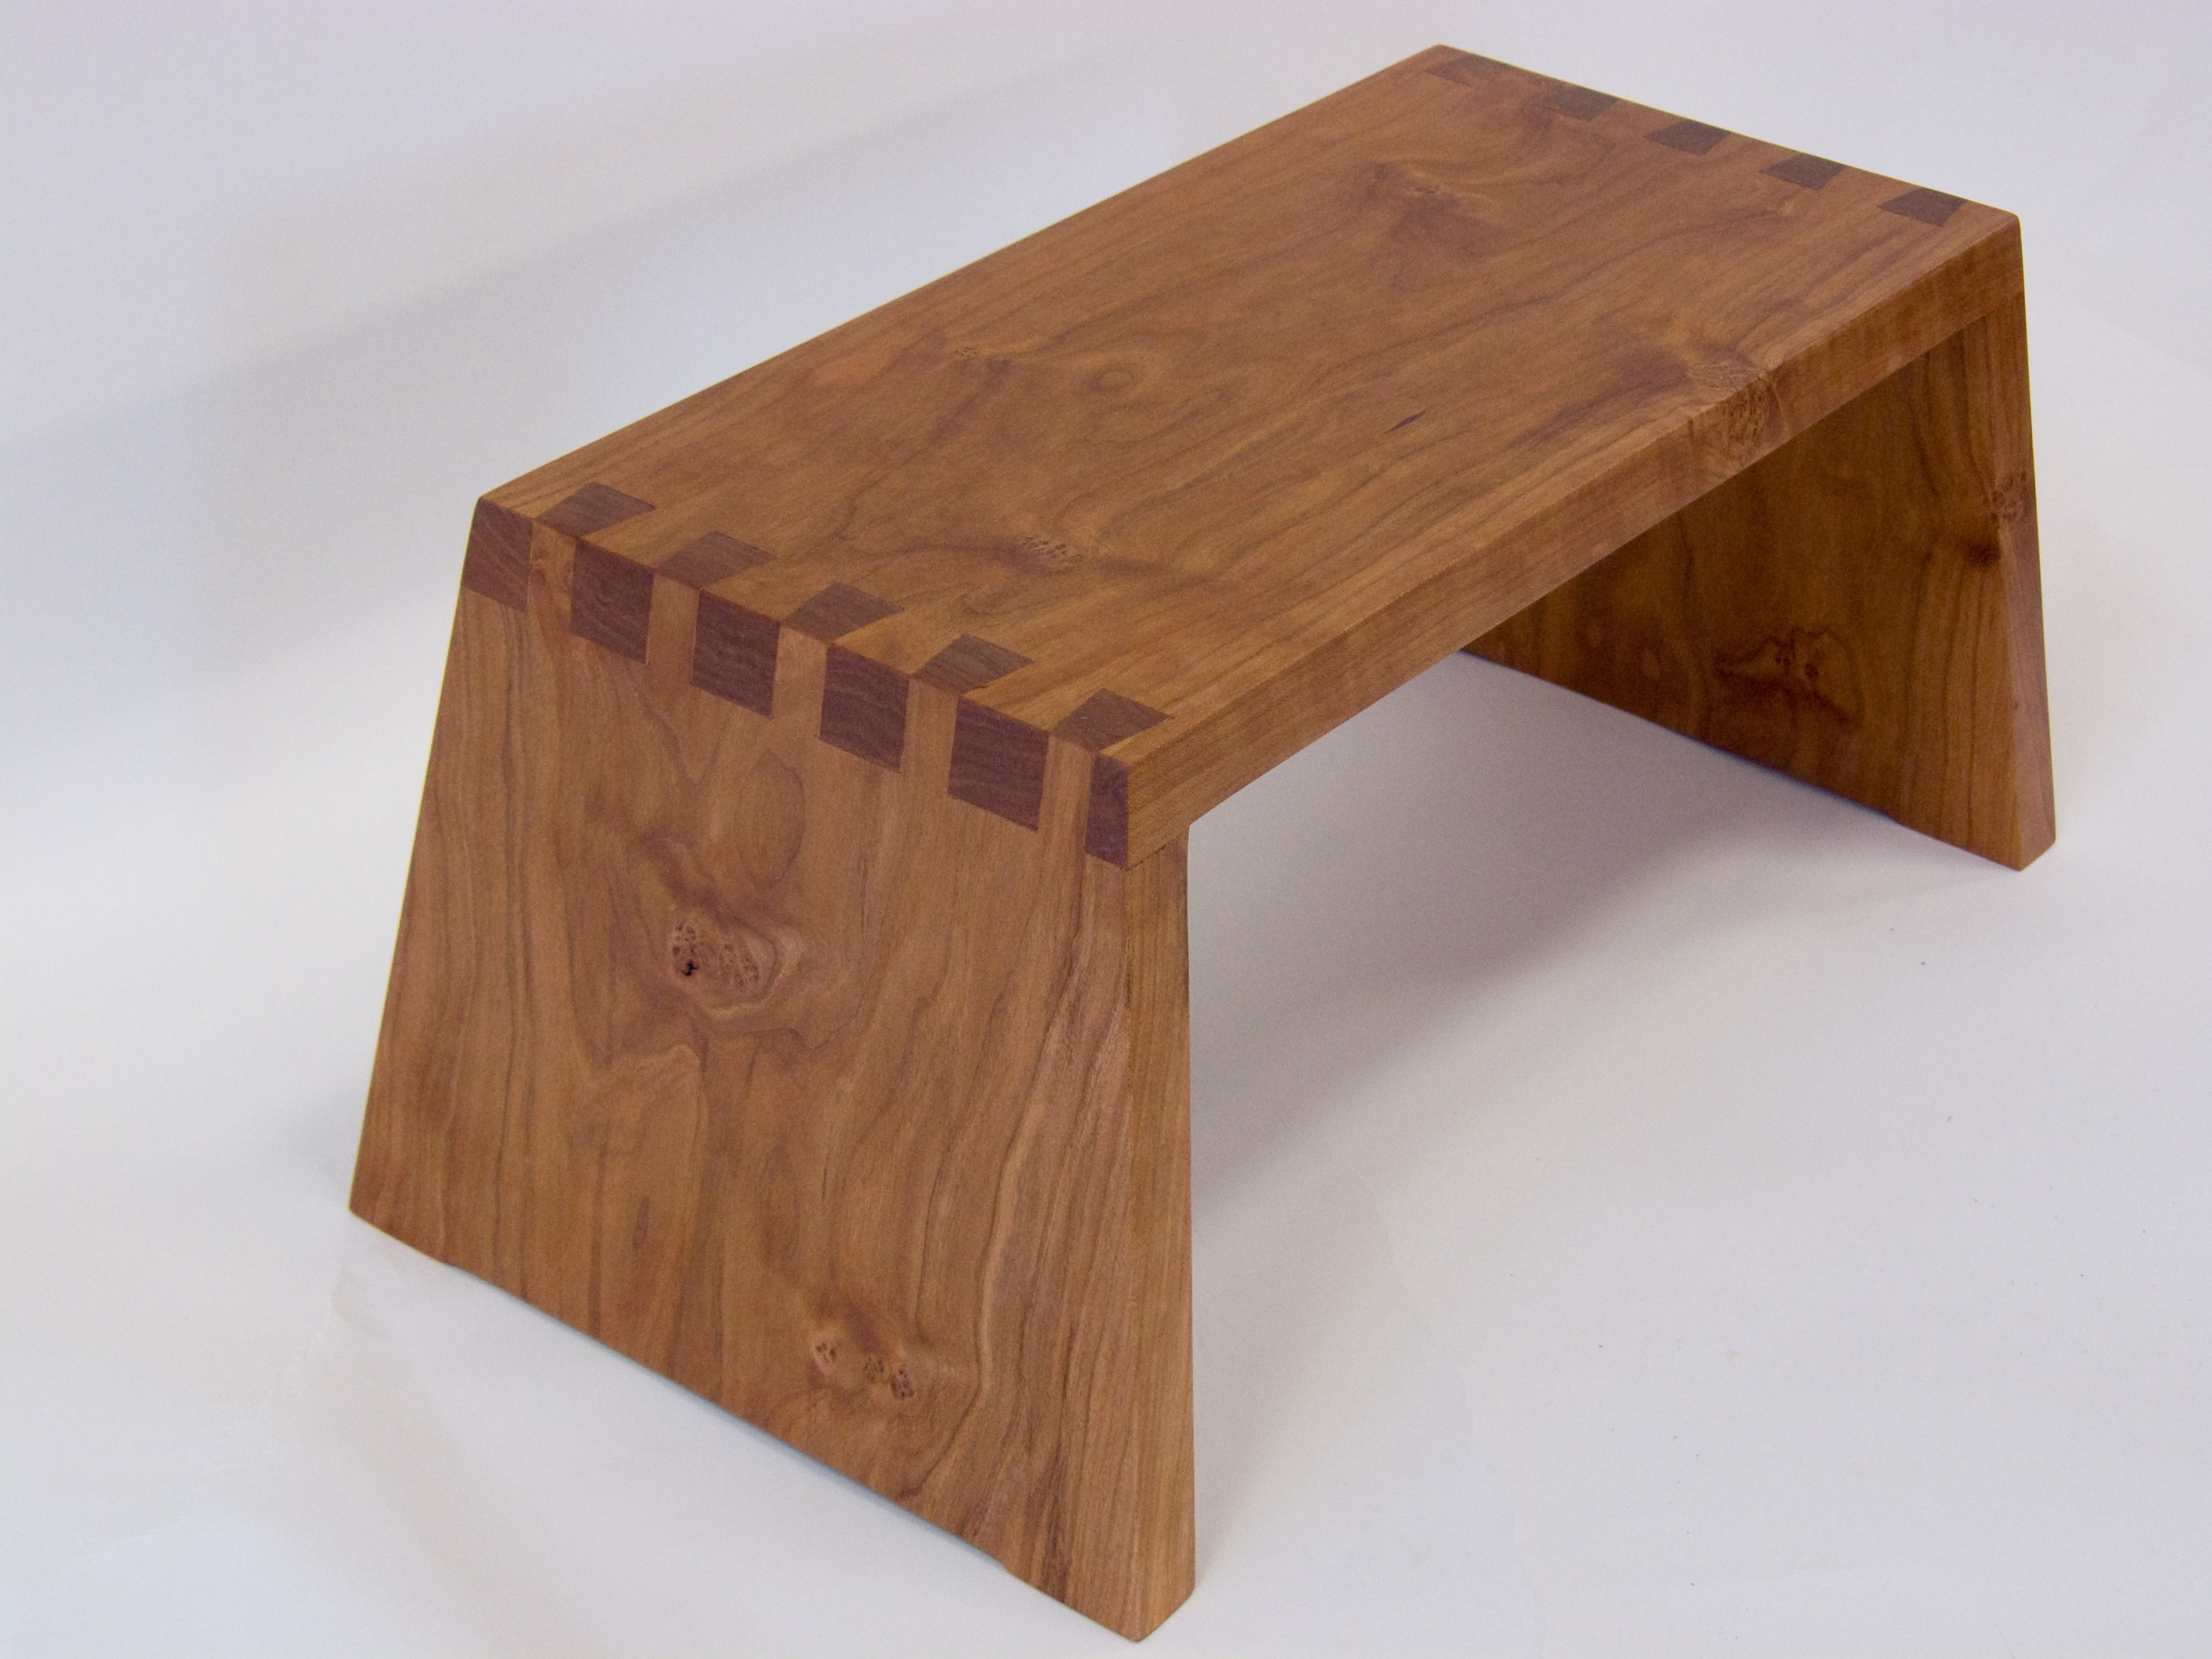
One of the things I like best about woodworking is the chance to create objects that are both useful and beautiful. The humble step stool is just such a project. A stool spends its life down on the floor dutifully presenting its back for people to step on. Like a true friend, a stool is always there when you need a lift. I think it deserves to look good.I set about designing the stool when my kids were very young. I was tired of hefting them up to the sink to wash their hands. At the same time, I wanted to give my wife access to the top shelf of our kitchen cabinets without her having to call me in to do the job. Of course, the stool had to be strong and stable, but it also had to be large enough to provide a comfortable perch and small enough to store easily. I wanted people to trust the stool before they ever set foot on it. At the same time, I wanted the stool to look good while it waited for its next customer.
From the start, I thought dovetails would be the best joint for the stool. Nothing says “strong” to people like a set of well-cut dovetails. In sketching out the stool, it occurred to me to carry the dovetail design throughout. So, I took the 10-degree dovetail angle and used it to flare the legs from front-to-back and side-to-side. The resulting leg splay creates an incredibly stable stool. I can literally balance on any corner of the stool without any danger of the stool tipping. The tapered edges added visual interest to the stool. It looked good and it looked stable.
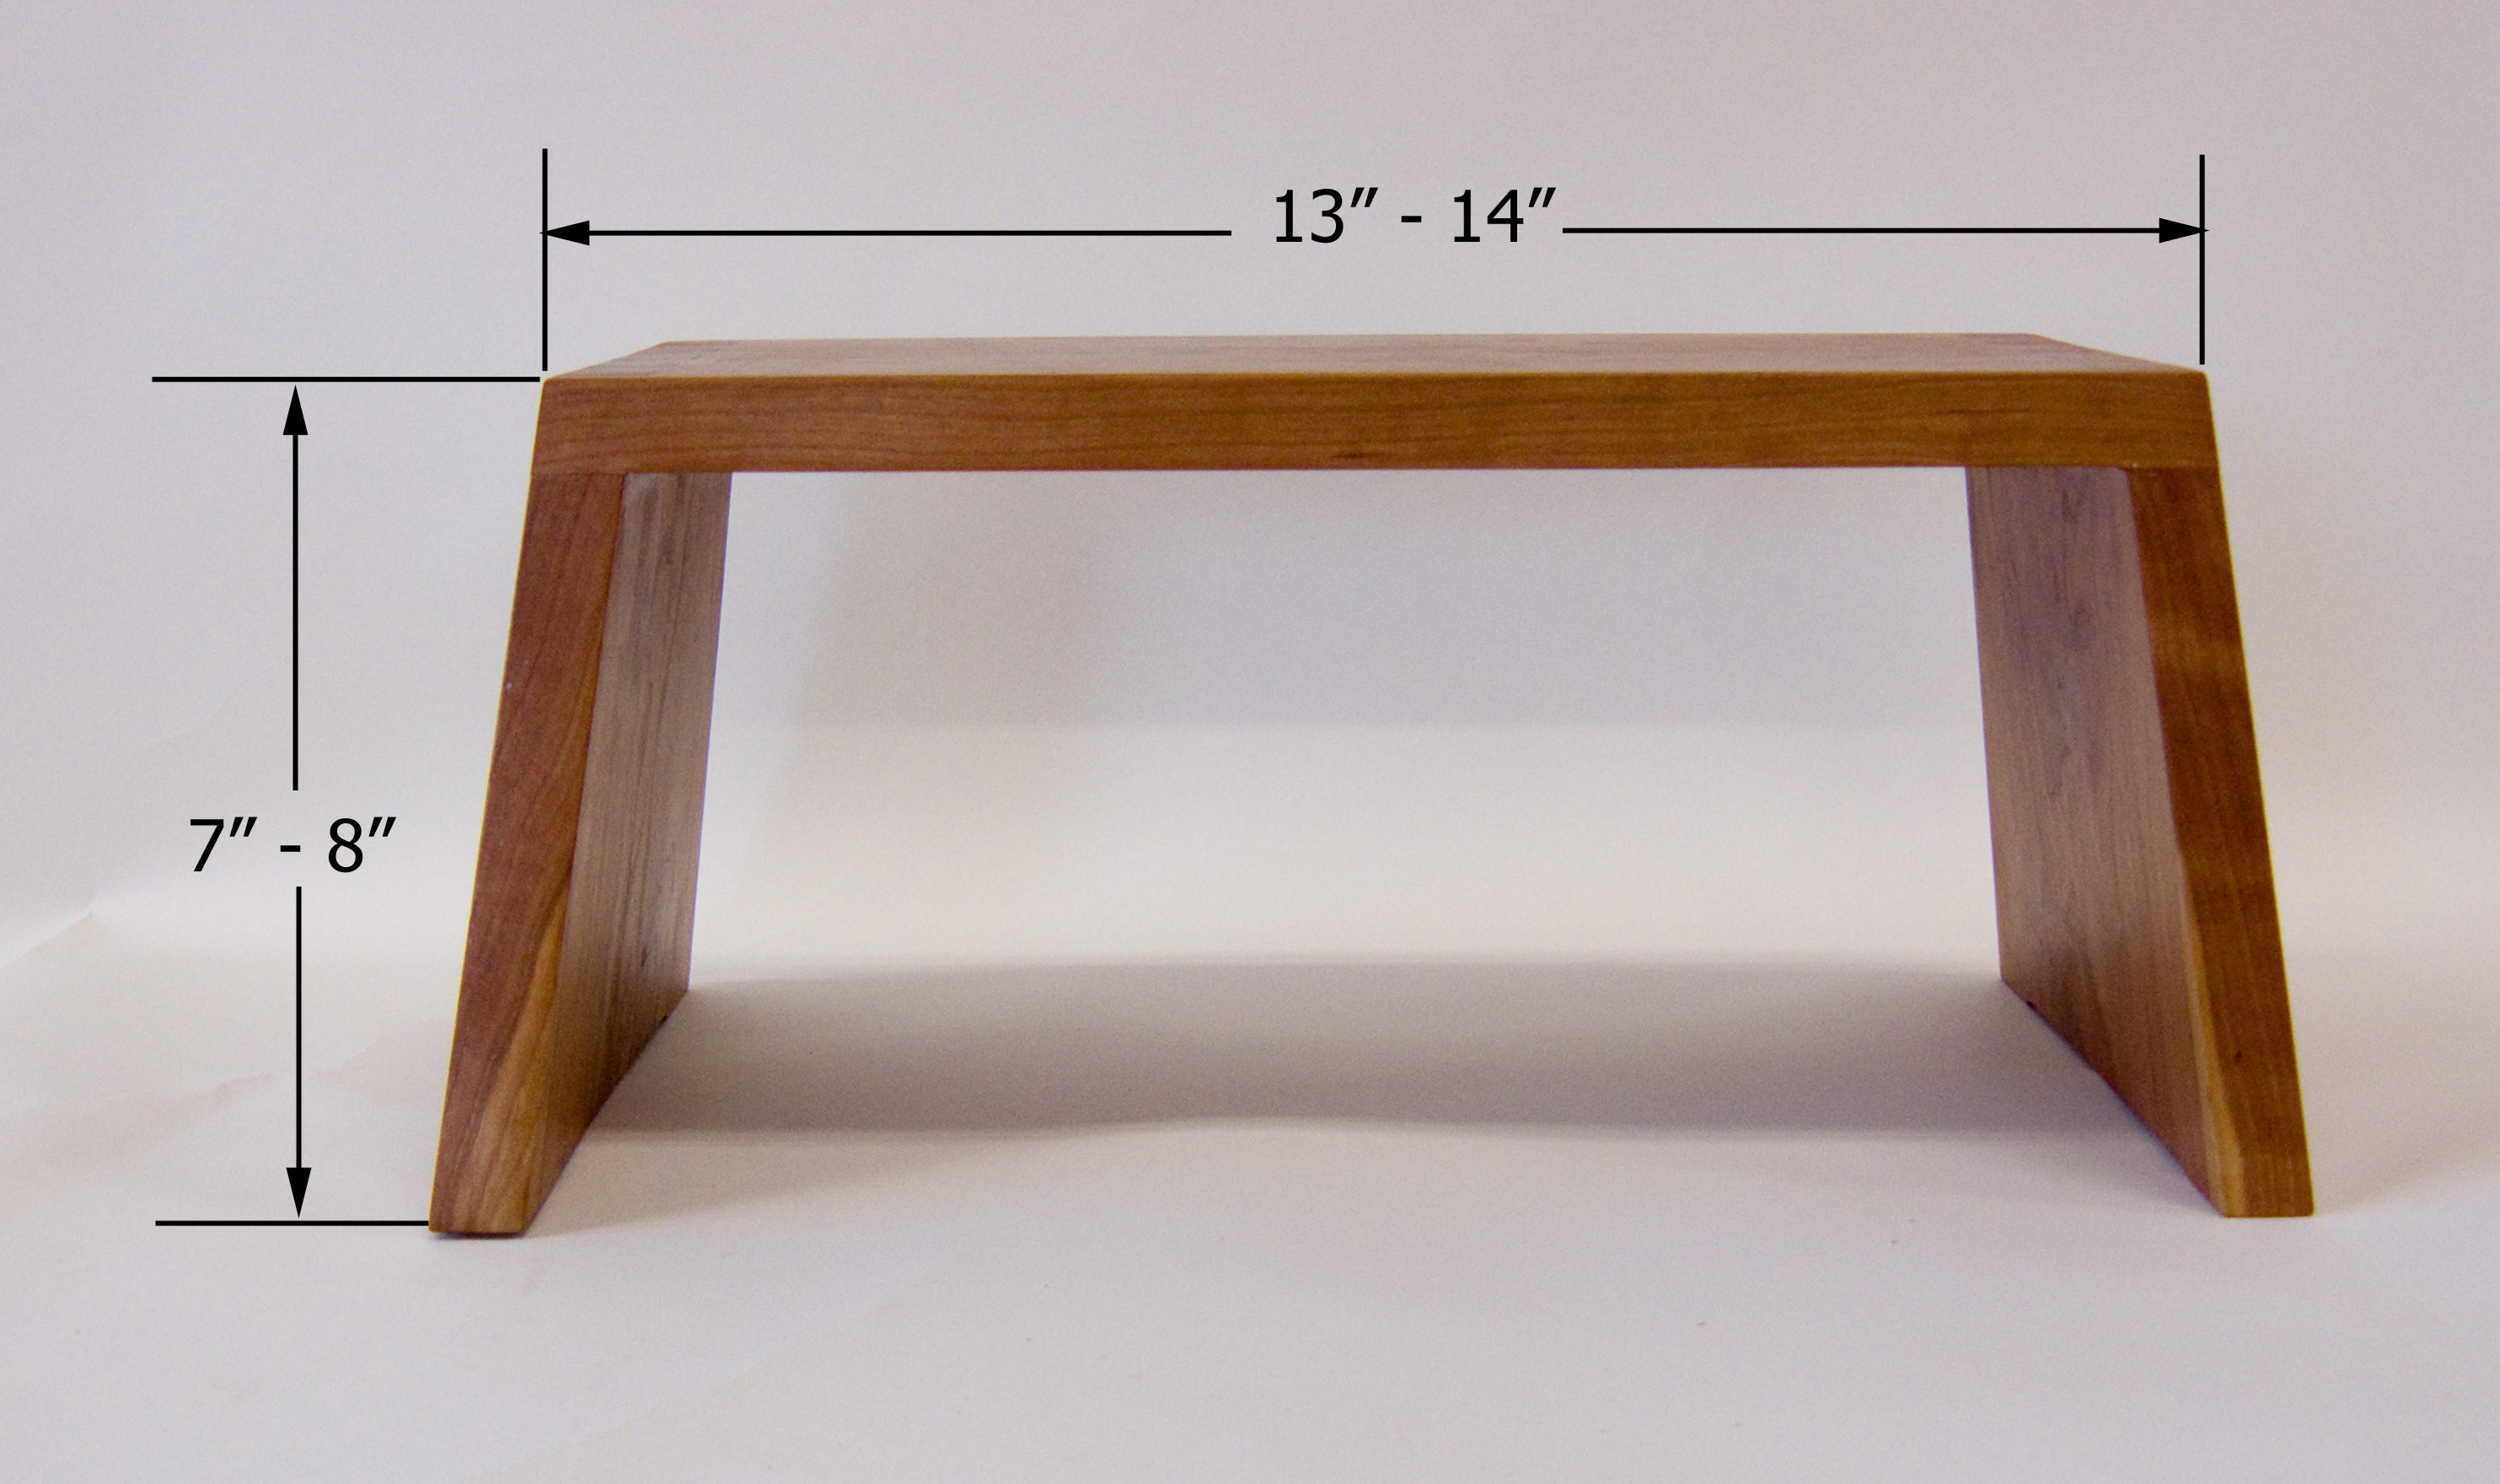
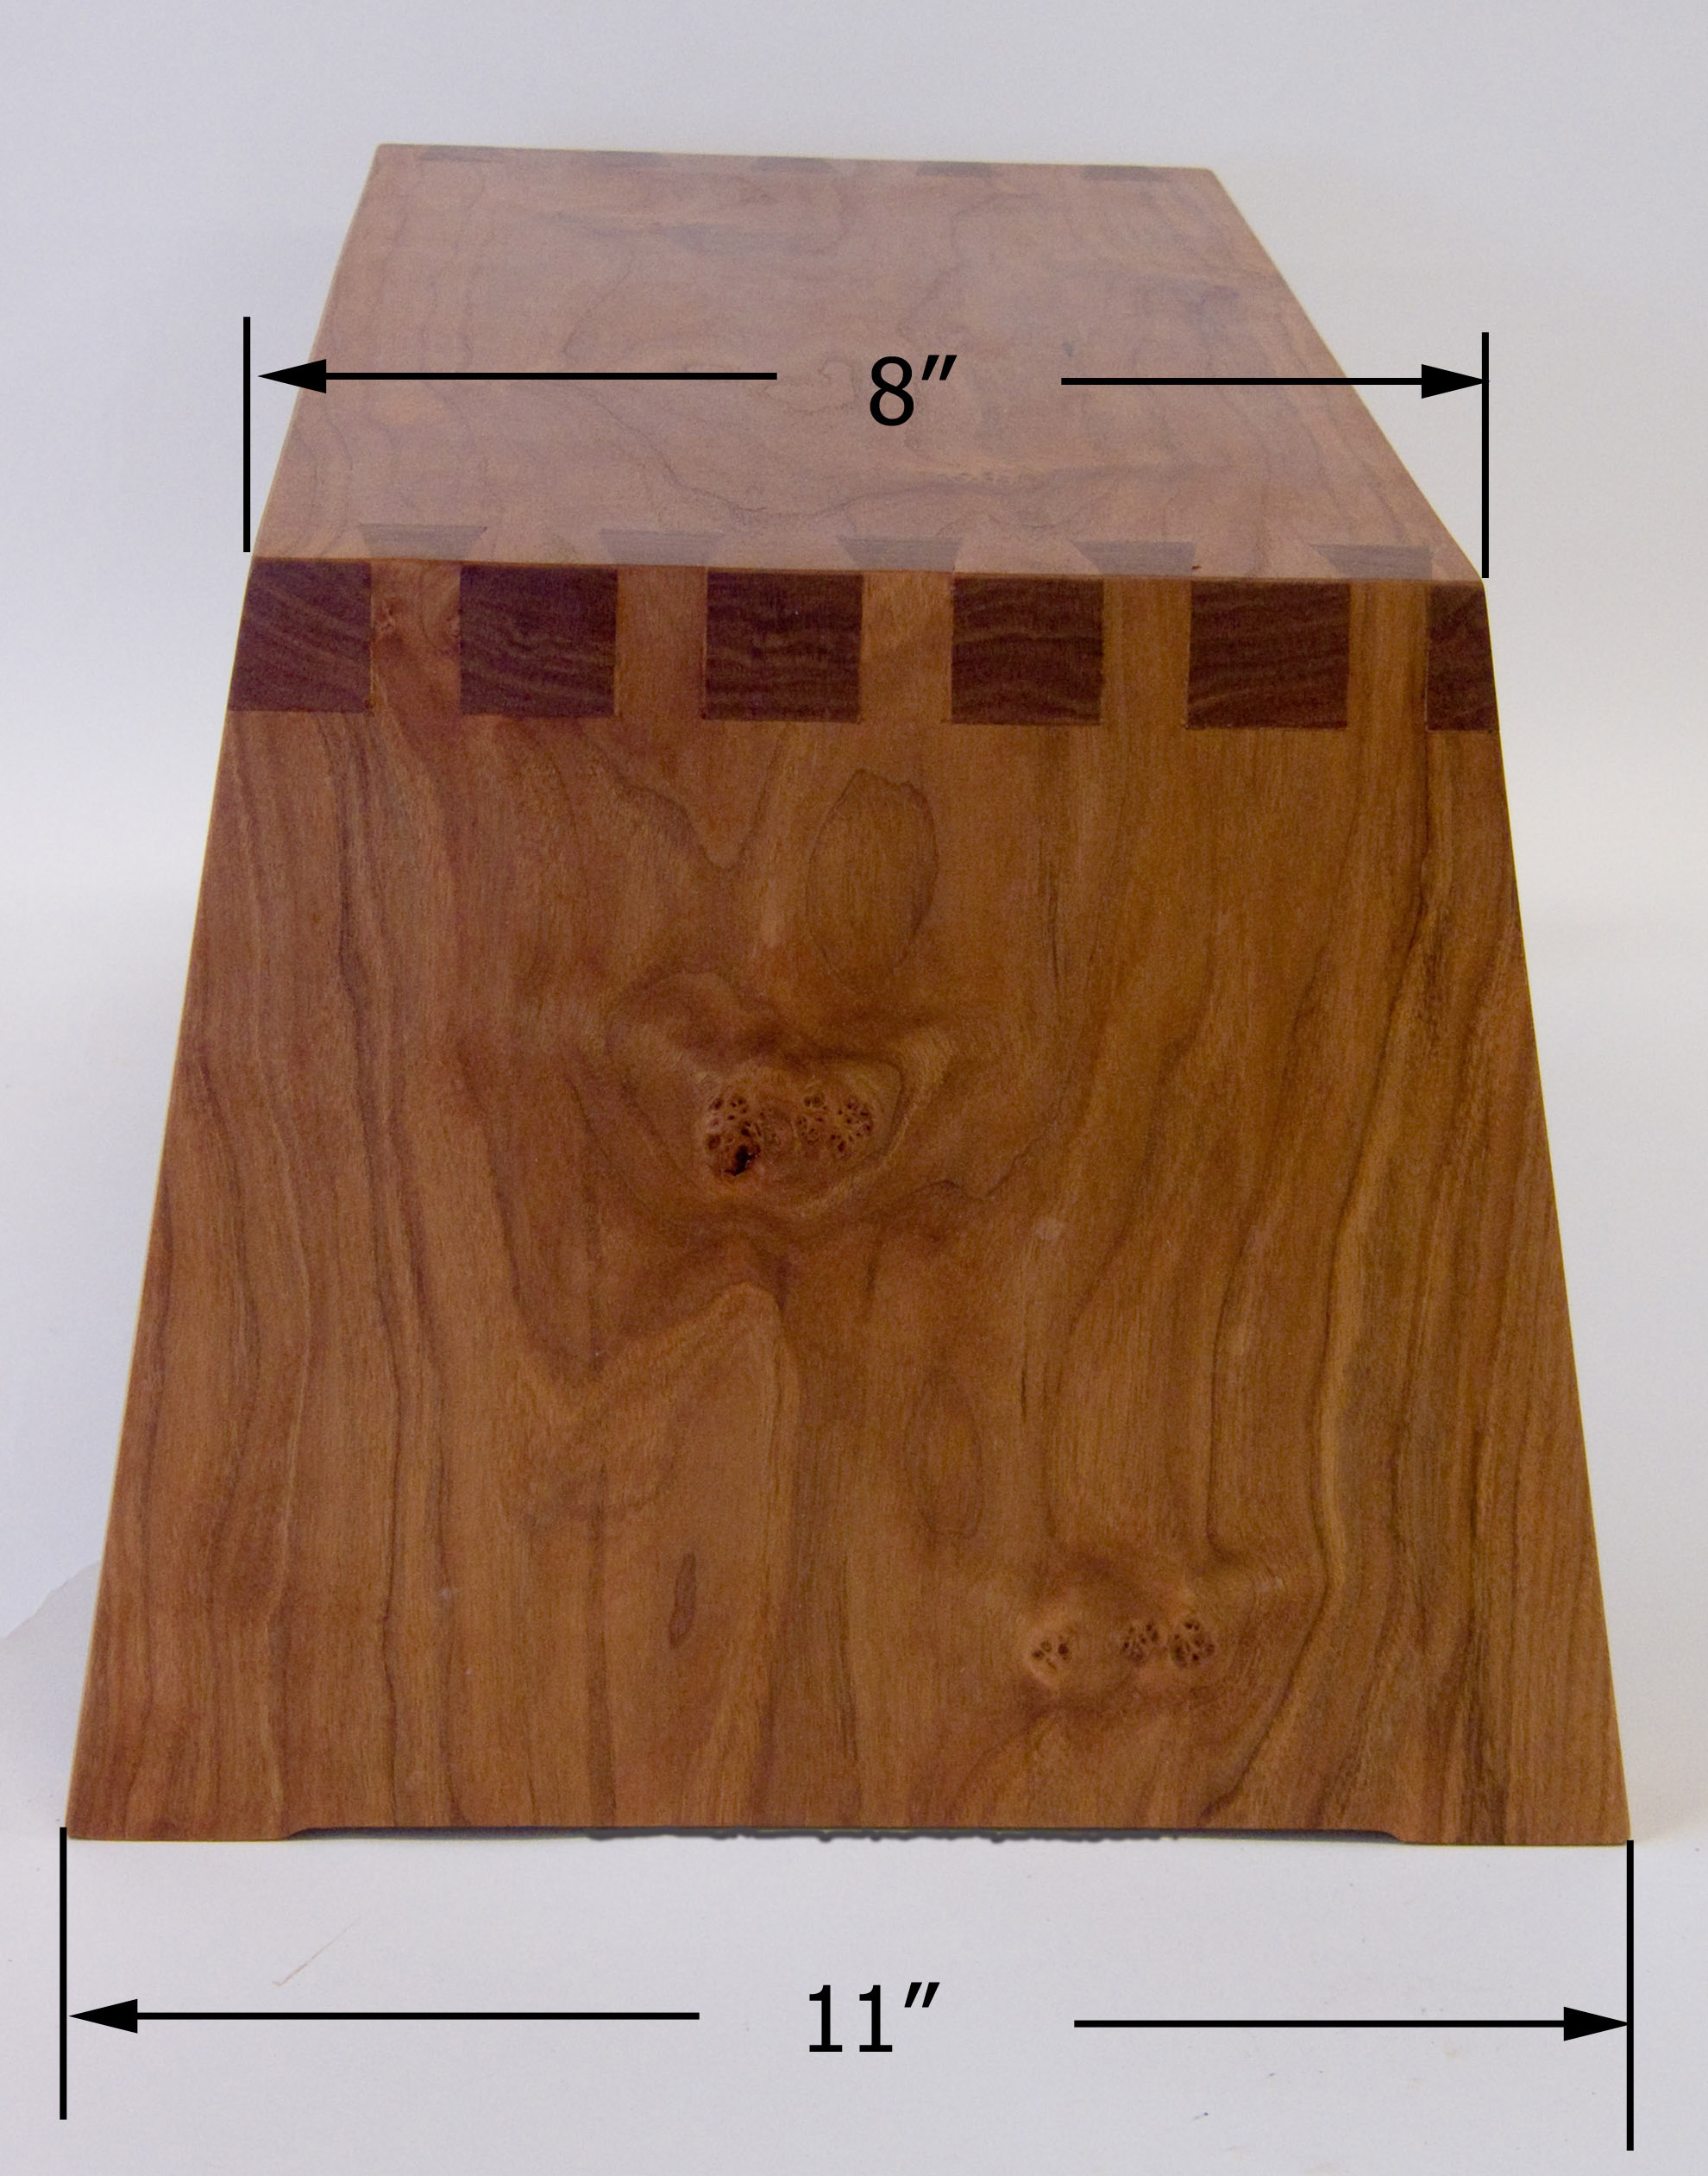
A stool height of 7″ to 8″ works best; it’s an easy step up for kids or adults and provides the needed boost in height for most situations. An 8″ x 14″ platform or step is big enough to comfortably stand on but keeps the stool small enough to tuck out of the way when not in use. You can vary the dimensions to suit your needs.

The dovetails are cut on the bandsaw to save time. A sharp set of chisels is required for paring the tails and chopping the pin sockets. A router table is needed to create the feet. The 10-degree leg splay complicates cutting the dovetails, but a ramp creates the angled cut automatically.
If you’ve never cut dovetails before, than I suggest getting comfortable with cutting 90-degree joints first. The technique I show on the bandsaw can be used to cut dovetails at a 90-degree angle. Even if you’re experienced cutting dovetails, I suggest you make a practice stool with scrap wood first. Practice stools make great shop additions – trust me, I have several of them, including one with the tails cut backwards, (don’t laugh).
Start the stool with a single plank of wood approximately 7/8″ thick, 11″ wide and about 32″ long. If you need to glue up boards to get the 11″ width, choose boards where the grain blends well so the joint is not obvious and keep the joint towards the middle of the stool to avoid cutting through the joint when tapering the legs. Note: It’s possible to make the stools from 3/4″ stock. However, the stool is stronger and looks better with 7/8″ thick stock.
Lay out the stool parts (Photo 1) and rough cut them to length.
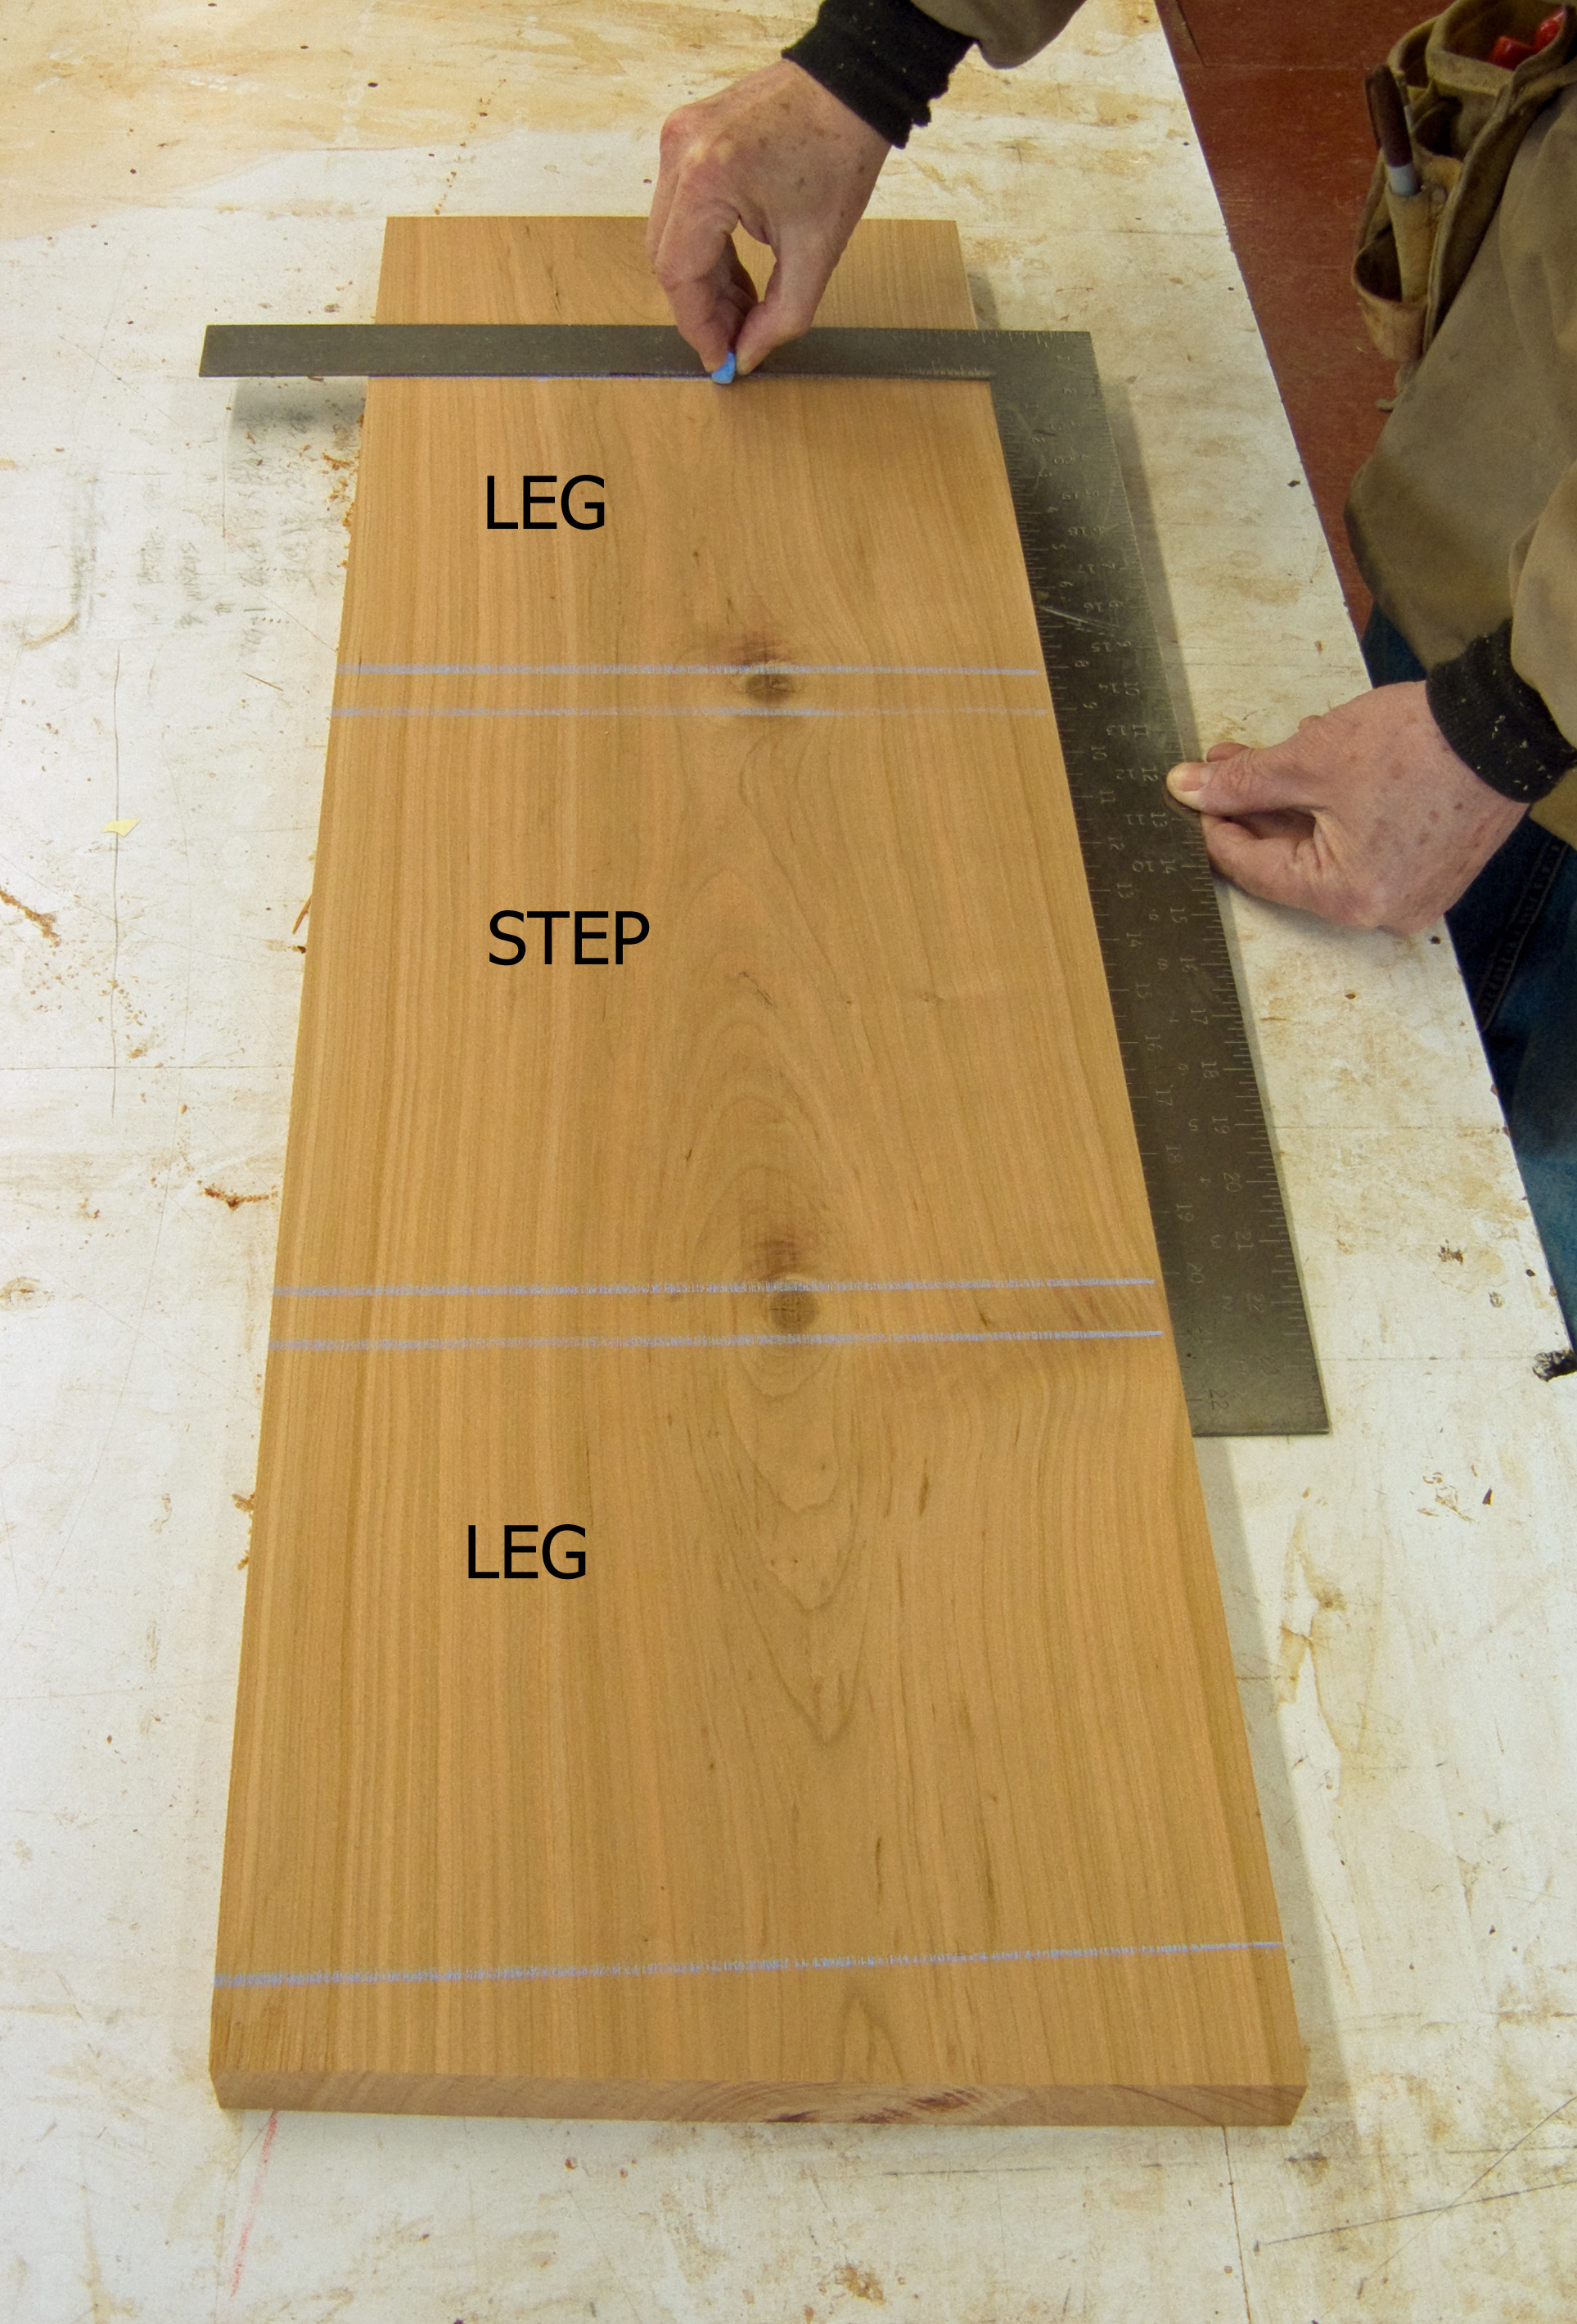
Photo 1. Rough out the stool parts on a single plank of wood. Position the parts as shown so the grain flows up one leg, across the step and down the other leg. Plan your cuts to eliminate defects like knots.
Then, cut 10-degree bevels on the ends of the legs and the step (Photo 2).
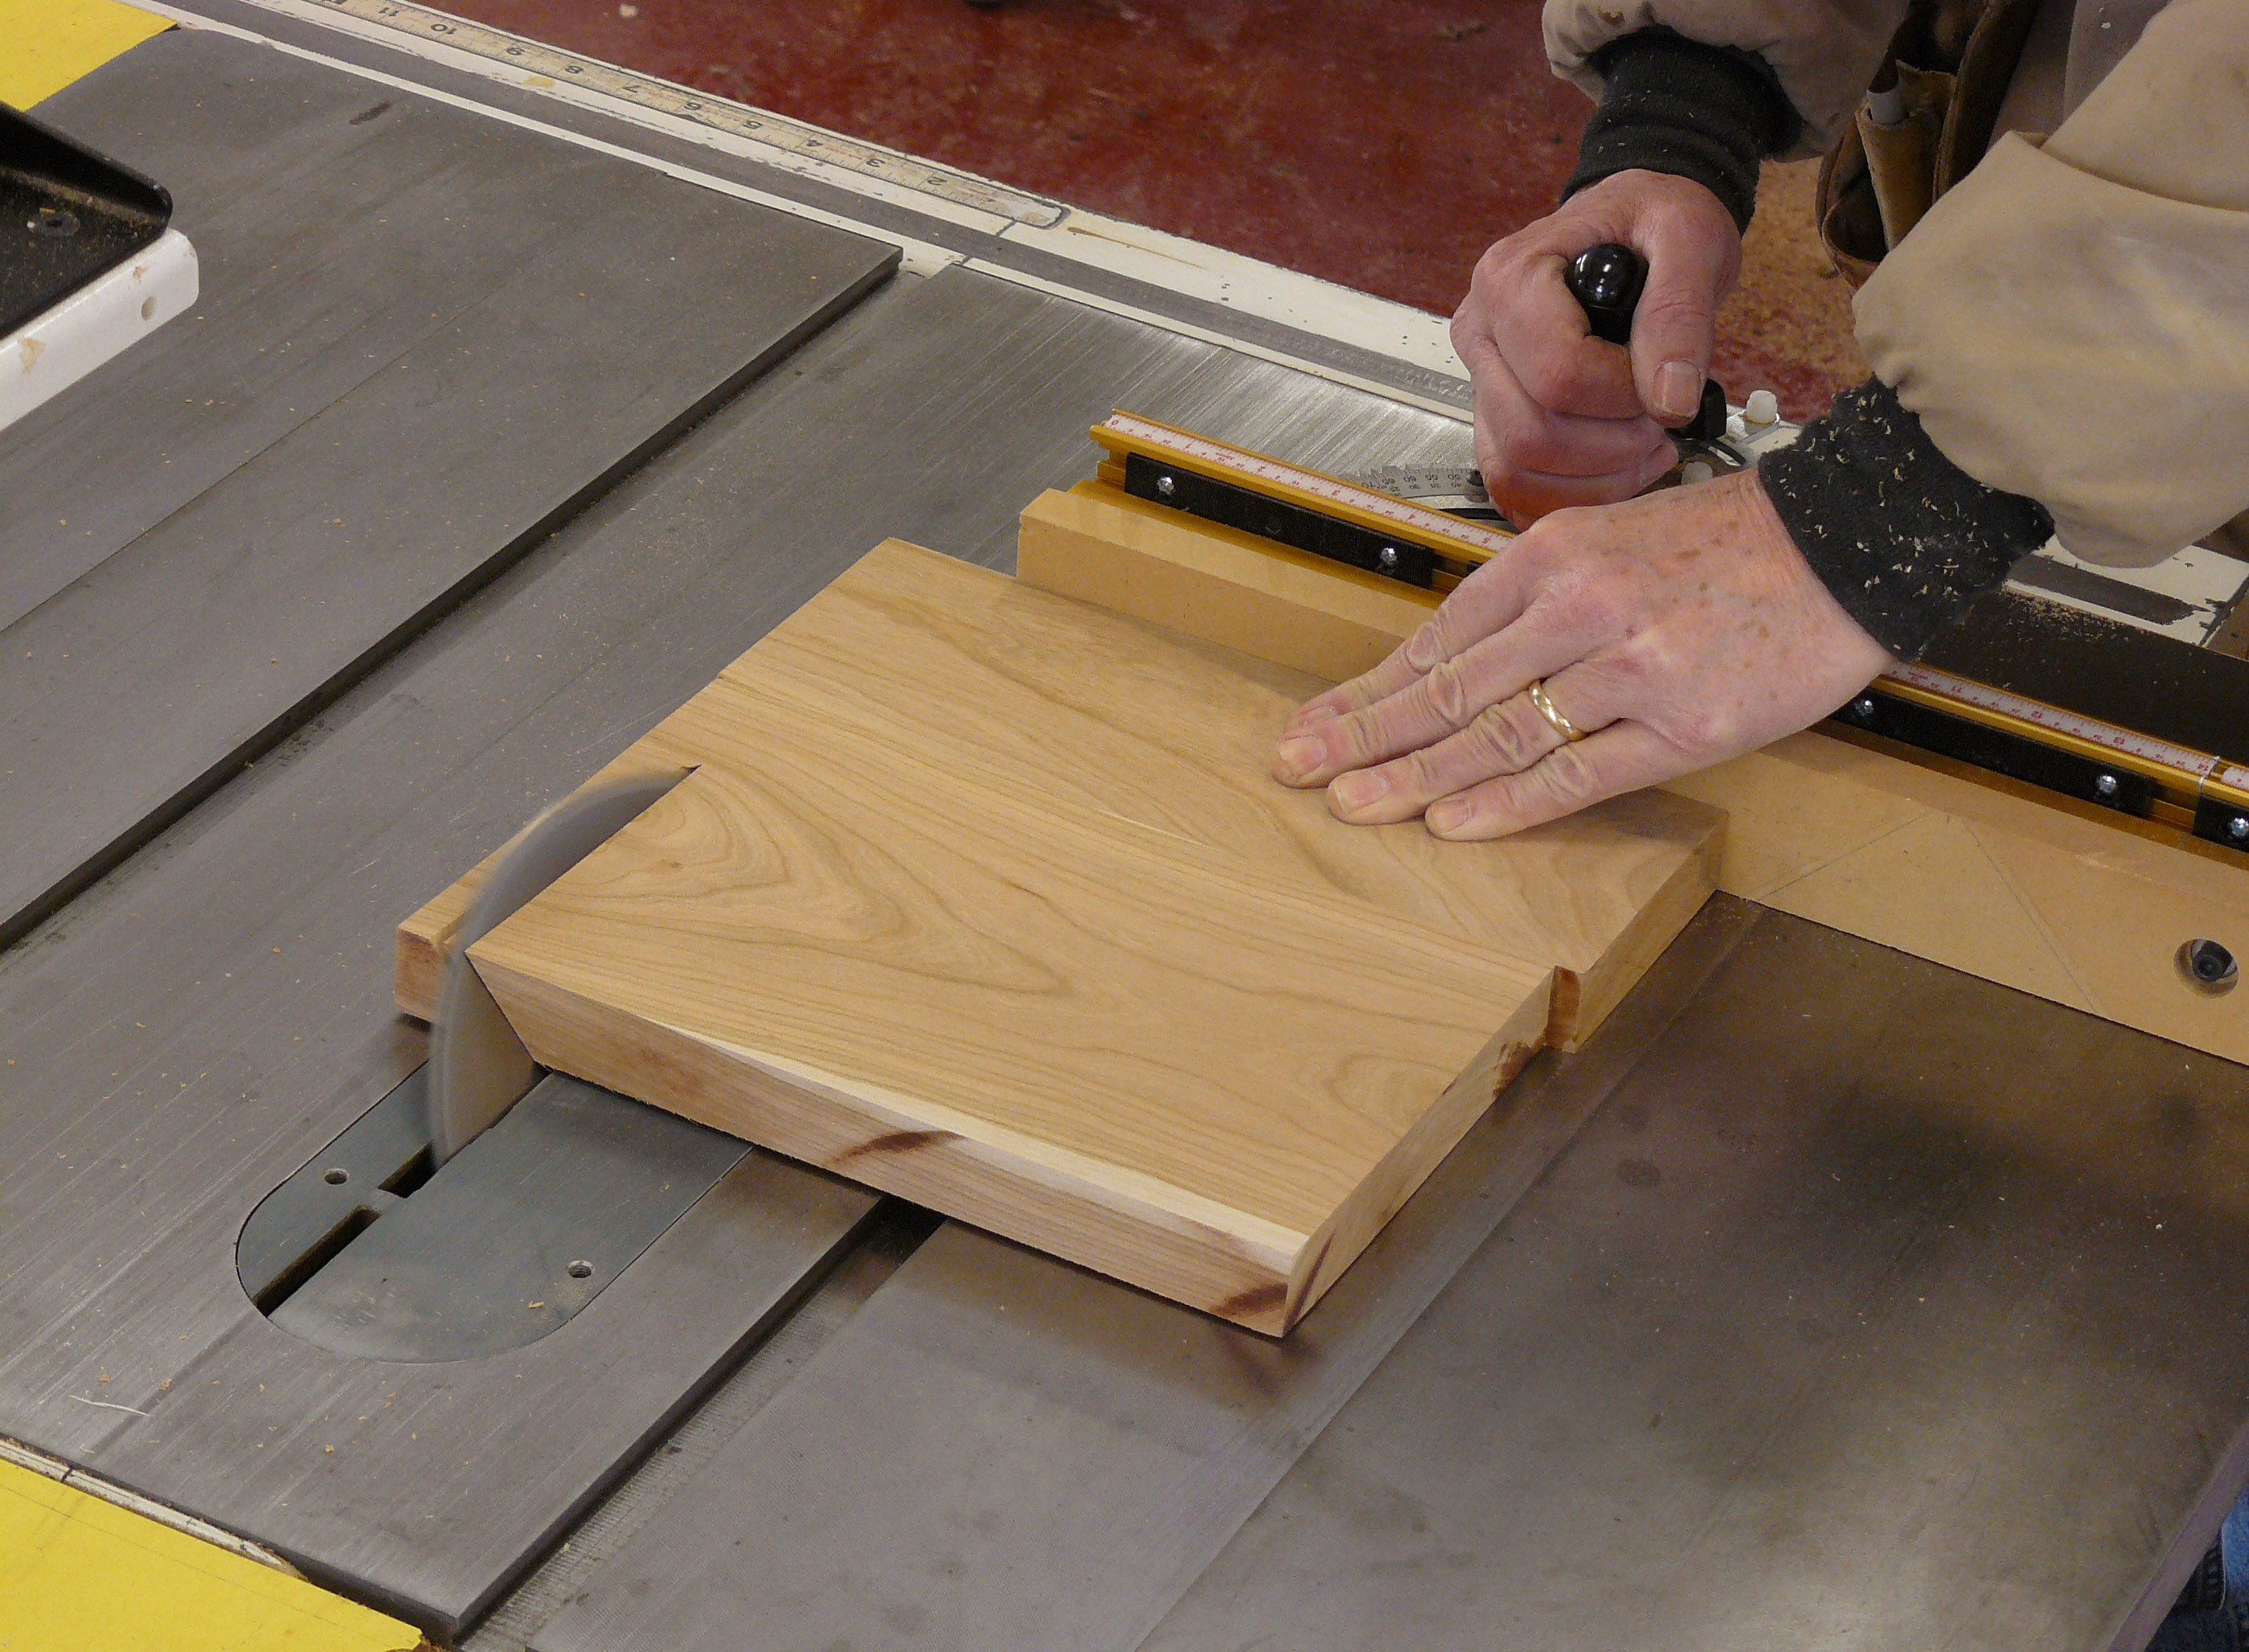
Photo 2. Cut the 10-degree bevels on the top and bottom edge of the leg. With the blade angled away from the miter gauge, both ends of the step and top of each leg is cut face down. Cut the leg’s bottom edge face up using a stop block. (Note: Guard removed for photo clarity)
Set the pieces in their original order and mark them for future orientation (Photo 3).
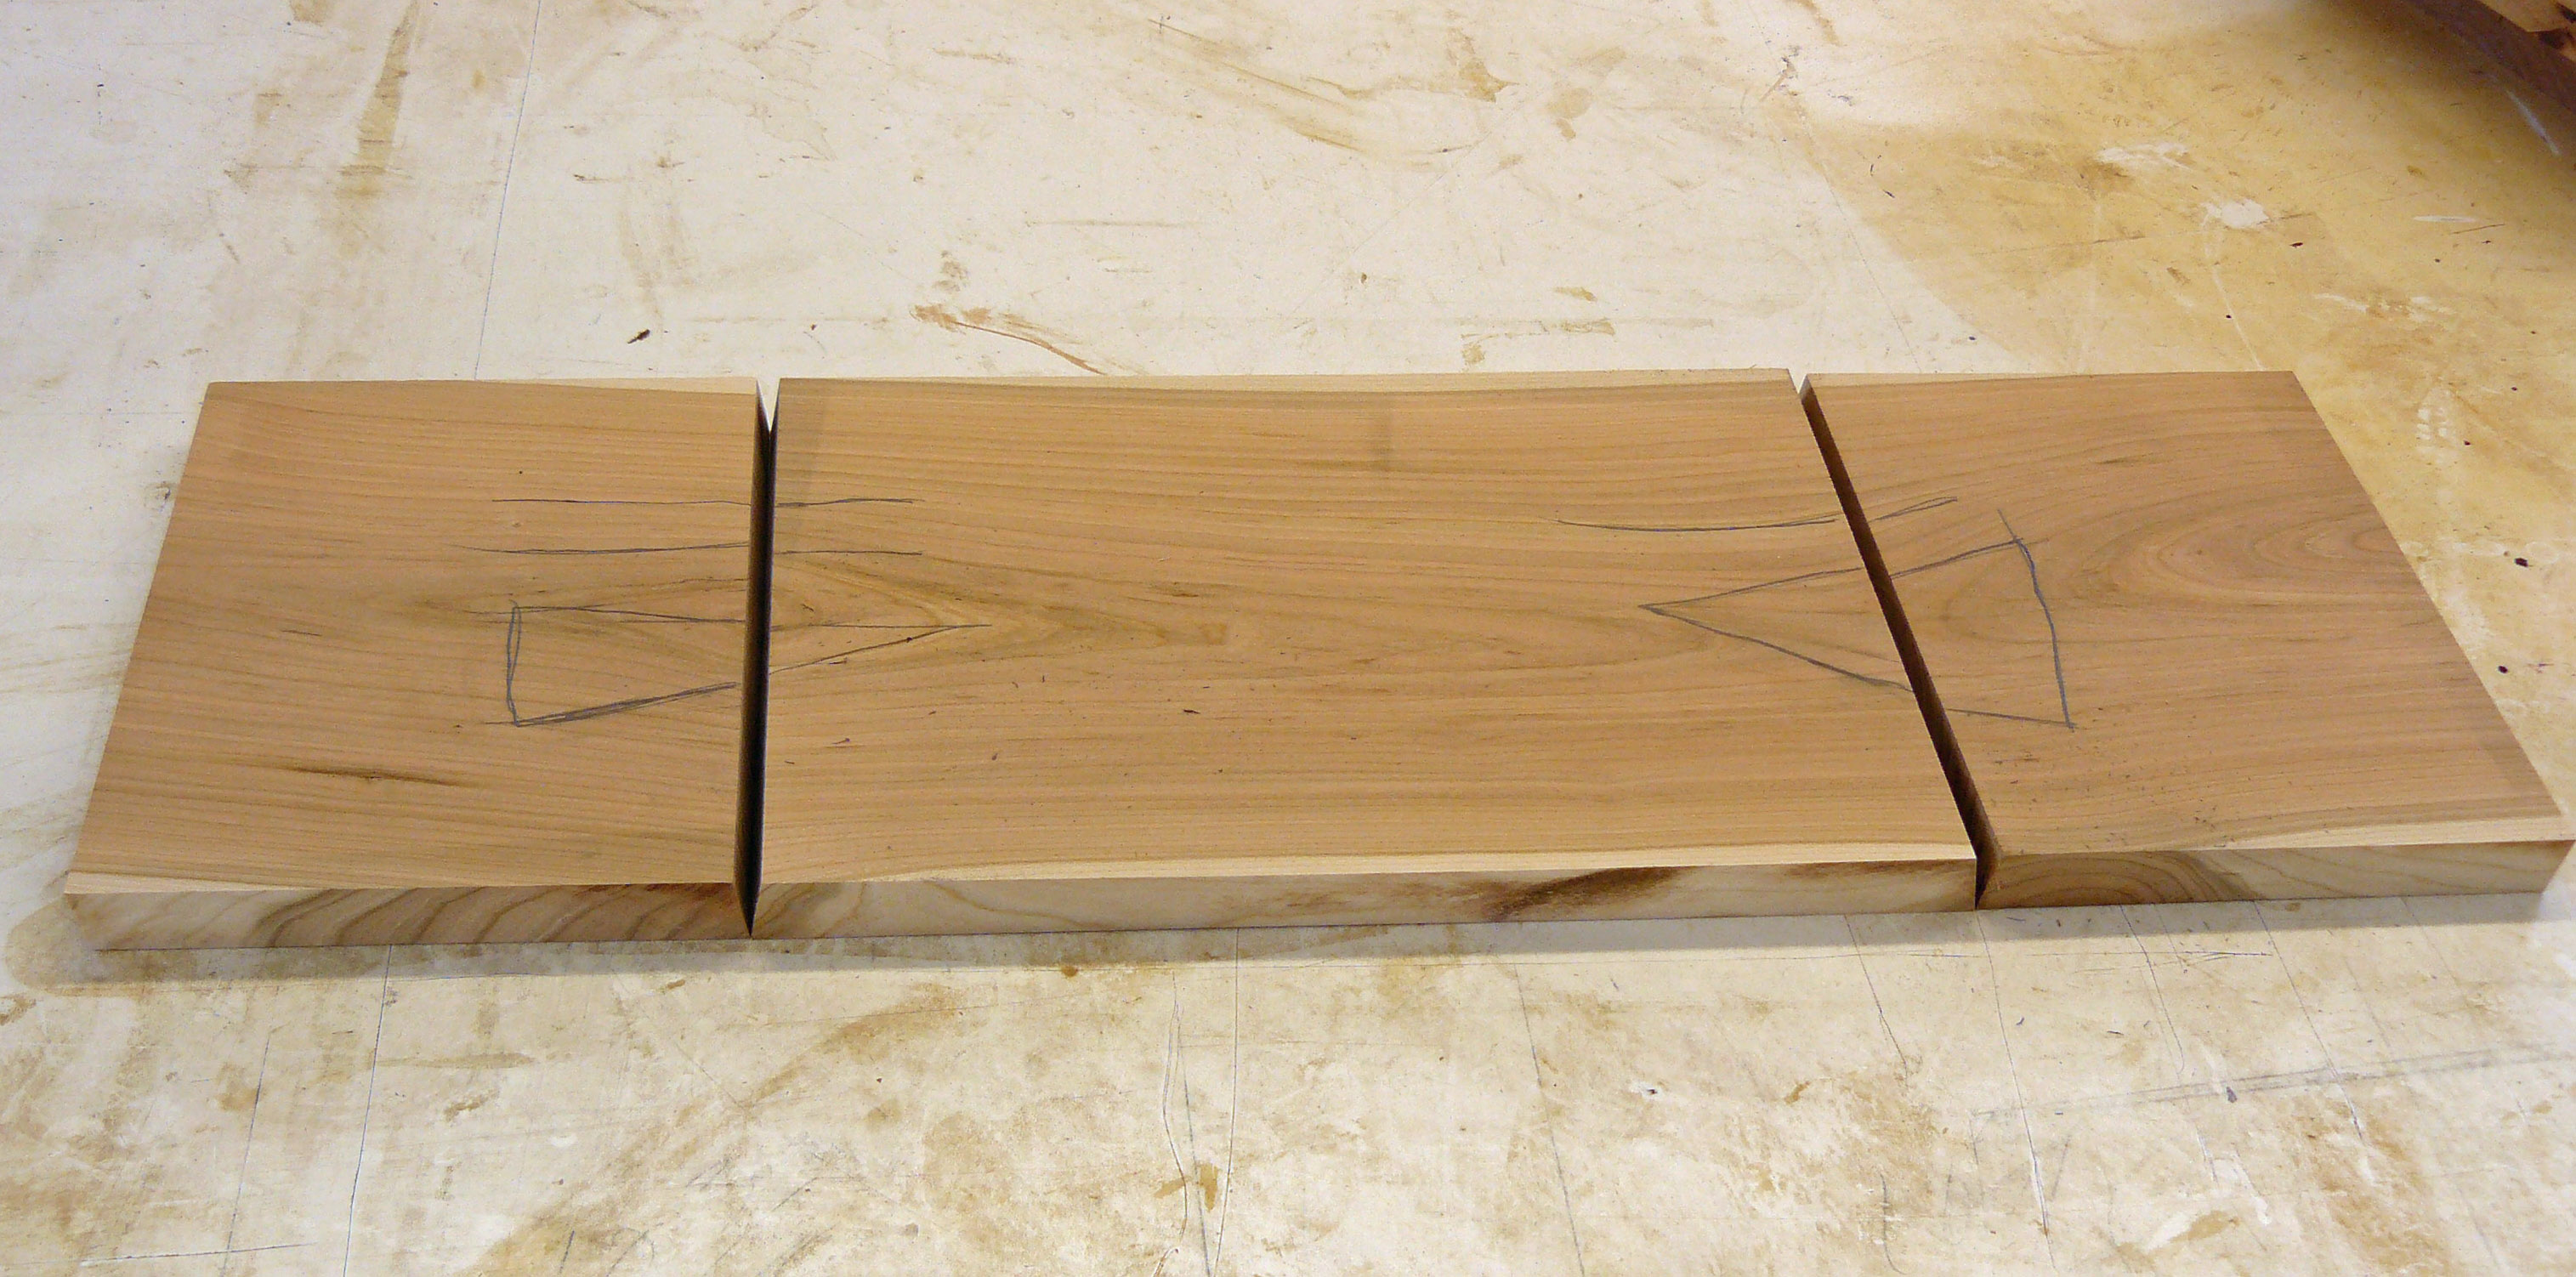
Photo 3. Layout the stool pieces to double-check your angle cuts. The top and bottom bevels on each leg should be parallel. The bevels at the top of the legs and the ends of the step should be opposites. Mark the pieces to keep track of their orientation.
Lay out the 10-degree side taper on each leg with a protractor. Mark the final width of the leg across the top (Photo 4).
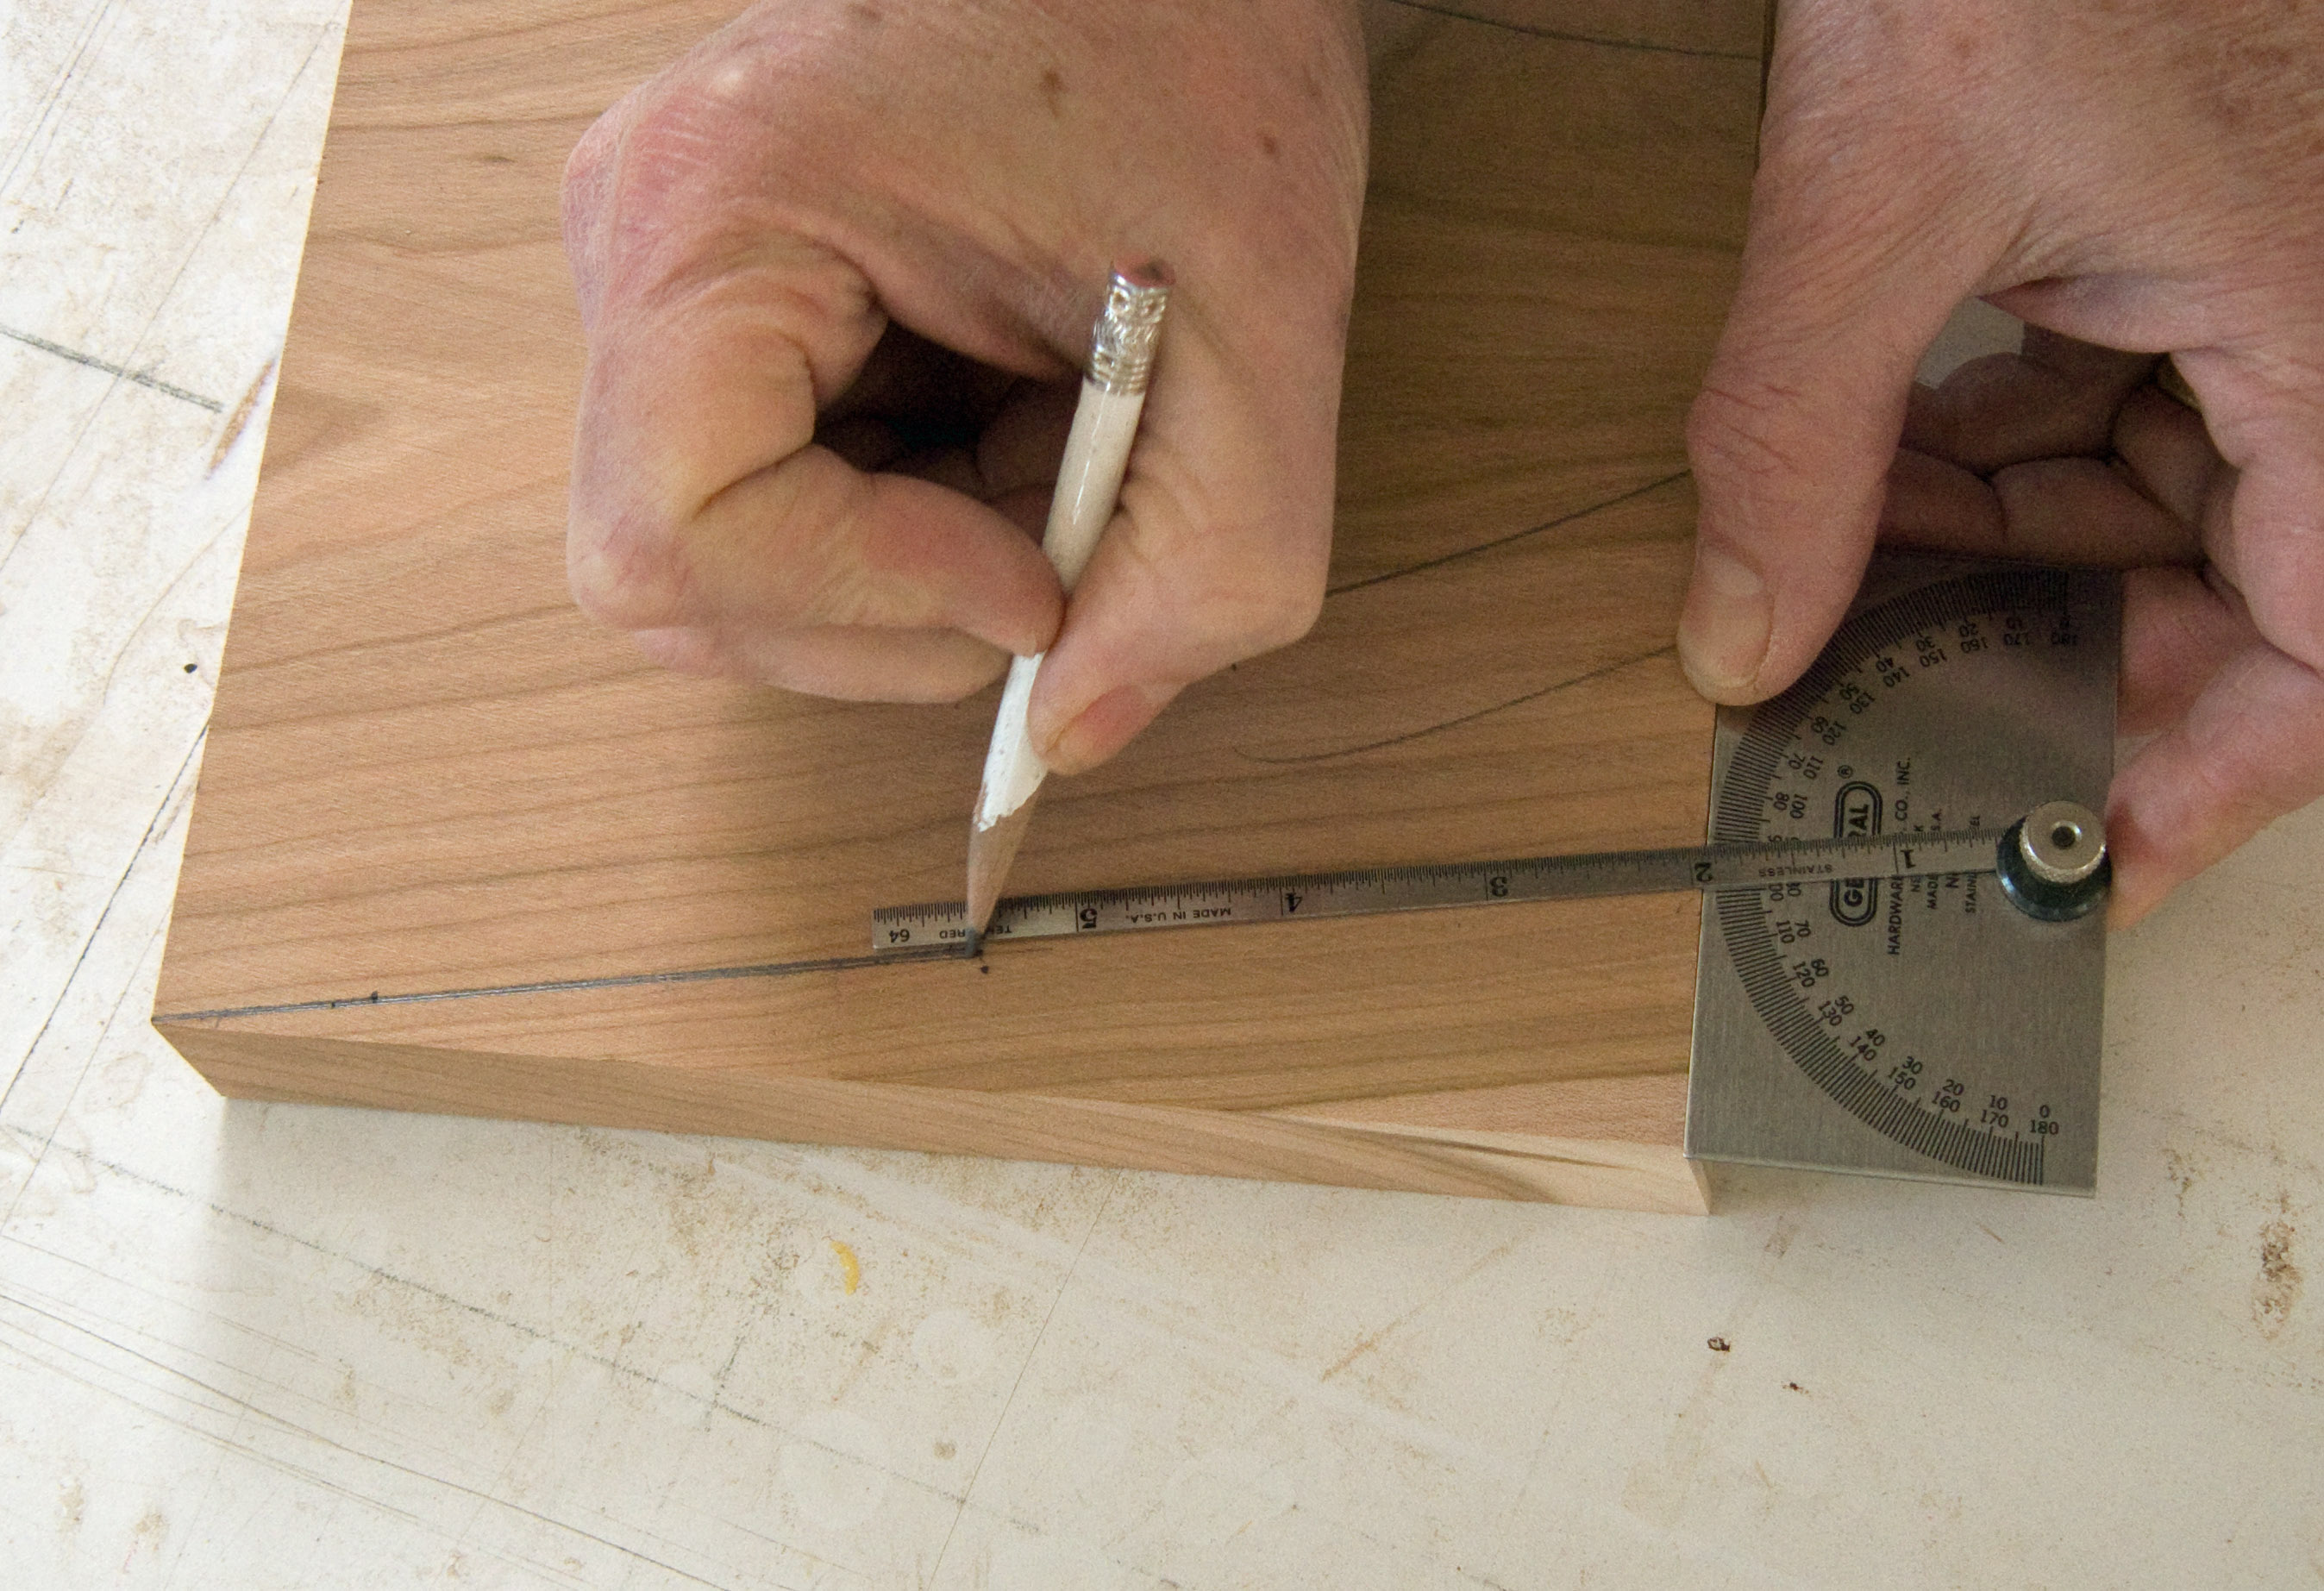
Photo 4. Lay out the 10-degree taper on both sides of a leg. Square the line across the top edge to indicate the finish width at the top of the leg.
Mark the location of the first pin in on the top of one leg (Photo 5). The typical half pin is eliminated in this stool design. This allows the top, or step, to be completely supported by the legs. A half pin on the outside of each leg would leave the top unsupported in those areas.When it comes to dovetailing, there’s always a debate about what to cut first, the tails or the pins. For this project, the pins come first because they can be cut on the bandsaw using a fence for a guide. The fence eliminates freehand slips and only requires a partial layout on one leg.
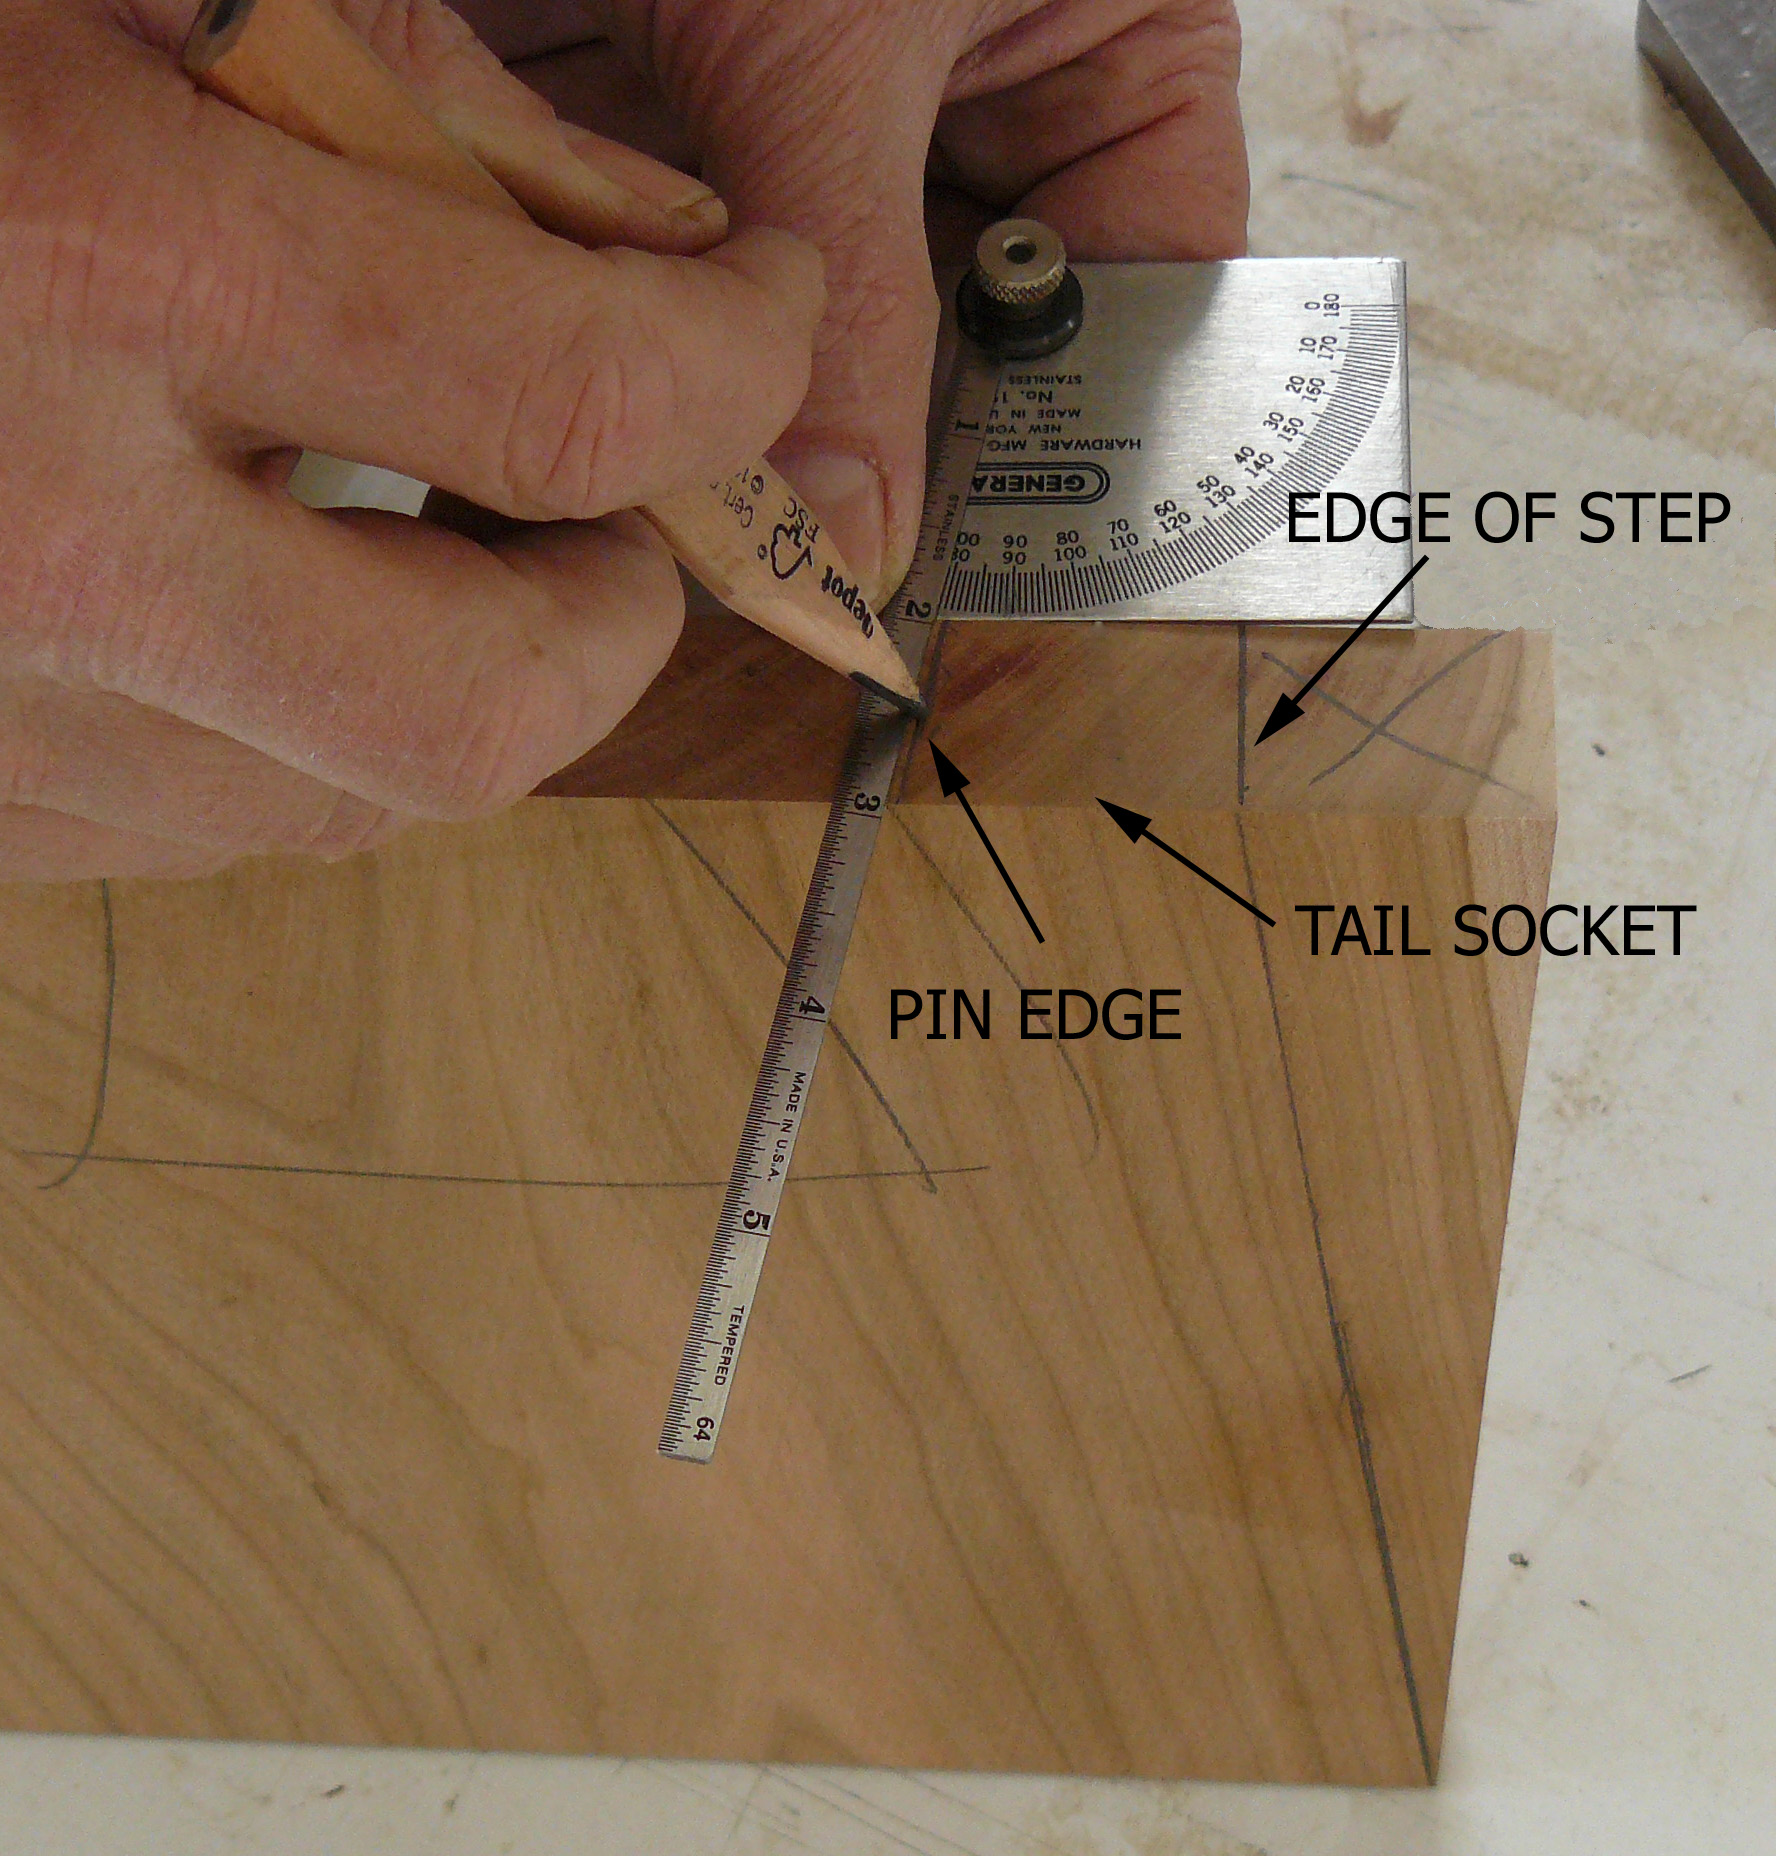
Photo 5. Mark the location of the first pin in from the edge of the leg. Do the same for the pin on the opposite edge. The first pin starts after the tail socket. Starting with a tail socket rather than the typical half-pin allows the leg to support the step across its entire width.
Determine the desired pin size and spacing on one leg. I found 1-1/2″ pin spacing works well yielding approximately 3/4″ wide pins and 15/16″ wide tails. Cut spacer boards that are equal in width to the desired pin spacing. Make the spacer boards of 1-1/2″ thick stock.Use a protractor to lay out four 10-degree ramps on some scrap. Make one pair long enough for the legs (8″-10″) and a second pair long enough for the step (14″). Cut the ramps out on the bandsaw. Attach the two shorter ramps to the face side of a leg blank and parallel with the grain (Photo 6). To make sure the ramp angle is correct, slide the elevated leg edge up against the back of the bandsaw blade. There should be no gaps between the leg edge and the blade back.
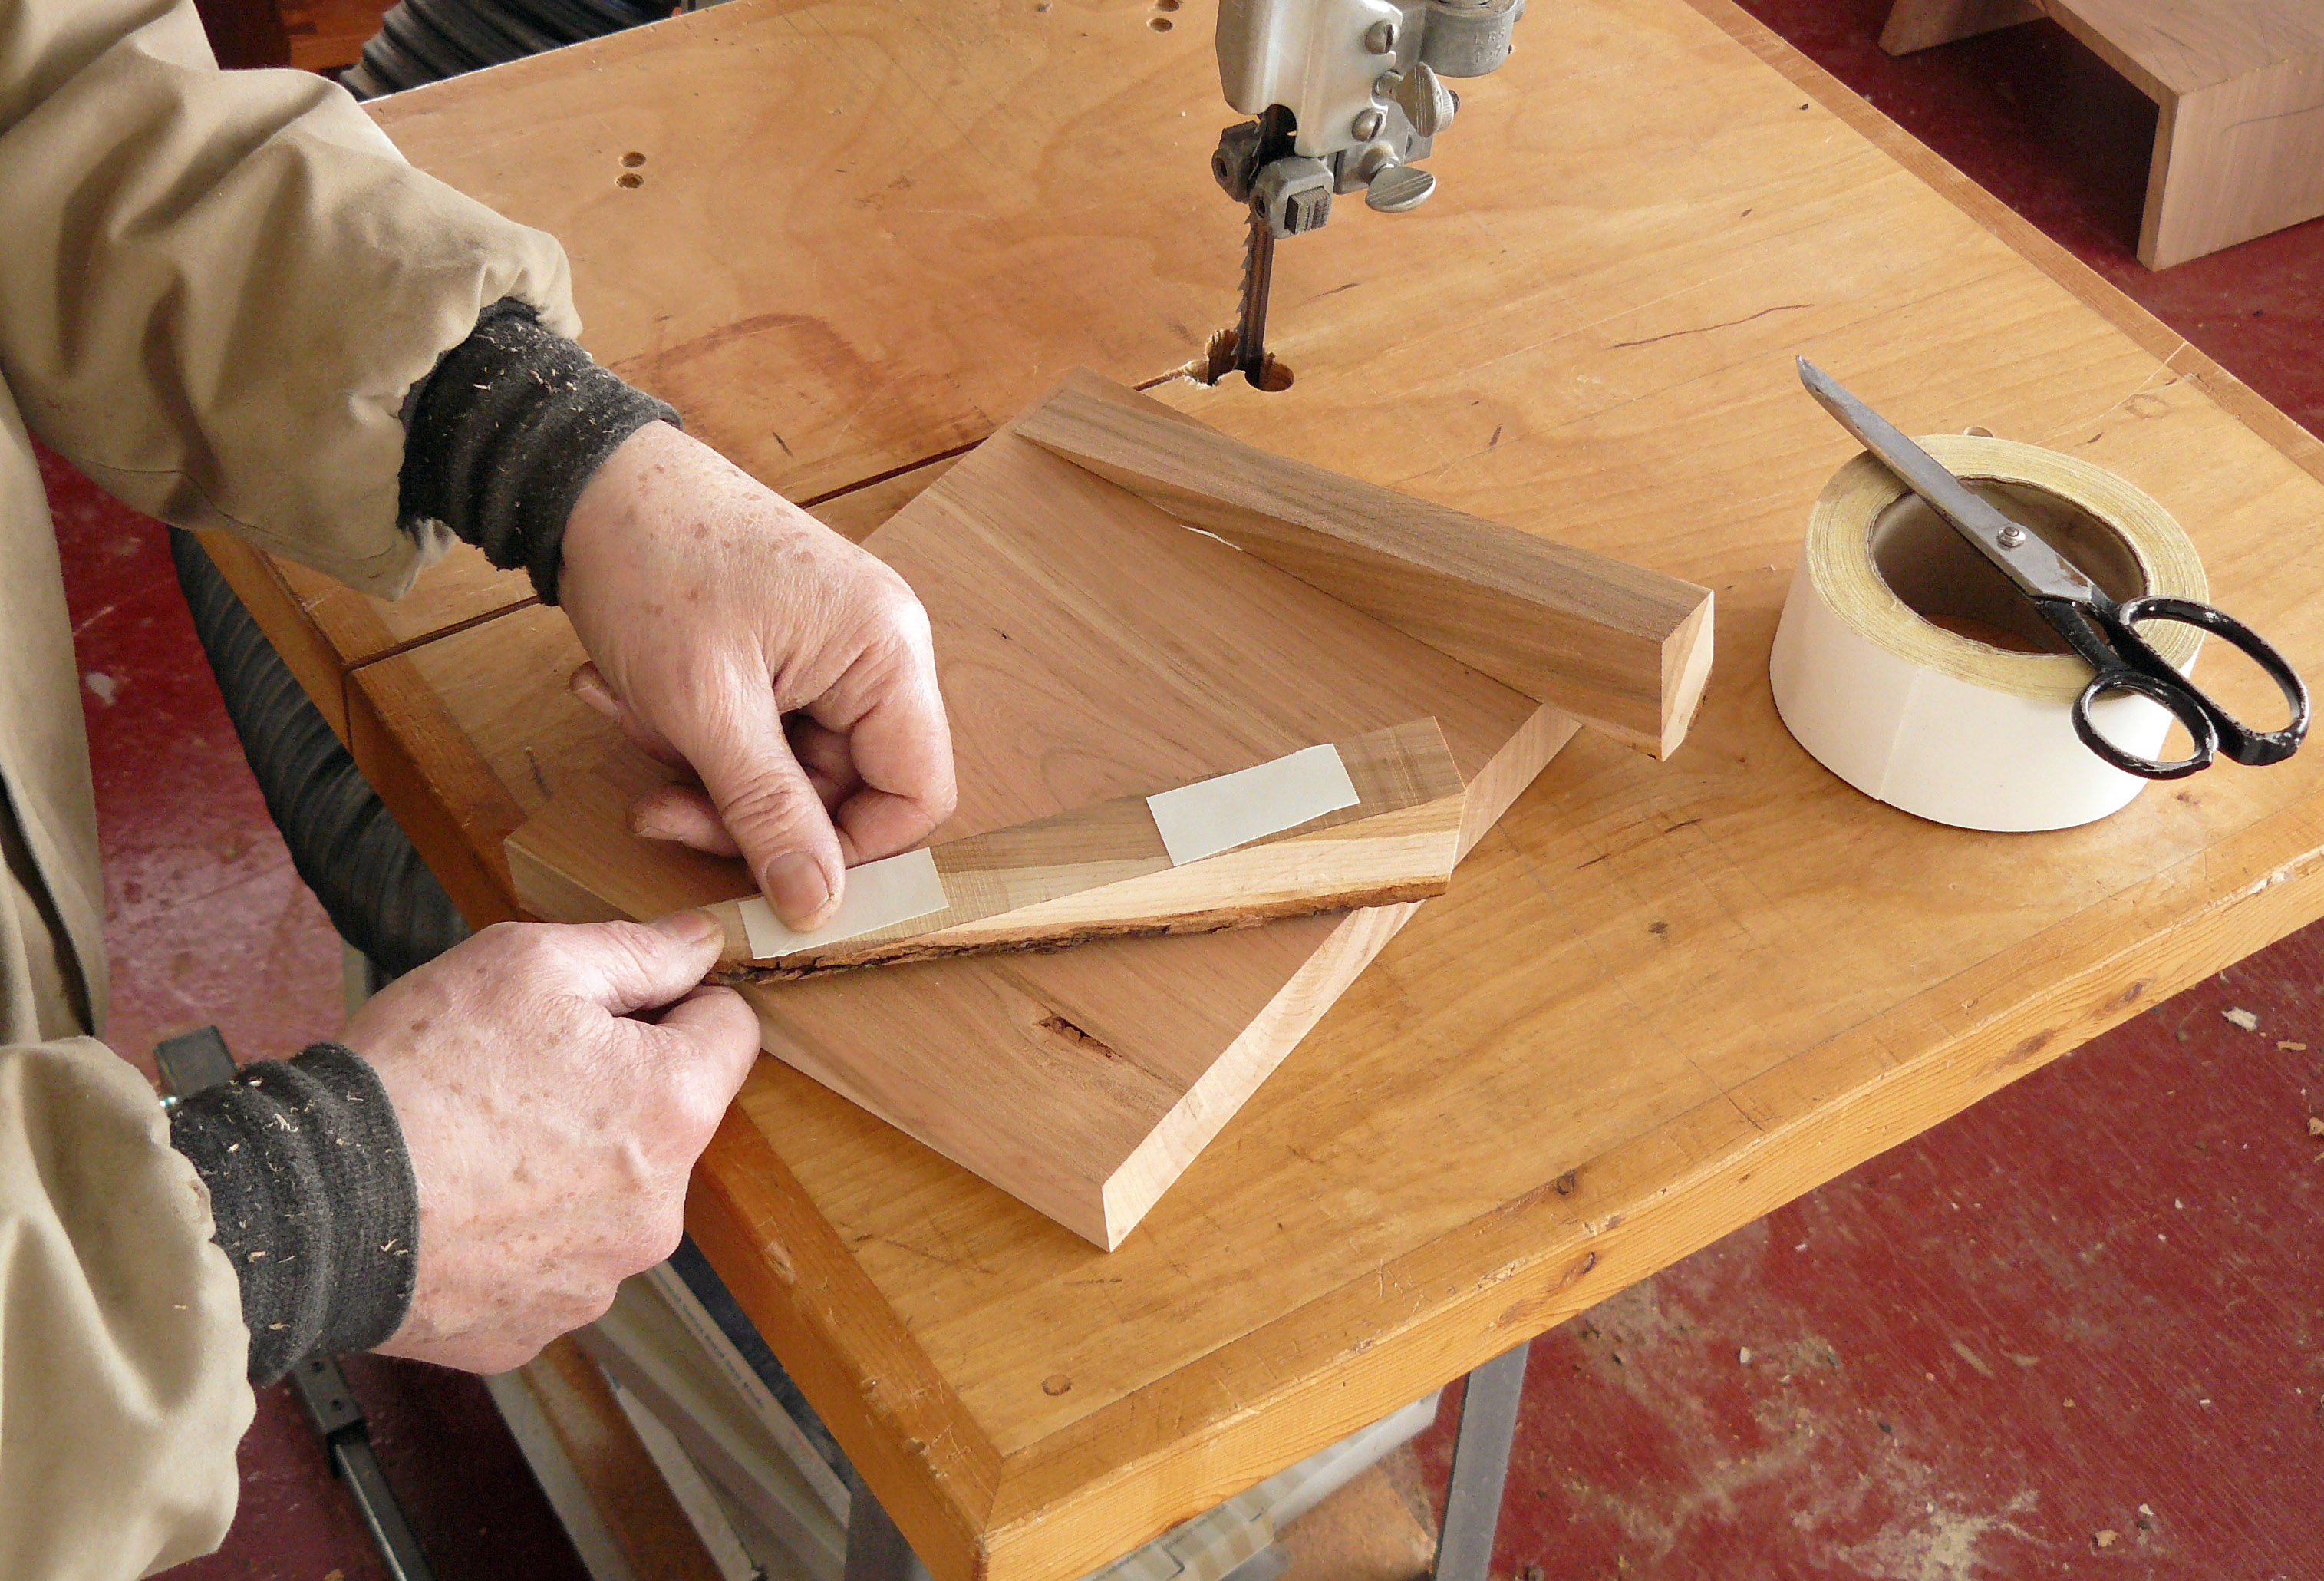
Photo 6. Attach 10-degree ramps on the backside of the leg. Put the narrow end of the ramp at the top of the leg. Double stick tape or hot melt glue works great for this.
Set up the bandsaw to make the first cut on the pins (Photo 7). The table angle does not have to be precise, so simply use the table gauge. Make the first set of cuts on each pin.
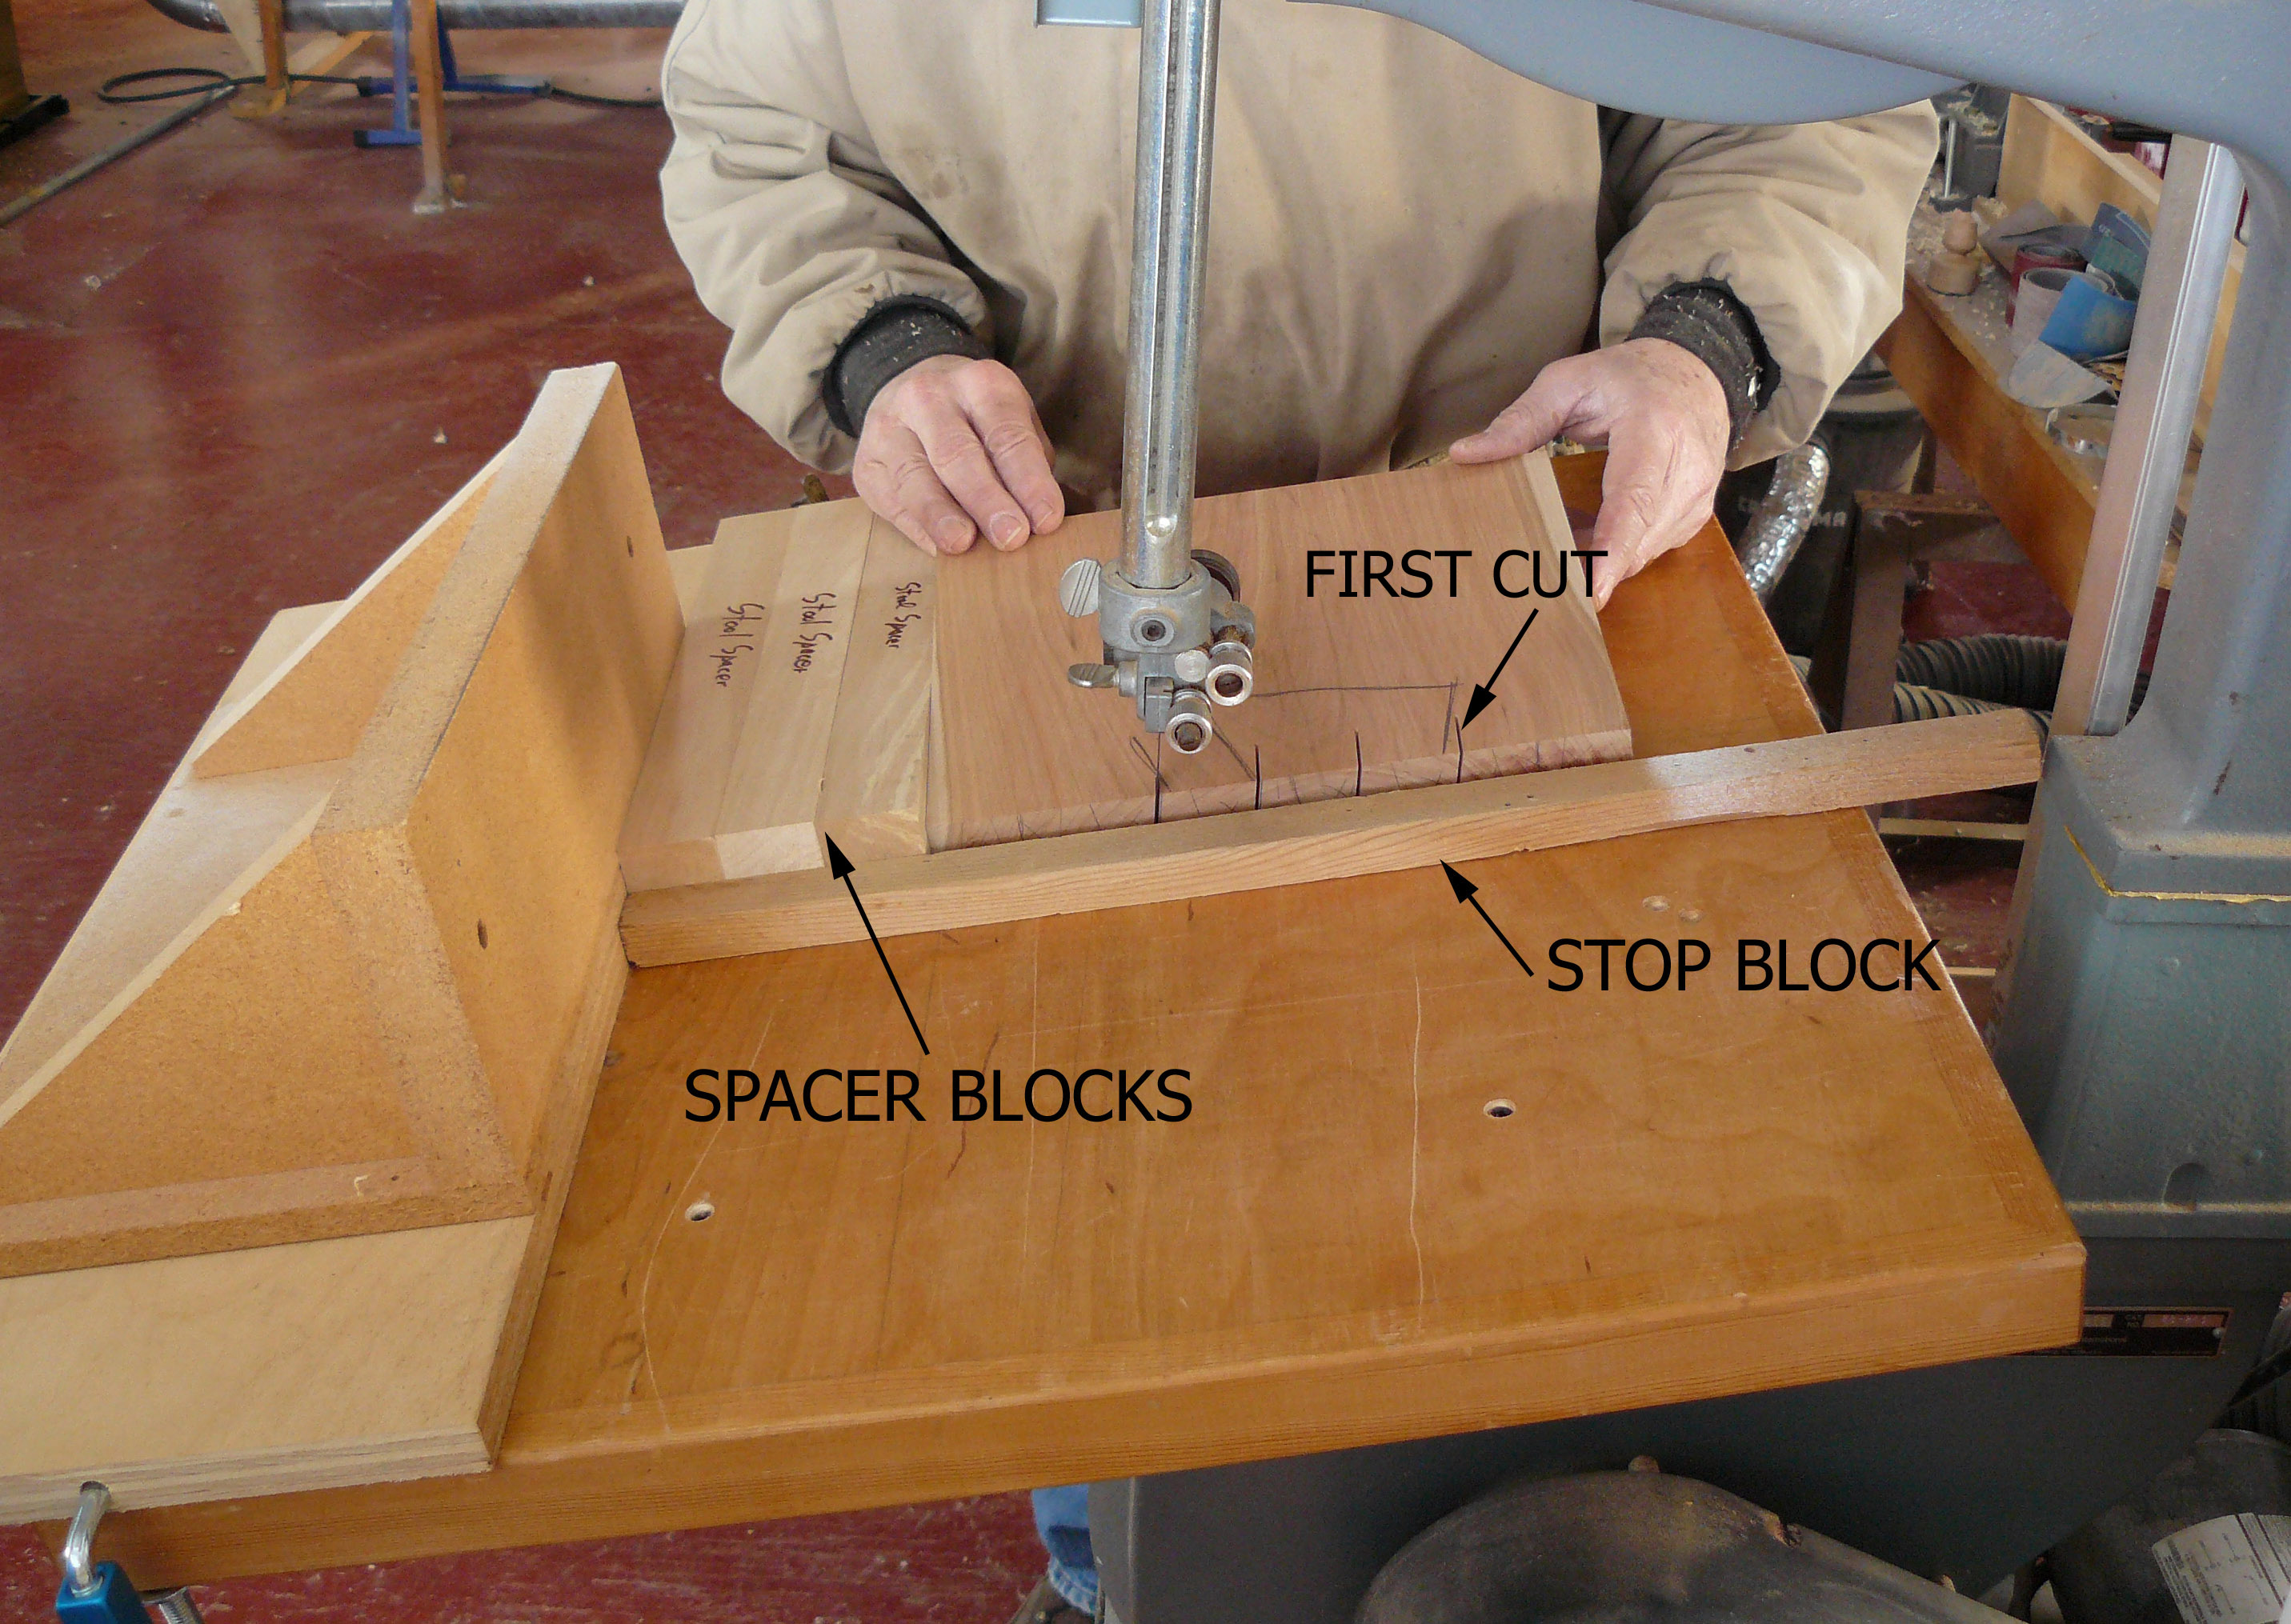
Photo 7. Tilt the table 10-degrees down to your right. Position the fence to cut the inside edge of the furthest pin. Set a stop block for the depth of cut. Make the first cut then add a spacer block equal to the width of your pin spacing and cut the edge of the next pin. Continue to add spacers to cut the remaining pins.
Then, reset the saw and fence to make the final cuts for the pins (Photo 8).
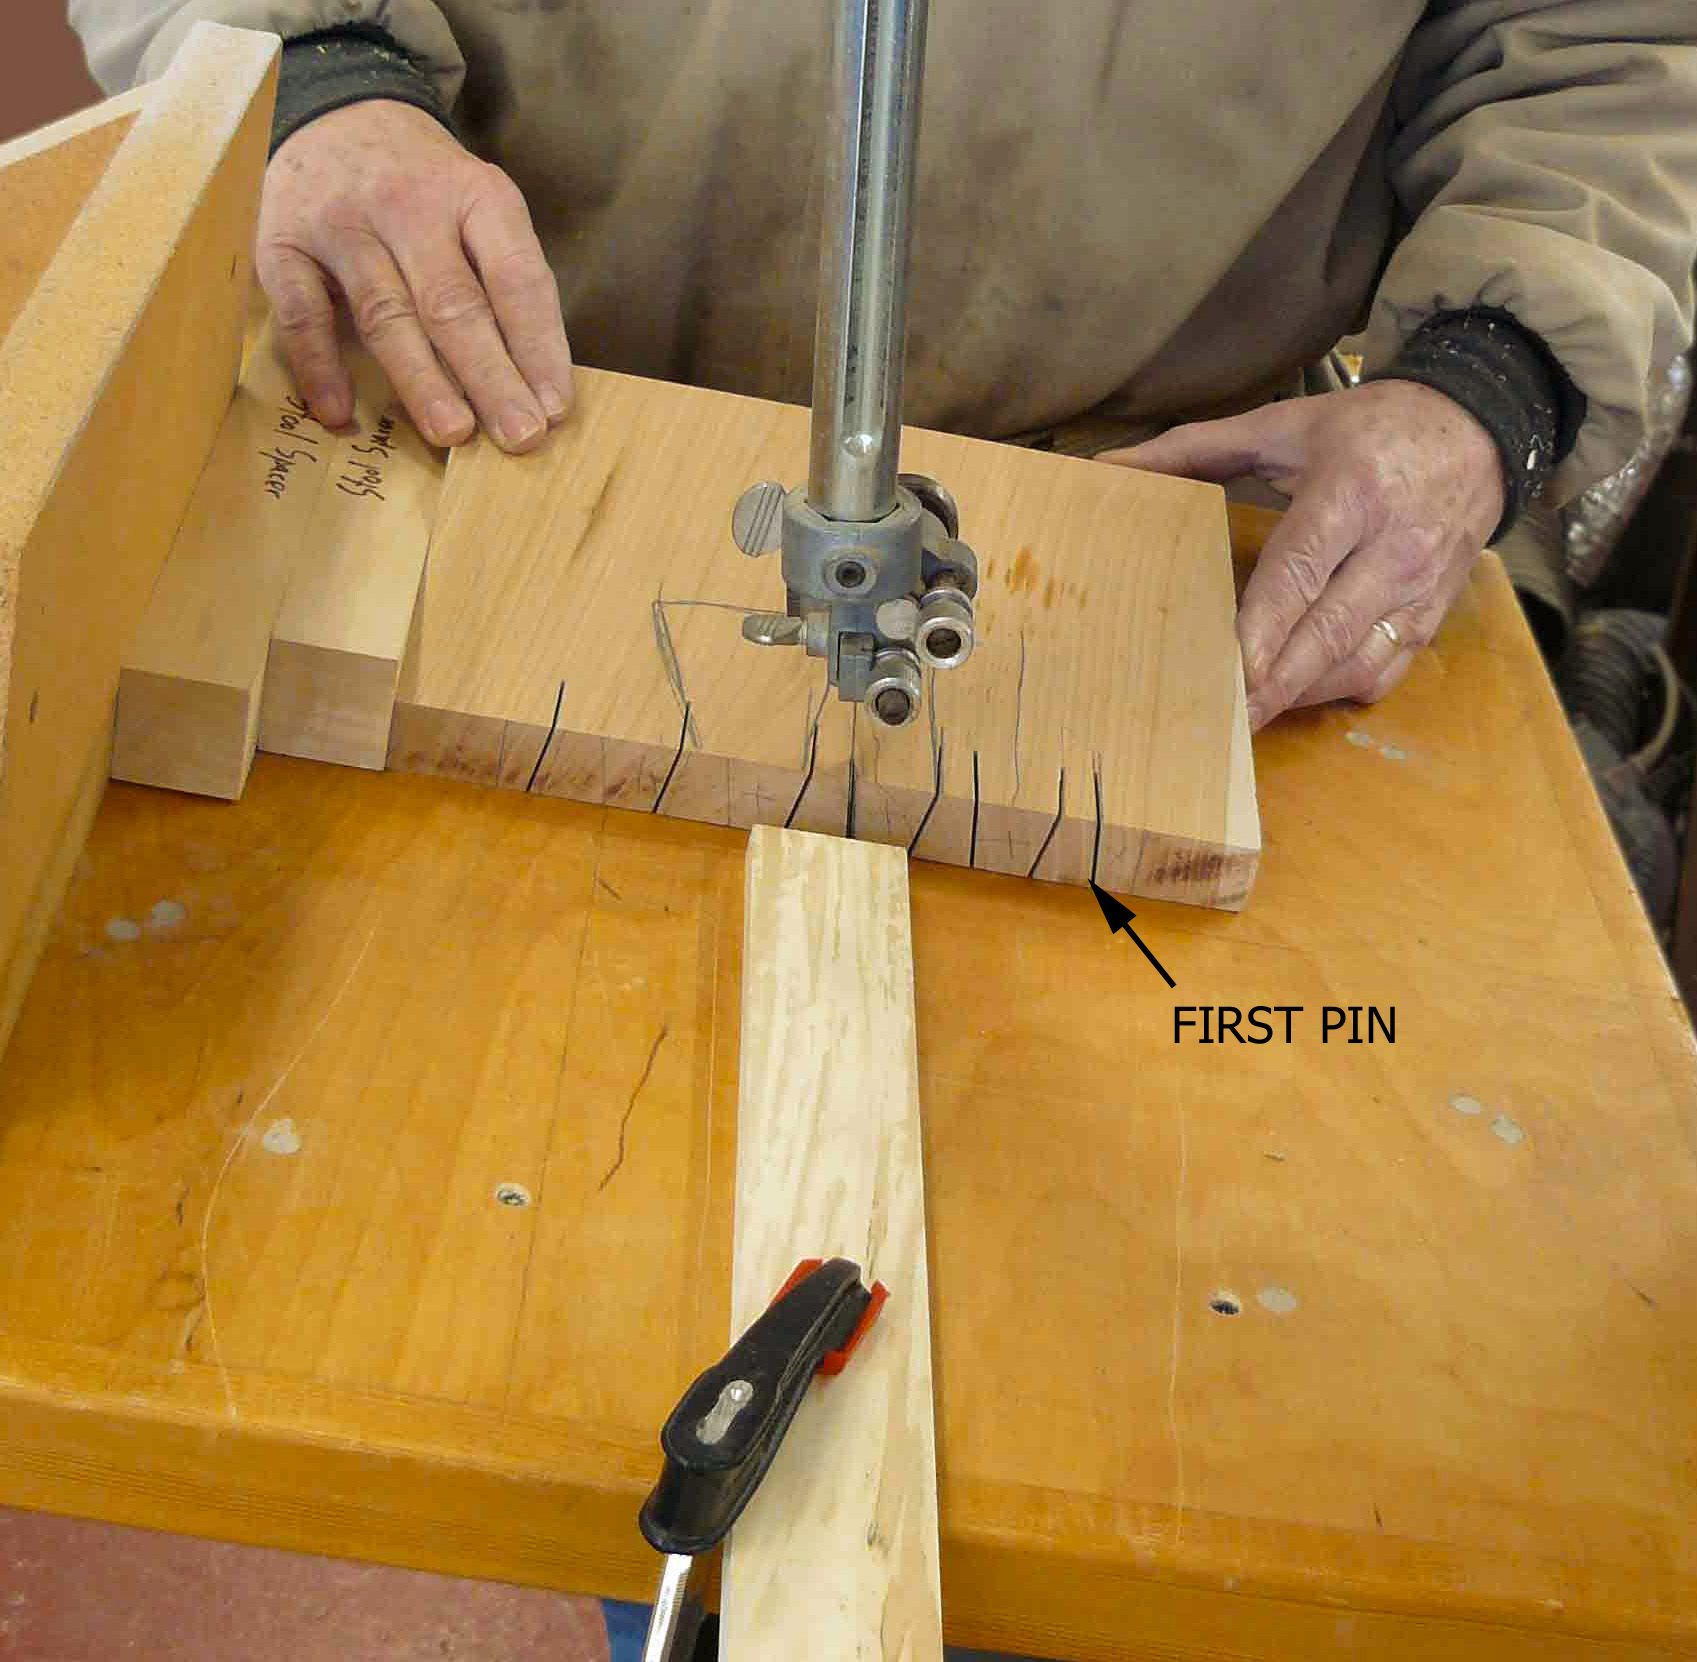
Photo 8. Tilt the table 10-degrees to your left and reset the fence to cut the outside edge of the first pin. Add spacers and cut the rest of the pins.
Cut the shoulders on the outside edges of each leg (Photo 9). For this cut, reposition the ramps to run along the width of the leg (across the grain). Keep your cut just shy of the line so you can pare later.
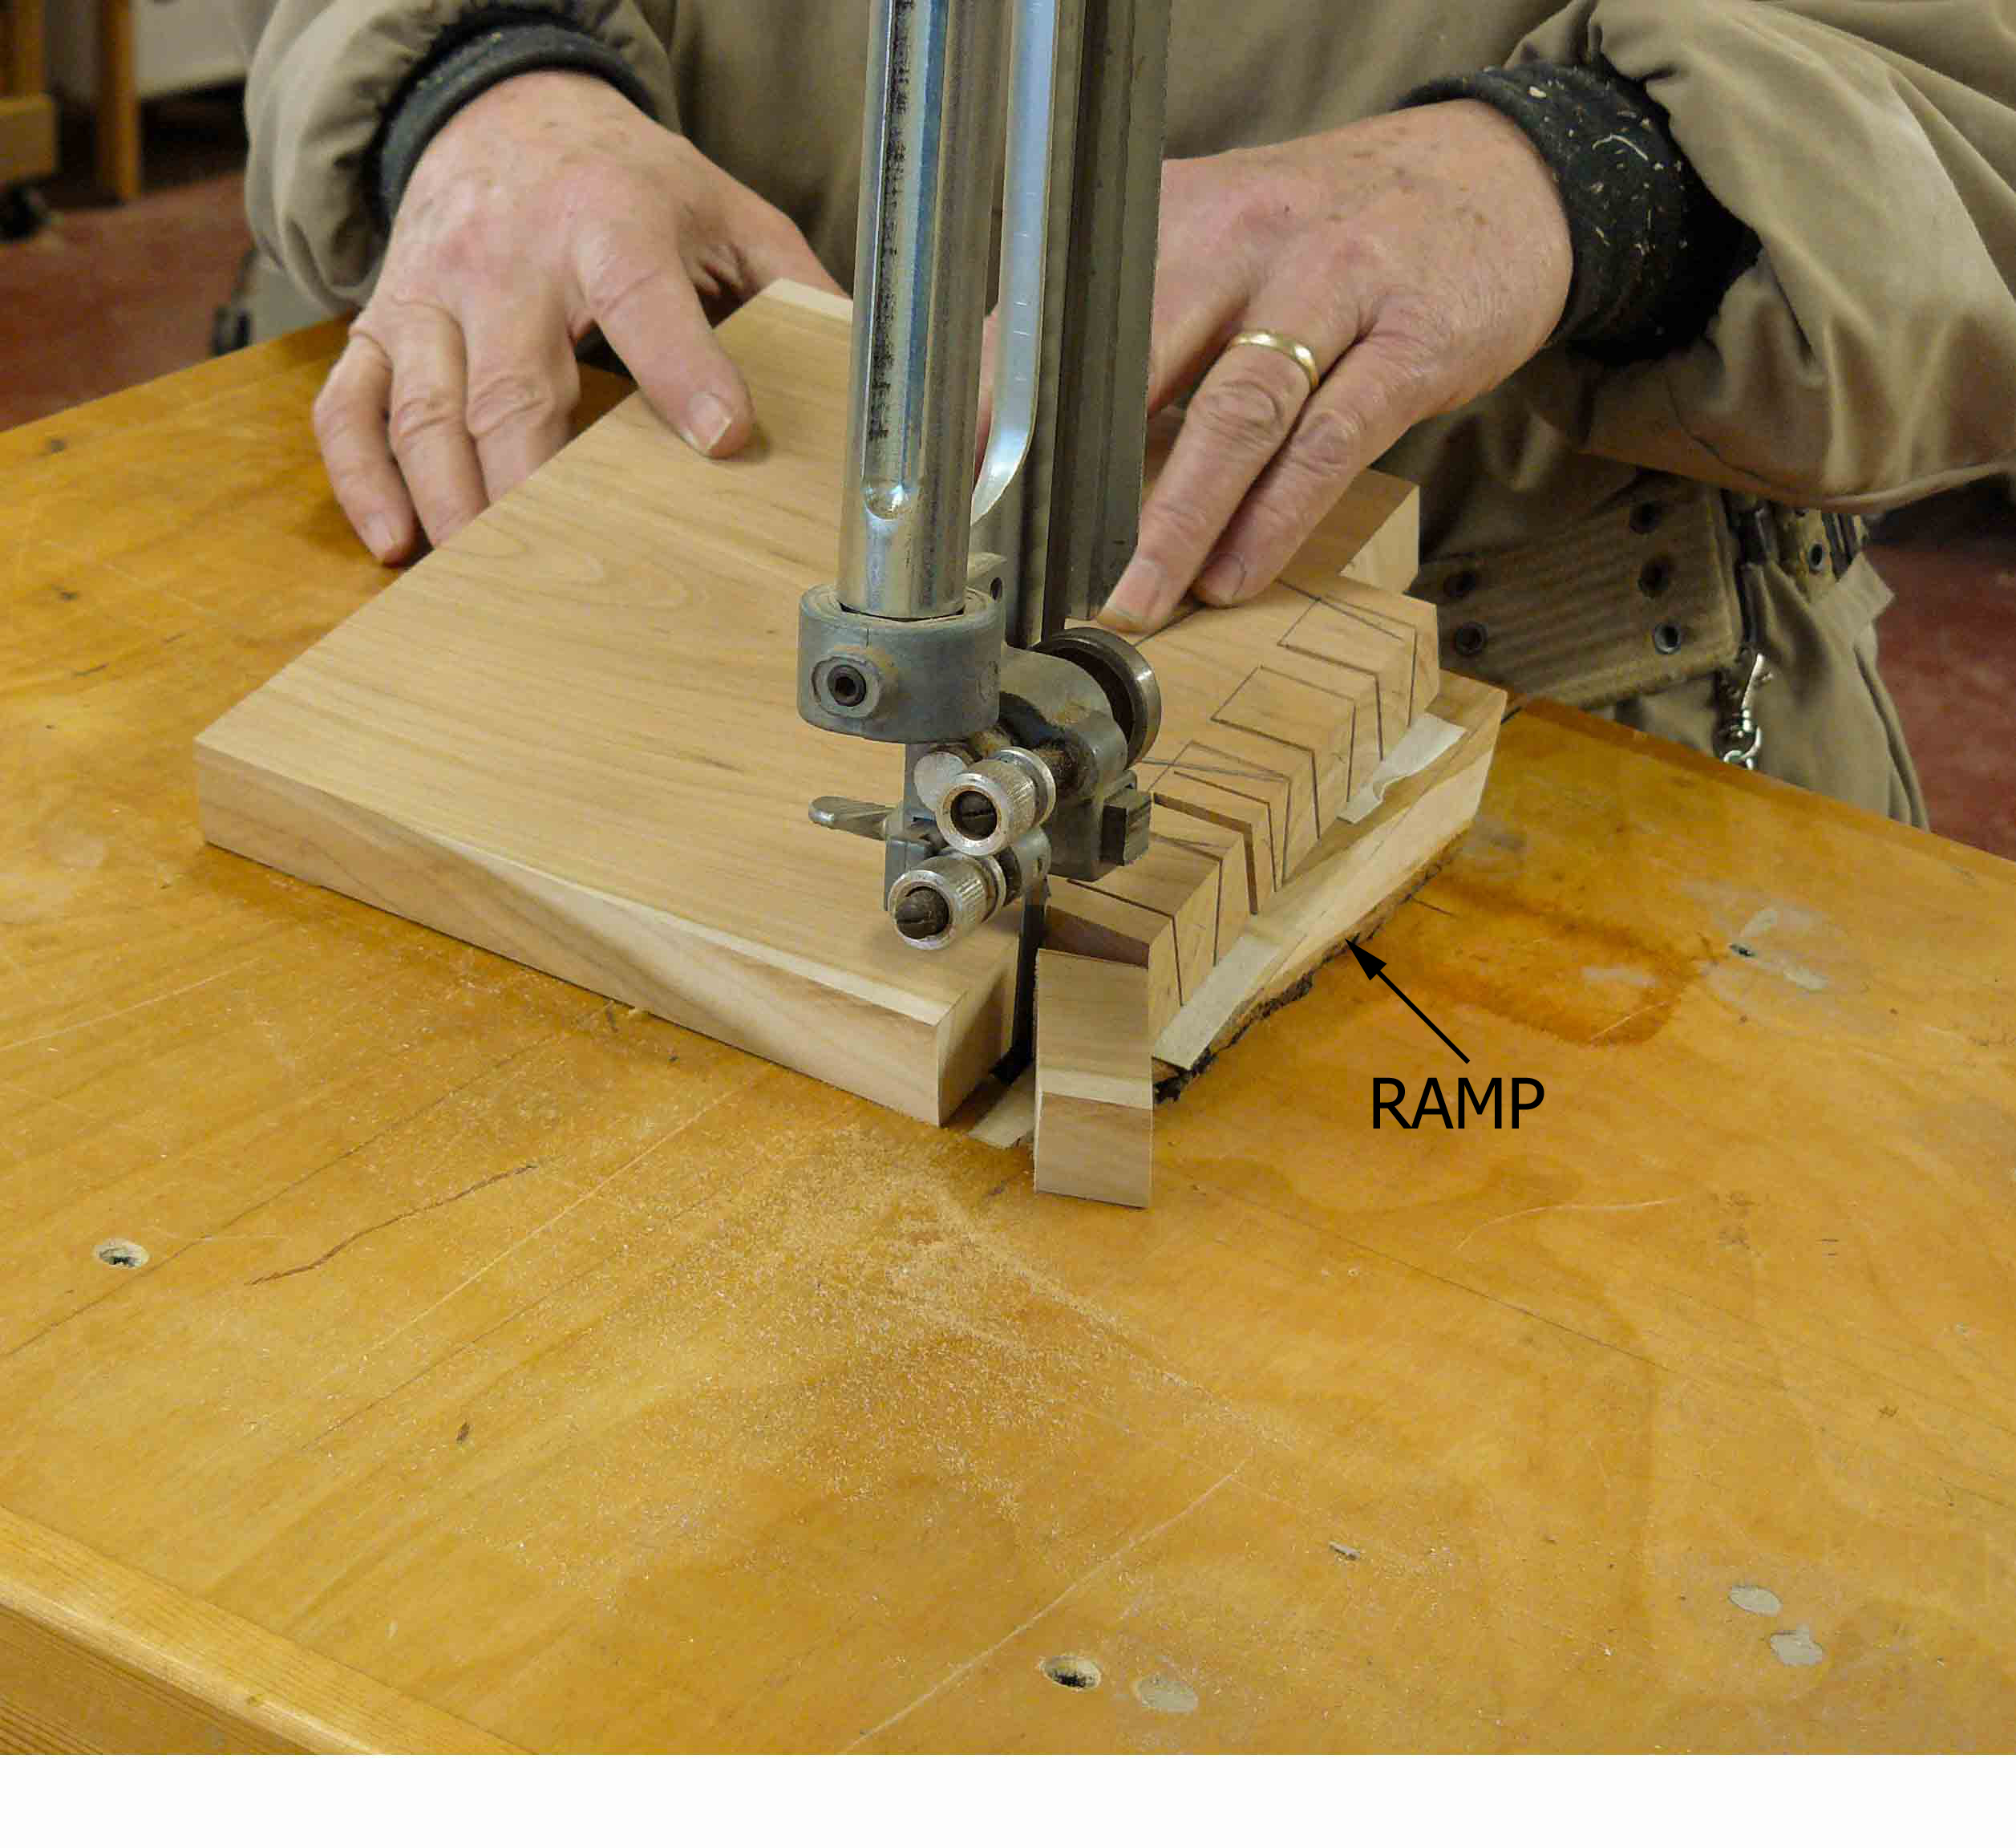
Photo 9. Cut the pin shoulders with the 10-degree ramps repositioned along the width of the leg blank. The ramps are repositioned so the leg slopes down to the blade for each shoulder cut. The bandsaw table is set at 90-degrees for this cut.
Chop out the tail sockets with a sharp chisel (Photo 10). Take care to maintain the 10-degree angle at the bottom of the sockets. The pins are done.
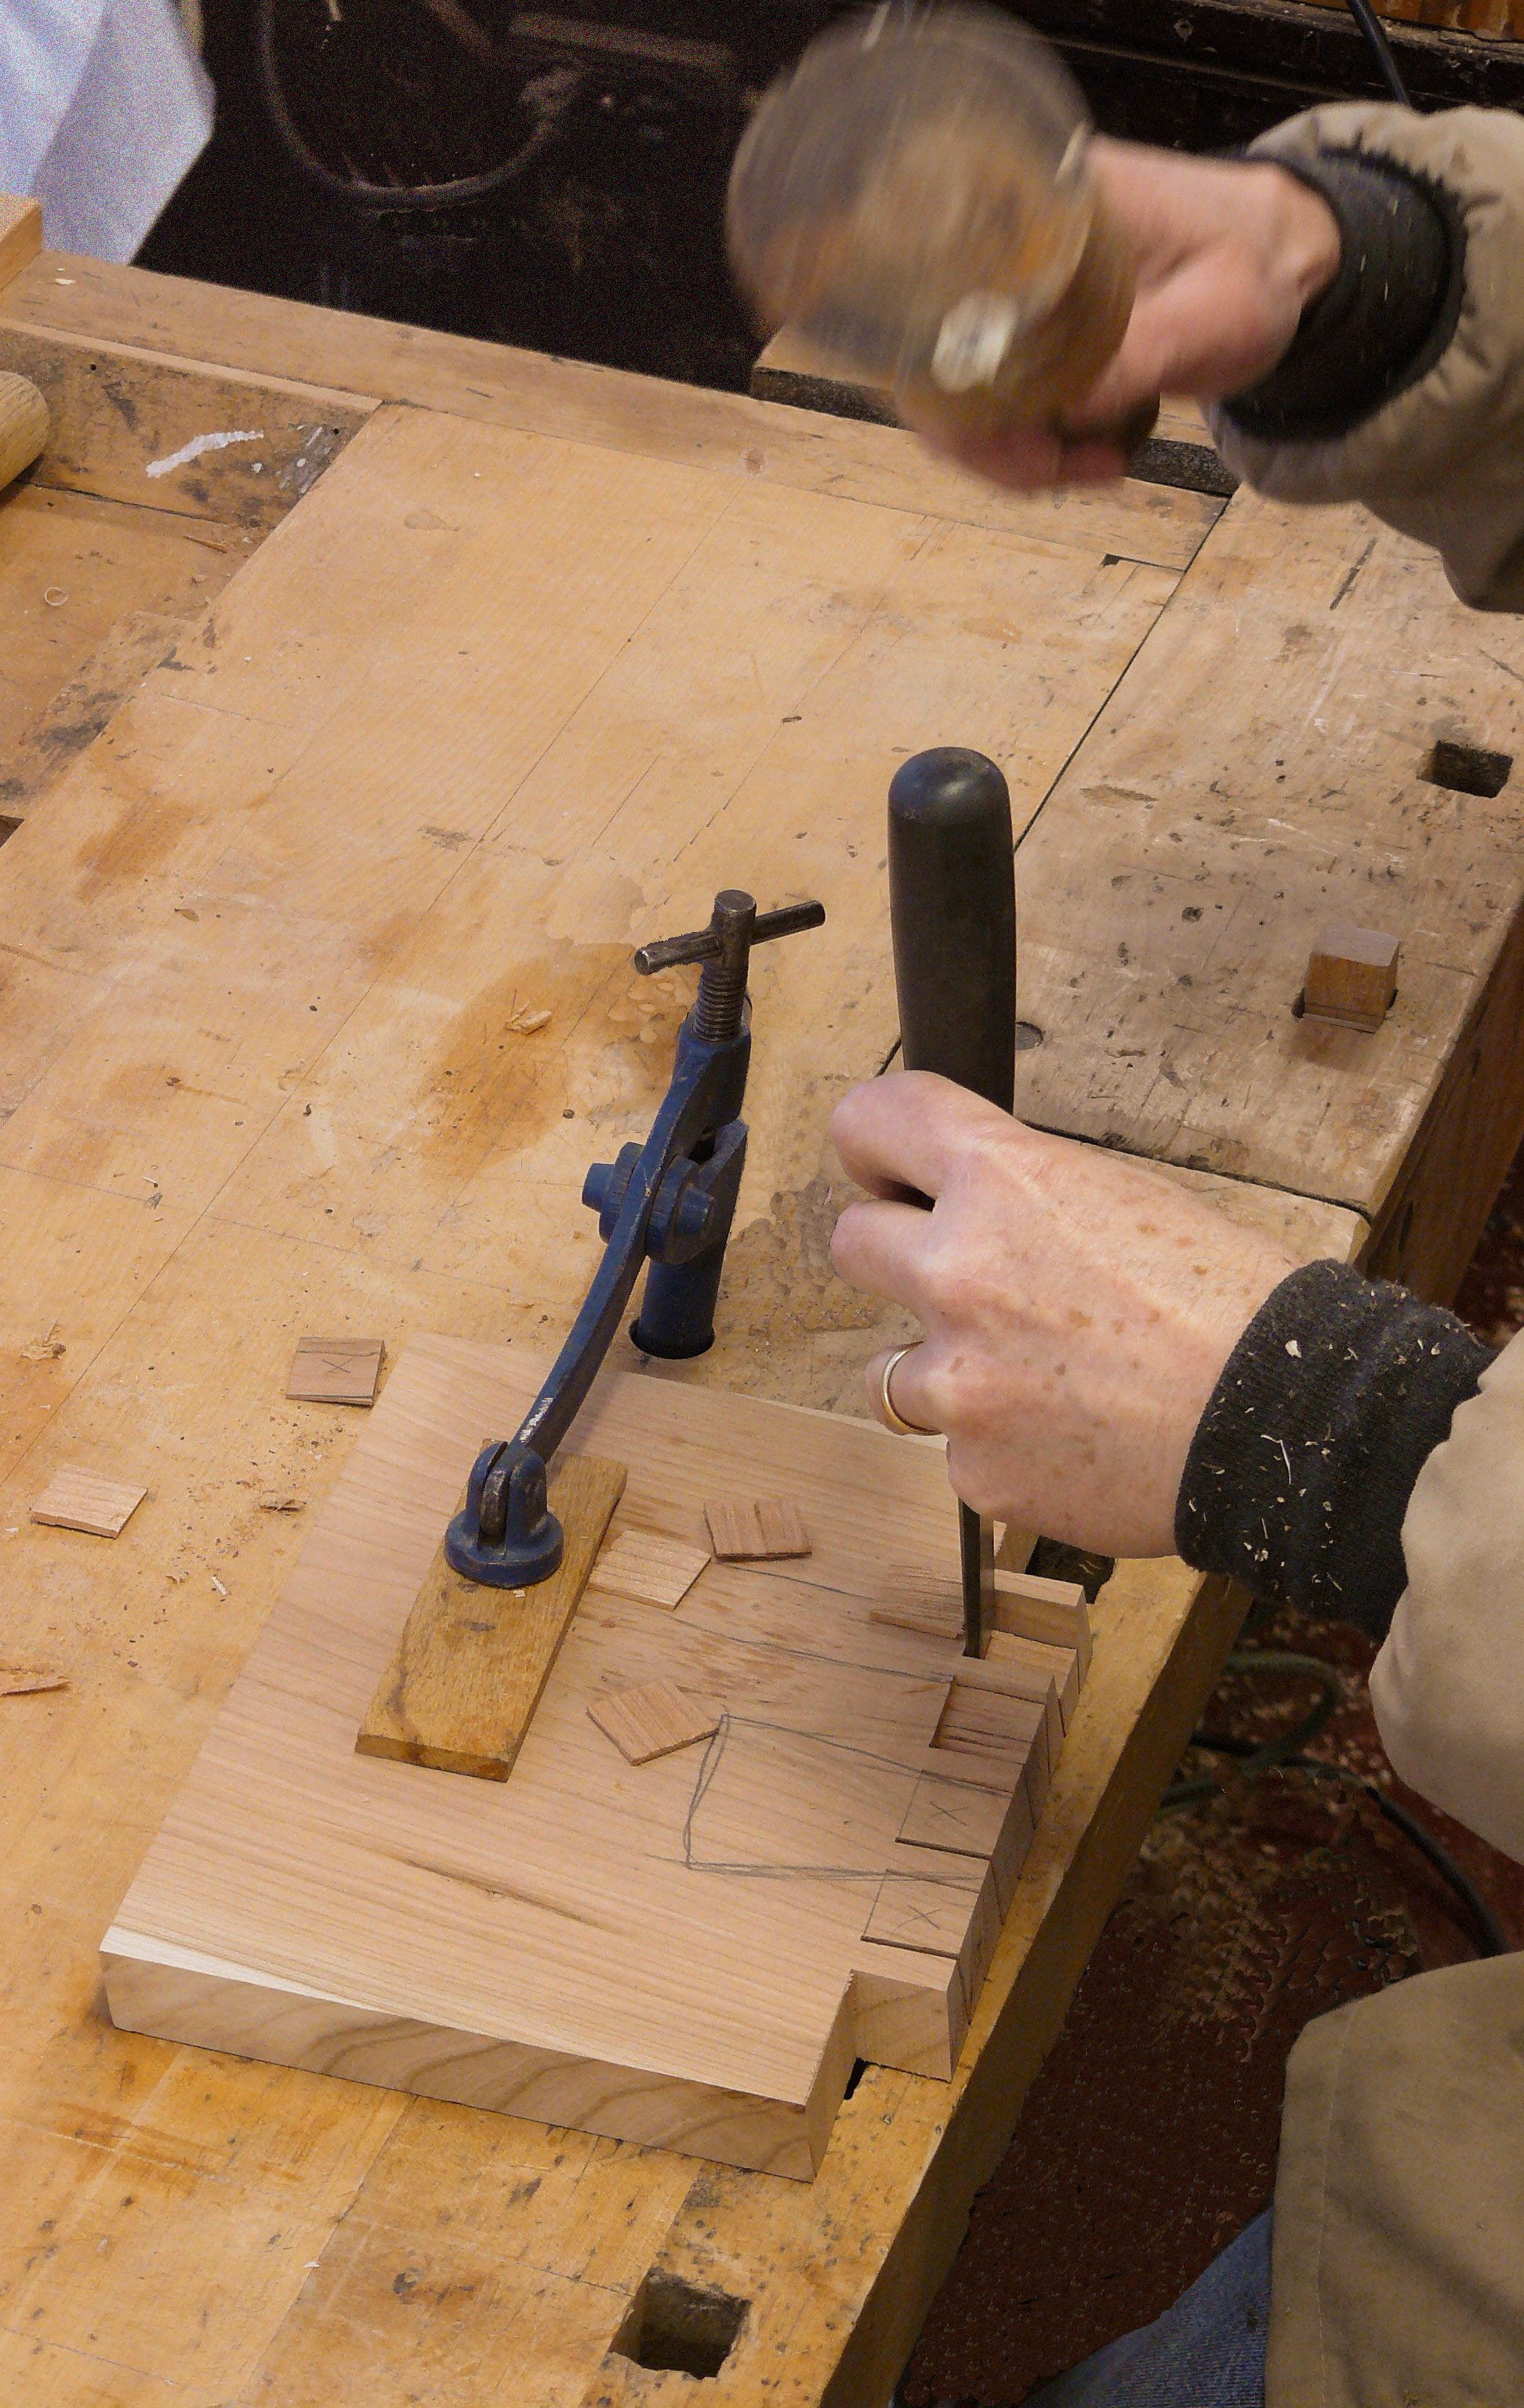
Photo 10. Chop out the tail sockets as you would any dovetail joint. Follow the saw kerfs to achieve the 10-degree angle on the socket bottoms.
Now, use those pins to mark the tails on the step (Photo 11). A precise layout here is essential for a good fit so take your time and make sure your layout lines are dead-on.
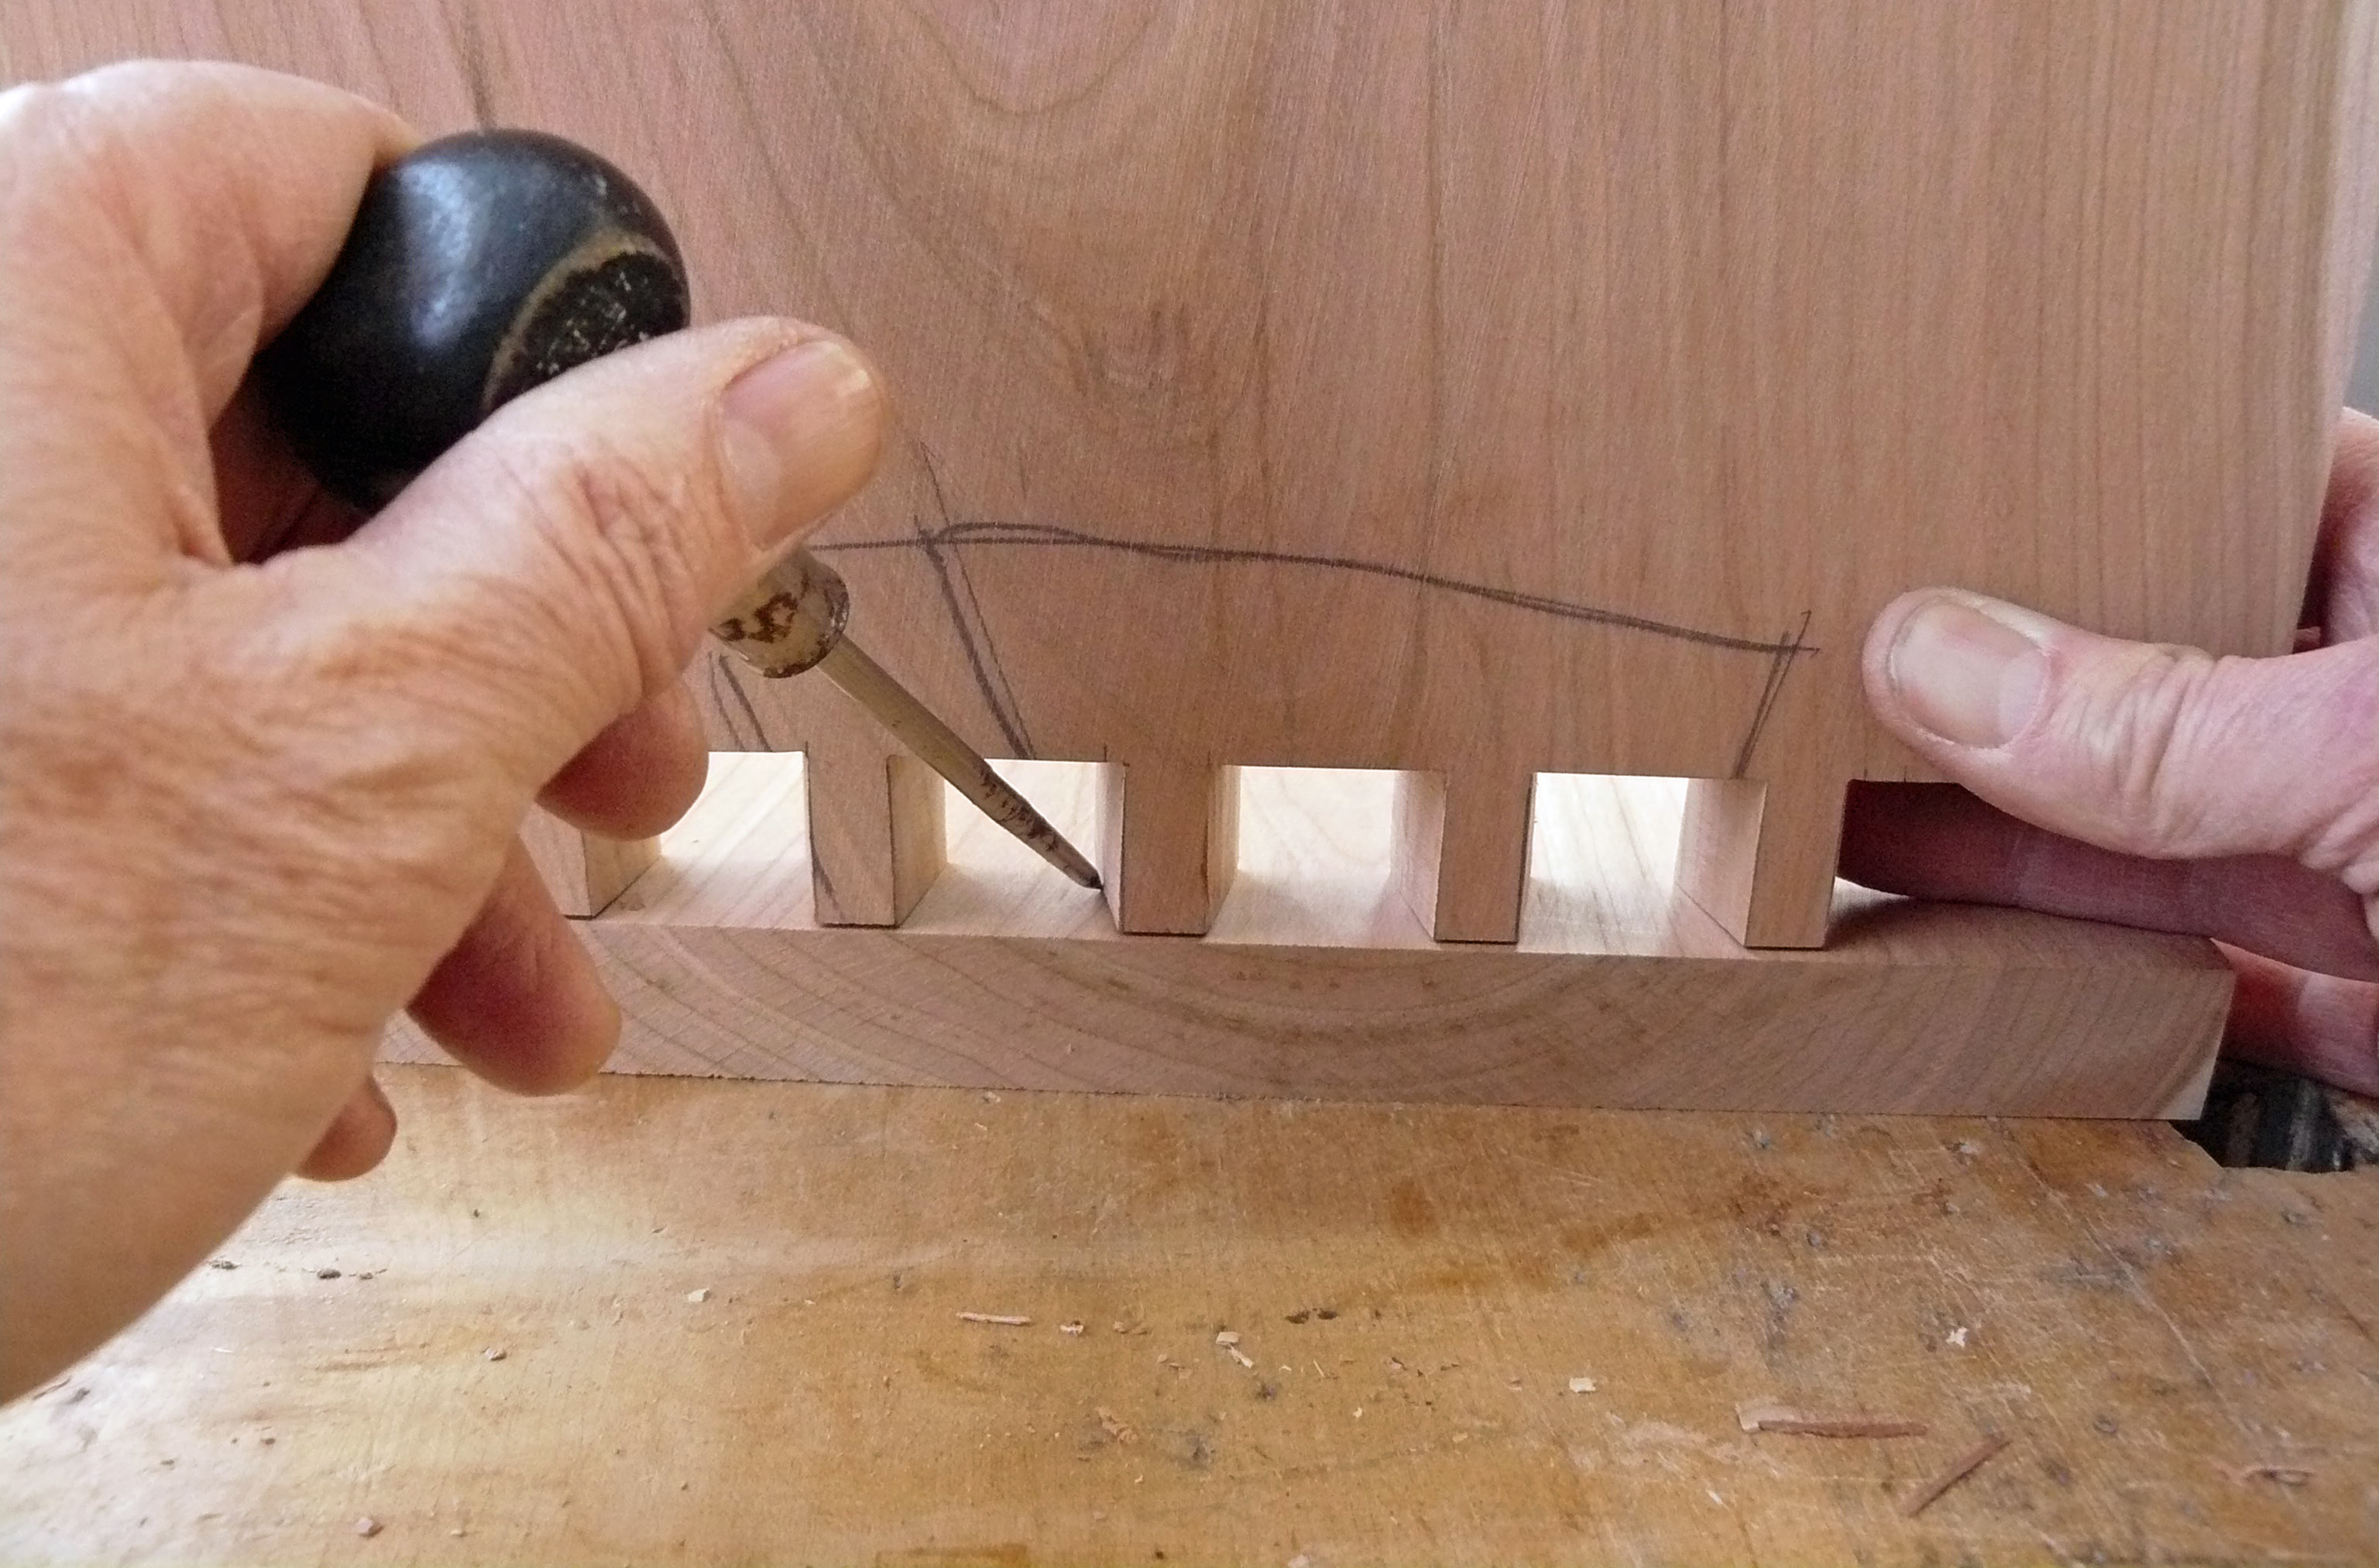
Photo 11. Using the pins to layout the tails on the underside of the step. A scratch awl or a very sharp pencil works best.
With the bandsaw table at 90-degrees, freehand cut the tails (Photo 12).
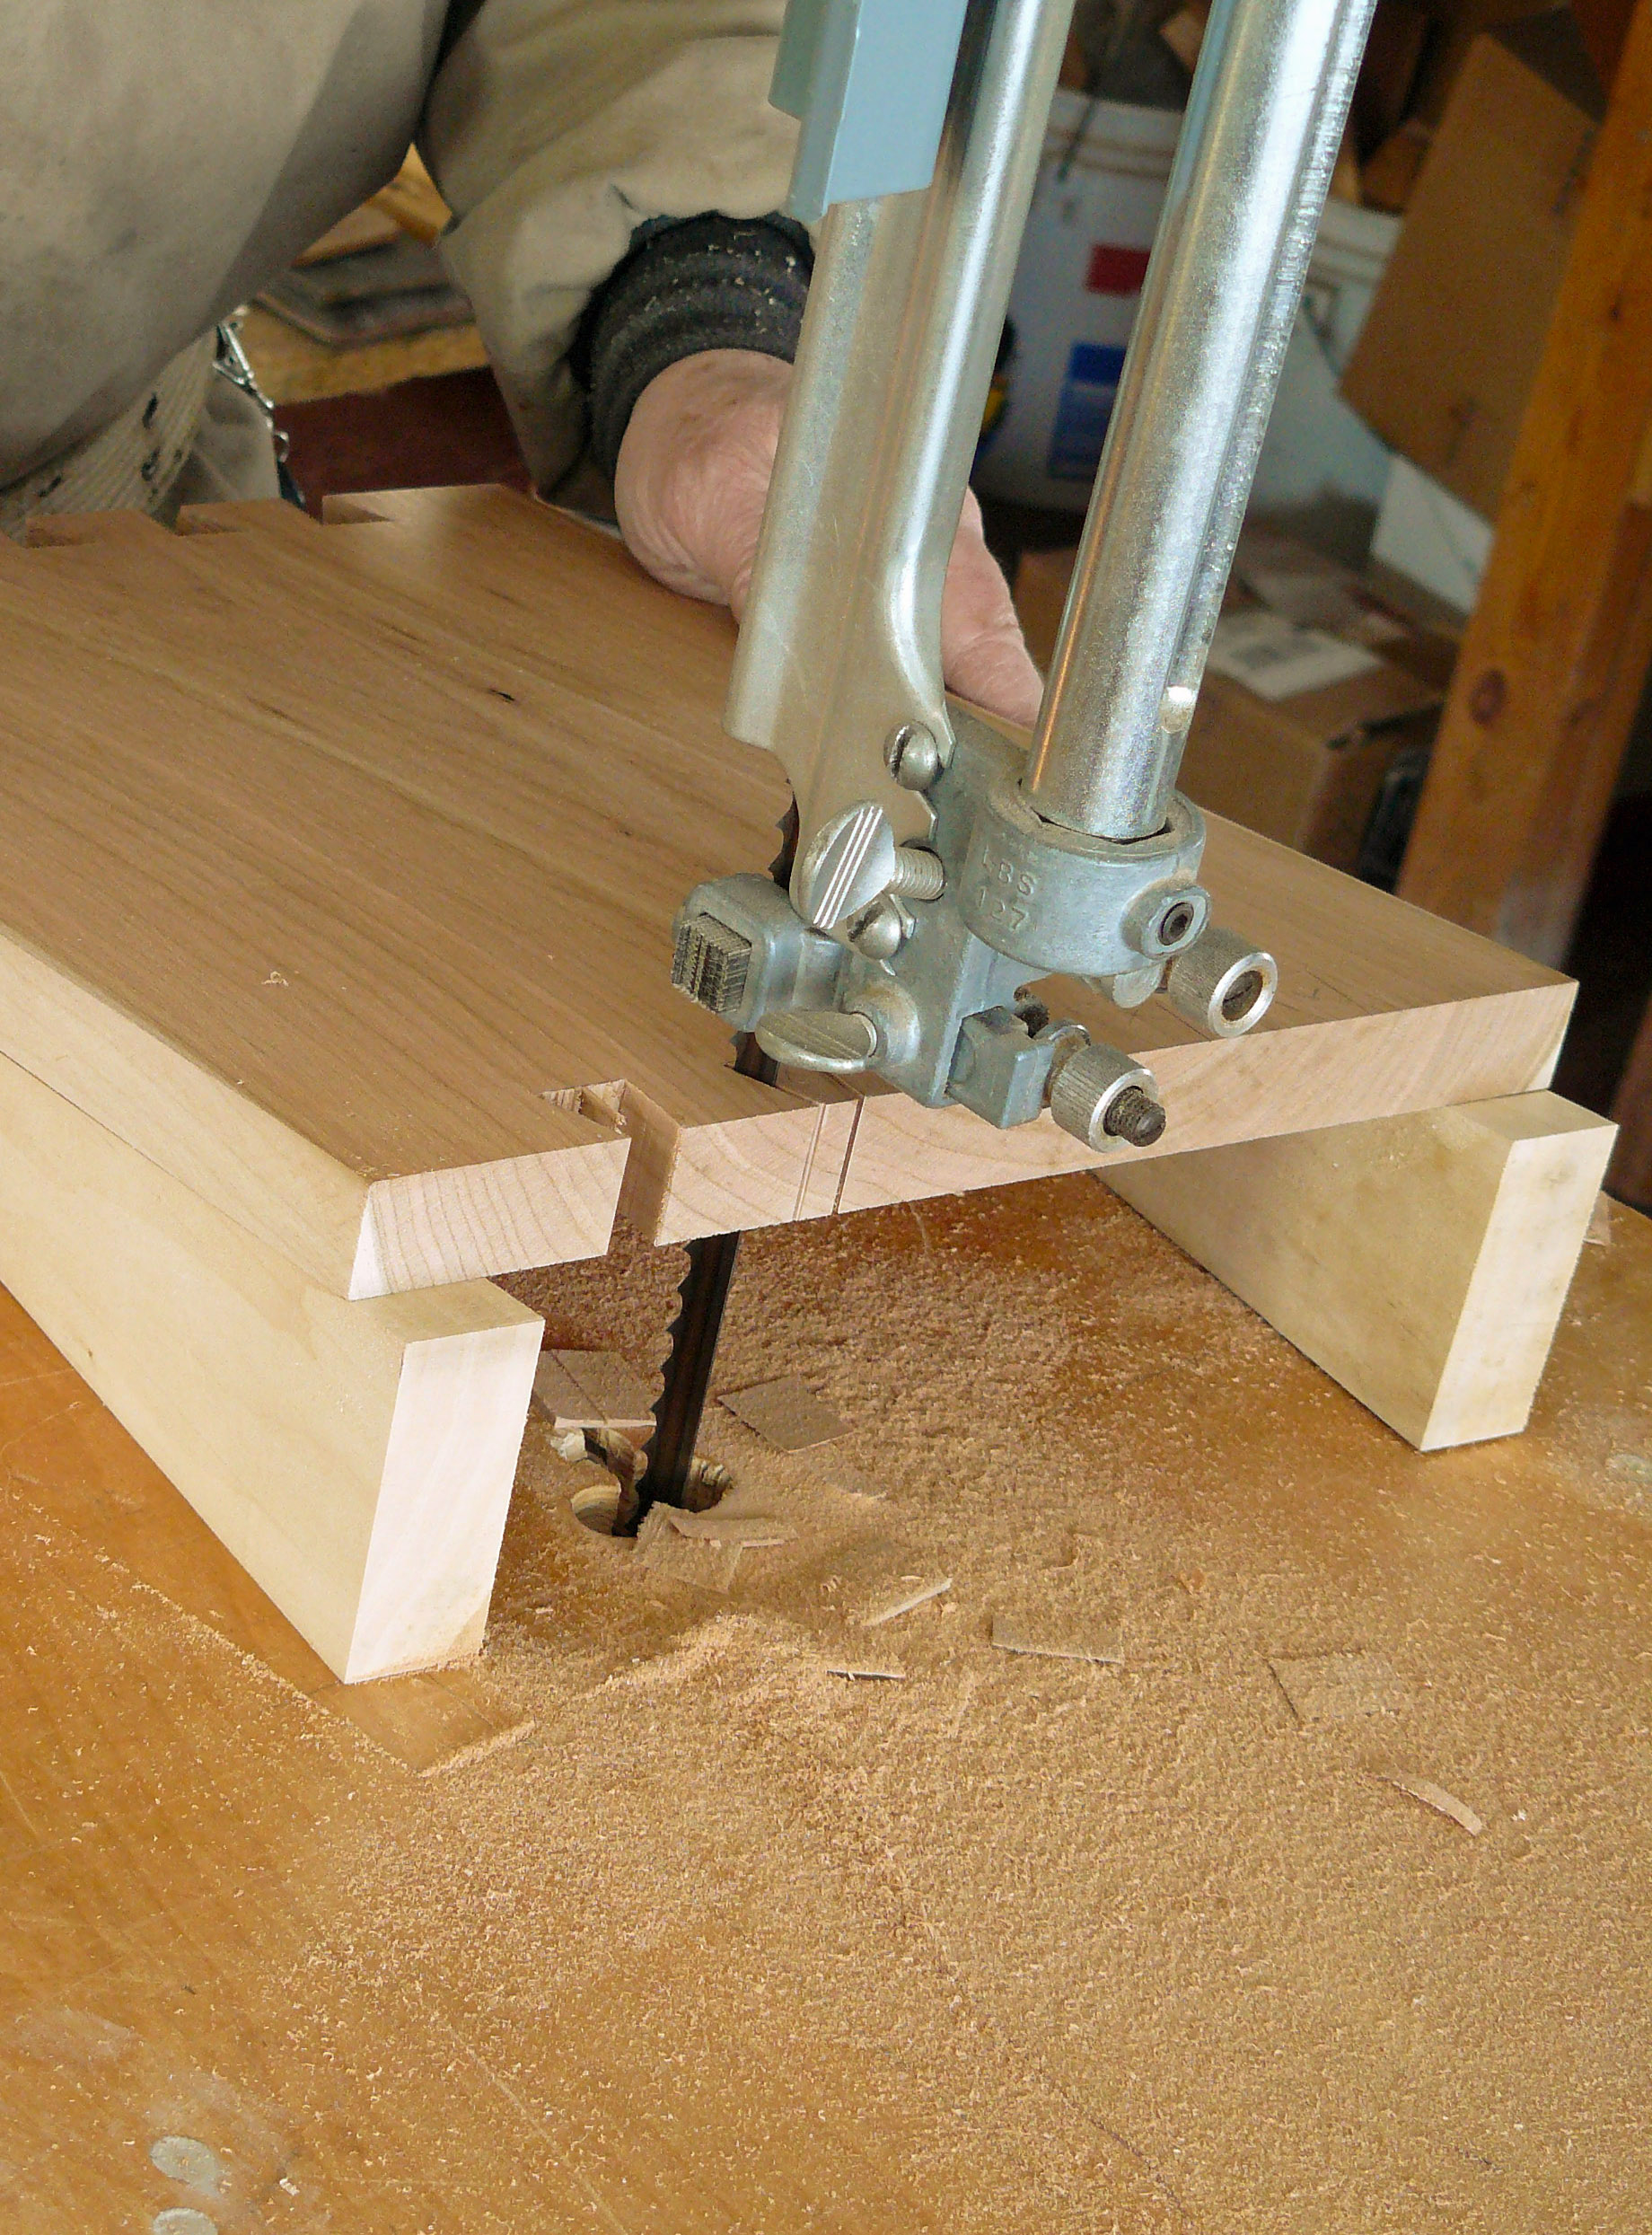
Photo 12. Cut the tails freehand on the bandsaw. Use a second set of 10-degree ramps cut long enough to support the entire step. Keep your cuts shy of the layout lines. Nibble out the pin socket with repeat cuts.
A stop block is not necessary here because the cuts must be kept shy of the lines. With a sharp chisel and a steady hand, pare down to your layout lines (Photo 13).
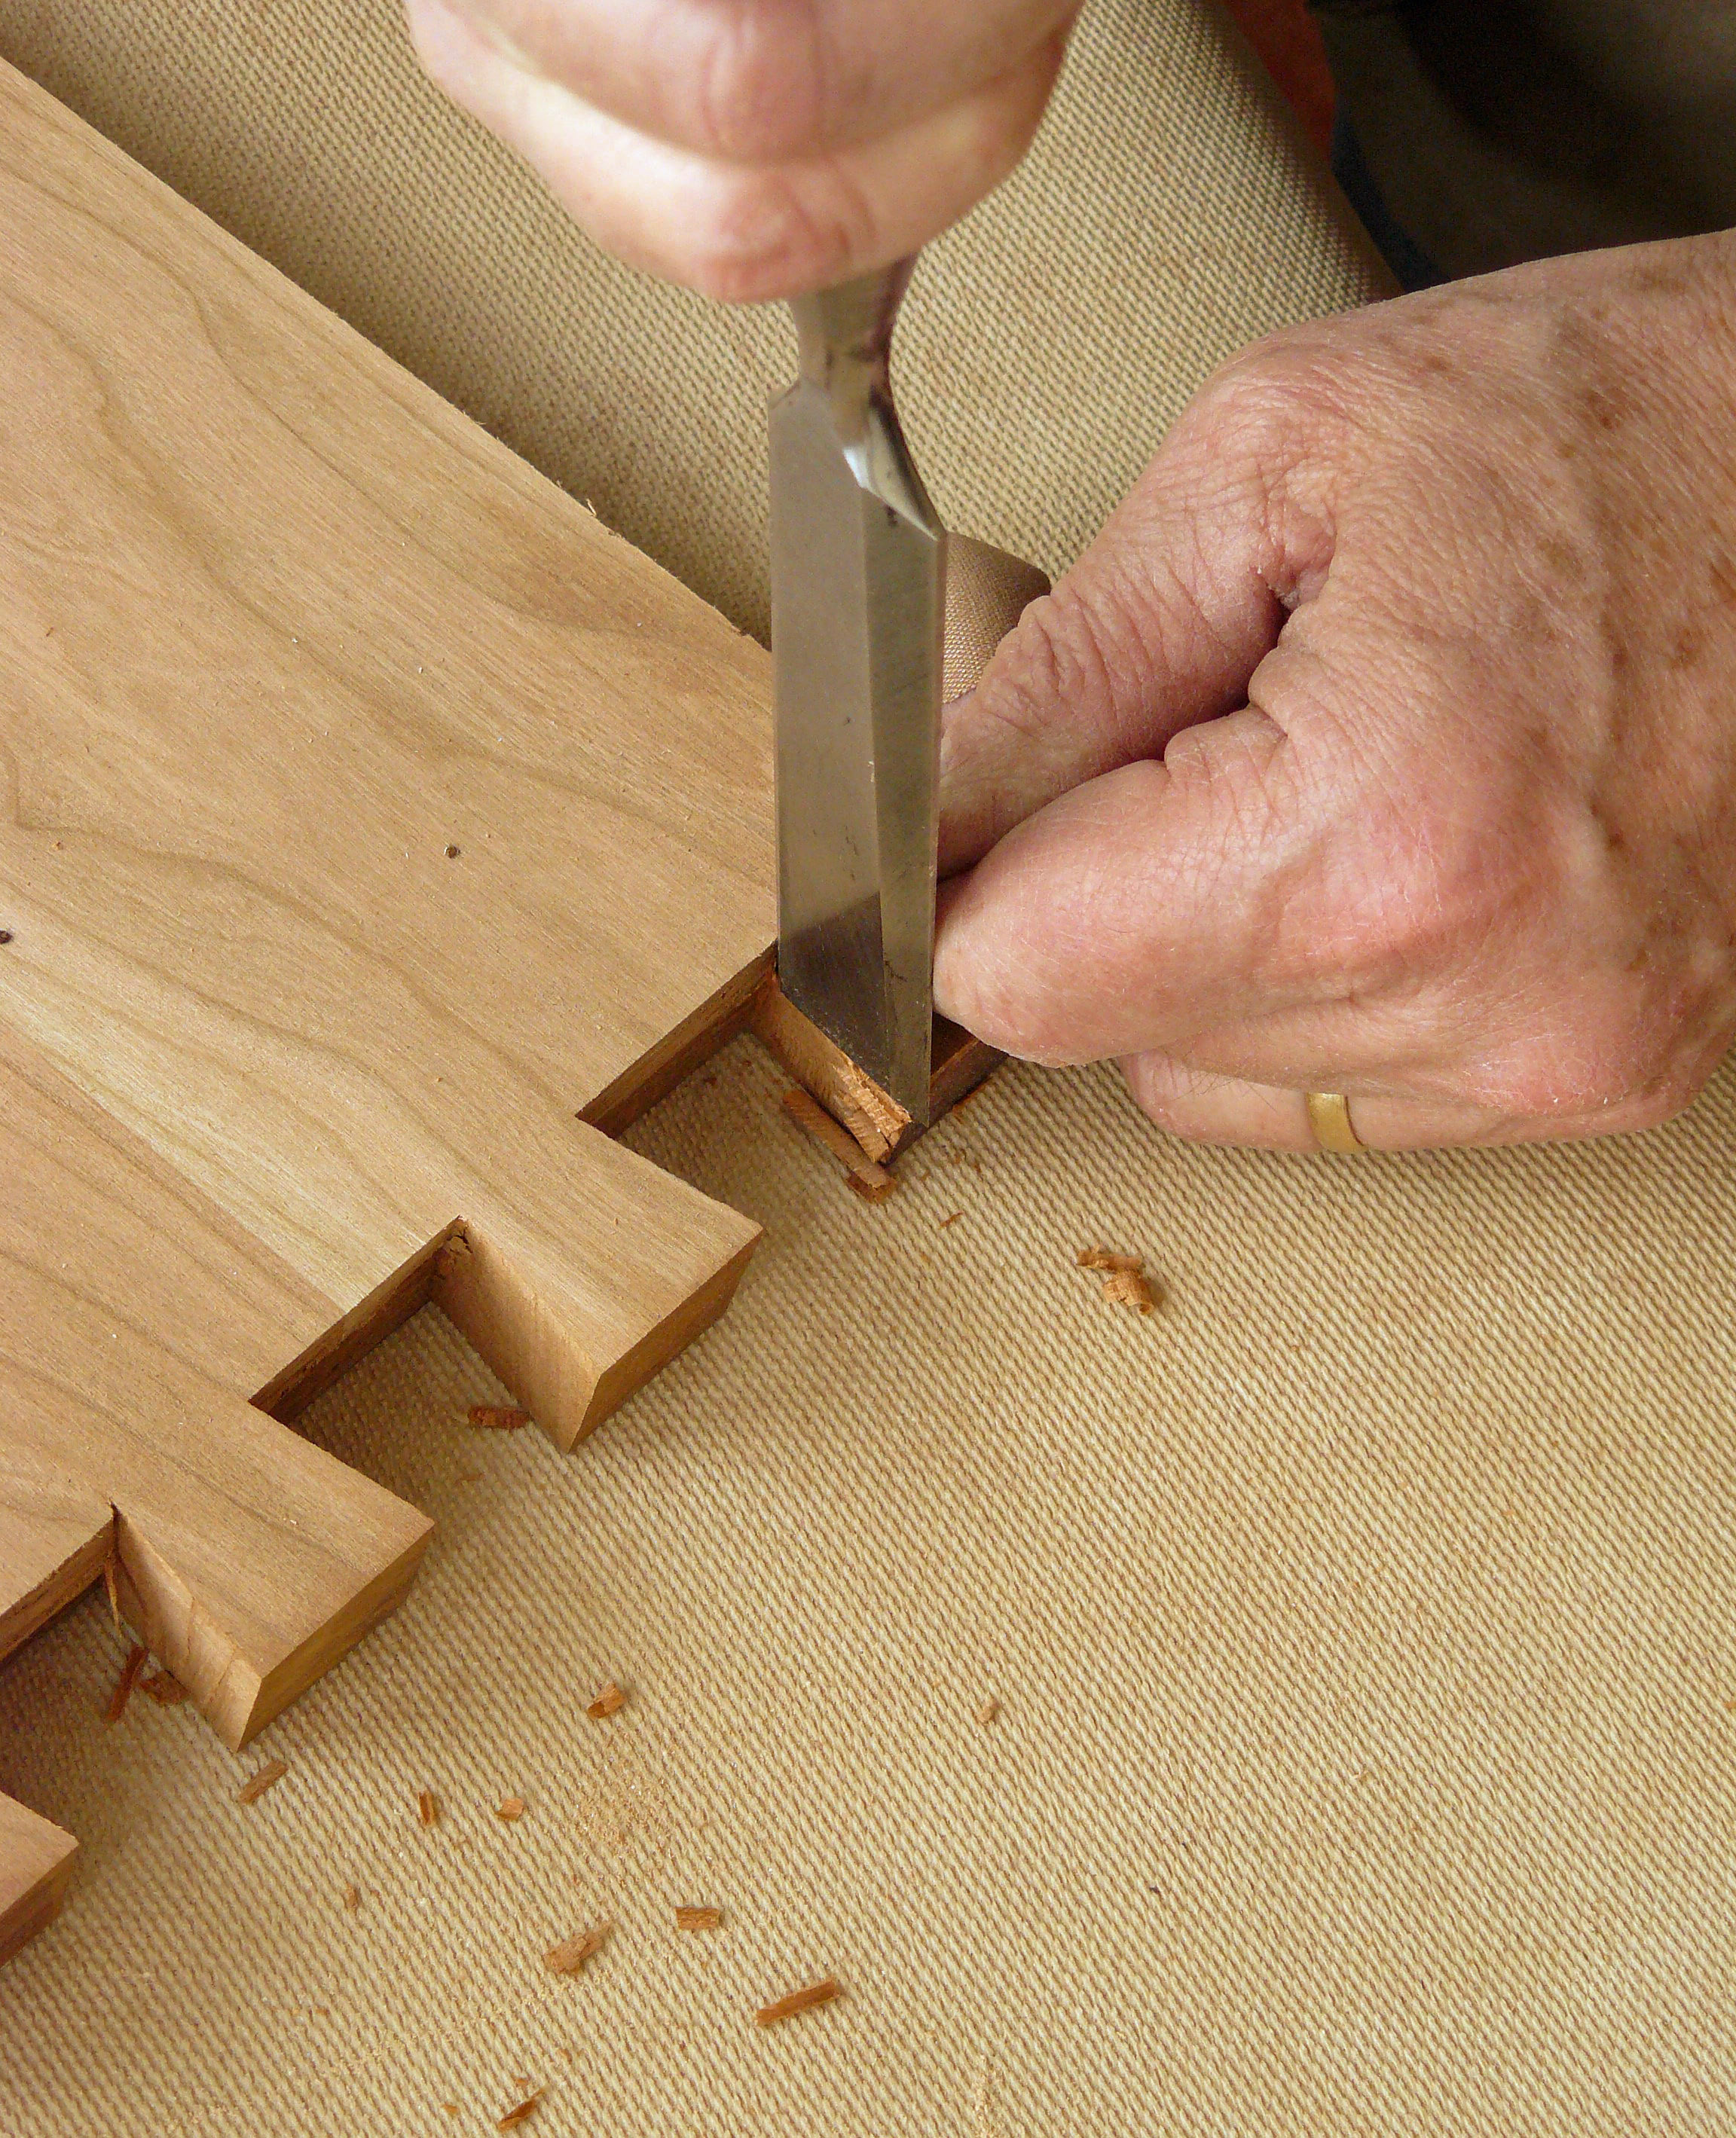
Photo 13. Pare the tails to the layout line and clean up the bottom of the pin sockets with a sharp chisel. Check the fit with the leg and continue to pare until the joint goes together with light taps from a mallet.
For glue-up, I like to use an extended open time glue and a small glue brush. Spread glue on all the mating surfaces between the step and the leg. Clamp the joint with gentle downward pressure on the top (Photo 14). Once the glue has cured, remove the clamps and rough sand the stool to remove excess glue and smooth the joints.
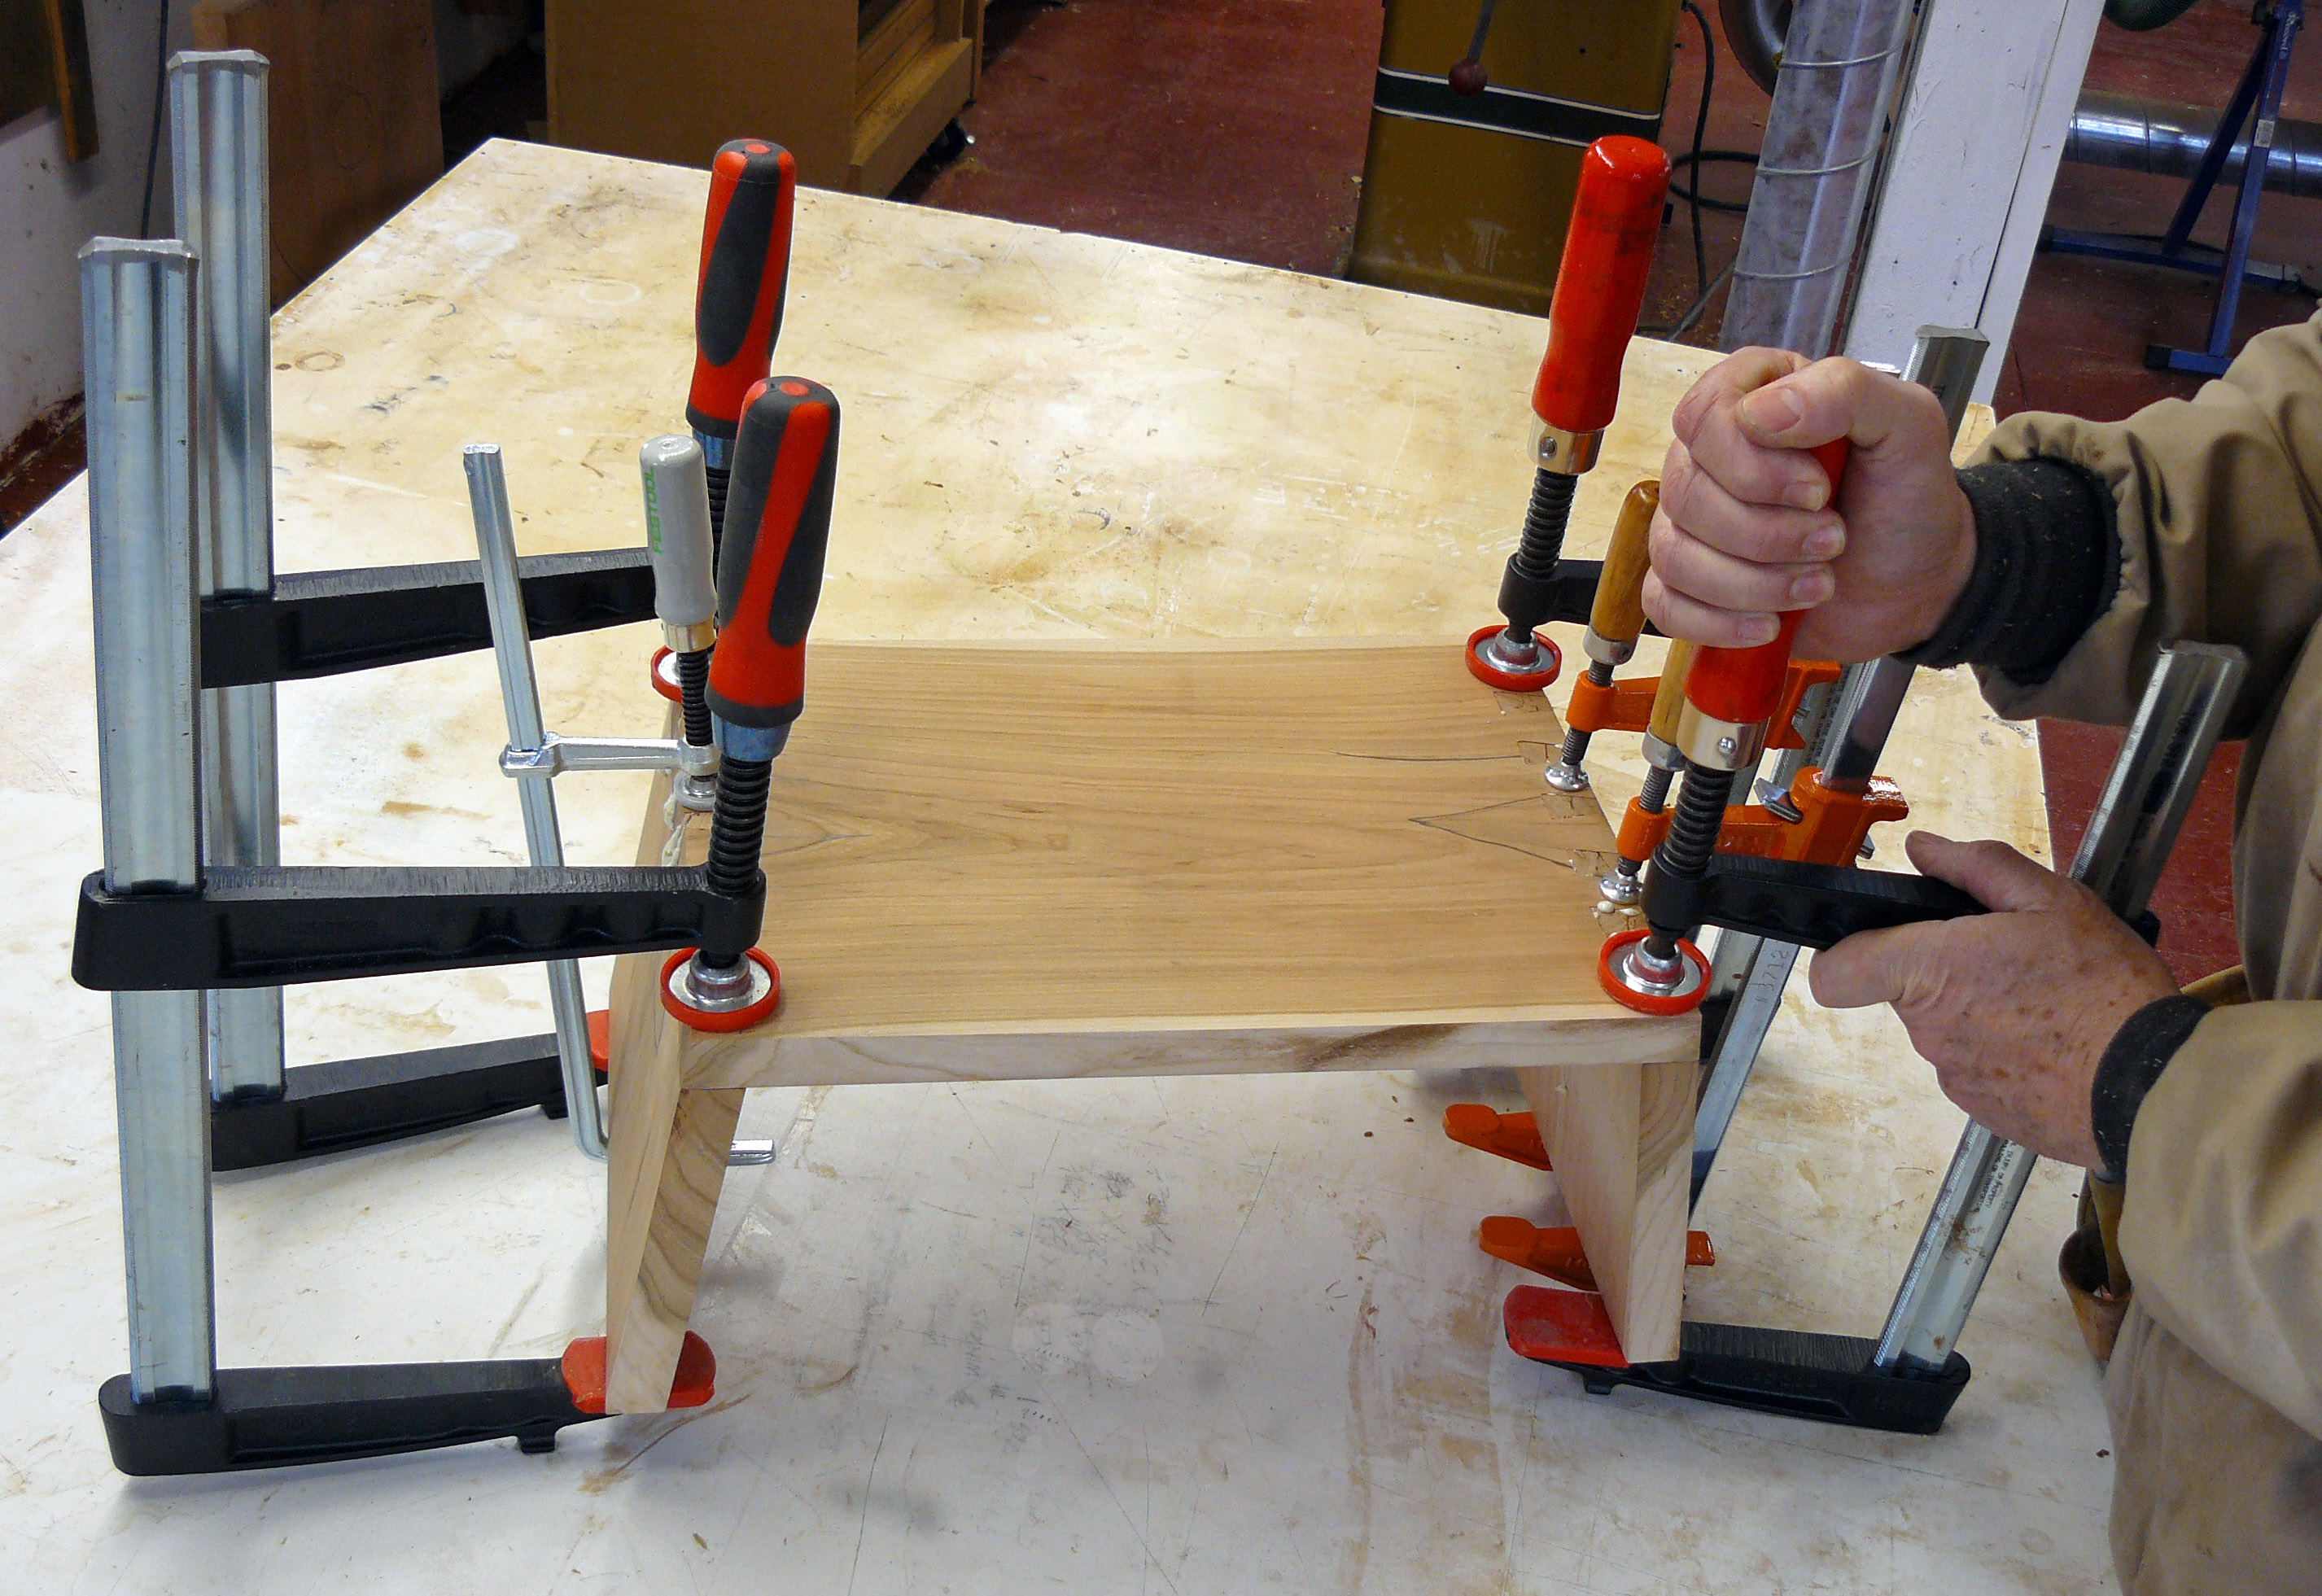
Photo 14. Glue and clamp the stool. The only clamp pressure required is downward on the top to make sure it sits tight on the leg.
Cut the tapers on bandsaw (Photo 15). Make sure you have a guideline laid out for the straight cut on the underside of the step. Don’t expect the blade to necessarily hit the line as it emerges from the leg, it’s just meant to guide your cut, not be your cut; just keep your cut parallel to the line.If your bandsaw lacks the height capacity to cut the leg tapers, you can always use a jigsaw. Cut the leg tapers first with the base of the saw set to 0-degrees. Hold the cut just shy of the step. Adjust the jigsaw base or shoe for a 10-degree bevel cut and rip the edges of the step along your layout lines. Smooth the bandsawn edges with a plane or sanding block.
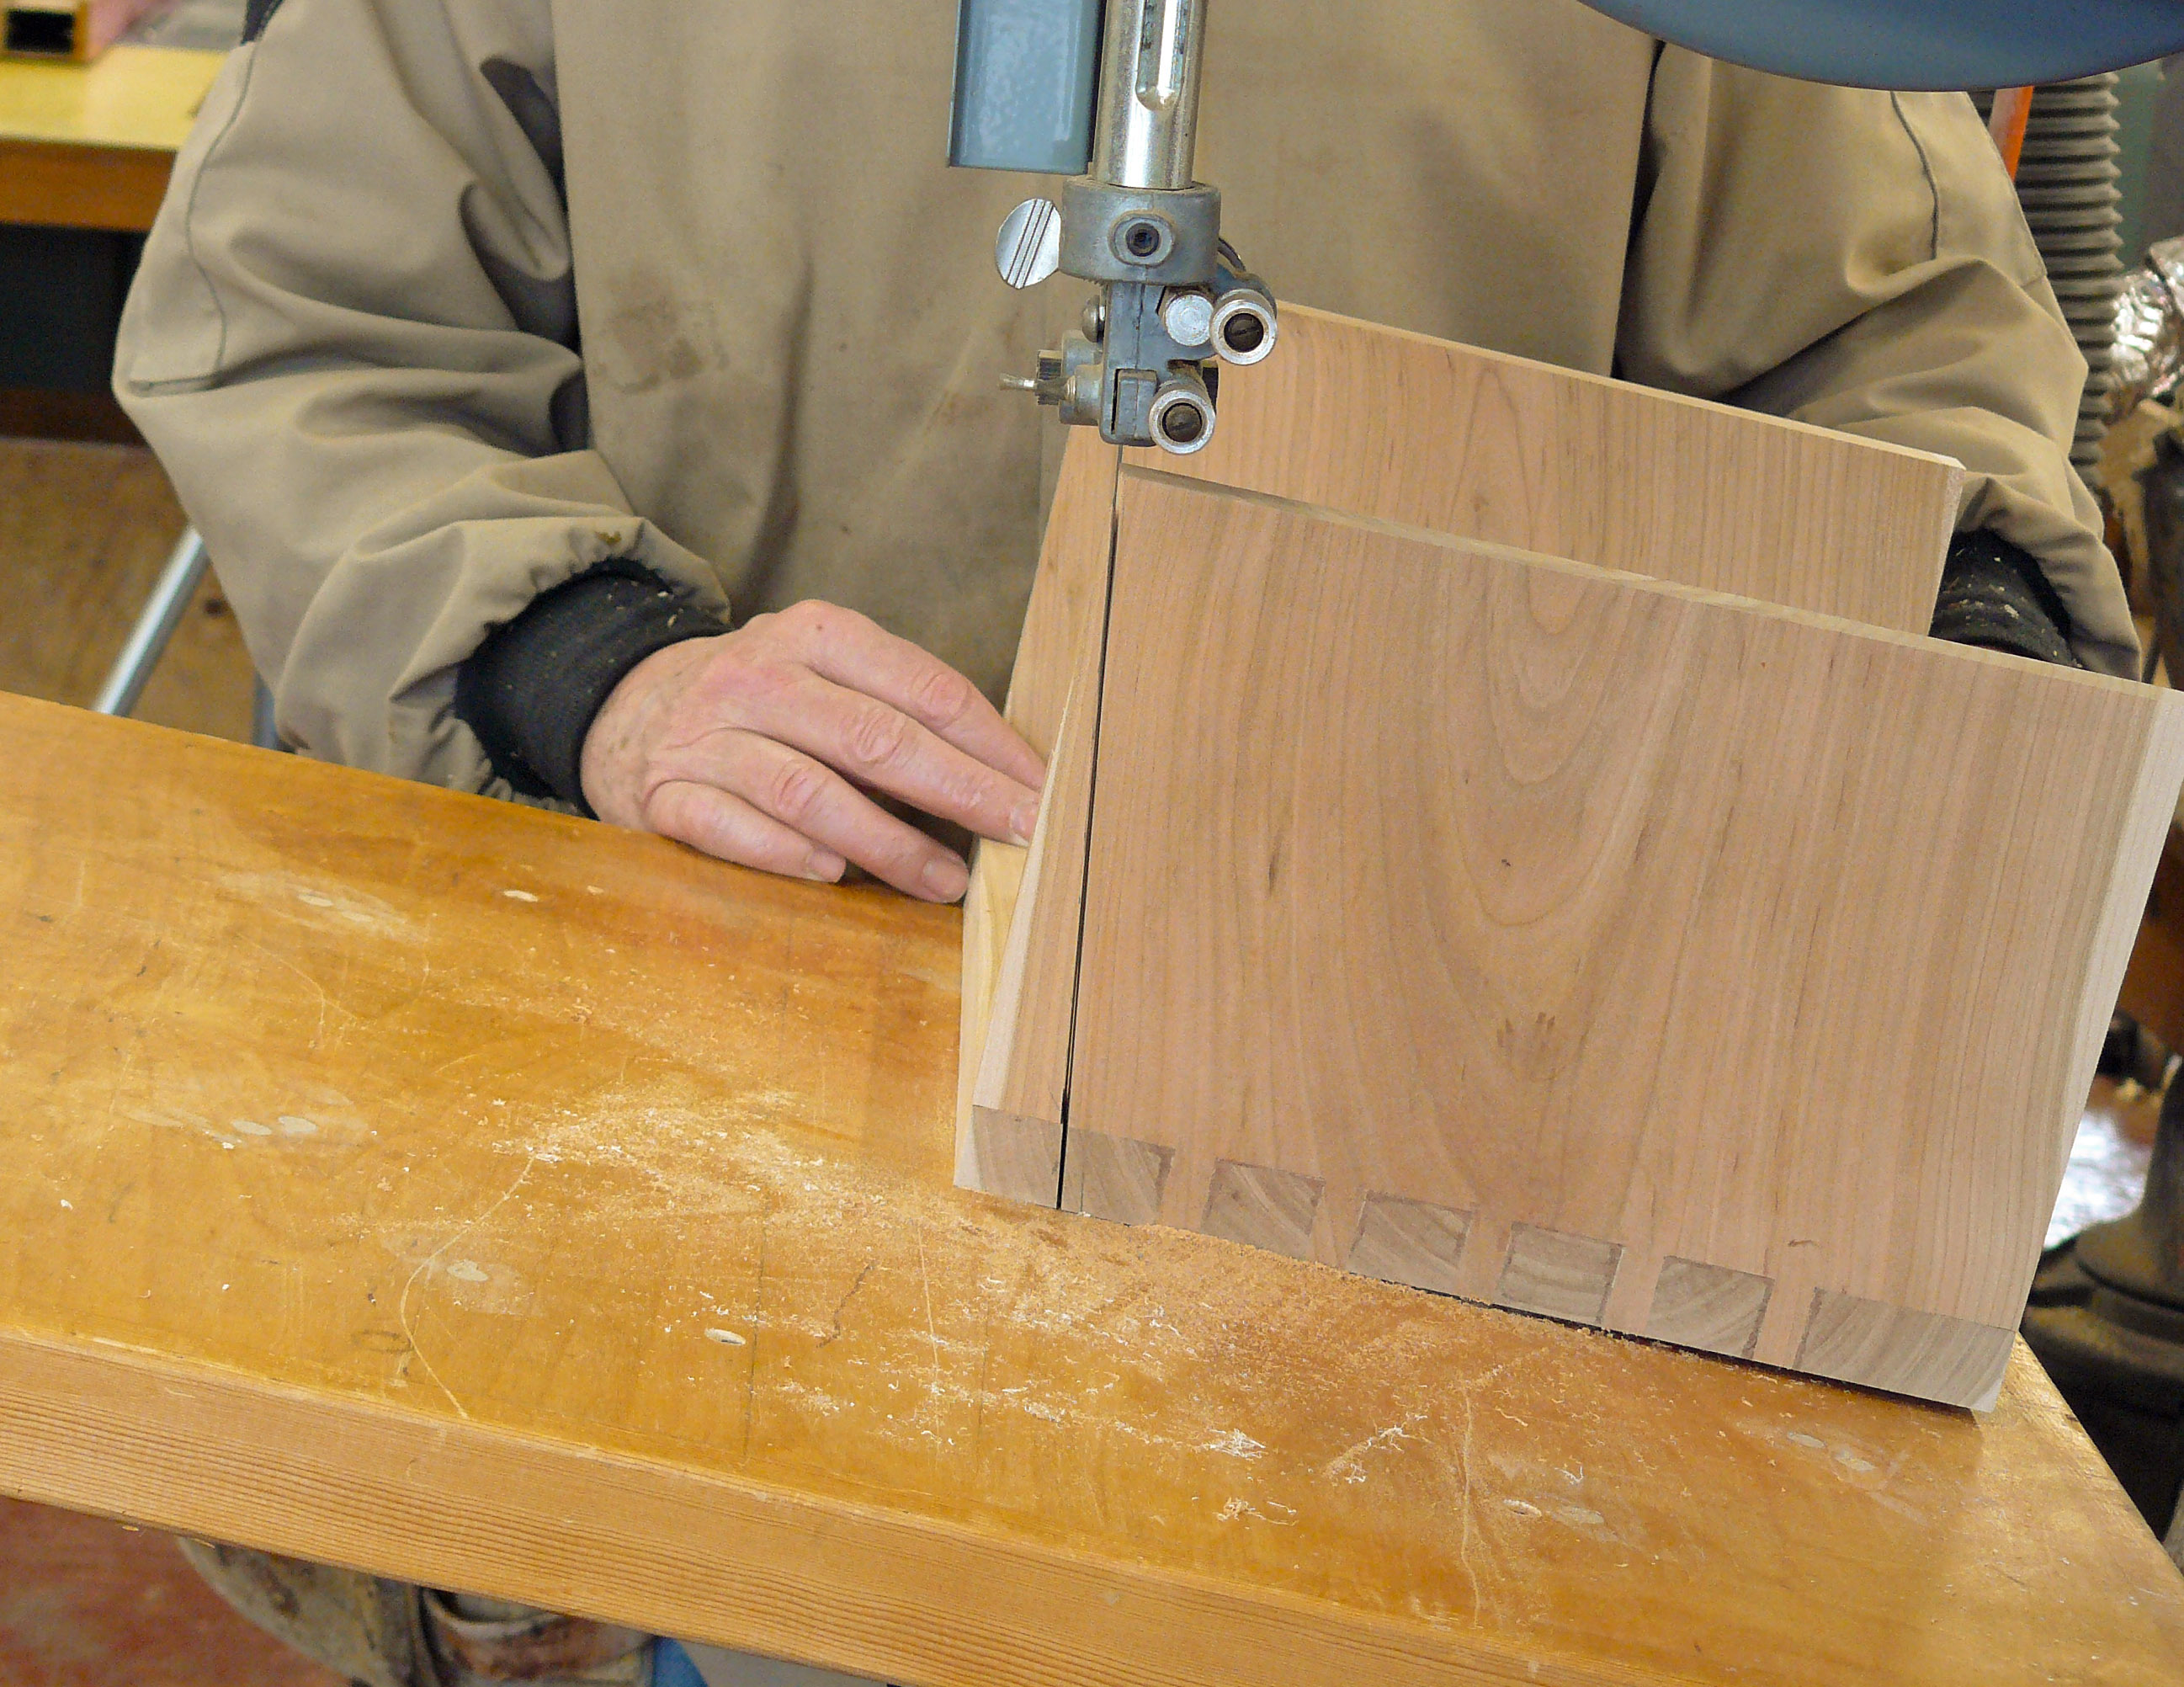
Photo 15. Cut the leg taper with the bandsaw table set to approximately 10-degrees. Lay out the cut on the underside of the step beforehand. Use the outside corner of the leg as your starting guide then parallel the layout line on the underside of the step.
The final step is to create the feet by routing a shallow relief on the bottom of the legs (Photo 16). A 1/2″ straight bit works best. A shallow cut, approximately 1/8″, is all you need.
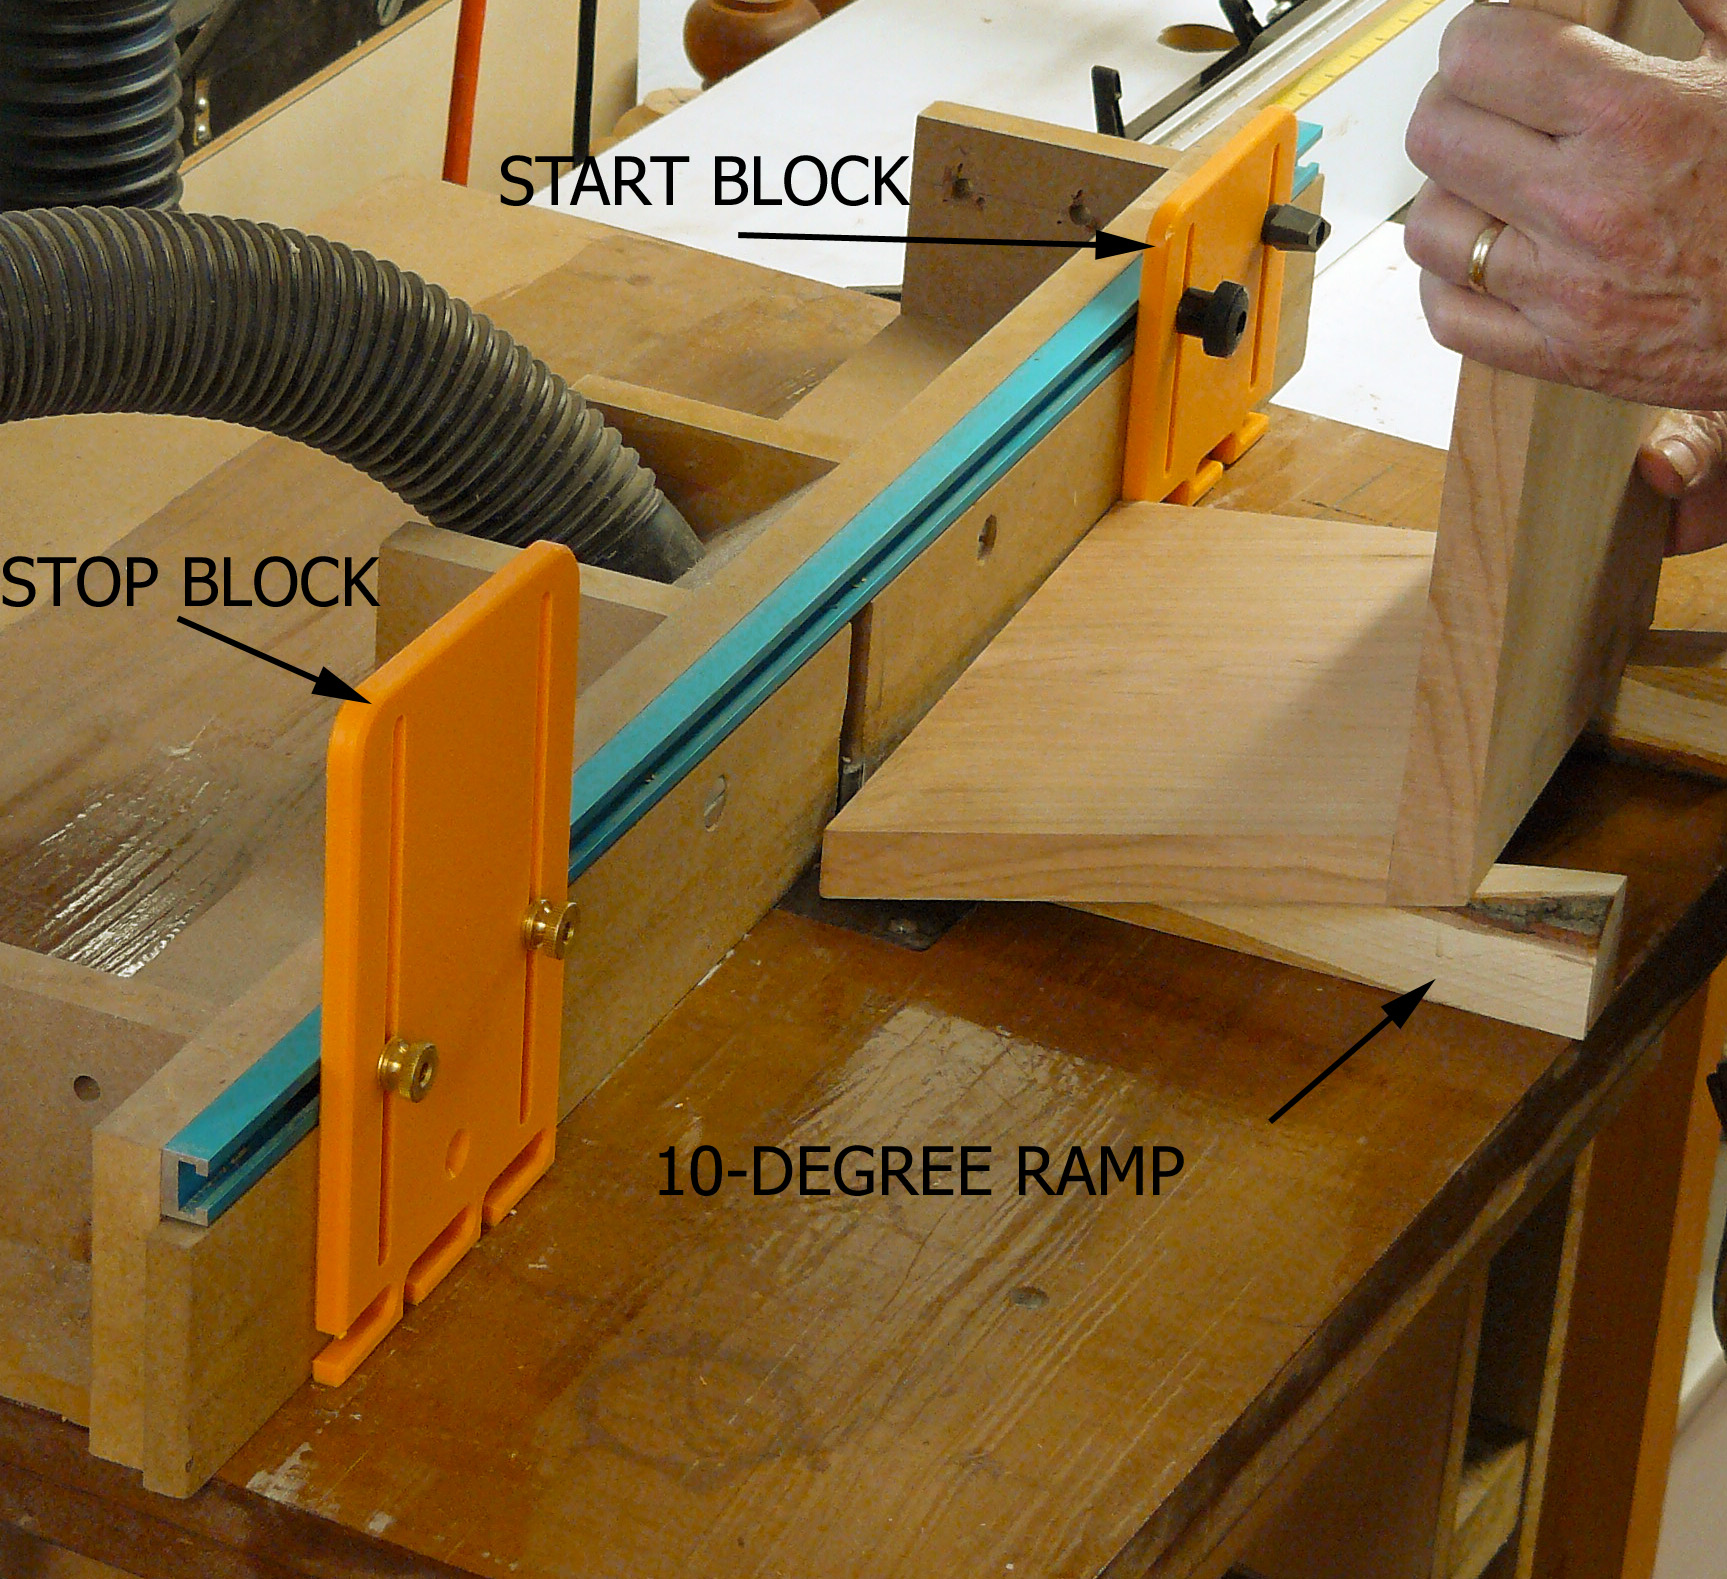
Photo 16. Rout the feet on the router table. Set a start and stop block to produce a 1-1/2″ long foot. Attach ramps to the stool. Set the leg corner against the start block and swing it into the bit. Slide the stool along the fence to the stop block and swing the stool away.
Finish sand the stool to 220-grit and apply an oil finish (Photo 17). I don’t recommend a film finish like polyurethane because it leaves a slippery surface for standing. Stick with oil, it provides better footing.
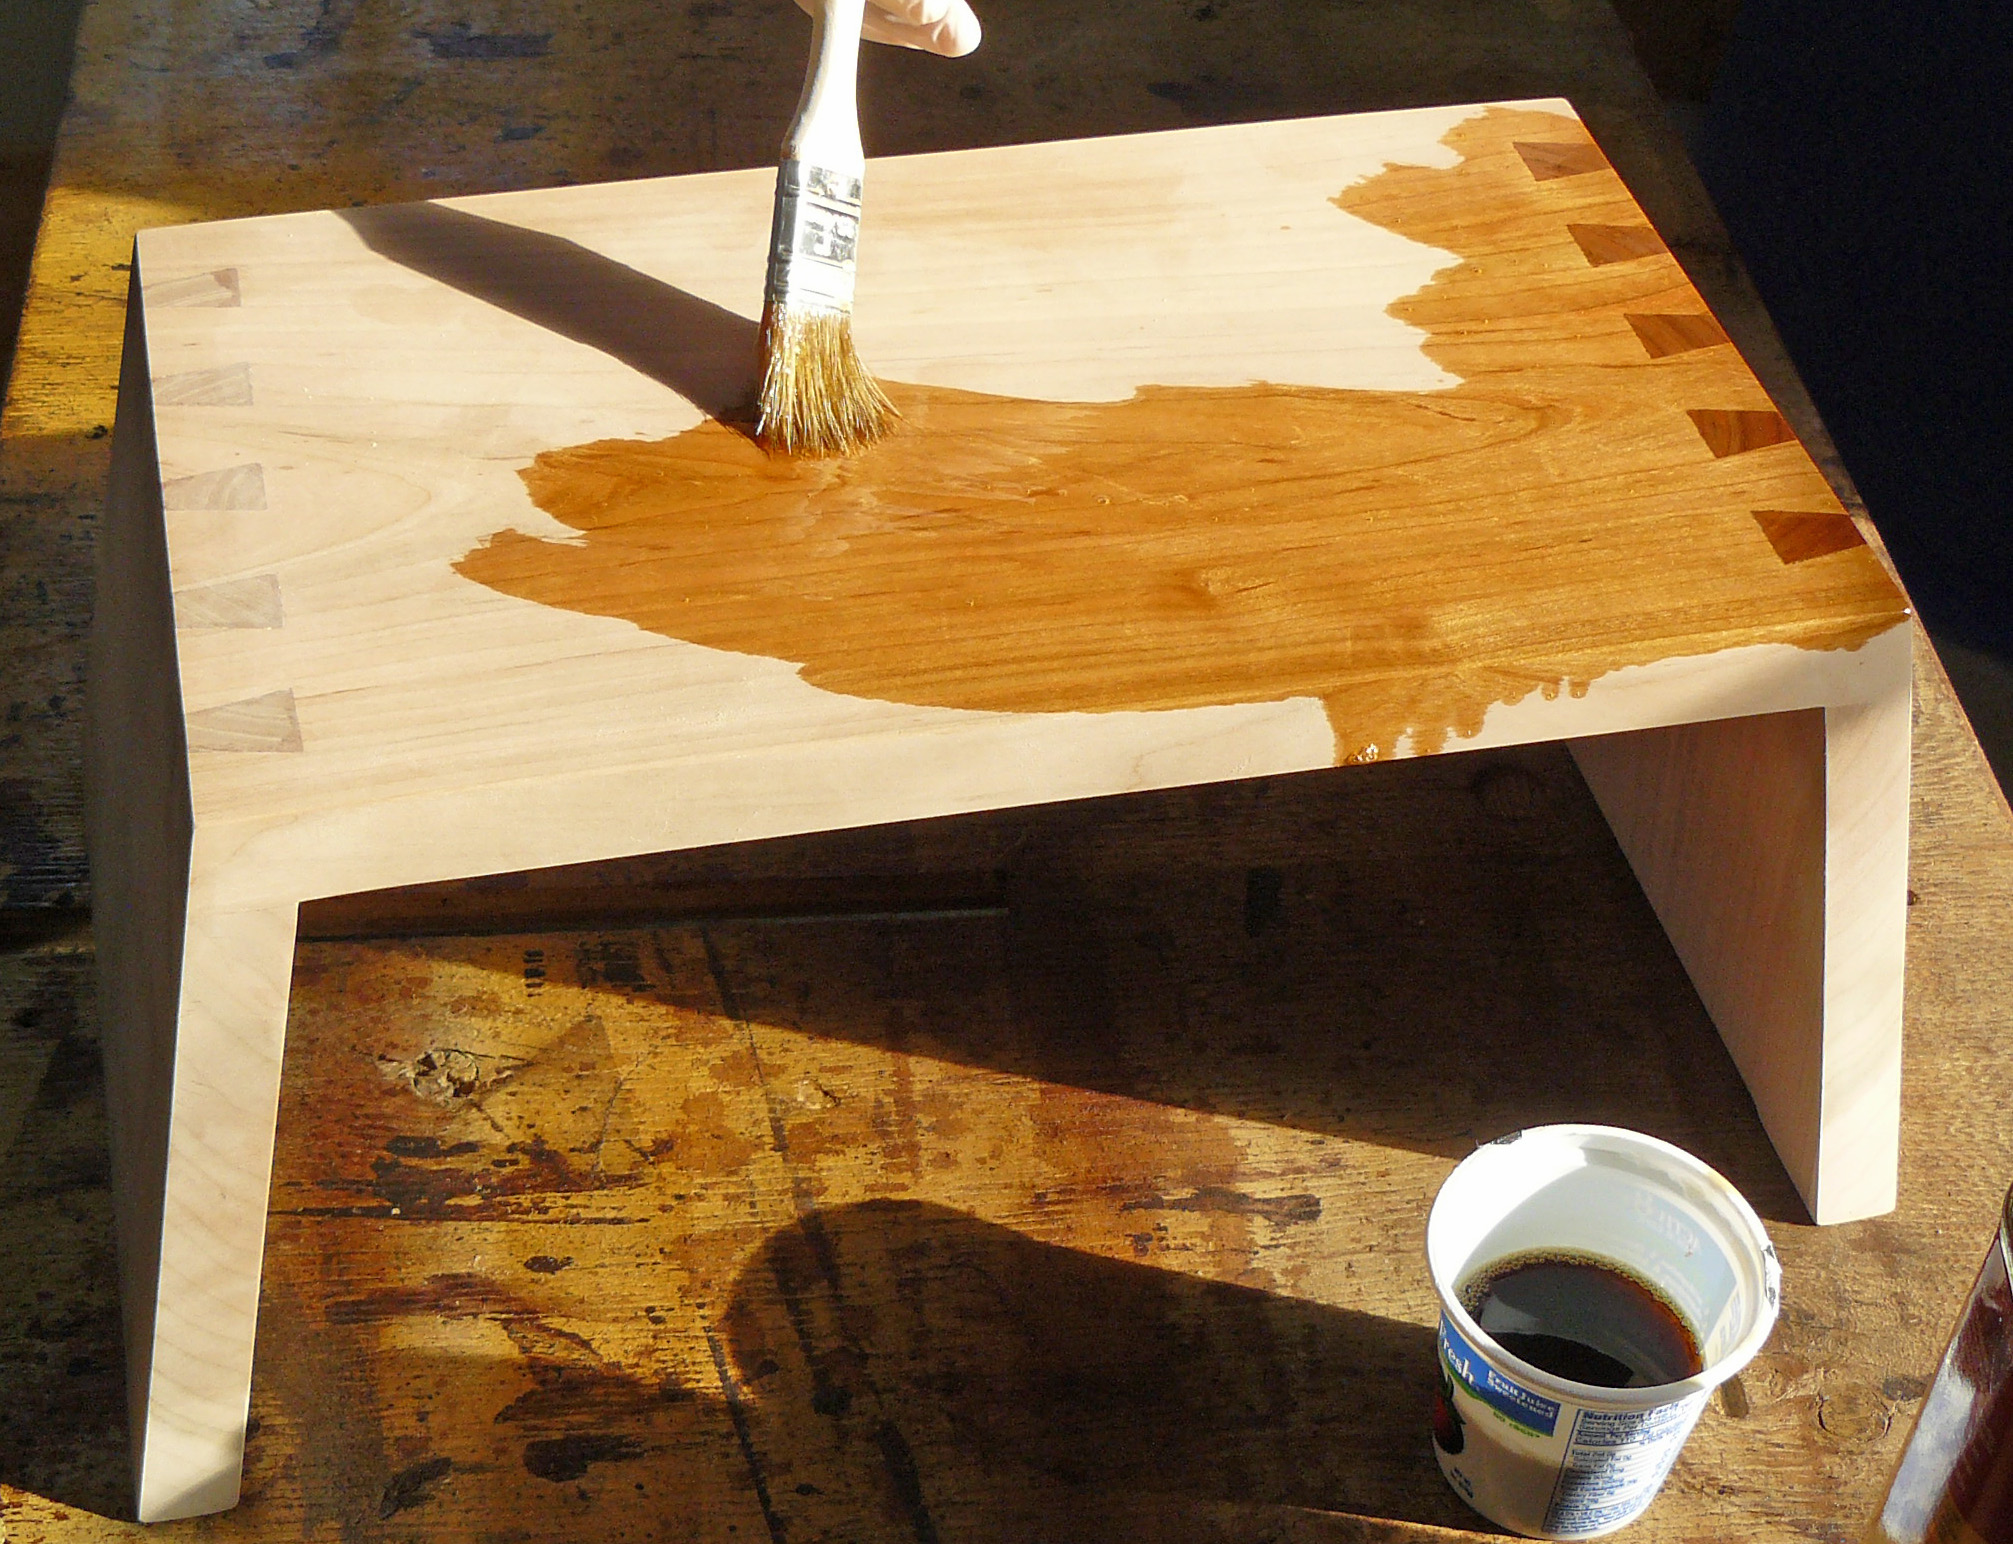
Photo 17. I like an oil finish on my stools. It looks good and is easy to repair; a real plus when you consider the beating these stools take on the floor.
That’s it! Enjoy your stool. Once you’ve made one of these, you’re all set to make dozens and believe me, when people see your stool, they’re going to ask you to make one for them.
Sources:
Band saw blade
Highland Wood Slicer
Highland Woodworking
(800) 241-6748
Slow set glue
Titebond Extended Set Glue
Rockler
(800) 279-4441

Is there a reason you don’t taper the legs prior to the dovetail cuts? Also, can the routing to make the legs be done prior to assembly?
In response to "fbtool" Yes, Leigh has a bulletin update, dated march 2002, addressing this issue. "How to Rout Angled Through Dovetails on your LeighJig". I am with all of you who are not comfortable cutting my own dovetails either on the bandsaw or by hand. That is the reason for the Leigh Jigs. Bless them.
put a finger slot in the top to make it easy to carry ( ~ 1" x 6" )
I would like to get the whole article for the step stool and drawings. I am a member and have an interest in building one for the wife. Thanks Don Wagley
Hi David , l will be glad to come for more training, course in your company.
Really like this step stool, but not comfortable cutting my own dovetails on a band saw. I have a Leigh RTJ400 Router Table Dovetail Jig do think there's anyway to make this with that jig?
Enjoyed watching that .Well done
There is a lot of good jigs and things
Is this stool available for purchase? Thank you!
Do you sell and ship these stalls? It is just what I am looking for but I am no carpenter!