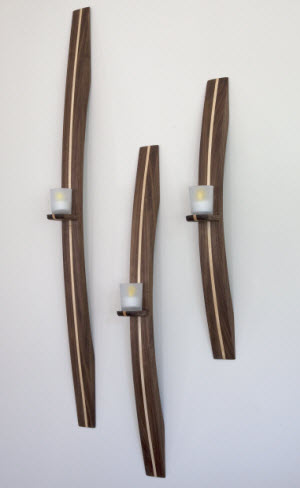
 I went to Daniel Kantor of Kantor Group (Minneapolis based design firm) to get a fresh idea for a WWGOA Christmas project. I am delighted with the design he has provided for this modern candle wall sconce, as it looks great and it is relatively simple to build in mass production for Christmas gifts. Dan designed a trio of sconces that can be hung together as a set, or separately. I will walk you through the process of building just one, as the construction techniques are the same across all sizes, and all of the dimensions for the trio are detailed in the diagram. Click Here for Scale Drawing.
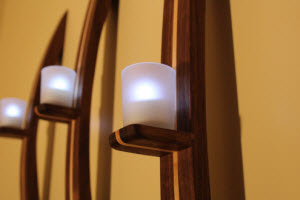
Votive holders and tea lights
The project is designed to hold a standard 2? votive holder with an LED candle that is sourced below (we have even arranged a WWGOA discount for you during the holiday season). Obviously you can modify the dimensions of the sconce and shelf to accommodate any size or style candle that you would like to use.

Start with blanks
Either mill some thick stock to the following dimensions or glue together some boards to achieve this size. The size for each blank: large: 2-1/8?W x 2-1/4? D x 40?L, medium: 2-1/8?W x 2-1/4?D x 30?L, and small: 2-1/8?W x 2-1/4?D x 24?L. To mill the blanks for the shelves, I simply made one of my sconce blanks 6? longer than necessary and cut two shelf blanks off the end, with dimensions of 2-1/8?W x 2-1/4?D x 2-1/2?L. You could actually mill all three shelves out of one blank but I was concerned about making the last cut on such a small piece. Plus it’s easier to get consistency in material between the shelf and body of the sconce if you cut these from the same board, so having an extra one glued up and ready was cheap insurance.
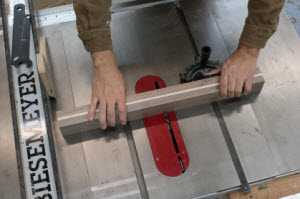
Mill dados for shelves
Select the best face side of your blanks, and measure and mark the center of each face. Set your dado blade (or router) for 1/4? x 1/4?, and mill a dado through the piece.
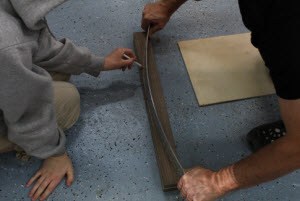
Draw your lines
Follow the measurements on the drawing for the points where the curves start and flex to, and use something flexible (I used a long ruler) to create the arc across these points. Have someone help as this is tricky to do alone.
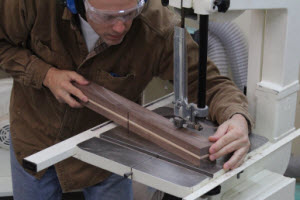
Cut to your lines using a band saw
Take your time, as these are important curves and you want them as smooth as possible. Leave the line so you have room for cleanup with the sander.
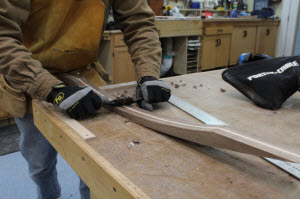
Spokeshave on the inside curve (optional)
I found that by using the spoke shave first on the inside curve I could get a smoother curve, particularly on the smallest sconce, as the belt sander was not able to sit flat enough to smooth the arc. If you don’t have a spokeshave you can do an adequate job here with a belt sander, but the spokeshave just sweetens it up a bit. A large sanding drum on a drill press would work well here as another option.
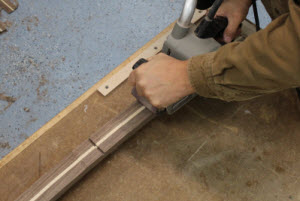
Belt sand all surfaces
Get the curve as smooth as possible, but don’t remove too much material near the dado, as that will change the depth. Check the material thickness periodically with a caliper to ensure that you are sanding evenly on each side.
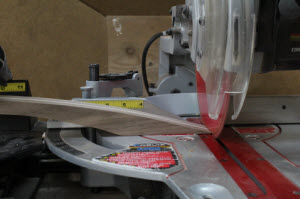
Square up the ends
After belt sanding you will find that the ends have gotten thin, fragile and uneven. To remedy this, trim approximately 1/8? to make the end a bit thicker for sturdiness, and square.
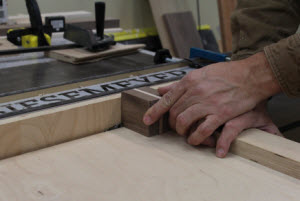
Mill rabbets on shelves
Mill 1/4″ x 1/4″ rabbets on the tops and bottom of your blanks, which will be used to secure the shelf. I like the added control of a cutoff sled for this operation, and have also configured a sacrificial fence to prevent accidental cutting on my fence.
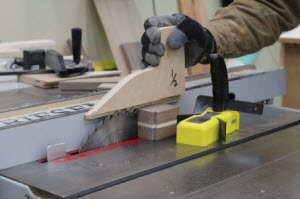
Cut the shelves
Set your fence for 1/2? and cut a shelf from each side of your blanks. Use a feather board and push stick to bring better control over this small piece.
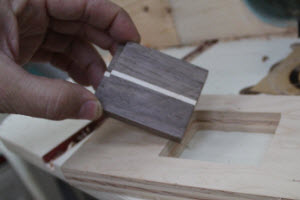
Mill a recess in the shelf: Step 1, build a jig
A recess in the shelf surface will help to keep the votive holder in place. I made a little jig for this by tracing the shelf onto a piece of scrap plywood and cutting it out with a scroll saw. Then, I set the shelf piece in there so it would be held securely during the milling process.
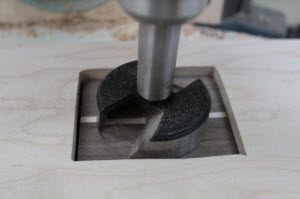
Mill a recess, step two
Using a 1-7/8? forstner bit plunge slowly into the top of the shelf, penetrating about 1/8? into the surface. Run your drill press at a slower speed for this operation due to the large size of the bit.
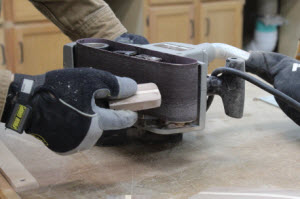
Shape the shelves
Use a belt sander or similar to contour the shelves a bit so they are less square and flow better with the rest of the piece.
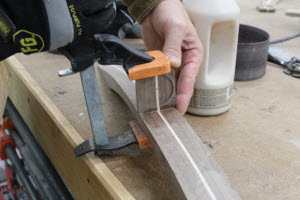
Attach shelves
Use a bit of glue and apply enough clamping pressure to secure the pieces together while the glue cures, for perhaps an hour or so. Be sure to force the shelf into alignment with the body at this point.
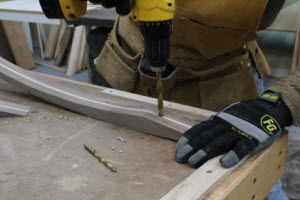
Easy hanging bracket
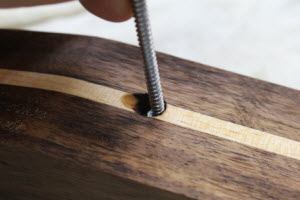
This design works much better if the sconce is installed in direct contact with the wall, without using a protruding mounting bracket. You may have a key hole router bit which is specifically designed for this purpose, but if not, this approach can serve as a workaround for you. First, use a 3/8? bit to drill a hole about 1/2? deep in the back of the sconce, into the thick portion of the top piece that meets the wall.
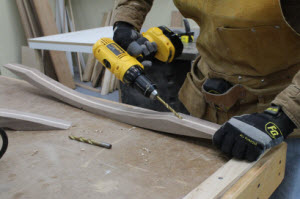
Now enter the previous hole at an angle
Using a 9/32? bit, place the bit in the previously drilled hole, and drill a hole into it at a 45 degree angle toward the top, approximately 1/4? deep.
Test the hanger
After you have drilled the second hole, test to be sure that your hanging screw or nail slides securely up into the recess, which will serve to hold the sconce solidly against the wall.
Hand sand everything one last time with 150-grit paper (320-grit if you plan to stain) to prepare for finishing.
Apply your favorite finish
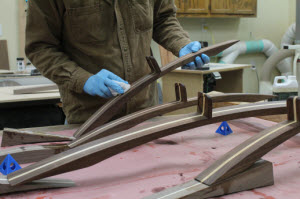
I used a home brew of tung oil and wipe-on poly to pop the grain and give some protection, but you can use whatever you prefer.
Photos By Authors
Sources:Quick Candles
www.quickcandles.com
800-928-6175
Product code 1101-12, Votive Candle Holder Frosted Glass Set of 12, $6.99
Product code 1088-12, Flameless LED Tealights, Amber, Set of 12, $9.99

What kind of wood are you using here?
Great looking project and easy as well. You will learn a lot of woodworking techniques with this project!
Fell in love with these and would go perfectly in my living room. That said, do you sell them to the public as I have no way of making them or someone to make them for me. Let me know. Much appreciated.
These are absolutely wonderful. such a simple and understated design, I might very well have to make my own.
does this project come with downloadable plans?
I can't see de images nor the scale drawing. Any suggestion? Thank you
that is a great idea. Thank, Ed!
Thanks, great idea, I will make a few sets. Just one comment / addition. Sanding a hollow shape with a belt sander is actually very easy and as especially if you keep the piece of leftover from your band saw operation. Use that piece by sticking it under need the belt of your belt sander and you have the perfect template to sand your work piece with. Have fun Ed
Thanks for the kind comment, Roberto. Hope you will make a set of these yourself, and please post on the forum if you have any questions that I might assist with.
truly precious things ...