 Want to use a router, but don’t know where to start? Learn how to use a router with these router woodworking techniques and tips.
Boy, I use routers a lot. They can do so much. From adding a profile to an edge to cutting dovetail joints, a router is an incredibly versatile machine. But if you’ve never used one, routers can be intimidating. This article provides buying advice on how to use a router along with tips to help you get started.
Router Types.
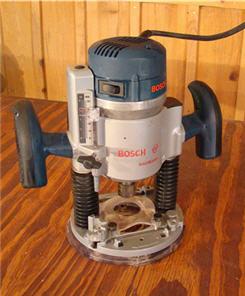
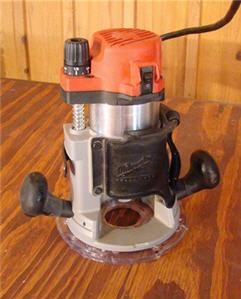
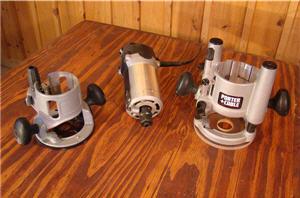
Routers can be divided into two categories: fixed base and plunge base. On a fixed base router, once the bit is in and the base is locked, the bit is in a ‘fixed’ position, meaning its depth is set and will stay set (Photo 1).
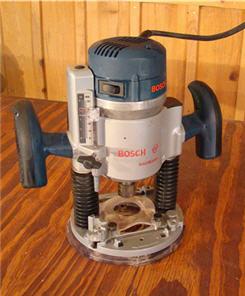
Photo 2: Plunge Routers excel at providing distinct starting and stopping points in a cut, often required for mortise and dadoes.
Since the base on a fixed base router can typically be removed, bit changes are generally easier on a fixed base router than on a plunge router. Many woodworkers find micro-adjusting bit height easier on a fixed base router than a plunge router, which makes fixed base routers a popular choice for use with dovetail jigs, router tables, and other tools where bit depth can be fussy.
The big advantage of plunge routers is that, since they can plunge in and out of the material, you can easily make cuts with distinct starting and stopping points. This is useful when making mortises and dadoes. I also use a plunge router for making adjustable shelf holes in cabinets, and find it works much better than a drill.
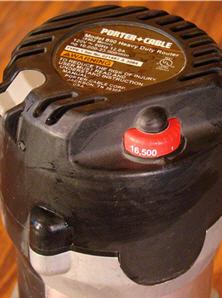
Photo 4: Variable speed is required for large diameter bits. The bigger the bit, the slower you can run the router.
Variable Speed
Variable speed is a must-have feature as you demand more of your router. Safety requires that you lower the router rpm (revolutions per minute) when working with large diameter bits (Photo 4). You absolutely cannot run large diameter router bits at full rpm. A router bit speed chart and other helpful tips can be found here.
Router Bit Shanks
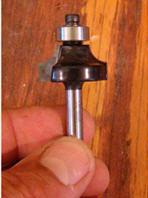
Router bits are available in two shank sizes, 1/4? and 1/2? (Photo 5). Given the choice, buy the bit with the 1/2? shank. There’s little, if any, price difference between the two. And the larger shank gives you two advantages. It helps stabilize the bit under cutting pressure so you get less chatter, which means a nicer cut (read less sanding). It also gives the collet (the chuck that holds the bit) more surface to grab, so there’s less chance of the bit coming loose.
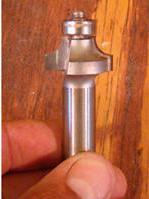 So when you’re router shopping you want to look for a machine that has both 1/4? and 1/2? collets. FYI, you may come across some router bits that have an 8-millimeter shank. These are used with a 1/2? to 8-mm reducer inserted into a 1/2? collet.
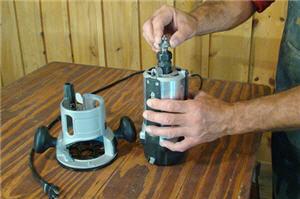
Photo 6: Unplug the router and remove the base before changing bits. 2/3 of the bit shank should be inserted into the collet.
Installing Bits
The first step in changing router bits is making certain the router is unplugged. Additionally you’ll make your life easier, and bust fewer knuckles, if you remove the router base when installing and removing bits (Photo 6). When installing a bit in the router, set it so 2/3 of the shank is inside the collet, then tighten the collet.
How to Use a Router
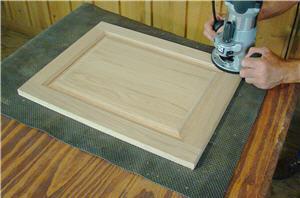
Photo 7: A router bad securely holds your work in place and allows you to rout all the way around the piece.
Secure Your Work
The last thing you want as you’re routing your material is to have to chase it across the shop. It needs to be secure to your bench. One solution is to clamp your material in place, but the clamp often gets in the way of the router and has to be repositioned. My preference is to use a router mat which provides an excellent non-skid surface (Photo 7). With your project on the mat you can work around all four edges without interference. You can find router mats at some home centers and woodworking specialty stores.
Here’s a tip. If it seems like your mat is losing its grip, rinse it under water to get the dust out of it. That usually helps restore some of its grab.
Protect Yourself
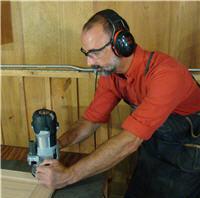
Don’t even consider plugging the router in until you’ve got ear and eye protection on (Photo 8). Routers are loud enough to cause permanent damage to your hearing if you’re not protected. And you should, of course, always wear eye protection when using tools.
Go In The Right Direction
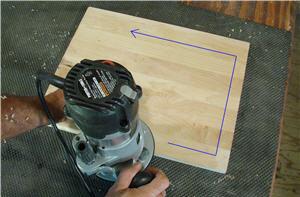
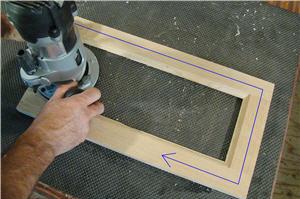
In order to safely use a router, you’ve got to move it in the right direction. When routing the outside edge of a board, you should go counterclockwise (Photo 9). Going in the correct direction prevents the router from climb cutting and getting away from you.
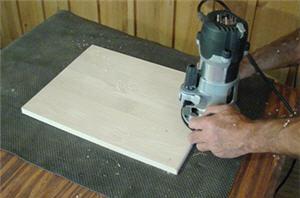
Photo 11: The correct sequence for routing all four edges of a board is to start on the end grain, then cut long grain, end grain, and long grain.
Start In The Right Spot
If you’re routing all four edges of a board, it’s important to make the cuts in the right sequence. Start on end grain (Photo 11). As the bit exits the end grain, it may slightly chip the adjacent edge. When you rout that edge you’ll automatically clean up any chipping.
Photos By Author

I need a full manual of how to use a Reuter
Had some old wood sashes I needed to make. So I picked up my dad's woodworking tools (3years after his passing) from his business to get the job done. I didn't realize how much technique there was to every tool he used. He made it all look so easy. I wish I had learned when he was still with us, but all these articles are a big help.
Just getting into woodworking 60 years after Jr High wood shop class.
Just signed up, I am a rookie. I retired several years ago and always wanted to do woodworking. I have done things in some ways reverse of most people. I have studied and bought the tools buying intermediate grade tools. I have virtually everything except a lathe. Now I need to learn how to use the tools properly. I look forward to reading and watching what is offered with the tool that intimidates me the most and I know the least about, the router
How to use a router
How to use the machine for crowns and roses
Very helpful article
I am a beginner and my desire Is to work safely and intelligently. Thanx I want to work safely and intelligently. I am a beginner..rocky thank
When using a router table, and using a round over bit on the inside of the work, what direction should you go?
Bits sizes/shaft 1/4 or 1/2 charts