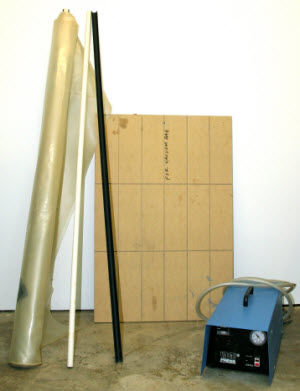
 This is the final installment of a three-part story, each showing a different way of applying veneer to a substrate.
The first article showed how to use contact cement to attach veneer to a substrate, part 2 showed using clamps and cauls, and this one explains how to use a vacuum bagging system. I will reiterate (once again!) the three general rules regarding laying up veneer. One, always apply veneer to two sides of a substrate to counterbalance glue. Second, apply the glue evenly across both the veneer and the substrate. Finally, avoid milling and cutting operations that cause a lot of dust when veneering. Not only can the dust interfere with good glue adhesion, but large bits of wood can telegraph through the veneer, making your surface look like a moonscape!Vacuum bags are one of the coolest tools in a shop. When I first began using vacuum bags as a clamping technique, I was always amazed at the power of the “pull” that the vacuum would exert on the plastic bag. It wasn’t until my engineer father-in-law visited my shop that I truly understood what was happening. While undoubtedly impressed at the process, he corrected my assumptions regarding the physics of a vacuum. He explained that the ever-present pressure of the atmosphere was really doing the hard work. The vacuum was merely evacuating the air (and it’s inherent counter pressure) allowing the atmosphere to collapse the bag, resulting in the clamping condition. Whoa! Understanding this helped me understand the entire process and the small problems along the way. I’ll begin by explaining all of the parts of a vacuum system, and then move on to the process of using a vacuum bag.
The anatomy of a vacuum-bag system:
Vacuum pump and evacuation hose. My unit plugs into a regular electrical outlet and effectively sucks air really well! The pressure is adjustable depending on how strong I want the vacuum to be. This machine is capable of pulling 1774 lbs. per square foot! That’s over 14,000 lbs of pressure on a 24″ x 48″ piece of veneer! The hose has a nozzle on it that fits into a nipple valve on the bag.
Thick vinyl or polyurethane bag with a valve for evacuation. The bags are available in 20 mil or 30 mil. thickness, the latter for prolonged use and abuse in a production shop. The bag is actually a 10 feet long tube open on both ends, with capacity to veneer 4 x 8 sheets onto plywood or MDF. I store it rolled up, and actually keep it half-rolled up when pressing smaller sheet goods like my example in this article. Depending on the project, the valve can be moved to accommodate correct air evacuation and the previous hole repaired.
C-channel closure (also known as tube and sleeve) clamp. To seal the bag, the bag is folded around a tube and a c-channel is pressed over the bag and tube to seal the width of the bag. Both ends are sealed in this manner.
Bleeder board. A bleeder board is sheet stock with channels cut on the table saw, and serves two purposes. It creates a flat place upon which to clamp, and the channels keep the valve open and air flowing to the valve. Without the bleeder board, the vacuum can suck the plastic bag into the valve and prematurely inhibit all of the air from evacuating.
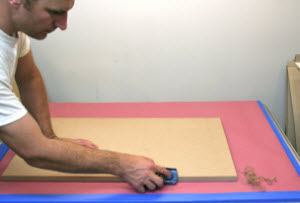 I chamfer the edges and corners on the platens. I use a top and bottom platen inside the bag to ensure a flat glue-up, just like when using cauls and clamps. If the edges on the platen are left sharp inside the bag, the vacuum pressure can pull the plastic bag down so tightly on the corners the bag may puncture. While I am using a hand plane (on MDF! the horror!) a block of sandpaper or laminate trimmer with a round-over bit works too.
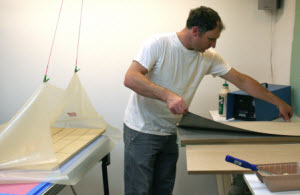
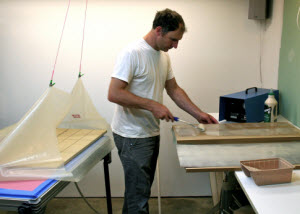 I arrange the bag so it can accommodate the veneering job I am working on. The bleeder board is already inserted into the bag and I roll glue onto the veneer and the substrate. As I mentioned before, I prefer Titebond III for this procedure because it has a longer open time. I rig up two small spring clamps to hang from the ceiling to hold the bag open. Because flat space is at a premium in my shop, I use the platen as a “table” to support the veneer during glue application, which ultimately will be flipped on top of the veneer to go inside the press.
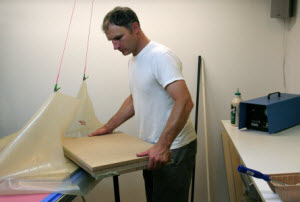 Now I insert the entire sandwich into the veneer bag on top of the bleeder board. The layers of the sandwich from the bottom up are a bottom platen wrapped in plastic (to prevent glue sticking to it), the substrate, the veneer, and then a top platen with rounded edges. All of this slips into the bag smoothly.
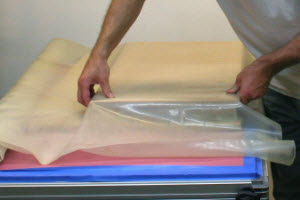 Once inside the bag, I adjust the layers to make sure all of the surfaces are aligned correctly. The parts may slide as the vacuum pulls the bag tight, but it is best to start as close to perfect as possible.
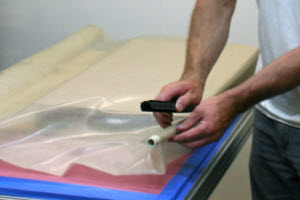 I fold the bag over the tube and press the c-channel in place to seal the bag. This makes for a remarkably good seal. I take care to not disturb the parts inside the bag while I do this.
 I flip the switch and wait for the magic to happen! The bag is loose like a sack, but it will only take ten seconds for the bag to begin pulling tight around my glue-up, and thirty or forty seconds for the air from the bag to completely evacuate.
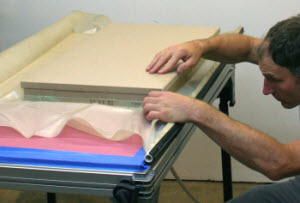 Notice how tight the bag has become! At 1700 pounds per square foot this glue-up has the weight of a car pressing it tight! I check to make sure my platens, veneer and substrate are still aligned. Depending on the way the bag is folded on top of the glue-up, and the efficiency and direction the air evacuates, the incredible pressure of the bag can pull the parts out of whack. That’s not a problem. I just turn off the vacuum, open the bag and re-adjust, and then seal it back up and start again.
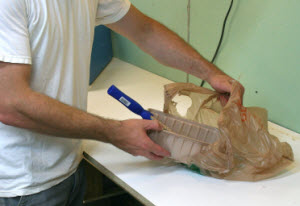 The glue technically takes 30 minutes to set up, so I protect my glue bin and roller with a plastic bag while I wait. This keeps the glue fresh and wayward bits of dust out. I’m going to need this glue right away when I apply the counterbalancing veneer on the other side of the substrate. I don’t want to pour it back into the larger container and waste all the glue that gets stuck in the roller and pan.
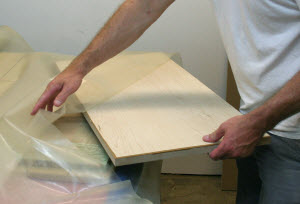 The moment of truth! Just kidding. If you follow these steps, this process is pretty foolproof. Once I extract the glue-up from the bag, I always clean the inside of the bag. Glue squeeze out is really easy to clean with a wet cloth when it is still wet on the bag, but more difficult when it hardens. I made the mistake once, and I’ll never do that again. I vacuumed pressed rigid glue into my project, permanently marring the surface.
Fortunately, it was on the bottom of my piece, yet it could have been worse. It could have punctured the bag, and the entire glue-up ruined as the glue sets while the bag refuses to pull a complete vacuum.
Originally, I acquired a vacuum and bag for a complex curvy lamination in my shop. I didn’t realize how versatile a tool it was until then. Now I use it for simple glue-ups like this, or others that require a bunch of clamps. Of course, at almost a grand for the vacuum and bag, it is an expensive tool, but for me, well worth it. But I would never get rid of my clamps and cauls — I reach for these in a pinch, and use them if the bag is already in use, or if I have stored the bag and don’t feel like pulling it out and setting it up. Contact cement is still a great option, too, as the setup and cost is minimal. Each time I assess the project at hand and the tools at my disposal.
Photos By Author
Sources:
Standard/Professional VacuPress Pump with 6 cfm Rocking Piston and 49″ x 121″ 30 mil. bag
$981.00 plus shipping
800-382-4109
www.vacupress.com
Note: While there’s nothing like a dedicated vacuum bag and electric pump, the price may be hard for some woodworkers to swallow. If your vacuum bag needs are smaller, have a look at the Thin Air Press from Roarockit. Vacuum bags and hand pumps are available for under $60, and they work very well.
www.roarockit.com
(416) 938-4588
View Additional Parts in this Series:
A Guide to Veneering Wood: Part 1
A Guide to Veneering Wood: Part 2
A Guide to Veneering Wood: Part 3

Nice summary. However, what do you do with the clams afterward in process two? ...the second (link) showed using clams and cauls... Fun with grammar checkers. :-)
Another way of bagging your projects is to make your own vacuum bags based on the size of your project. These would be a one time use bag. You will need mortight for sealing the 4 edges of the bag, plastic at least 3 mils thick, vacuum fitting for drawing air from the bag and a vacuum gage if desired. To use put the project into the bag, put a cloth over the project to absorb any squeeze out and press the edges firmly to eliminate any leakage, attach airline from the compressor to the vacuum fitting and turn it on. the compressor will pull the air from the bag through the vacuum fitting. depending on the day it will pull a vacuum of 28-29 inches of mercury. This method is used in the airline industry to make fiberglass and carbon fiber repairs and leaves the repair undetectable. Heat blankets have also been used with the repairs. This is called bagging the repair.
Great techniques and explanations. You're just missing the ironing technique: 1. put glue on both the veneer and substrate 2. wait for both to dry 3.lay the veneer onto the substrate (dry glue sides together) and then iron them together. The heat reactivates the glue.
I used a very similar bag for several years. We would often veneer both faces at once, wrap the pieces neatly in thin plastic drop cloths and press them in stacks of three or four between two platens. We used thin scotch tape to hold the plastic. We also laminated many curved pieces this way.
Do you think a non piston air compressor would make a vacuum pump ? Speedy Paint compressors were used on commercial power brake testers
The bag is a great idea and wAy better than clamps. Wow thank you.
I got the Roarockit at your suggestion. Used it the first time yesterday. It was so easy and did a great job. Have several projects I'm going to use it with. Thank you
Thank you just what I needed