Cabriole Legs Session 1: Overview
David MunkittrickDescription
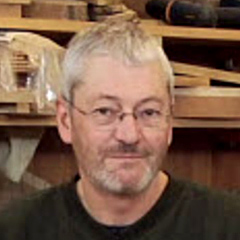
Meet your instructor, professional woodworker and author Dave Munkittrick.
Find out what makes a cabriole leg unique and discover the hand tools you’ll need to complete your own Queen Anne style leg including:
- A cabinetmaker’s rasp
- A spoke shave
- Velcro sanding pad
You’ll also be introduced to the 2-dimensional key that unlocks the mystery of making the 3-dimensional cabriole leg.
I am really excited to have Dave Munkittrick in the shop. And he's going to present a class, a lesson, all about making Cabriole legs. So, Dave, one, thanks for coming, two give us, what's the lowdown on making a gorgeous cabriole leg like this? This looks to me because of its three dimensional nature like it'd be really difficult to do, is it a pain? Well, it's actually surprisingly easy and, this template is what makes it so easy, cause it's just two dimensions, you lay the leg out in two dimensions and, cut out most of the material you see that's missing here out of the block is actually done on the bandsaw.
So compound cutting is part of the secret to getting this going. Now let's talk about the pattern, so we've got a couple of things going on this class for you folks. One, you're providing three patterns Three patterns, this is a 24 inch leg. We also have an 18 and a 30. So that takes you anywhere from chairs and coffee tables, up to full sized tables and a 24 inches nice for a little chest on table design.
So if what you want to do is really get to the woodworking part of this, and not worry about the design part of this, you can use Dave's patterns. Fasten them to your own piece of wood, cut those out and you're good to go as far as design goes. What if somebody wants to design their own legs? Because I think you're going to teach us that too. So I'll walk you through on how to make the template and the rules of thumb and what makes a nice looking cabriole leg.
And of course the curves and, you know, where you put things and the thickness of your toe and various variables like that are all up to you and you can put your own mark on it. And it's one of the things you like about, cabriole legs in general is that the maker imparts some of themselves into the legs. Well, and they can, just the nature of the hand work, they can't help, but do that. And also the, you know there are so many different foot designs. This is just one design of many, many that are out there.
So the handwork is a cool part of this. So to talk about this whole deal where you are going to teach design. Correct. Have the fallback position the students have the fallback position of using your existing which are proven shapes that you've already developed. It's really what you see here, that's what the templates will give you is a leg that looks like this.
And then after the band saw work you're going to go to the bench and the hand tool part of this is pretty interesting. So this tool is really the key to success with this whole thing, right? Yep. That's your primary tool right there which is a cabinet maker's rasp, with a taper in the front the convex on one side flat on the other that lets you get into all the tight corners and also do, you know, the big, long gentle curves as well. And you're going to show a little bit of work with a spoke shave, but this is really your, this is doing.
Spoke shaves are nice to have, they're not as you can do everything with the rasp and some sandpaper obviously. It's pretty neat that for such a complicated looking aspect of furniture as you say, unfortunately, for the tool junkies you don't have to go out and tool up with a lot of stuff it's one good rasp and you'll be good to go. All right, so then the other thing that's pretty cool about this is, when you teach adding this transition block and you've got a great secret for that to make sure that, the grain on the transition block, between the leg and the rail has such a nice color and great match for the leg, so I like that trick a lot. And from there from the rasp work you've got everybody doing some sanding on their work and end up with nice looking legs like you have. Well, this is a great class and we were really lucky to have Dave teaching this for us.
He's made a lot of these legs in his furniture career and has really developed some nice processes for both the design and the woodworking aspect, removing the material and getting such fair curves in the finished product, so thanks, Dave, for presenting this this is going to be really exciting. It'll be fun.

Share tips, start a discussion or ask other students a question. If you have a question for the instructor, please click here.
Already a member? Sign in
No Responses to “Cabriole Legs Session 1: Overview”