
Freehand Lettering with a Router
George Vondriska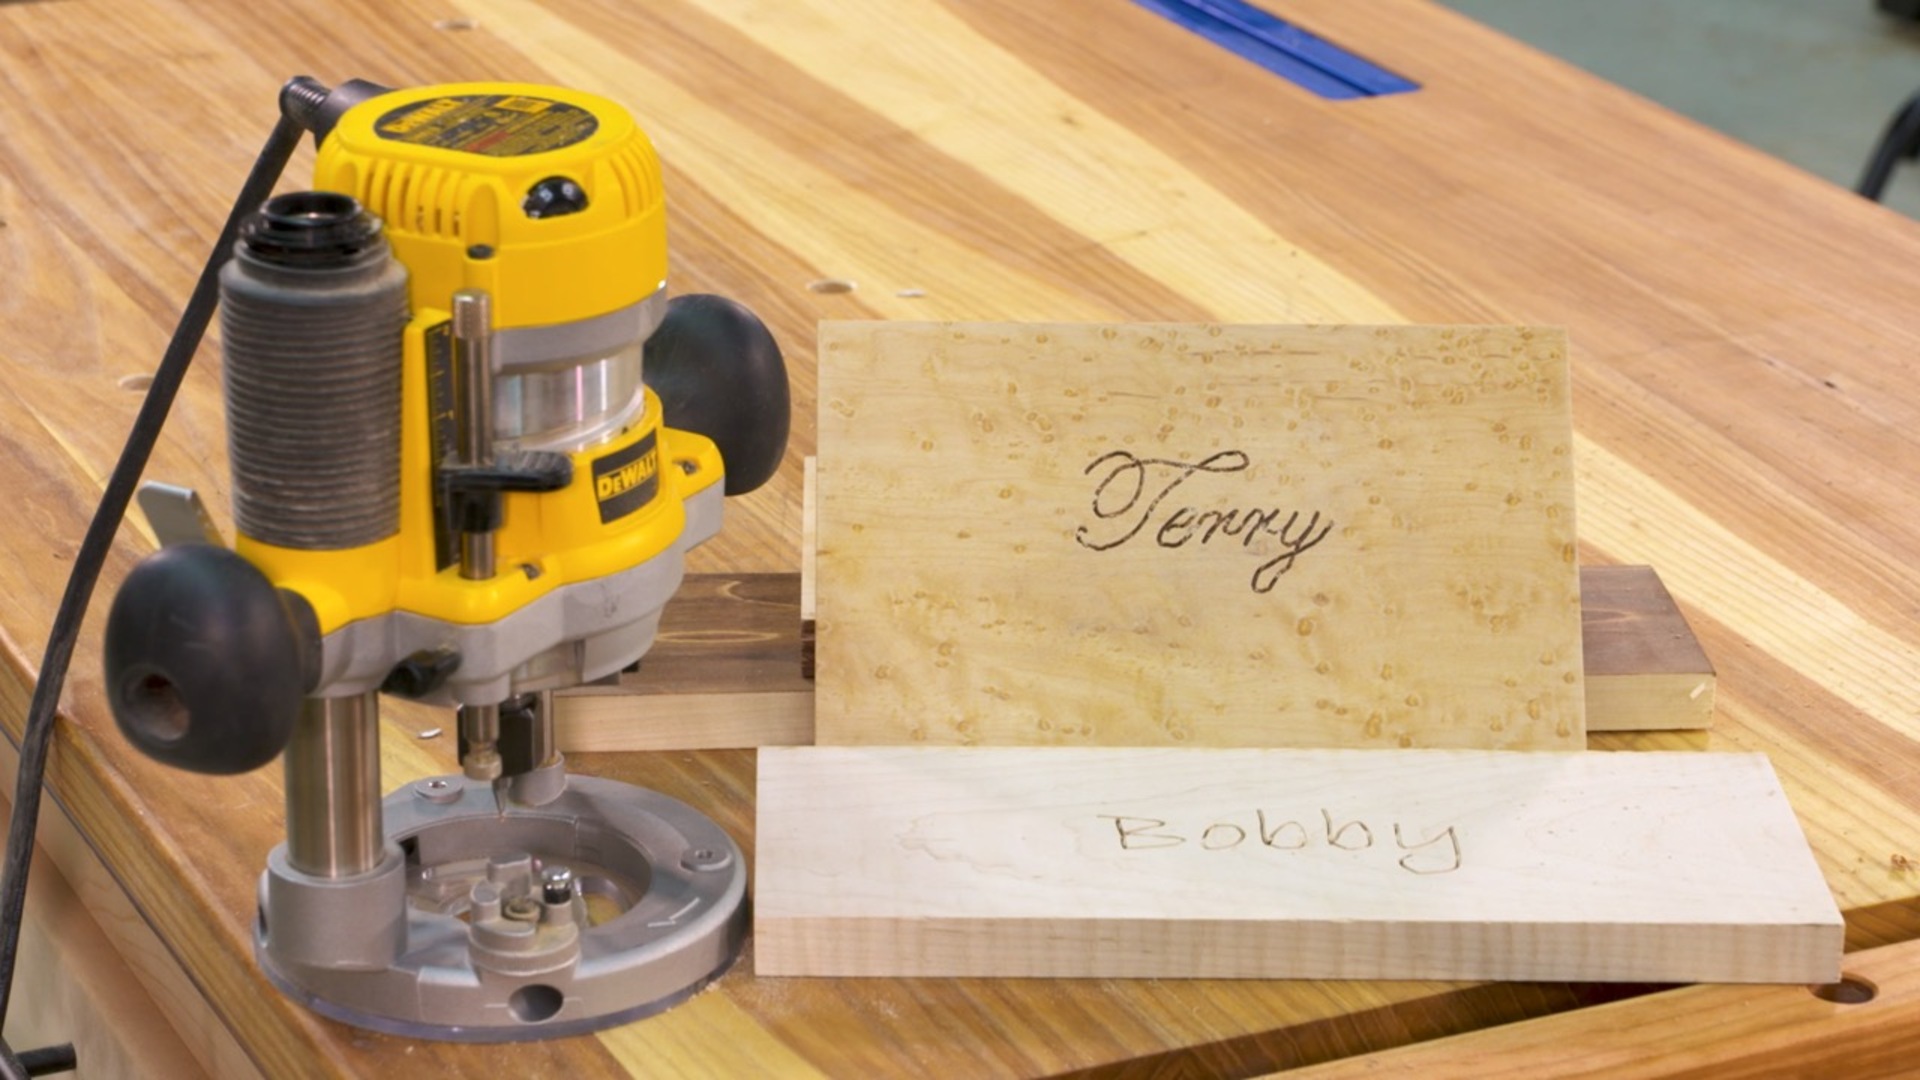
Video Player is loading.
Description
At some point every woodworker wants to make a sign. There are lots of precise ways to do that, including using letter template sets, CNC, laser engraver, or a scroll saw. But sometimes you want to let your creative side flow and get into a freehand mode. Why not try making a freehand router sign using a router without a template? It might not have the crisp precision of a sign that was created using a template, but it will have an organic feel that might be appropriate for certain applications.
To give you the best chance for success with your freehand router sign, there are a few key points to keep in mind:
Printed template. Although this approach doesn’t use a conventional template set, you can afford yourself the luxury of printing a guide for yourself on a laser printer. Be sure to adjust the font size to align to the final size that you want for your freehand router sign.
Adhesive. To temporarily attach your template in a way that it can be easily removed following the freehand router operations, be sure to use the right adhesive that won’t permanently attach the paper to the wood.
Router bit. Choosing the right router bit is important. A 60-degree V-bit works well as it removes material while producing a gentle flair rather than a straight edge.
Try adding some contrast. Shallow lettering carved into wood might be hard to see from a distance, but there are ways to make the lettering stand out against a contrasting background. Consider using a veneered blank, with contrasting wood underneath the top layer. Alternatively you might want to apply some stain onto the wood before carving, so that the carved portion will be on a lighter colored background.
If you want to brush up on your router safety before starting on this project, here is an article that you might find helpful.